配置 WLAN 模板
配置和使用 WLAN 模板来简化配置过程,并确保组织中各个 WLAN 之间的一致性。
在 瞻博网络 Mist 门户中,WLAN模板(“组织>无线>WLAN模板”)提供了一种配置统一用户策略的方法,并有选择地将其应用于您的组织、选定站点和/或选定的 WLAN。在 WLAN 模板中创建的策略允许您管理用户对指定资源(如社交媒体站点)的访问。您还可以将它们用于网络分段,例如使 IoT 设备远离专用网络,从而在恶意行为者访问设备时限制暴露风险。
在大型部署中,建议为每个 WLAN (SSID) 创建一个 WLAN 模板。为了帮助实现自动化,我们还建议您在 WLAN 模板中定义所有 WLAN。WLAN 模板对于自动化和确保策略应用非常有用,以:
- 多个站点
- 站点组
- 整个组织
- 排除特定站点
- 特定设备配置文件中的接入点。
- 以上任意组合
有关如何创建和使用策略的详细信息,请参阅 WxLAN 访问策略 。
图 1:WLAN 模板
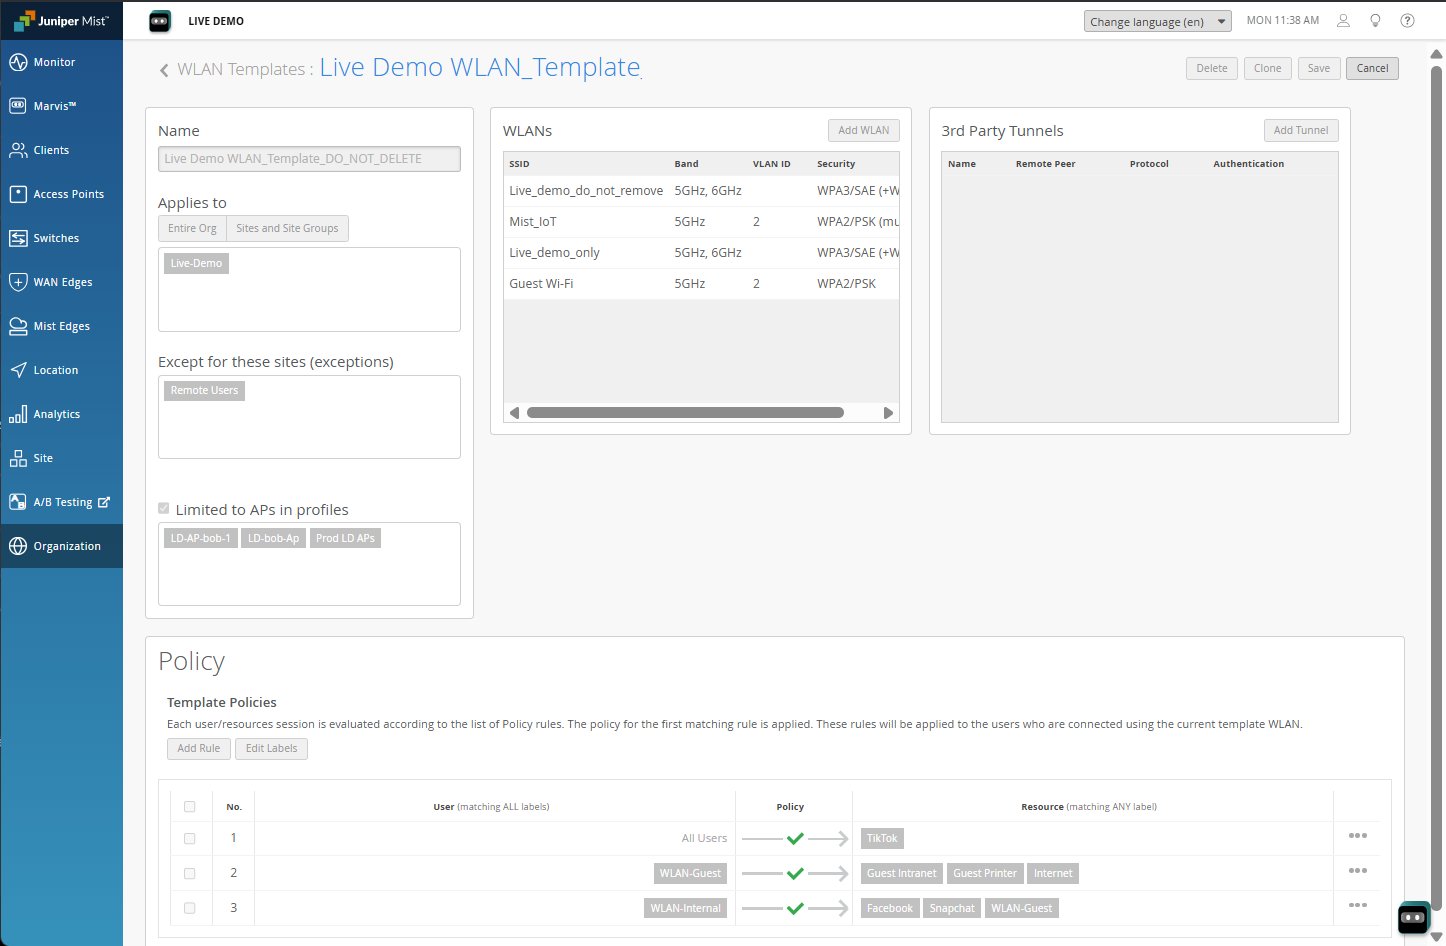 中的用户策略
中的用户策略
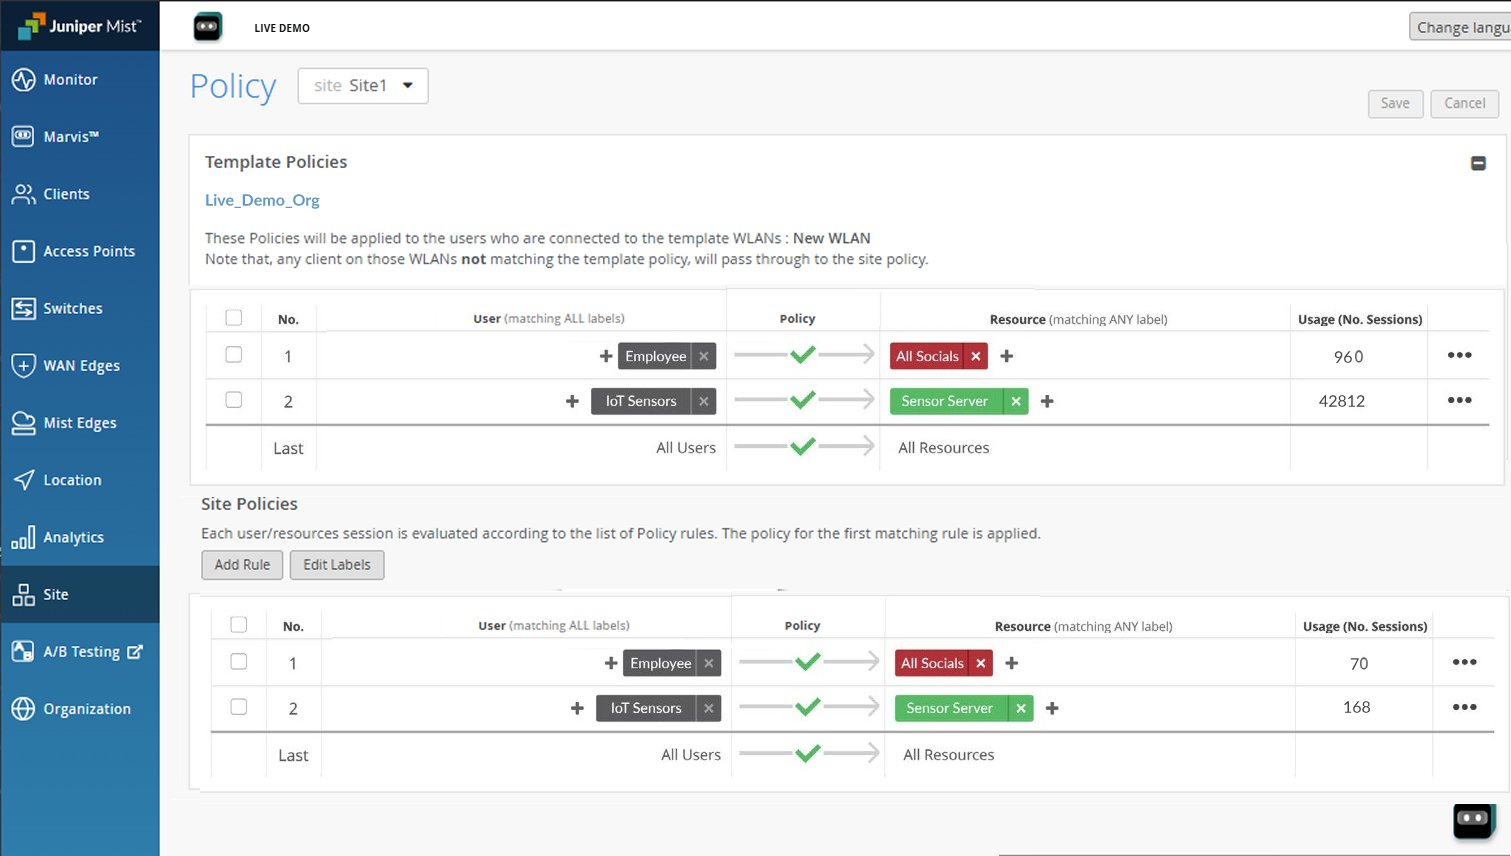
请注意,您还可以在站点级别创建特定于站点的用户访问策略: Site > Wireless |策略。
在站点策略页中,您可以查看站点策略和作为 WLAN 模板的一部分创建的策略的策略的使用统计信息,即命中计数或应用策略的次数。
图 2:用户访问策略摘要
要创建 WLAN 模板,请执行以下作: