Create a WxLAN Policy to Override Client VLANs
Support per site VLAN flexibility with Multi-Pre-Shared Key (mPSK) by creating WxLAN policies that override client VLANs.
Let's illustrate the value of this feature by looking at a common use case when implementing Multiple-PSK. In this scenario, Site A needs the flexibility to use VLAN A for PSK A and VLAN B for PSK B. Site X needs to use VLAN X for PSK A and VLAN Y for PSK B. You can create WxLAN policies to assign VLANs to clients based on the PSK user role. The WxLAN-driven VLANs override any other VLAN assignments on a client. For example, this policy would override a dynamic VLAN that was received from RADIUS.
You can use this feature in addition to the normal methods of assigning a user to a VLAN by policy such as through RADIUS AVPs (Tunnel-Private-GroupId or Airespace-Interface-Name) or VLAN attached to MPSK.
Requirements
-
APs must have firmware version 0.14.29091 or newer.
-
The VLANs must be configured either in the VLAN list in the WLAN settings, ETH0 port configuration, or Mist Tunnel.
To create a WxLAN policy to override client VLANs:
-
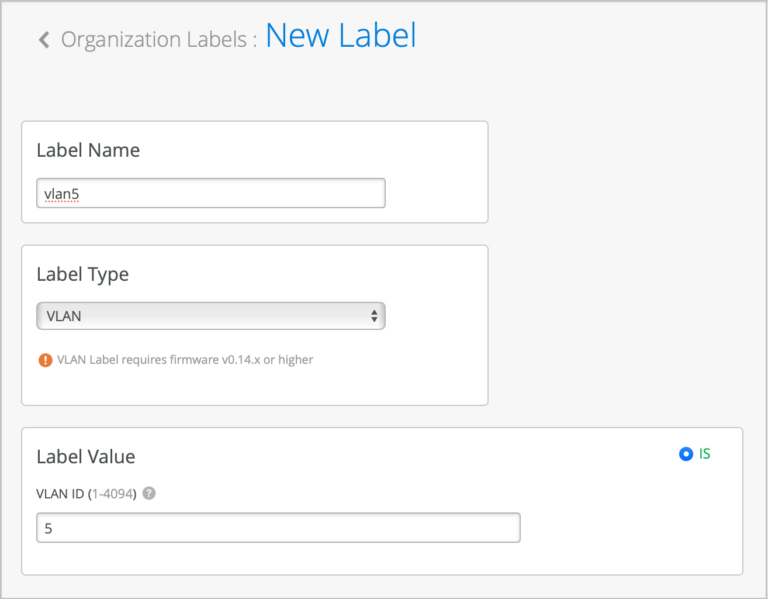
Click Add Label, and set up the label for the VLAN that you want
to use in your WxLAN policy:
-
Label Type—Select VLAN.
-
VLAN ID—Enter the VLAN ID that you want to associate with this label.
In this example, vlan5 is the name of the label, and 5 is the VLAN ID.
-
-
Click Add Label, and set up the label for the PSK user role that
you want to use in your WxLAN policy:
-
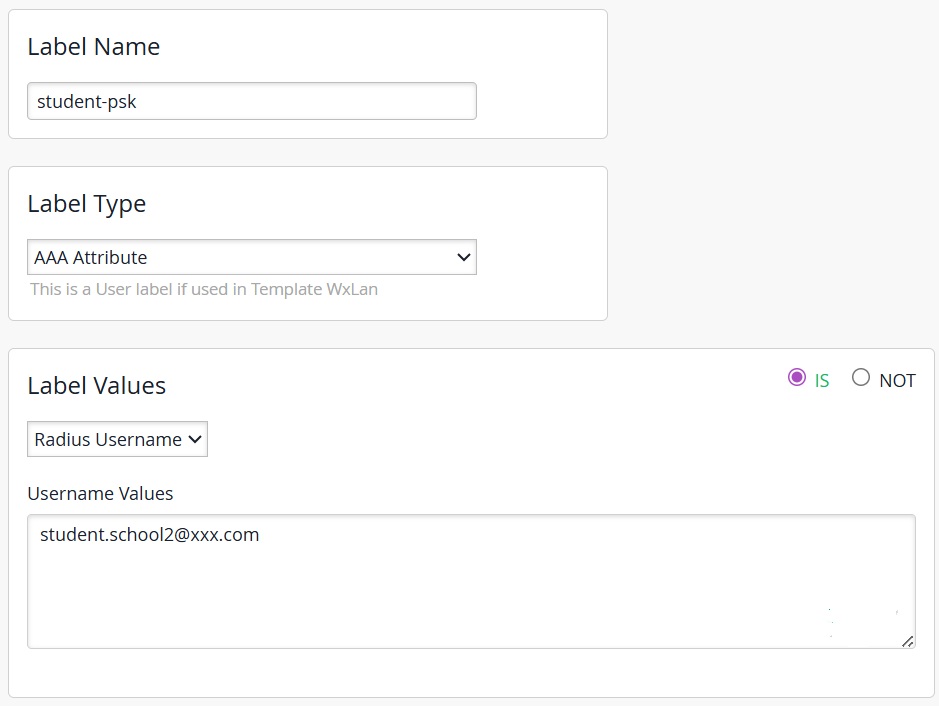
If the Label Type is AAA Attribute,
then select Radius Username or User
Group from the drop-down.
- If the Label Values is User Group or User Role, enter a user group detail in the User Group Values field to associate with this label. The user roles can be assigned from SSO portal/captive portals, RADIUS servers, PSK, and so on.
-
Or, if the Label Values is Radius Username, then enter a username assigned by the Radius in the Username Values field to associate with this label.
In the following example, assume that student-psk is the label name, student is the username, and one of the user's username is student.school2@xxx.com. If the username student partially matches the string student.school2@xxx.com, the label assigns the corresponding VLAN tag. In this example, the username can also be student.school2@xxx.com, student.school45@xxx.com, and similar values.
-
If the Label Type is AAA Attribute,
then select Radius Username or User
Group from the drop-down.
-
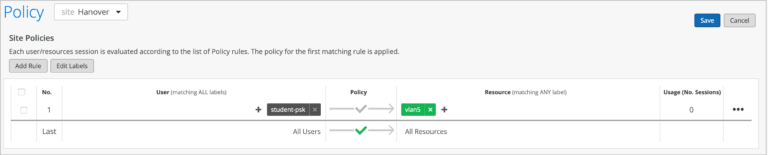
Create a WxLAN Policy that assigns users to a VLAN:
-
In the Resources area, click the plus sign (+), and then
enter the label that you created for the VLAN (for the current example, you would
enter vlan5).
As shown below, the policy assigns these users to the specified VLAN.
-
In the Resources area, click the plus sign (+), and then
enter the label that you created for the VLAN (for the current example, you would
enter vlan5).