Autoplacement: Position New APs
With the autoplacement feature, Juniper Mist™ can place the access point (AP) X,Y coordinates on a floorplan for you automatically. This feature saves time and makes for an easier deployment.
You should only attempt autoplacement during a maintenance window. During the autoplacement process, wireless clients cannot connect to Access Points (APs) as the APs will not broadcast the SSIDs. The amount of downtime you need to schedule depends on how many APs are on the floorplan. Also see the requirements listed below.
Requirements for using autoplacement:
- The AP models that support autoplacement are AP24, AP27, AP32, AP33, AP34, AP43, AP45, AP47, and AP-723H.
- The minimum required firmware version for autoplacement is version 14.28310.
Before you use the autoplacement feature in a new deployment, ensure that:
-
You have physically installed the APs at the site.
-
You have claimed or adopted the APs into your Juniper Mist organization.
-
You have not placed any APs placed on the floorplan in the Juniper Mist portal.
Note:If the preceding description doesn't fit your situation, see Autoplacement: Verify AP Positions for an Existing Site.
To place access points on a floorplan automatically:
-
Click the Auto Placement button near the top right corner of the
page.

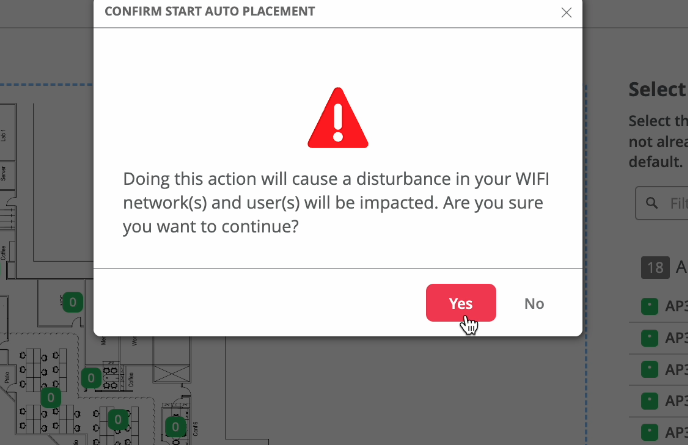
-
When the warning appears, read the information, and then click
Yes to continue or No to cancel.
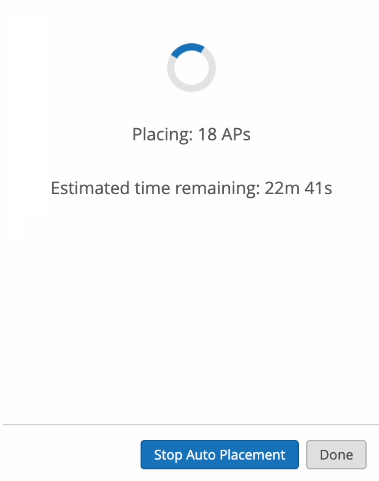
It takes a few moments for Juniper Mist to complete the operation and display the X,Y coordinates of the APs. The amount time it takes depends on how many APs are on the floorplan. The more APs you place on the floorplan, the longer it takes the autoplacement operation to complete.
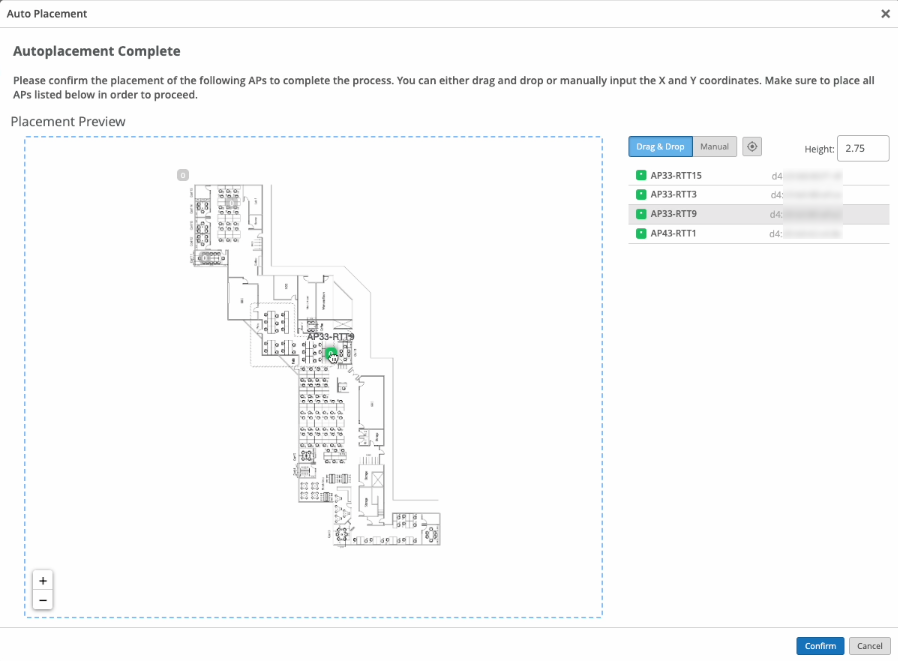
Upon completion of the autoplacement scanning, Juniper Mist prompts you to select your reference APs. You need to identify the positions of these APs manually. The reference APs act as a source of truth that Juniper Mist uses to calculate the locations to place the remaining APs automatically.
-
On the right side of the page, view the progress message and the final status
message:
-
If you see the Placement Preview and a large check mark on the right side of the page, it indicates that the autoplacement process is complete. You can review the results and either accept or reject the results. See the Evaluate the Results section below.
-
If you see “APs Misplaced” on the right side of the window instead of a large check mark, this means that an error occurred. You need to restart the autoplacement process.
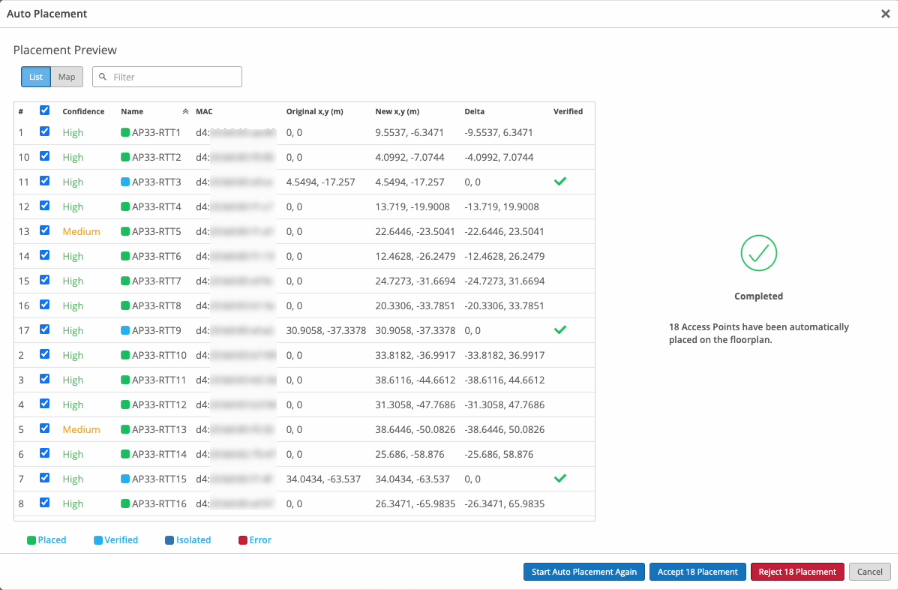
Evaluate the Results in the List View
View the results in the List View of the Placement Preview.
Example: Placement Preview with Completed Status
Example: Partially Complete Autoplacement
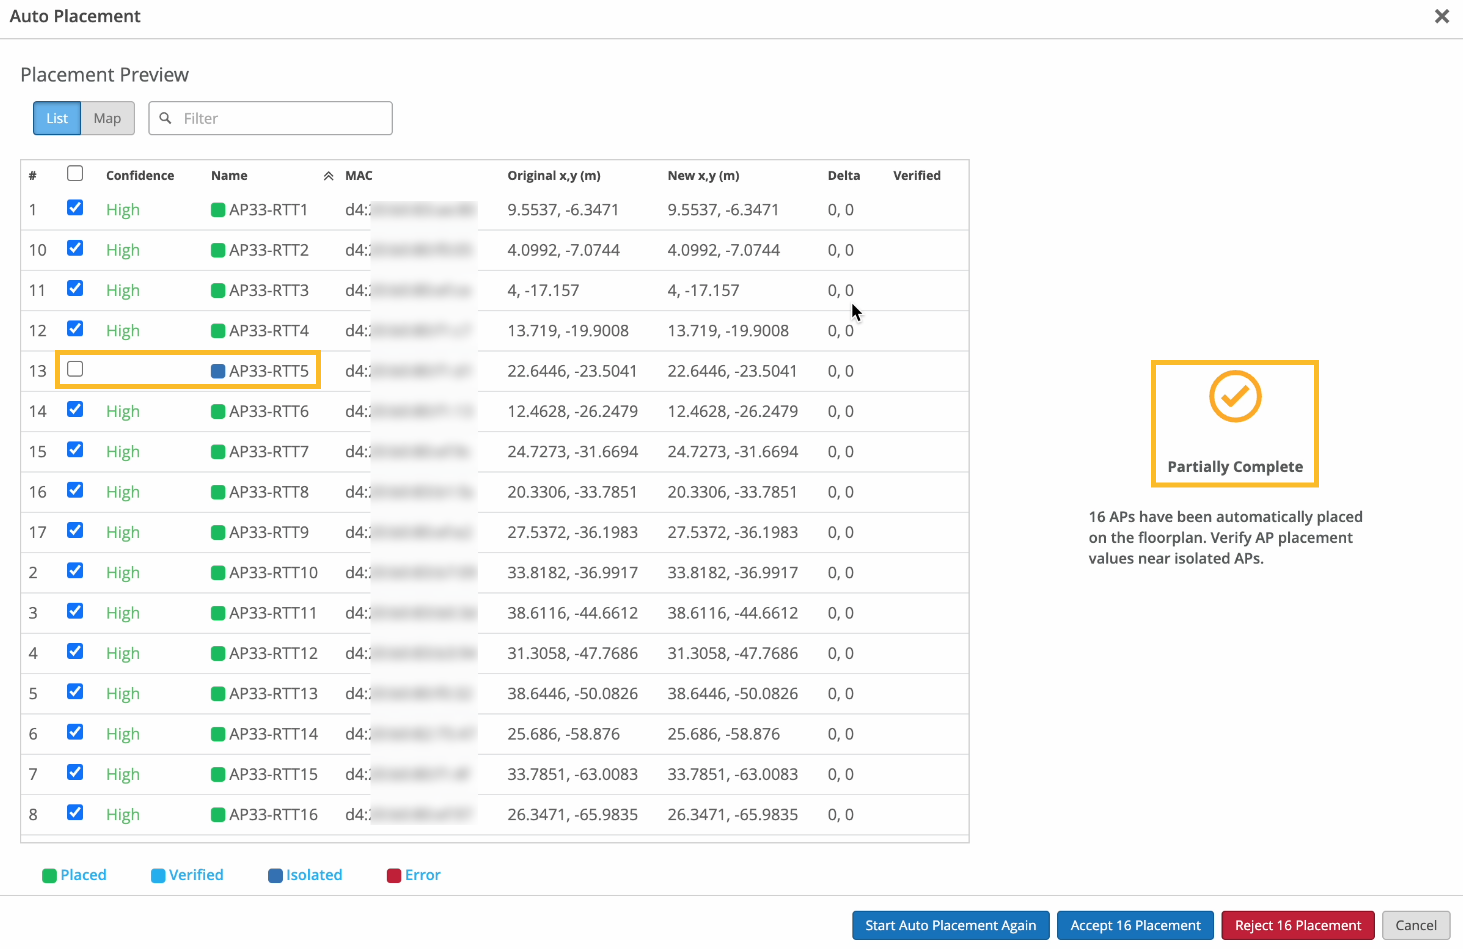
Icons
-
Green check mark—For new site deployments, a green check mark appears only when a reference AP has been placed correctly.
-
Blue square—A blue square next to the AP name indicates that the AP is isolated and cannot communicate with other nearby APs. Juniper Mist cannot place these APs on the floorplan automatically, which is why the autoplacement status is Partially Complete.
View More Information in the Map View
You can use the map view to evaluate the autoplacement.
Click the Map View button, and then select the Show Confidence check box in the top right corner of the map. Juniper Mist displays the confidence levels for the APs.
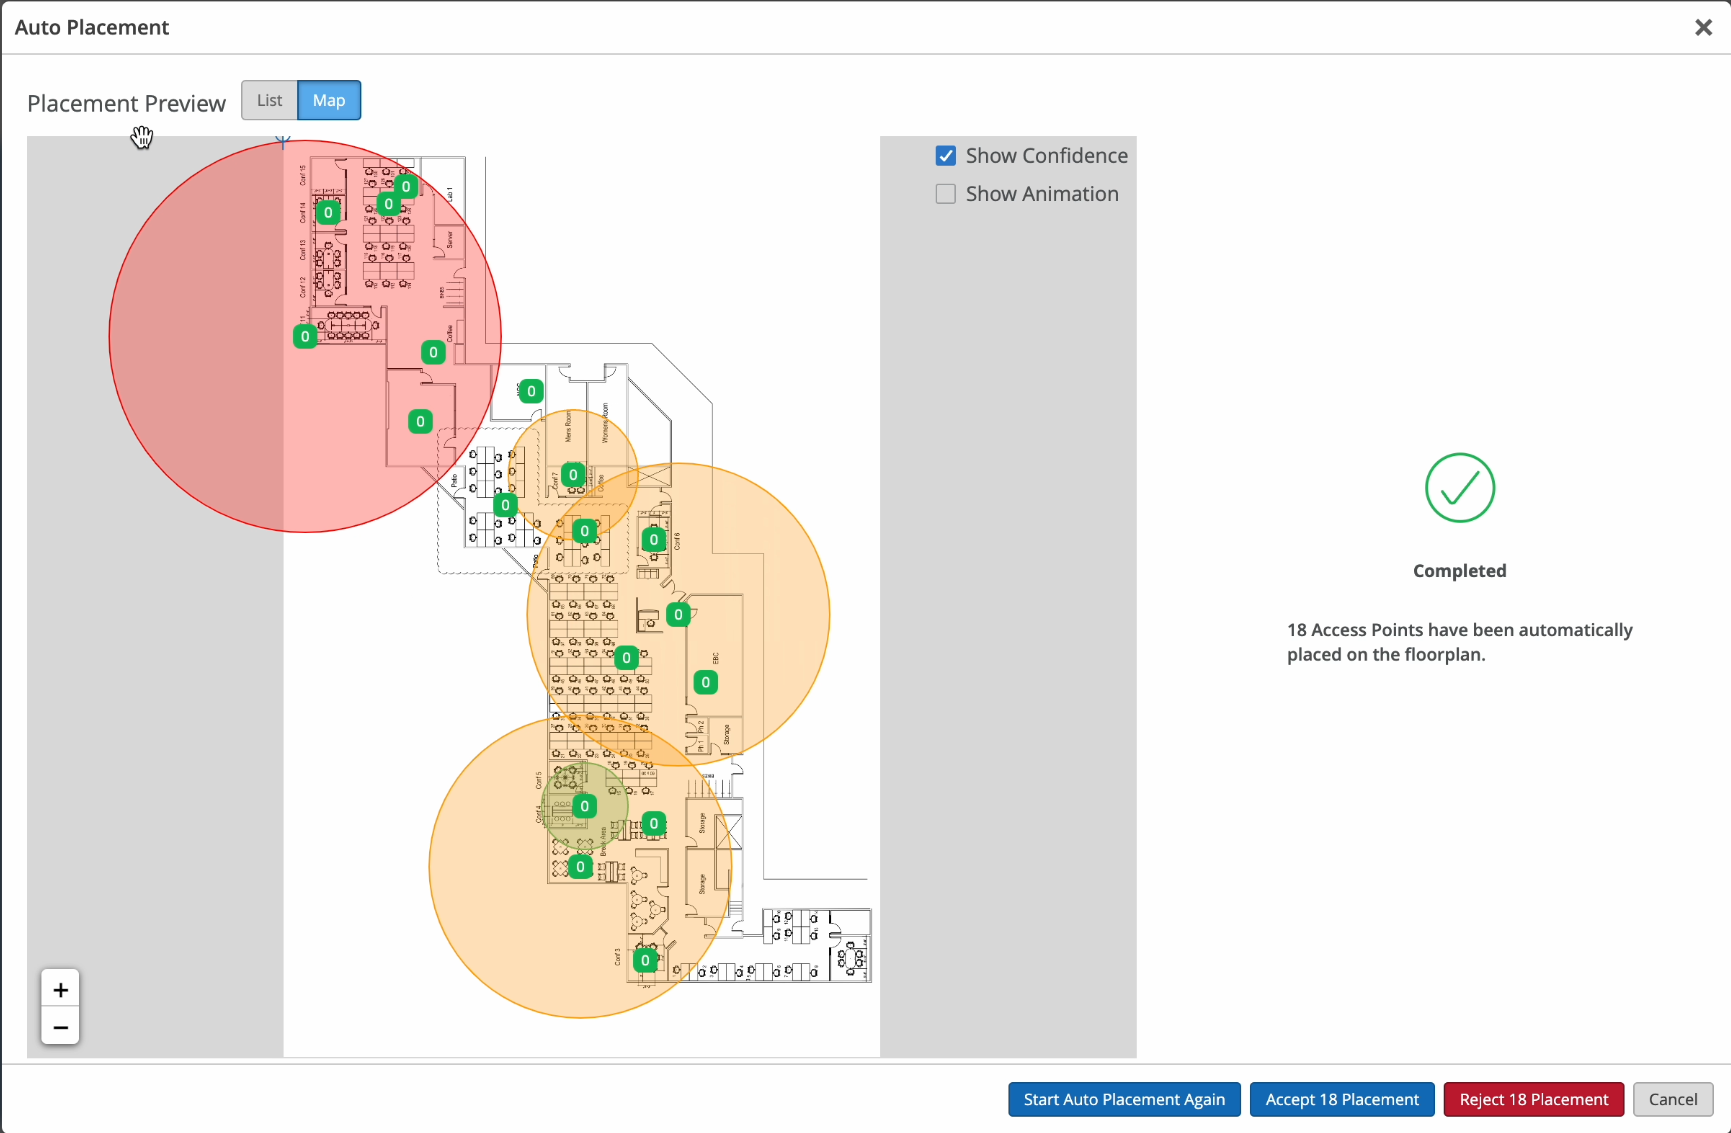 Tip:
Tip:To view the confidence level for an individual AP, hover your mouse over the AP.
The confidence level indicates how confident Mist is with the autoplacement of the APs. Confidence levels are high, medium, and low. Mist displays a radius to indicate the probability of where the APs might be located. The algorithm places the APs in the most probable location.
-
A low confidence level (red) is associated with a larger radius area and indicates low certainty about the actual location of the APs. If Mist indicates a low confidence level, then you’ll need to manually place the APs on your floorplan within the radius predicted by Mist. Note that Mist cannot place isolated APs automatically on the floor plan—you’ll need to manually place them on the floor plan.
-
A high confidence level (green) indicates a smaller probability area and therefore high certainty about the AP location.
-
A medium confidence level is indicated by orange color.
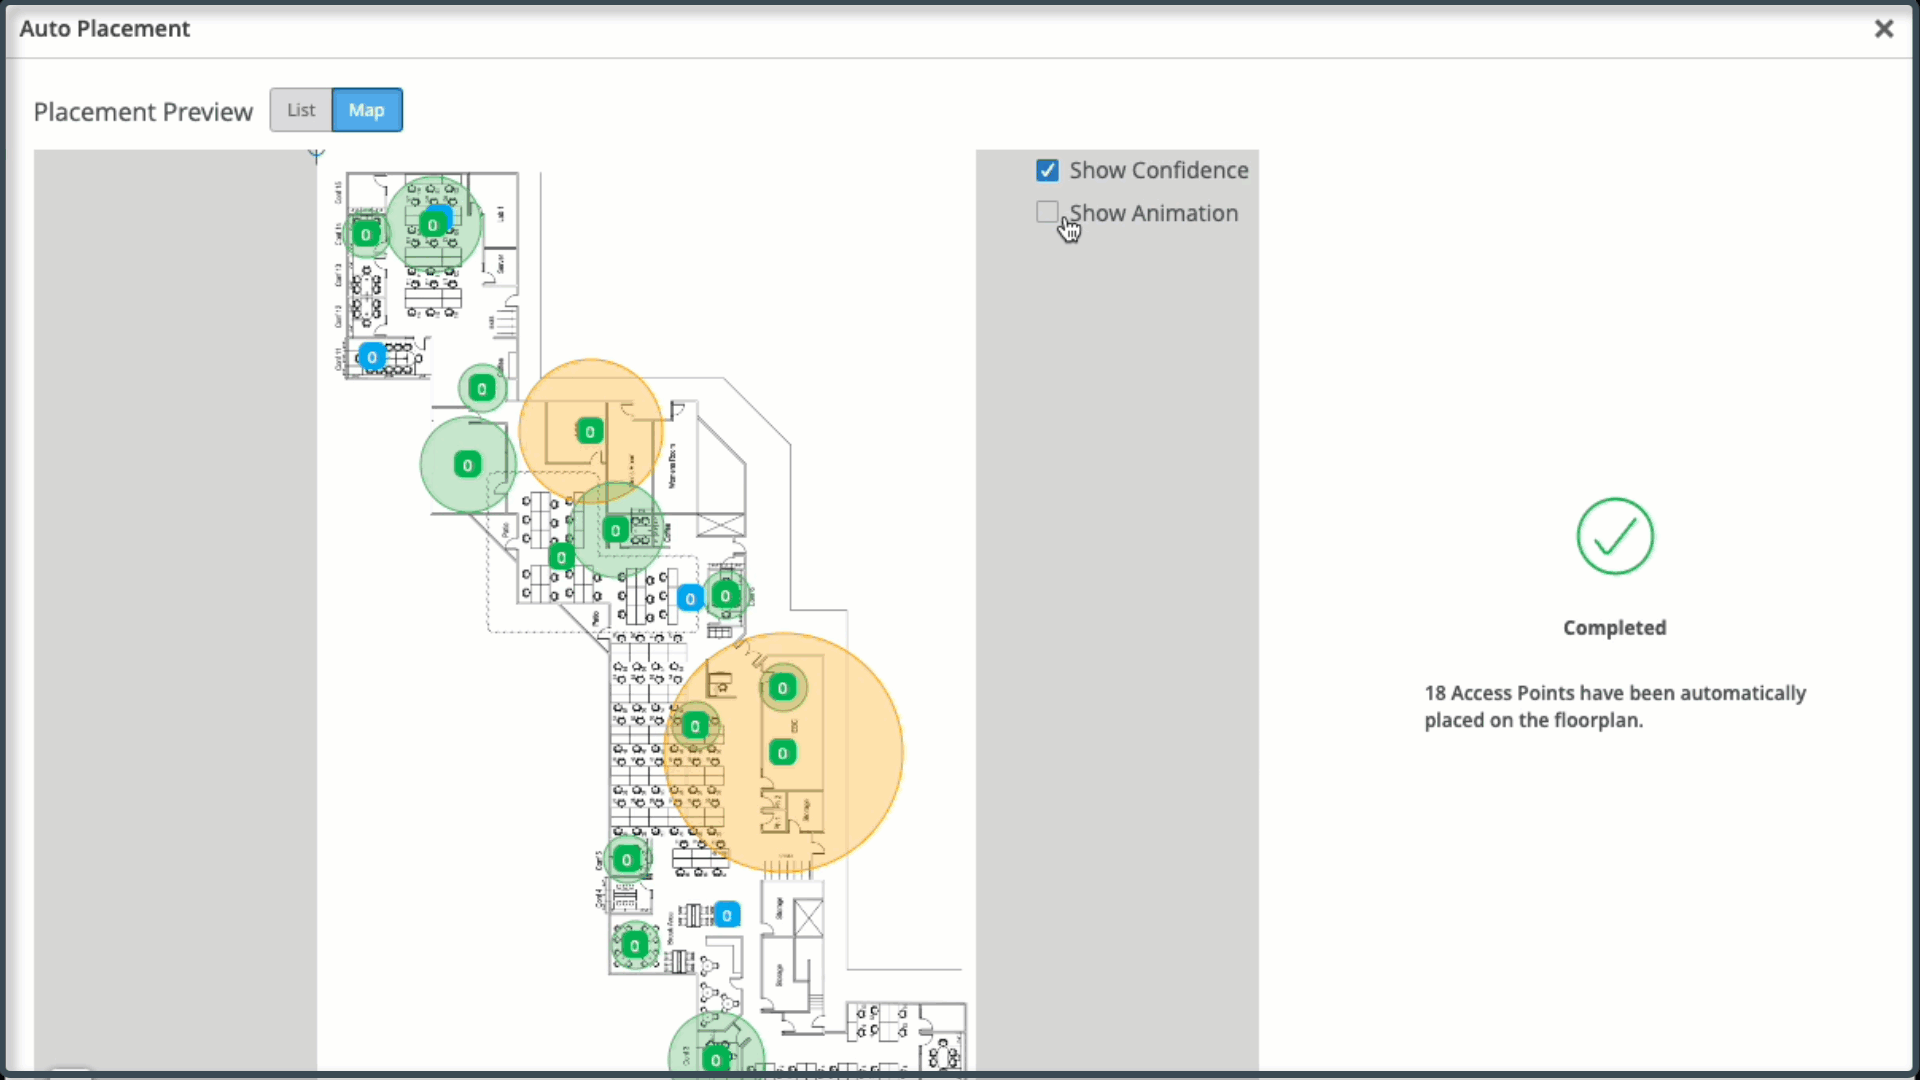
To get a visual of how the APs were autoplaced, select the Show Animation check box in the top right corner of the map.
Example: New Site Autoplacement (Animation)
Accept or Reject the Results
You can accept or reject the results for individual APs or for all APs.
Select or clear the check boxes as needed, and then click Accept or Reject.
-