Help us improve your experience.

Let us know what you think.

Do you have time for a two-minute survey?


Add a Custom Guest Portal to a WLAN

With the Custom Guest Portal option, guests must complete a sign-in form to get internet access. This option is easy to set up and allows you to collect information from your guests.

You can keep the default settings for quick setup or customize the form fields, the text, the layout, the images, and the authentication methods.

Before you begin: Create the WLAN that you want to add the guest portal to. For more information, see Configure a WLAN Template.

To add a custom guest portal to your WLAN:

  1. Navigate to the WLAN.
    Note:
    • If the WLAN is in a WLAN template, select Organization > Wireless > WLAN Templates, click the template, and then click the WLAN.

    • For a site-level WLAN, select Site > Wireless > WLANs, and then click the WLAN.

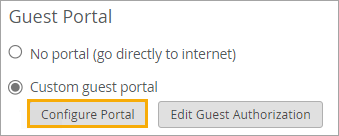
  2. In the Edit WLAN window, under Guest Portal:
    1. Click Custom guest portal.
    2. Click Configure Portal.
    Location of the Custom guest portal option in the Edit WLAN window
  3. In the Guest Portal Options window, go through each tabbed page to review the defaults and make changes if needed.
    Table 1:
    Feature Description
    Form Fields Set up the input fields to collect information from your users. For help, see Form Fields for Custom Guest Portal.
    Customize Labels Review and modify the on-screen text. You can even set up your portal for different languages. For help, see Text and Language Options for Custom Guest Portal
    Customize Layout Add a logo, change the background, and make other changes in the appearance of the portal. For help, see Layout Options for Custom Guest Portal
    Authorization Enable features such as social login, sponsored access, emailed or text-based confirmation codes, and so on. For help, see Authorization Options for Custom Guest Portal.
  4. As you make changes, click Preview Guest Portal to see how your portal looks.
    The preview appears in a new browser tab.
  5. When finished with all changes on all tabs, click OK at the bottom of the Guest Portal Options window.
    Note:

    The OK button is unavailable if any configurations are incomplete. For example, the default layout includes terms of service. If you keep this option, you must either enter text in the Terms of Service text box or enter a Terms Link on the Customize Labels tab. For help with this option, see Layout Options for Custom Guest Portal.

  6. Select or clear the Bypass guest/external portal in case of exception check box at the bottom of the Guest portal section.

    When this feature is selected, each access point will try to reach the portal or IdP. If it is not reachable, then the AP will automatically authorize the guests to connect to the WLAN.

  7. Click Save at the bottom of the Edit WLAN window.

To verify the appearance and functionality of your guest portal, use your wireless device to connect to your WLAN. You can then adjust the portal configuration as needed.