Help us improve your experience.

Let us know what you think.

Do you have time for a two-minute survey?

header-navigation
keyboard_arrow_up
close
keyboard_arrow_left
Juniper Apstra 5.0.1 / 5.0.0 User Guide
Table of Contents Expand all
list Table of Contents
file_download PDF
{ "lLangCode": "en", "lName": "English", "lCountryCode": "us", "transcode": "en_US" }
English
keyboard_arrow_right

Move Virtual Network to Different Routing Zone

Release: Juniper Apstra 5.0
{}
Change Release
date_range 04-Nov-24

You can move one or more virtual networks from one routing zone to another (as of Apstra version 5.0.0). This is traffic-impacting for any endpoints that are part of the selected virtual networks (since the VNs need to be deleted from one RZ and recreated in the other one).

Move One Virtual Network to a Different Routing Zone

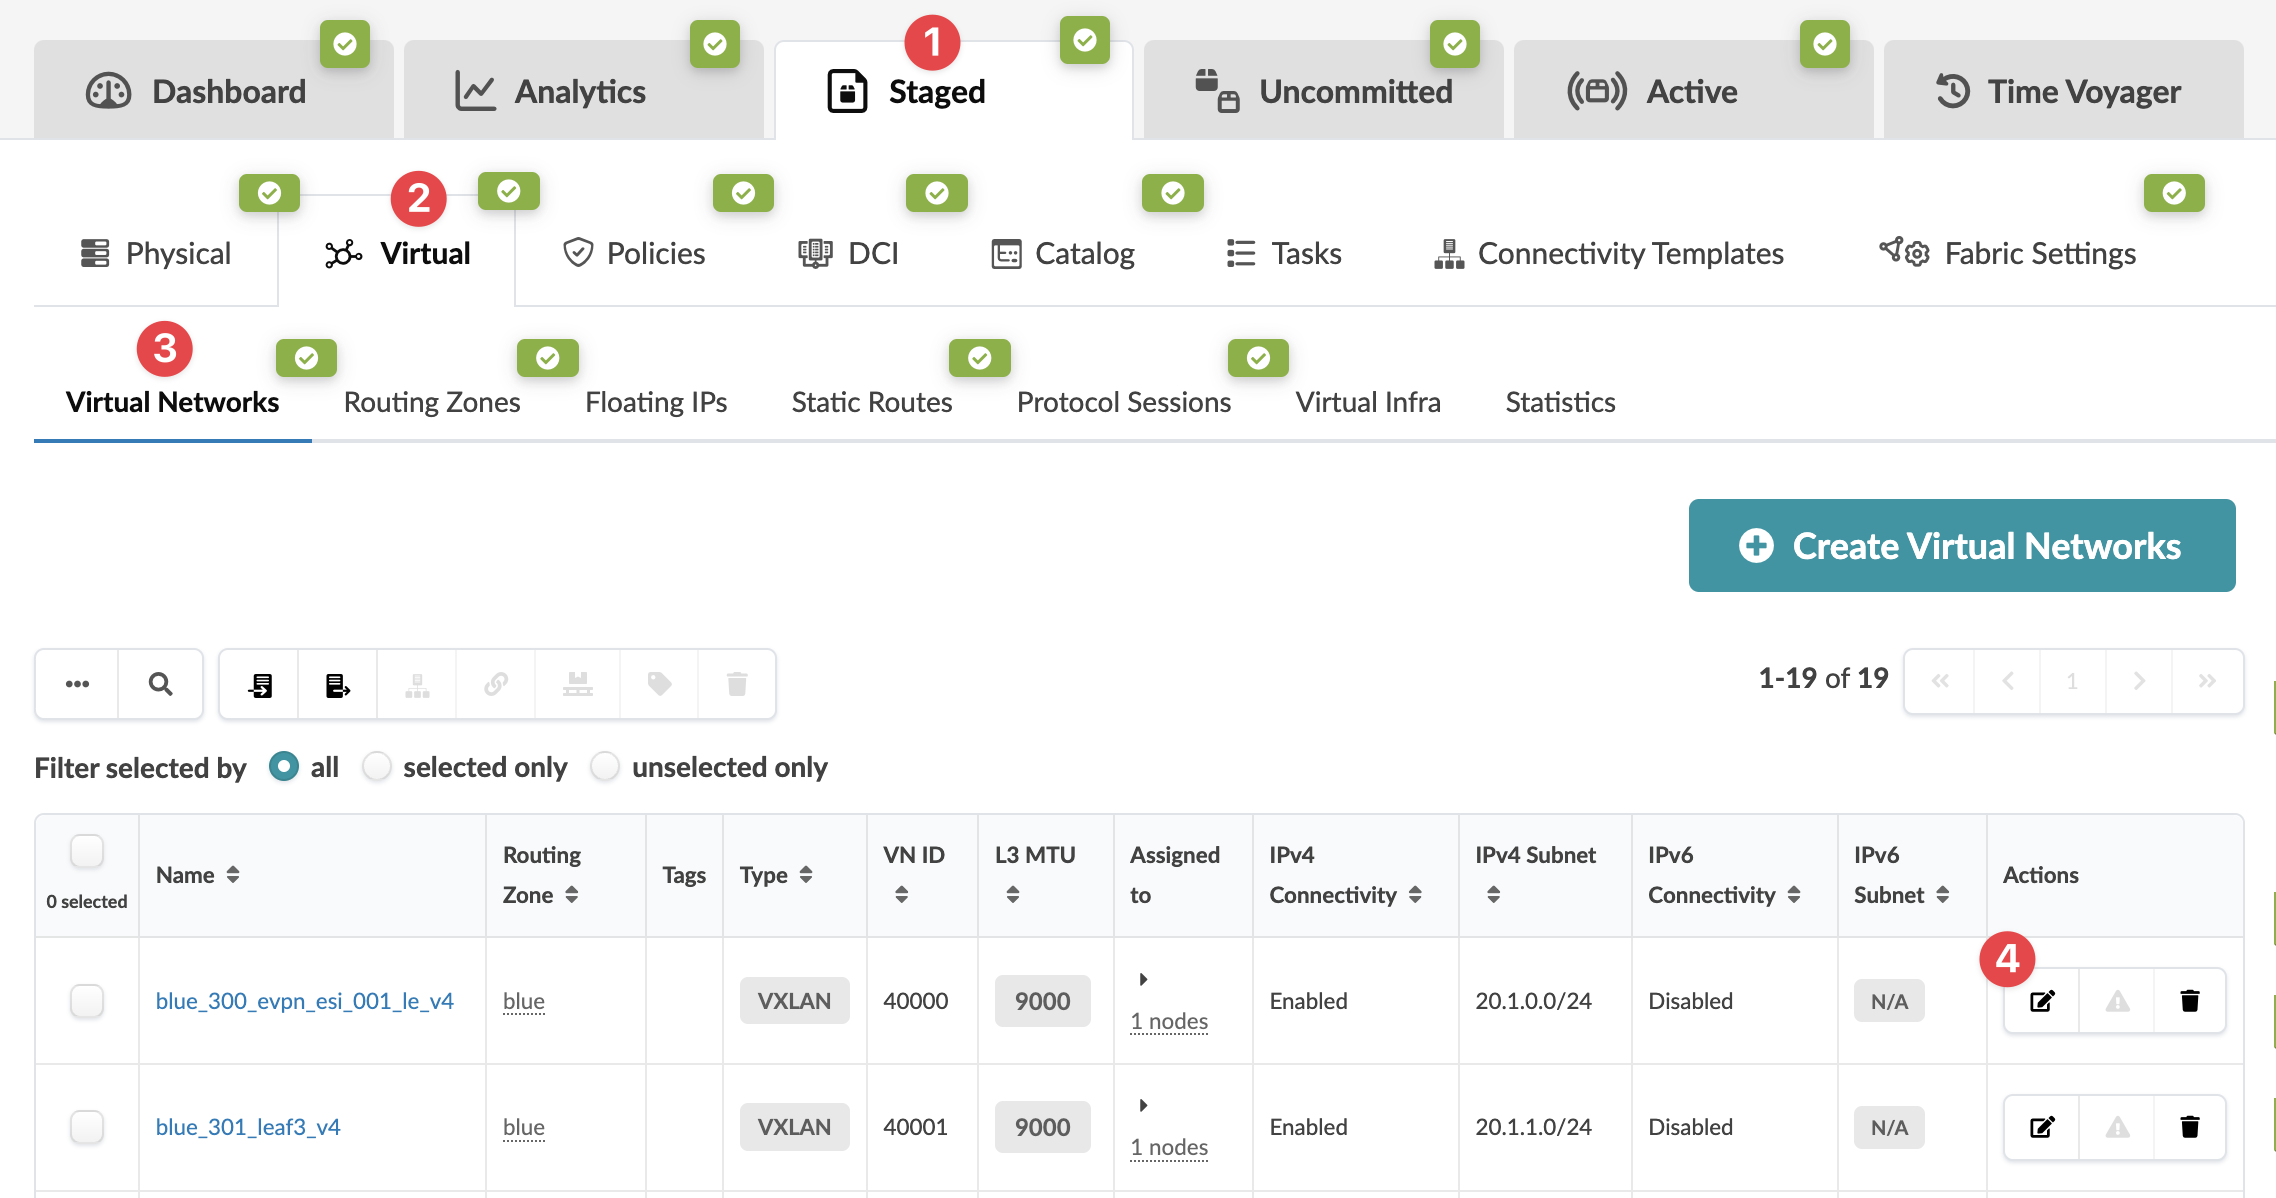
  1. From the blueprint, navigate to Staged > Virtual > Virtual Networks and click the Edit button in the Actions panel for the virtual network to move.
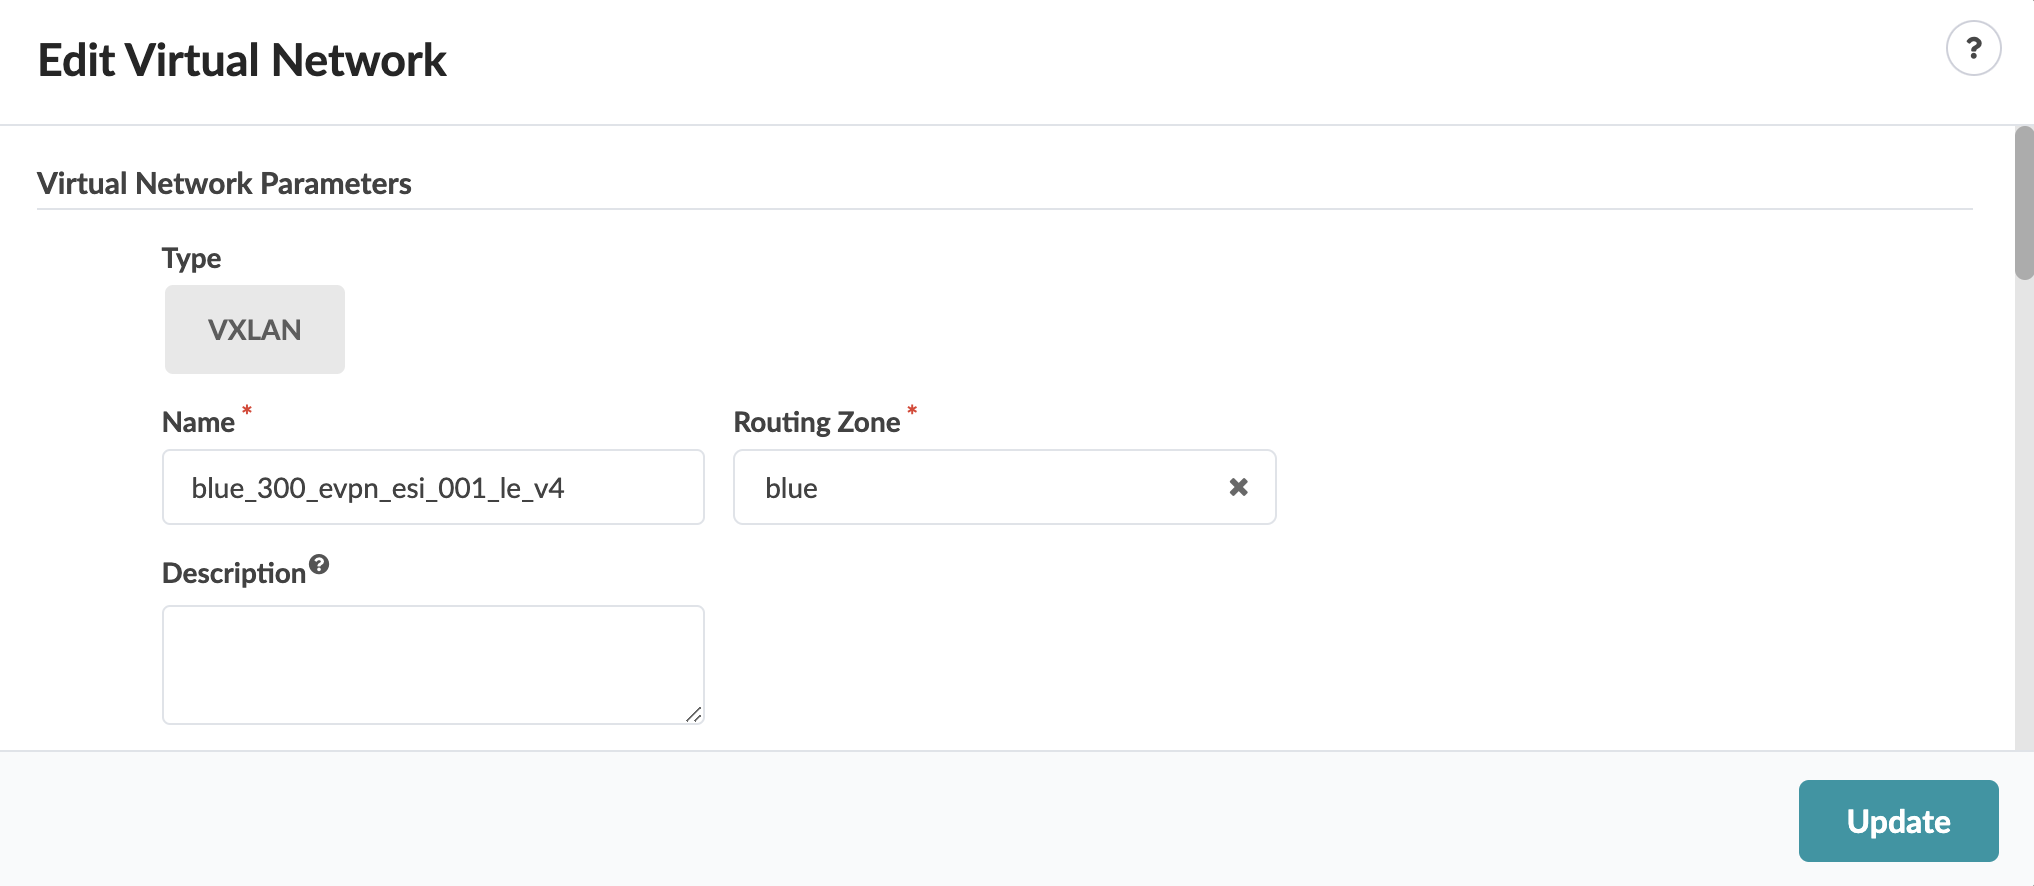
    The Edit Virtual Network dialog opens.
  2. From the Routing Zone drop-down list, select the routing zone that you want to move the virtual network to. (The virtual network subnet IP, gateway IP (if the VN is IP-enabled) and VLAN ID of the source virtual network will be preserved, so these need to "free of use" in the destination routing zone.)
  3. Click Update to stage the change and return to the Virtual Networks table view.

When you're ready to activate your changes, go to the Uncommitted tab to review and commit (or discard) your changes.

Move Multiple Virtual Networks to a Different Routing Zone

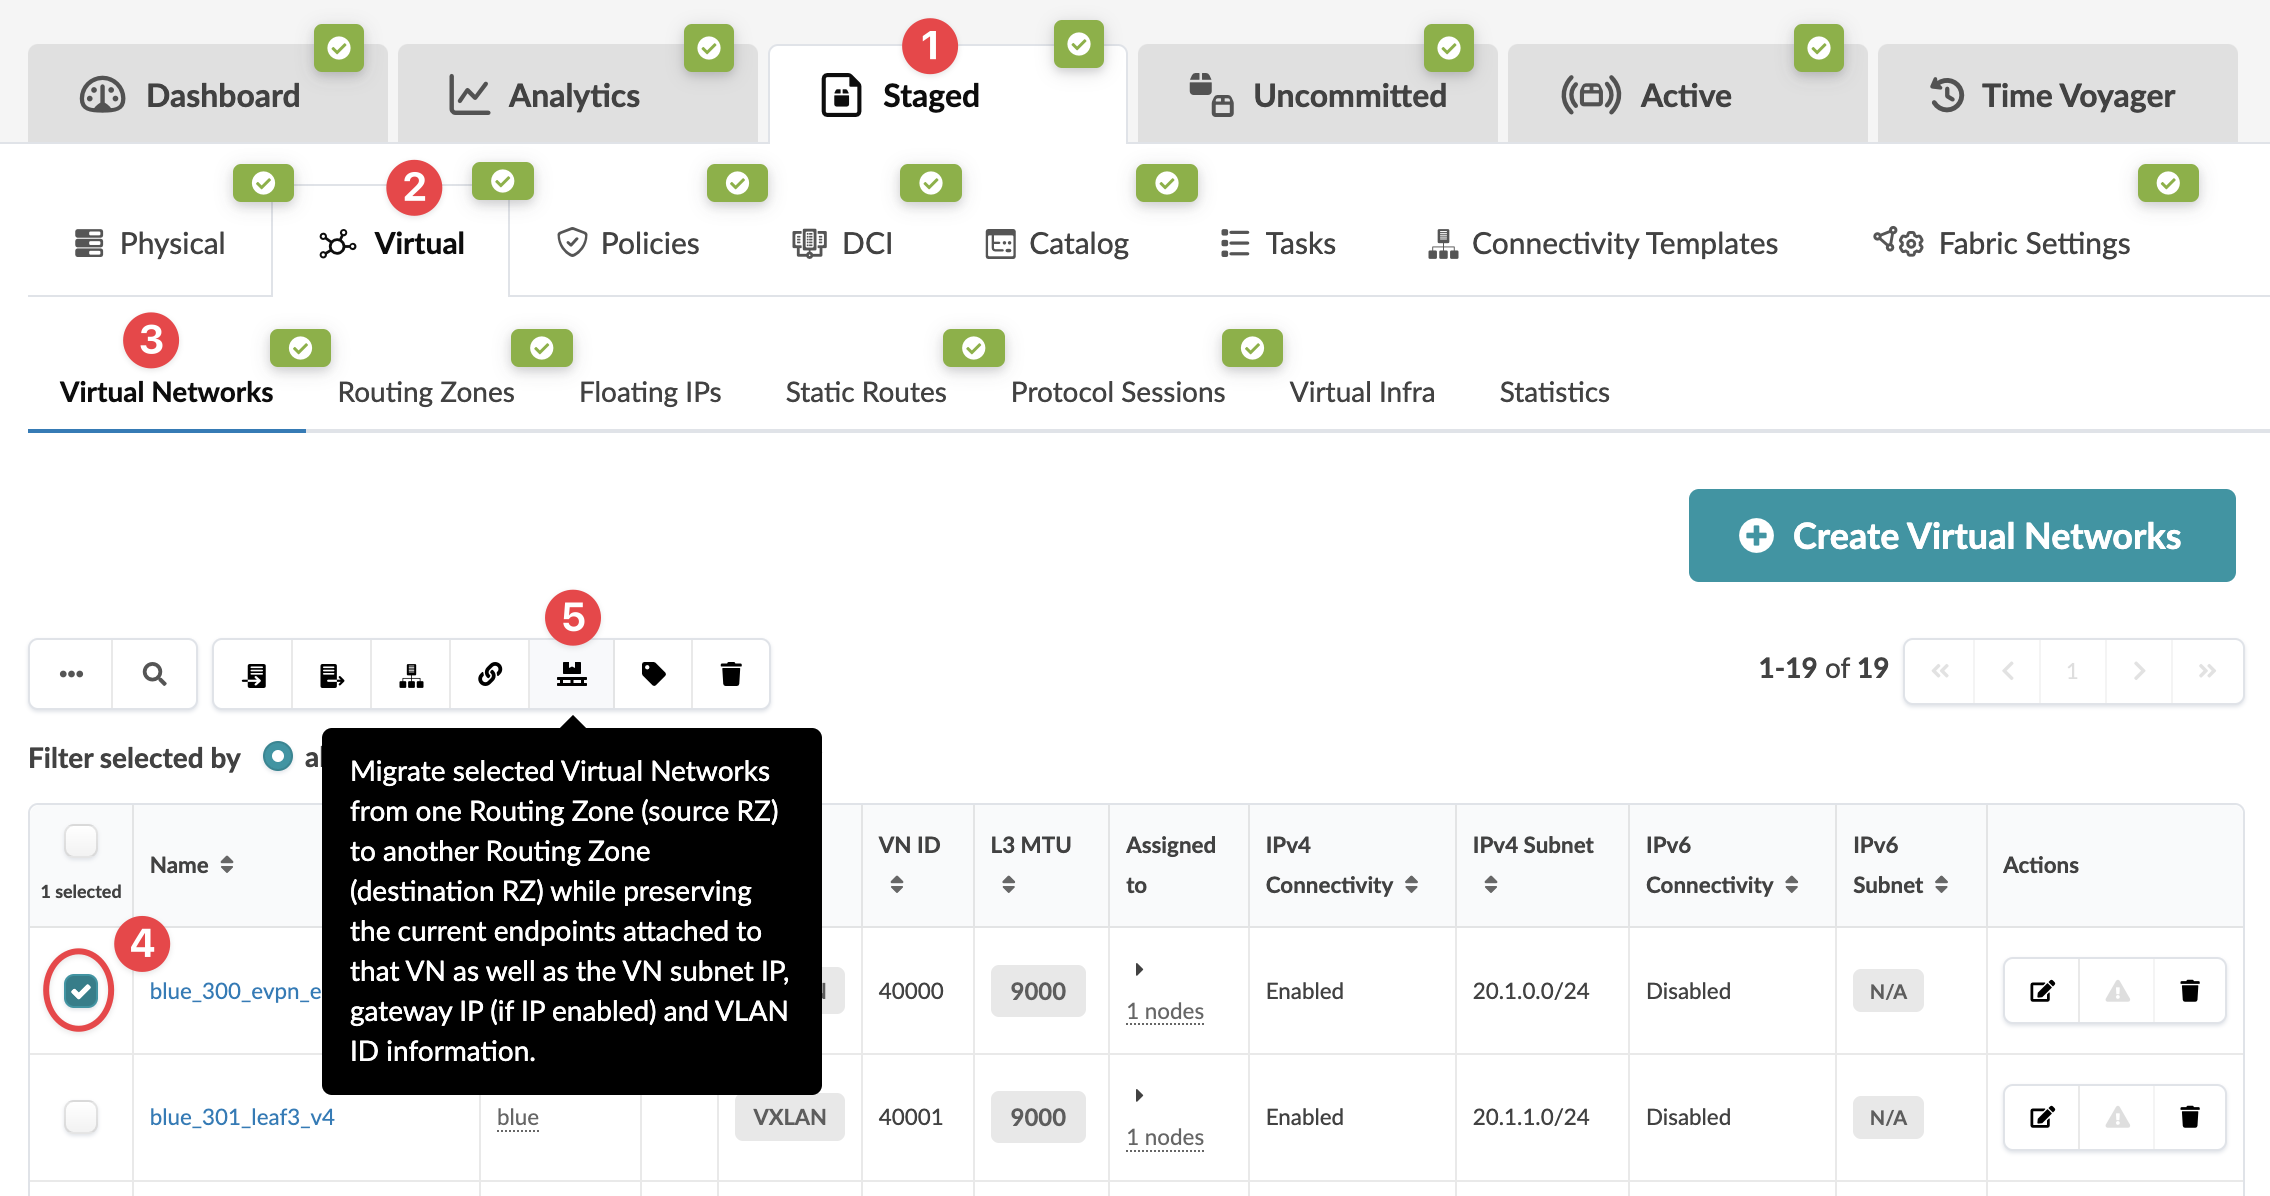
  1. From the blueprint, navigate to Staged > Virtual > Virtual Networks, select the check boxes for one or more virtual networks to move, then click the Migrate selected Virtual Networks... button that becomes available above the table.
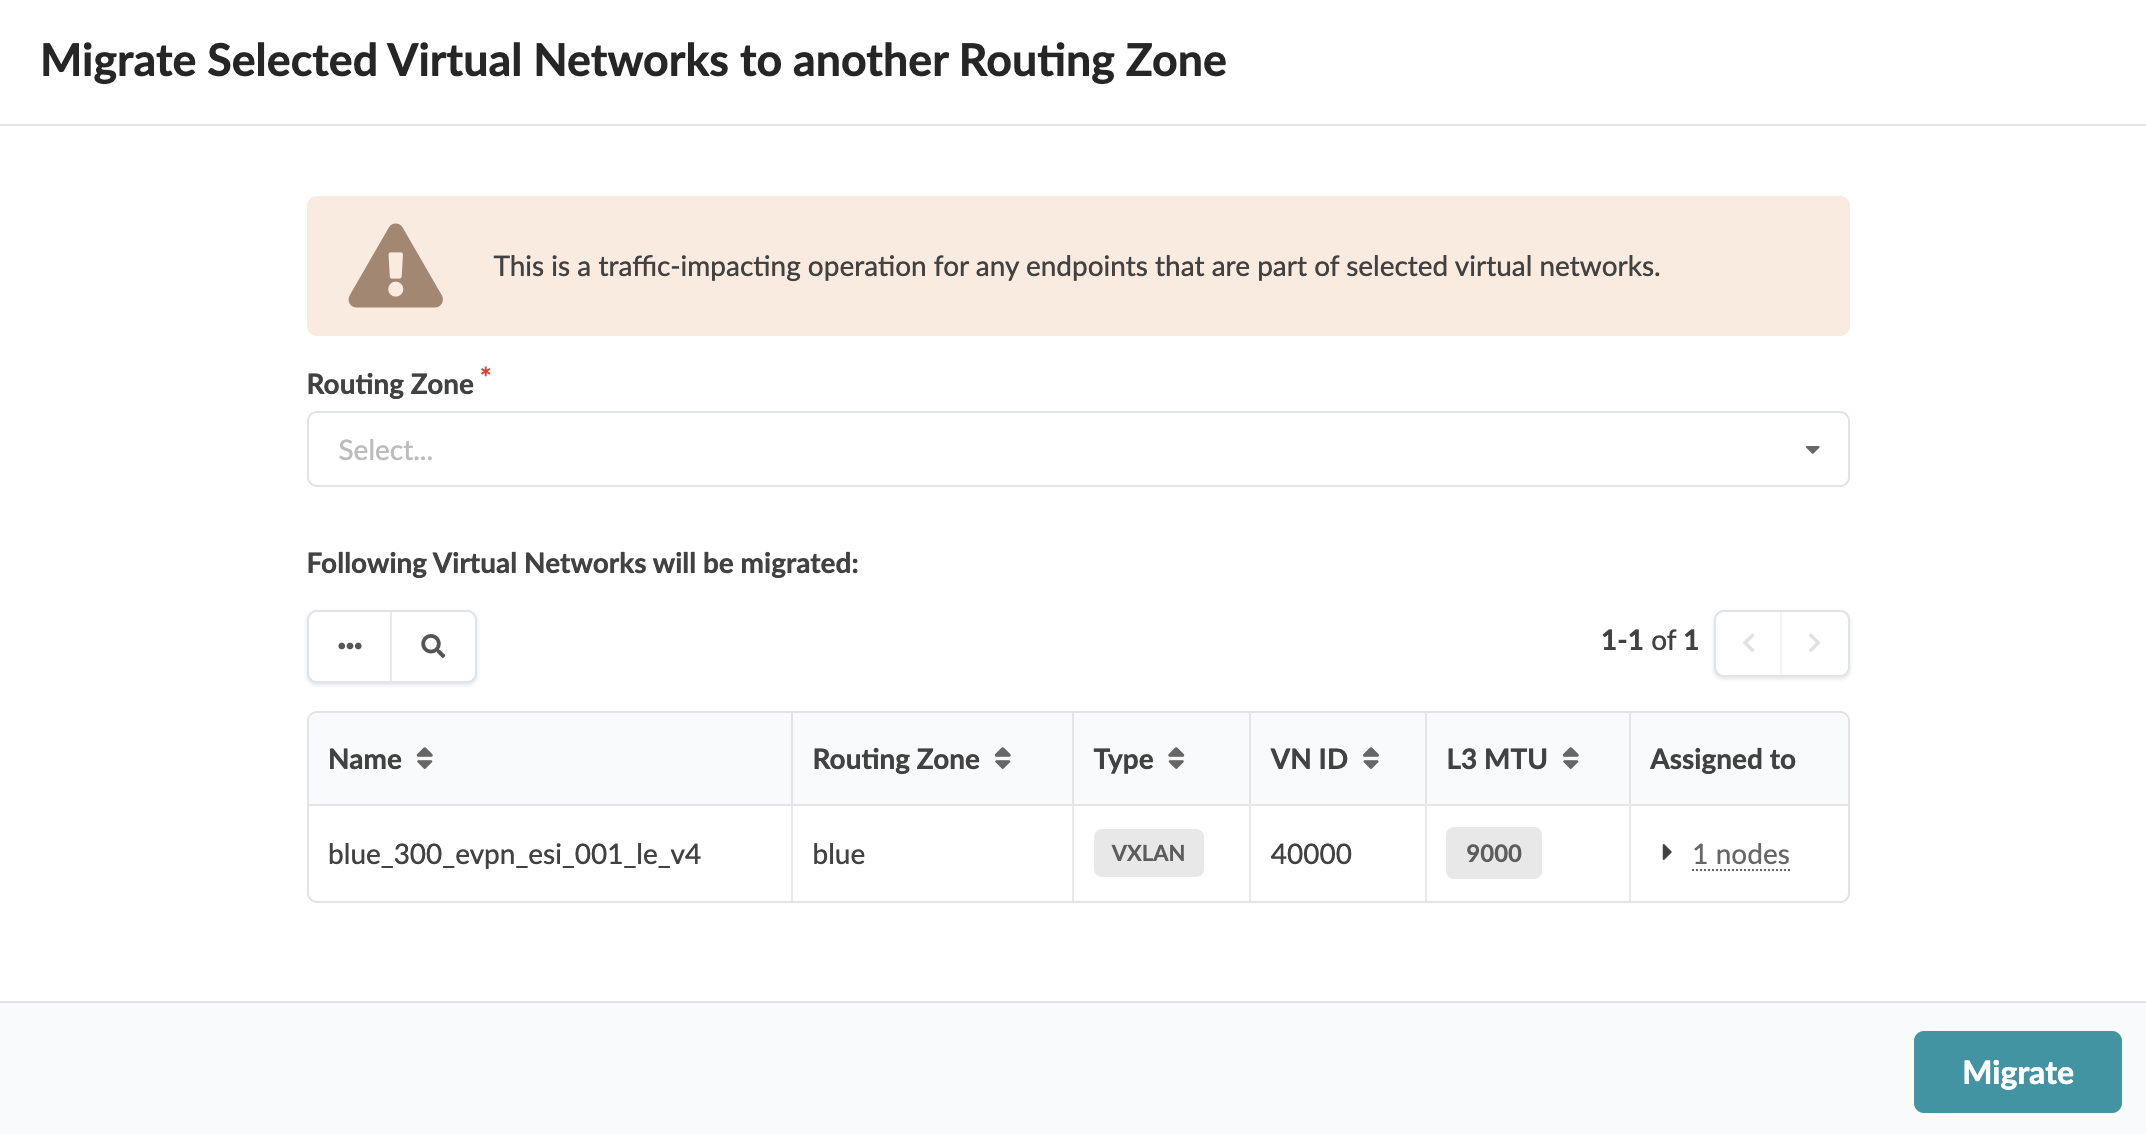
    The Migrate Selected Virtual Networks to another Routing Zone dialog opens.
  2. From the Routing Zone drop-down list, select a different routing zone. (The virtual network subnet IP, gateway IP (if the VN is IP-enabled) and VLAN ID of the source virtual networks will be preserved, so these need to "free of use" in the destination routing zone.)
  3. Click Migrate to stage the change and return to the Virtual Networks table view.

When you're ready to activate your changes, go to the Uncommitted tab to review and commit (or discard) your changes.
footer-navigation