Juniper Apstra Demo: Adding a New Virtual Network
It’s SO easy to add a virtual network with Apstra. Here’s how.
With Apstra, adding a new virtual network to an existing data center fabric is simple. Follow along as this short demo takes you step-by-step through the process from start to finish.
You’ll learn
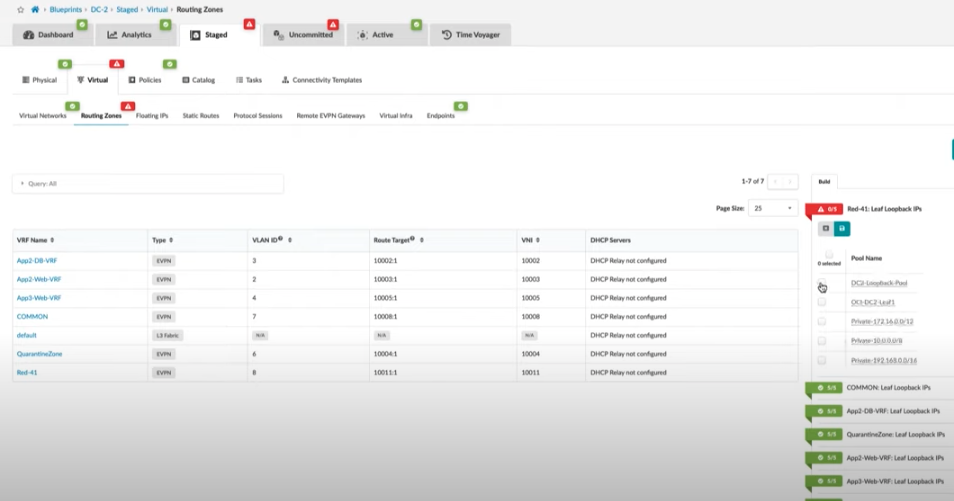
First step: create a new routing zone
FYI: Red elements or tabs mean there are additional elements to define
Why you should write a note when you make changes –– and how to do so
Who is this for?
Transcript
0:01 [Music]
0:07 this video is to illustrate how easy it
0:10 is to add a new virtual network to an
0:12 existing data center fabric using
0:14 juniper appstra
0:18 the stage tab is where you can make
0:20 changes to the active blueprint under
0:22 virtual tab i'm going to create a new
0:25 routing zone
0:32 i'm going to allow the system to
0:34 allocate resources from pools that are
0:36 previously defined
0:40 this is the routing policy i'm going to
0:41 select for this tenant
0:48 as we see the new routing zone being
0:50 created we see red indicators telling us
0:52 that there's additional elements that we
0:54 need to define
0:58 in this case it's loopback ips so we're
1:01 going to select a pool
1:04 we'll save that and the resources will
1:06 be allocated for the configurations that
1:08 will be generated shortly
1:13 as the resources have populated the tab
1:15 turns green and the changes are queued
1:17 in the uncommitted tab for review before
1:20 we push the changes live
1:22 now we're going to create the virtual
1:24 network that resides within the new vrf
1:28 it's a vxlan that will extend to all of
1:31 the racks in the system
1:40 i specify the routing zone that we just
1:42 created in the previous step
1:47 let's use this selection to make the
1:49 same vlan id represent this virtual
1:52 network on each switch
1:55 when i make the tagged selection it will
1:58 create a connectivity template that
2:00 we'll use to add a tagged vlan to
2:02 workloads that we add later to the
2:04 fabric
2:11 and i'll specify all three racks that i
2:13 have in the system for the location of
2:15 this virtual network
2:22 another red tab appears that tells me i
2:24 need to specify a pool for ip addressing
2:33 i select a pool the addresses are
2:35 allocated and then the changes are also
2:38 queued in the end uncommitted tab
2:41 when it changes from red to yellow that
2:43 means that the change is waiting for me
2:45 to review before i commit them to the
2:47 active network in this case all looks
2:50 good so i will commit
2:56 it's recommended to write a note when we
2:58 make changes because it lets others know
3:00 what the change was about
3:06 and it will also show in the time
3:08 voyager tab in case we want to roll back
3:10 undo the change
3:20 at this stage i'm going to view the
3:22 configuration of the device and i'm
3:24 going to verify that the new virtual
3:25 network has been created
3:30 as a final result you can see red 41 now
3:33 exists in the configuration for this
3:35 leaf switch
3:37 [Music]