Onboard an SSR Device to a Conductor
The steps in this section describe the process of onboarding SSR100 or SSR1000 series devices to a Conductor using the Mist-redirect ZTP (Zero Touch Provisioning) process, without Cloud Telemetry (WAN Assurance Telemetry) integration. This procedure requires an account, organization, and sites configured on the Mist portal, and provides steps to configure those items.
For details about WAN Assurance offerings;
- See Cloud Telemetry for information about conductor-managed deployments with access to Mist Telemetry data.
- See Mist WAN Assurance for information about Mist-managed deployments.
The Mist-redirect ZTP process for Conductor-managed deployments is only supported on Juniper SSR100 or SSR1000 series devices.
High Level Steps:
- Install and deploy a Conductor
- Import or create a network configuration on the Conductor
- Create an account on the Mist portal
- Add your Organization
- Create Sites
- Connect your Device
- Onboard the SSR
Conductor Provisioning
The SSR device must have a configuration provisioned on the managing Conductor before powering up and onboarding the SSR device. That can include either importing a configuration, or manually generating the configuration on the conductor.
Additionally, the conductor uses the asset ID to recognize the SSR device and associate it to a logically configured router. For the SSR to onboard to the conductor, the asset ID must match the appropriate router in the conductor's configuration. It is crucial to verify the Asset ID for the SSR device when provisioning the router configuration on the conductor.
It is strongly recommended to configure the SSR WAN and LAN interfaces to match the ports identified as the WAN and LAN ports in the documentation (see below).
Mist Configuration for Onboarding the SSR
Configuring WAN Assurance requires Administrator level privileges on all platforms, SSR and Mist.
1. Create an account on the Mist portal.
2. Create an organization for the authority.
-
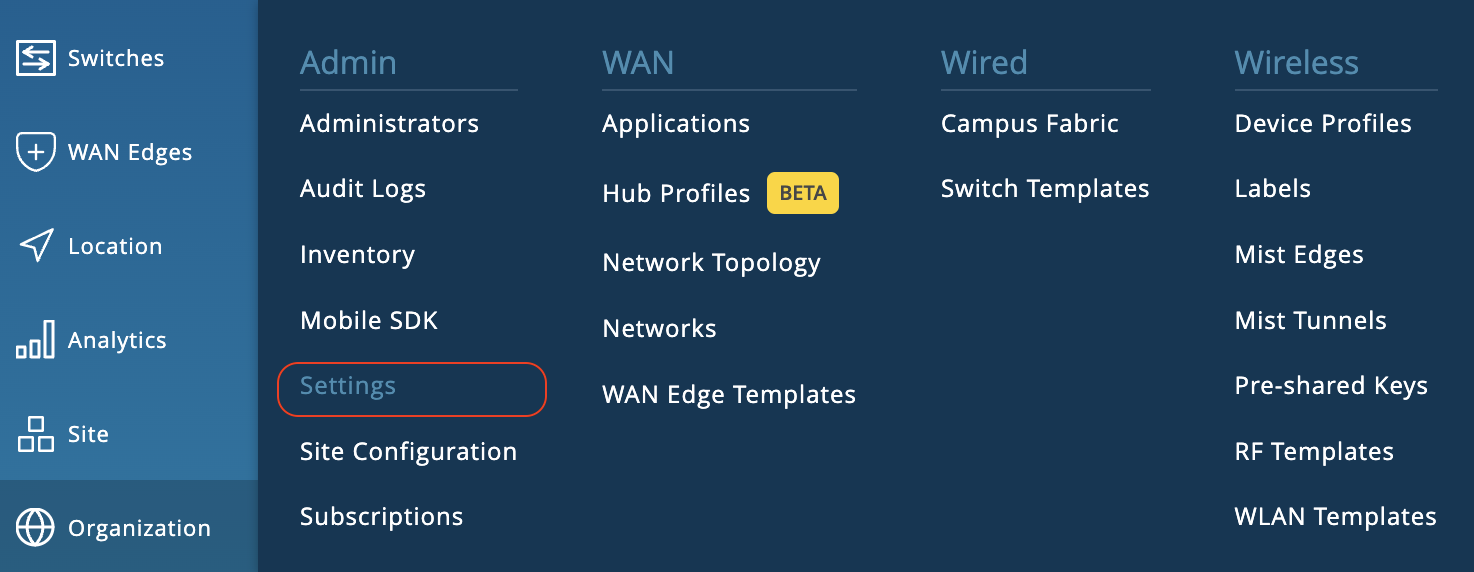
From the Mist menu on the left, select Organization, and select Settings from the menu.
-
In the Create Organization panel, enter a name for the Organization.
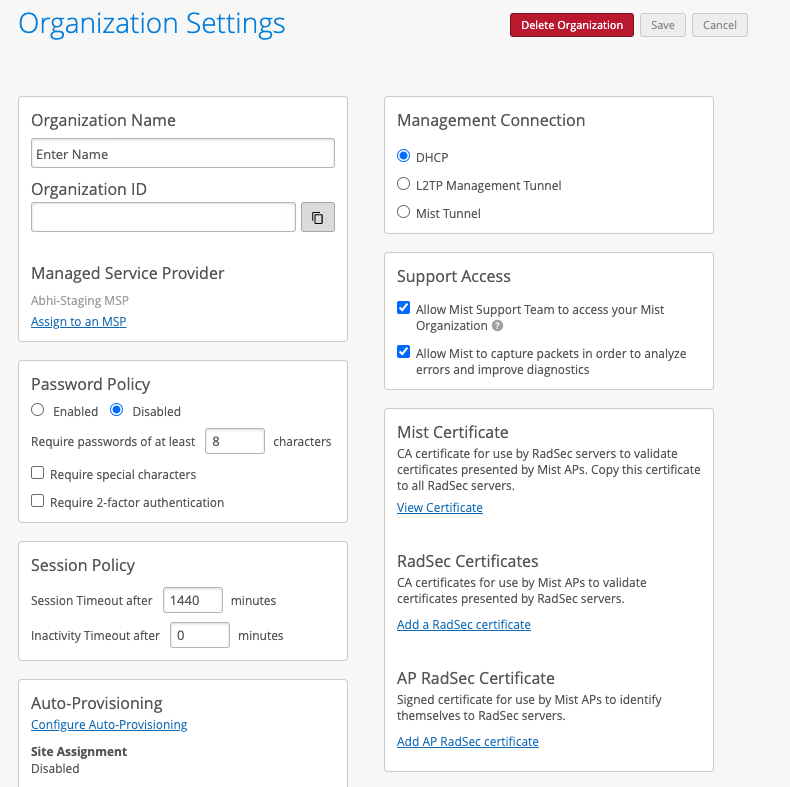
For additional information about creating an Organization, please refer to the Mist Organization Config documentation.
3. Create one Site for each physical location for onboarding the SSRs.
Create a unique site for each physical (or logical) location in the network. For example, the spoke and hub should be onboarded to different sites. Other devices from the Juniper stack such as Mist APs, Switches, SRX, etc., should be onboarded and assigned to the same site as the SSR when possible. This provides a clean topology view of all devices running within a site.
-
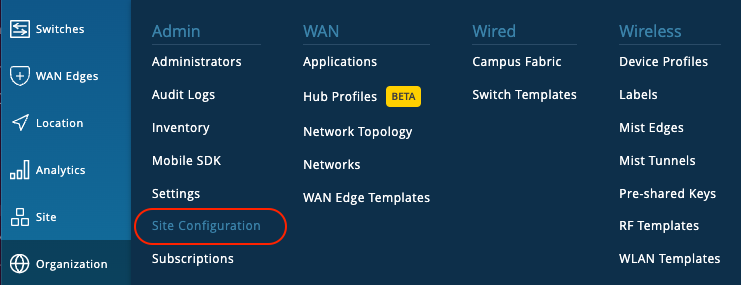
From the Mist menu on the left, select Organization and select Site Configuration from the menu.
-
In the Sites List, click on the Create Site button.

-
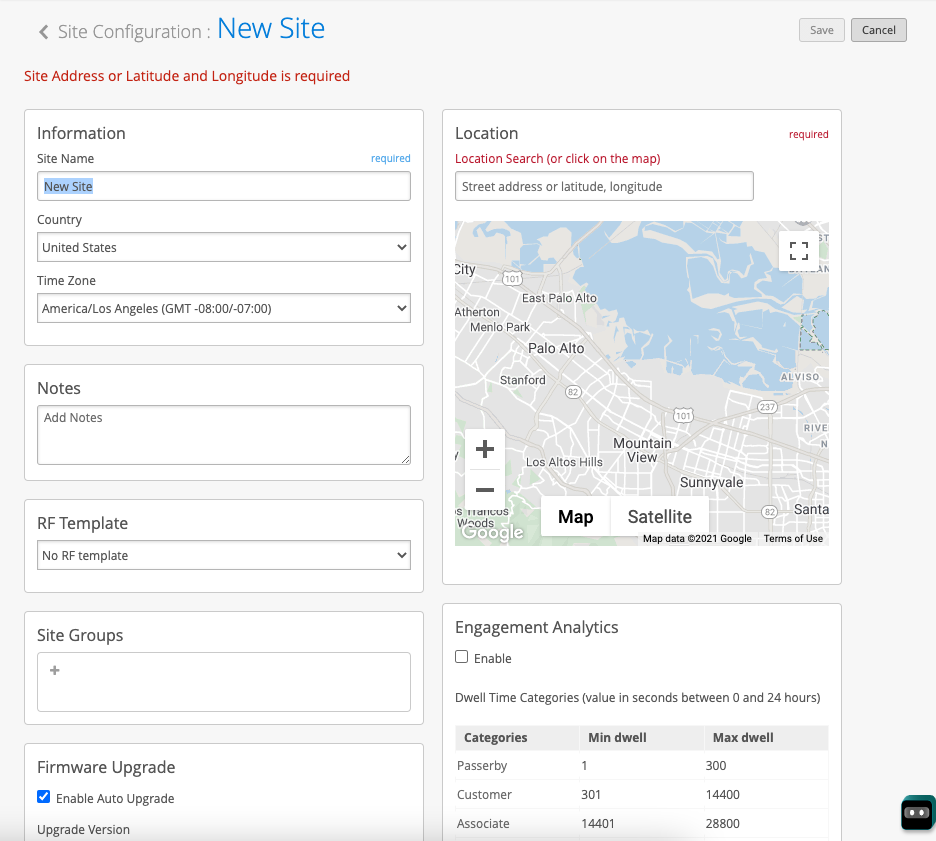
Use the New Site panel to configure a site.
-
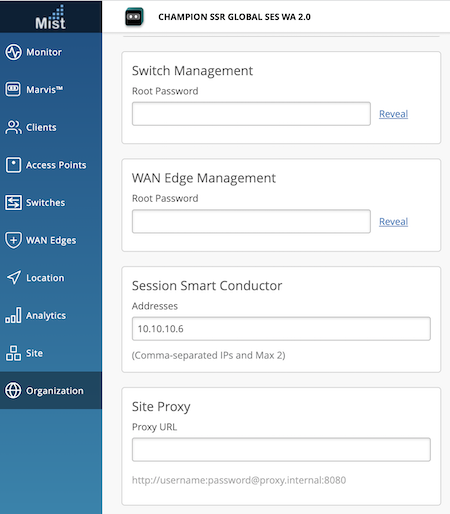
Add the Conductor IP address to the Site. This allows devices such as the SSR 120/130 to use ZTP to access the conductor through Mist.
For information about the fields used to create a site, please refer to the Mist Site Configuration documentation.
For new deployments enter the Conductor IP address as shown above.
When onboarding an SSR device to an existing Conductor-managed deployment, the existing condutor IP address is used.
Connect Your Device to the Cloud
Before powering on the SSR, it is important to verify that the Conductor this SSR will be connecting to has a valid configuration for the SSR to download. See Provisioning Notes above.
Once the conductor IP address has been configured, it is time to connect and power up your SSR device.
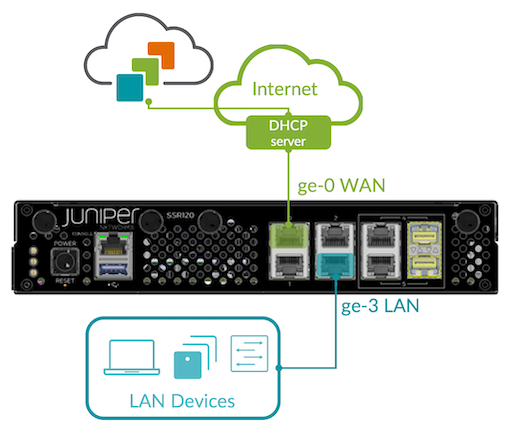
Your SSR device uses port 0 (ge-0/0/0) as a default WAN port to contact Mist for zero-touch provisioning (ZTP). You will also be setting up port 3 (ge-0/0/3) with a LAN network.
-
Connect port 0 to an Ethernet WAN link capable of providing the device with:
- DHCP address assignment
- Connectivity to the Internet and Mist
-
Connect port 3 to your LAN devices, including:
- Mist-managed Juniper EX switches
- Mist APs
- User devices
-
Power on the device.
Great job! Your SSR device is now connected and awaiting further instructions.
Onboarding the SSR
The conductor sends instructions to the connected SSR devices to self-onboard; the process is automated and the devices do not require any user interaction.
Verify Onboarding
After onboarding the SSR, it is important to verify that the process was completed successfully.
To Verify the SSR Onboarding:
-
Launch a command prompt window.
-
Execute the command:
sudo systemctl status 128T
-
When the service is listed as Active, log into the system as Admin using the system default password. By logging into the system, you have verified the installation.
-
Close the command prompt window.
-
Use a web browser to navigate to the IP address of the SSR GUI. For example;
https://192.168.1.25 -
Log in to the SSR GUI using the admin name and password you created earlier.