Manually Installing the SSR
This section describes the manual installation process for the SSR. For automated installation see Installing from Bootable Media.
Install Using SSR-Installer
The SSR software installer package is part of the SSR ISO, and is hosted in the Juniper software repository, located at https://software.128technology.com/artifactory/list/generic-128t-legacy-isos-remote/. During installation the system will need access to the internet to retrieve software applications and libraries. Please ensure the system can reach the public internet prior to commencing. For offline installation instructions, follow the instructions for installing from bootable media. If you are performing an upgrade, see Upgrading the SSR Networking Platform for upgrade instructions.
The SSR Software package is available from our public servers located at: https://software.128technology.com/artifactory/list/generic-128t-legacy-isos-remote/ using the username and token provided to you. The username/token simplifies access and does not require the conversion process used for the certificate. With the latest release of the SSR Installer, both a certificate and a username/token can be used for installation. However, to use a username/token for software access, Installer 3.0.0 is required.
Do not uninstall old versions of the SSR Installer. Later versions of the SSR Installer have dependencies on the earlier versions, and uninstalling them may cause issues for rollback operations.
Manually Installing using the SSR-Installer
- Launch a Linux command prompt.
- Enter the command to install the Yum repository that corresponds to the SSR software installer.
https://software.128technology.com/artifactory/list/generic-128t-isos-release-local/
- Enter the command to download the installer.
sudo yum install 128T-installer
Beginning with Installer version 2.7.0, the use of the Screen utility is no longer necessary. However, for older versions of the Installer, it is strongly recommended to use the Screen utility when performing a manual installation to avoid SSH session timeout.
- Create a screen and attach to it.
screen -d -m -s <name-of-screen-session>
screen -x <name-of-screen-session>
- Enter the command to launch the Interactive Installer wizard.
sudo install128t
The installer splash screen appears.
- Press the Enter key to select Begin and start the installation wizard.
Items that have a hotkey have a bold or alternate color letter within the element. If two items have the same hotkey, pressing the hotkey in succession will toggle among all items with a common hotkey shortcut.
To select a radio button option, navigate to the radio button using the arrow keys or Tab key and press the Space bar. Pressing the Enter key will execute the function highlighted at the bottom of the pane, typically OK or Back. Additionally, you can navigate fields using the Tab key.
- You will be asked to enter either the client certificate or the username and token you received as part of your SSR purchase.
If your login credentials are not available, select the
Skipbutton.
-
For the username and token, enter your username and token information.
-
For the client certificate, copy the entire contents of the certificate, including the Certificate and Private key information, and paste it into the Client Certificate window of the install wizard.
The content must begin with the line-----BEGIN CERTIFICATE-----and end with-----END RSA PRIVATE KEY-----.This is performed more easily when accessing the target machine over SSH using terminal software, rather than interacting with the target machine directly. Alternatively, store the certificate as /etc/pki/128technology/release.pem to avoid having to copy and paste.
-
Press the Tab key after pasting the client certificate to select the OK button, and press Enter.
- From the Version Selection window, select your desired version from the list, then click OK to continue. The installation begins, and may take several minutes to download and install.
- Press the Enter key to select OK and close the installer.
- Detach from the Screen utility if used.
ctrl+a
d
Upon completing the installation, the Installer automatically launches the Initializer.
Initialize the Node
The Initializer is a complementary application to the Installer that tunes your operating system, prepares the platform to run the SSR software, and creates the bootstrapping files necessary to load the software. The Initializer is automatically launched once the Installation wizard is complete.
-
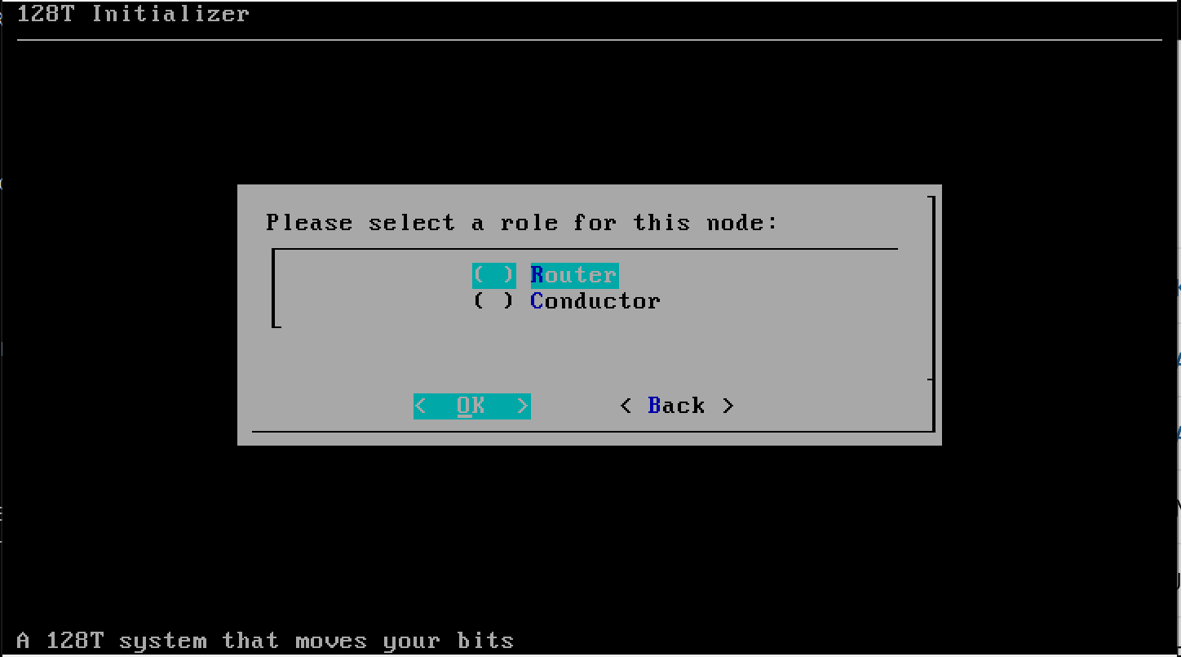
On the Initializer wizard screen, use the space bar to select either a Router or **Conductor **role for the SSR node and press the Enter key to select OK.
-
For routers, you will be prompted for the IP address(es) of your conductor(s). If you have conductors, enter their administrative addresses here, and this node will retrieve its configuration from the conductor. If you have only one conductor (i.e., a standalone conductor), leave the field labeled 2nd Conductor Address blank. If you have no conductors, choose Skip.
-
When asked What kind of Router node is this?, select from the following options:
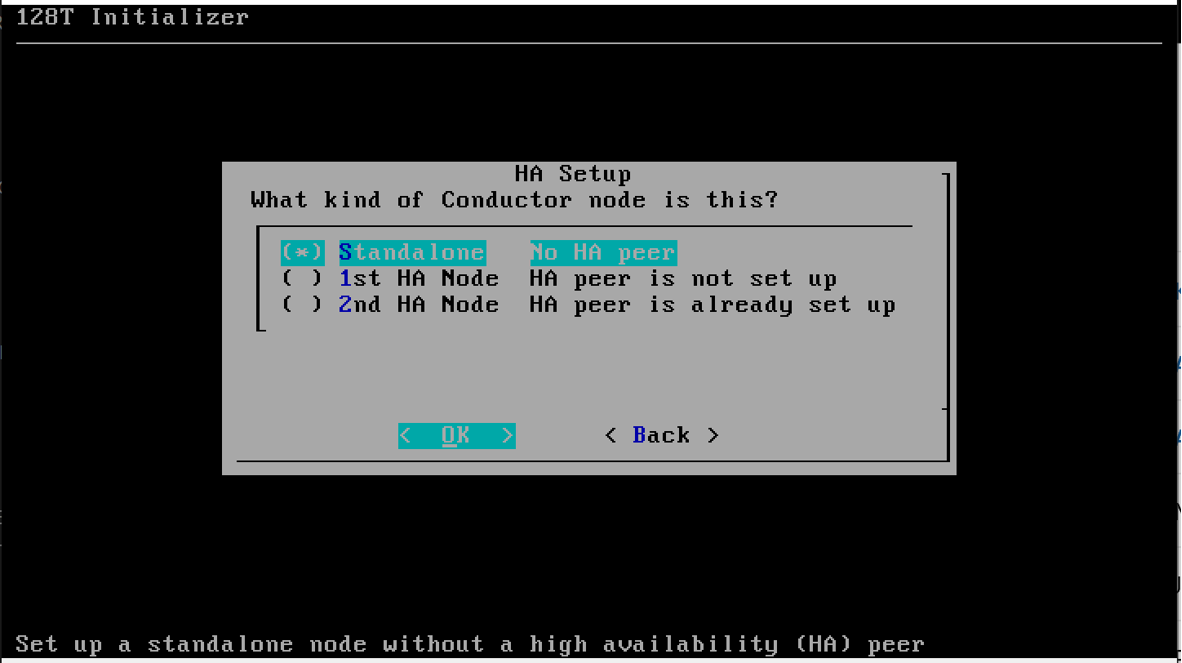
- Standalone: This router has no highly available peer, and is not currently planned for high availability.
- 1st HA Node: This router is the first node of a high availability pair. You will be prompted for the High Availability address of this node. Note: The address must be reachable by the 2nd HA Node.
- 2nd HA Node: This router is the second node of a high availability pair, where the first node has been initialized. You will be prompted for the High Availability address of the first node.
- Enter the following system properties on the Node Info screen:
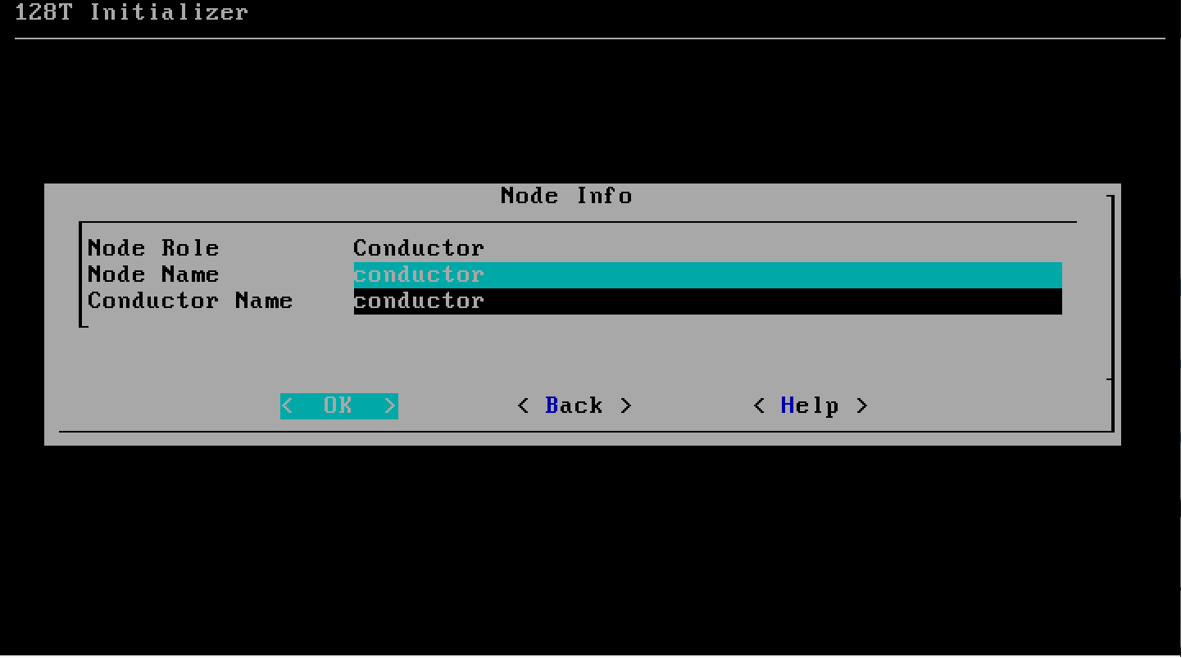
- Node Name: The unique name of the system within your SSR Router or Conductor, for example labsystem1. By default this field uses the Linux system's hostname.
note
Both routers and conductors can consist of one node (for standalone systems) or two nodes (for highly available systems).
- Router/Conductor Name: The name of the Router or Conductor system as a whole. When referring to a running SSR software instance, it is identifiable by the full name of
nodeName.routerName; e.g.,labsystem1.boston. The full system name is reflected in the PCLI prompt as discussed in the Document Conventions section of this document.
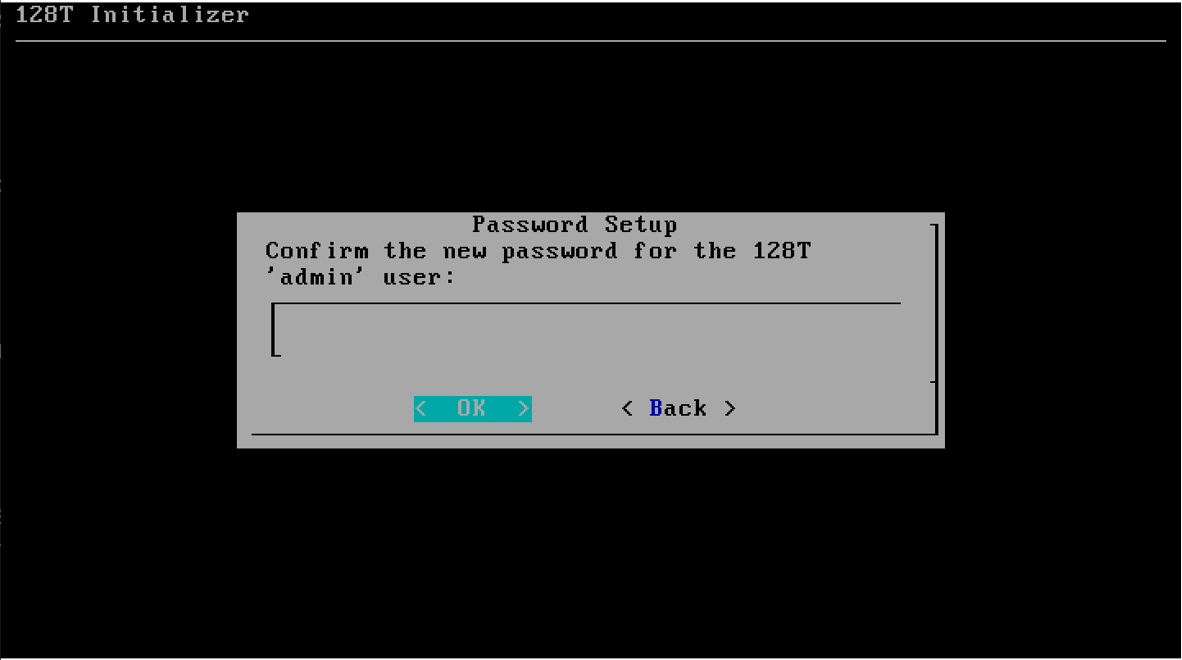
- On the Password Setup screen, create a password for the Admin user. The administrator password must be at least 8 characters long, contain at least 1 uppercase letter, at least 1 lowercase letter, at least 1 number, and cannot repeat any character more than 3 times.
Resetting a password requires entering the old password. If a password is lost or forgotten and the account is inaccessible, the account cannot be recovered. Please keep password records accessible and secure.
-
Press the Enter key to select OK. The Initializer performs a hardware compatibility check. The compatibility check may fail due to warnings or failure notices, which are displayed in the output script. If no failures are present, you can choose to continue with the installation even if multiple warnings exist. For information on why a specific test may have failed or generated a warning, contact technical support.
-
When prompted, either reboot your system or start SSR.
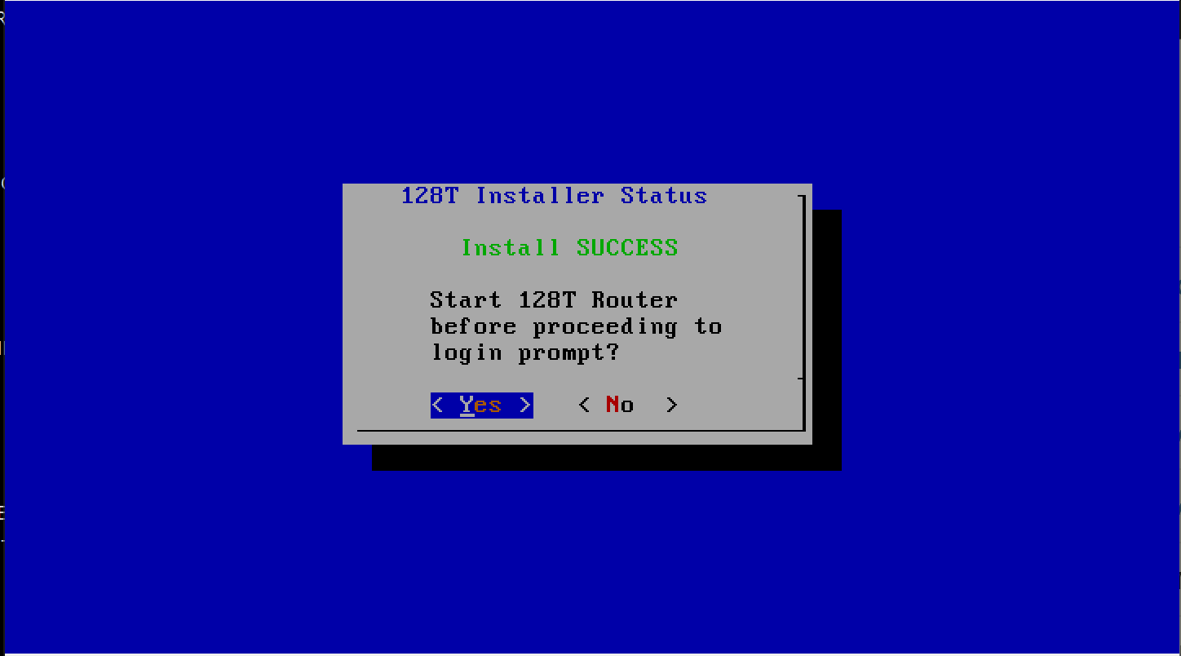
If installing the SSR software for the first time, a system reboot is required.
Verify Installation
After installing the SSR Routing Software, it is important to verify that the installation was completed successfully.
To Verify the SSR Installation:
-
Launch a command prompt window.
-
Execute the command:
sudo systemctl status 128TResult: The service is listed as Active (running).
If the service is listed as Inactive, run thesudo systemctl start 128Tcommand. This may take several minutes to fully launch the service. -
Once the service is listed as Active, log into the system as Admin using the system default password.
Result: The installation is verified. -
Close the command prompt window.