Image-Based Installation
Beginning with version 6.0, an image-based ISO installation process has been implemented. This installation and upgrade process is only available for SSR version 6.0 and higher. Conductors with version 6.3.0 installed are able to manage routers installed with image-based and package-based software versions.
If you are installing SSR Version 6.3.x, use the Universal ISO Installation process.
The package-based installation is still available for older installations and upgrades.
The image-based installation creates two volumes on the disk, installs the full 6.0.x image into one of the volumes, and boots into that image. When an upgrade is initiated, the new ISO image is copied into the other volume. The upgrade process copies configurations and persistent information from the old image to the new image, then reboots into the new version.
The Image-based install consists of the following steps:
- Download
- Installation
- Default Port Identification
- Associate the Device with Mist Using the GUI
- OR
- Adopt the device using the PCLI
Download
The image-based ISOs are available to download at the following location:
https://software.128technology.com/artifactory/list/generic-128t-install-images-release-local/
Files available for download are:
*.iso- This file is used for installing/staging bare metal platforms. Use this file to perform an image-based install.*.tar- This file is used by Mist or the SSR conductor for image-based upgrades, and is accessed directly by the system during the upgrade. User download is not necessary or advised.*.qcow- This file is used for virtual environments such as KVM or ESXi. Do not use this file to perform an image-based install on a Mist-managed device or system. For more information see Deployment Using QCOW2.*.ztp.raw.gz- This file is used by manufacturing, and is not applicable for customer use.
You will be prompted for your username and token to access the web page listing the software versions. Download is done directly from the page.
Create a Bootable USB
Use the instructions Creating a Bootable ISO to create a USB to be used to install the image.
Installation
-
Insert the flash drive into the appliance, and boot into the flash drive.
-
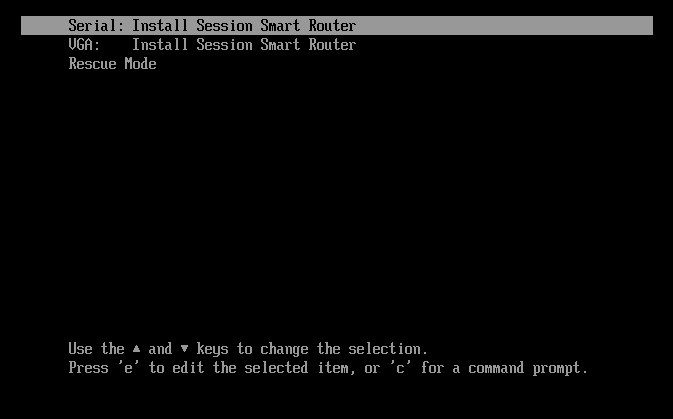
Select the installation method: Serial Console or VGA. If you do not make a selection, the Serial mode installation is selected by default.
-
In the Installer window, select 2 for the ZTP Install Mode. This mode supports the image-based installation. OTP and Interactive modes are not supported for image-based install.
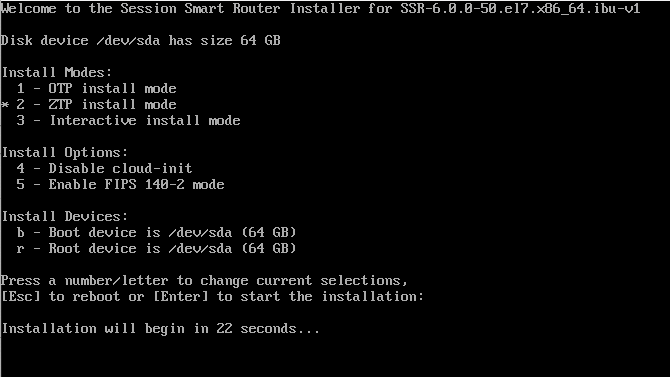
On a system with multiple disks, the Install Devices selection allows you to steer the boot and root filesystems to individual devices if necessary.
-
If you require FIPS enforcement, select 5 for
Enable FIPS 140-2 mode. If you do not require FIPS enforcement, skip to step 7.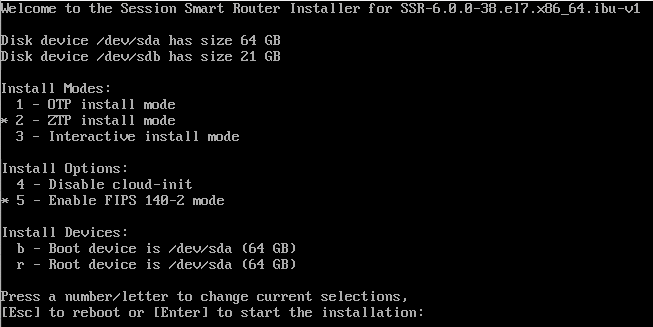
-
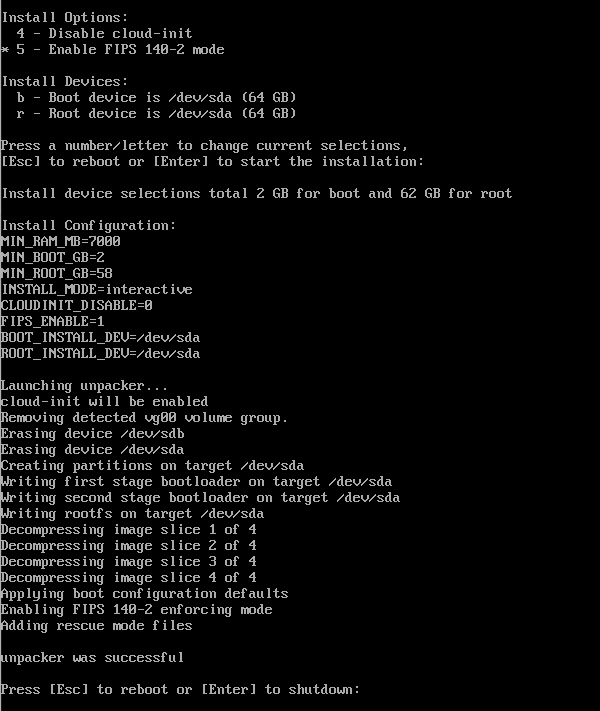
The resulting system boots into FIPS 140-2 enforcing mode.
-
Verify FIPS mode is active by reading the kernel crypto state using
sysctl. The result is an error when attempting to use a non-FIPS compliant crypto such as md5.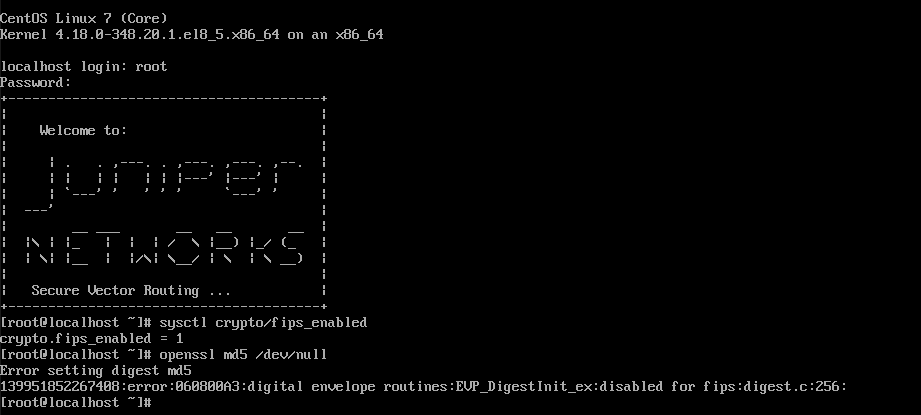
-
Press the Enter key to start the installation.
-
Once complete, you are prompted with an option to press Esc to reboot immediately, or Enter to shutdown and continue later.
-
Upon restart, the system initializes and is internet ready. Since each manufacturer's device port layout is different, use the following information to identify the port layout of the device to complete the onboarding process.
Device Default Port Identification
When a whitebox device is installed with SSR software, the software scans the device to generate a default port map. When the device is recognized as a certified device, a known port layout is configured as the device default. When the device is unrecognized, a default port layout is generated based on PCI address order. This order often does not match the external bezel port order. Some trial-and-error testing of port connections may be required.
The following sections provide information about port connections on Juniper certified devices and non-certified devices that are considered compatible.
- Lanner 1515: Certified Device
- Silicom Madrid 90500-0151-G61: Certified Device
- Fitlet2 Dual Port: Non-certified, Compatible Device
- Fitlet2 Quad Port: Non-certified, Compatible Device
- Additional Non-certified, Compatible Devices
Use this data to identify the port layout for your whitebox device. A link to return to this process is provided at the end of the process for each device.
Associate the Router with Mist
This section covers the basic steps to associate your router with a Mist Organization using the SSR and Mist GUI. The following animation presents the steps for associating the onboarded router with a Mist organization.
The steps performed in the animation are listed below.
-
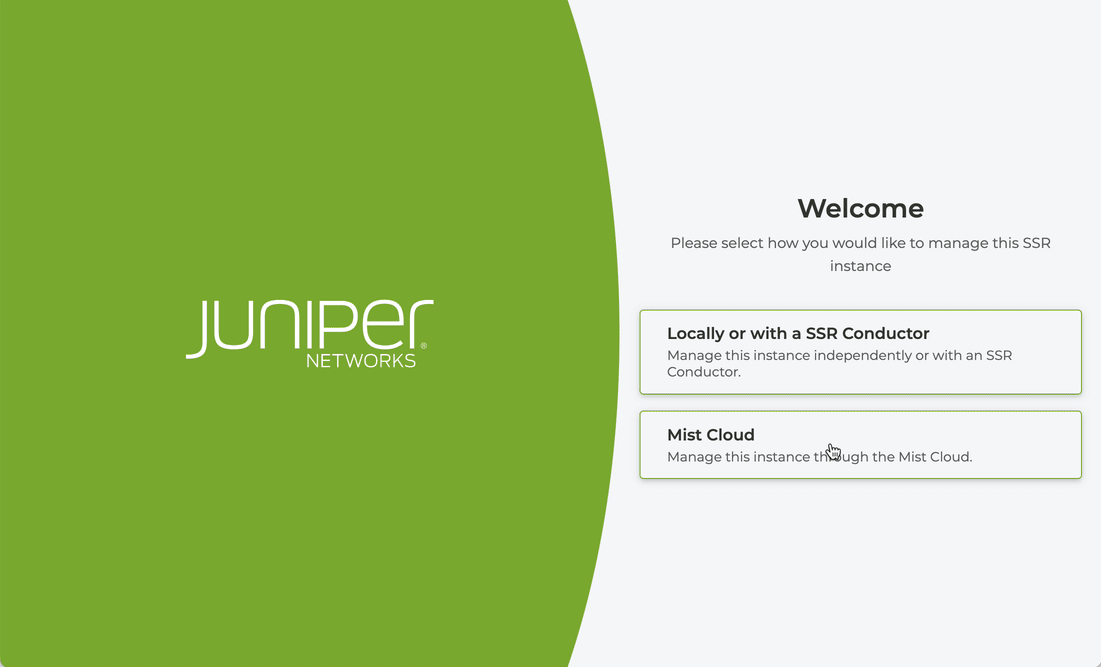
Upon reboot, you are presented with the SSR login screen where you can choose to Manage the router through the Mist cloud. Select this option.
-
Choose how to associate the router with the Mist Cloud; selecting an Organization, or use a registration code. In this example, we will choose the organization.
-
Log in to Mist.
-
Select the organization from the drop-down list.
-
If you assigned your router a name, enter it here and select ADOPT.
-
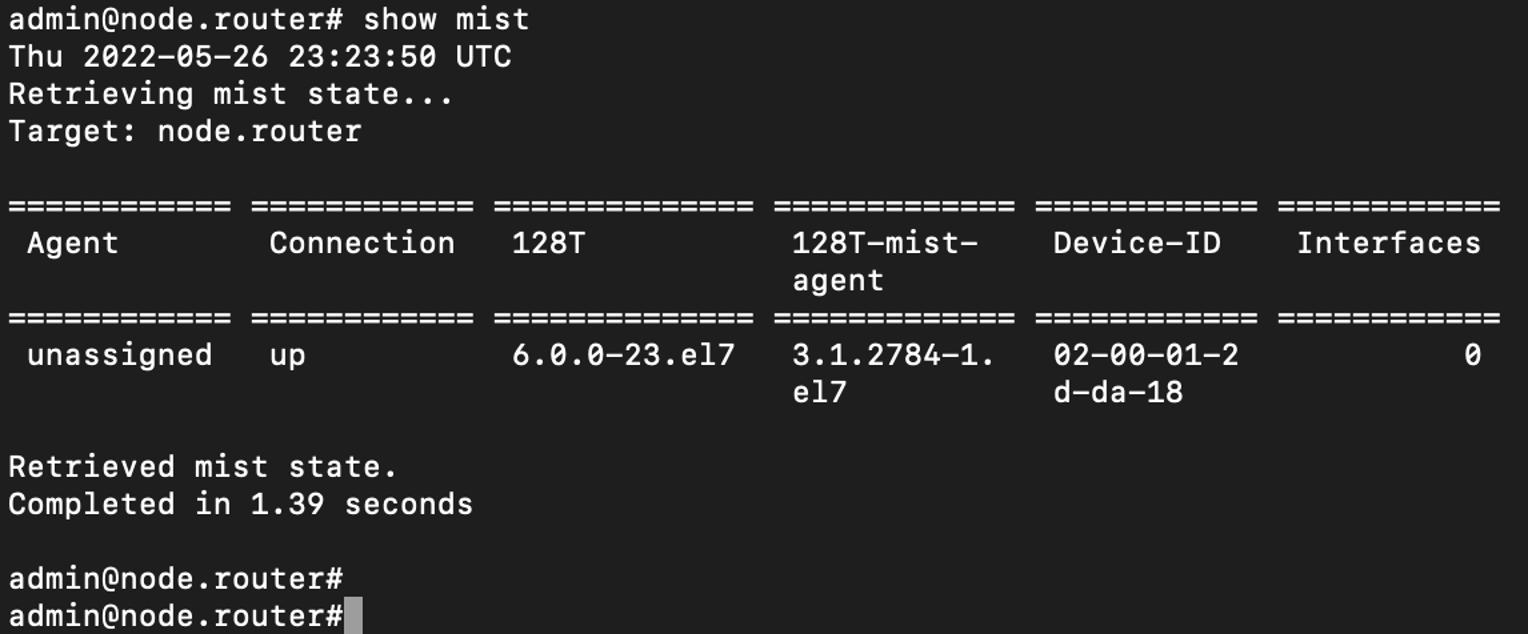
If there are no errors, the router is associated with the organization and visible in the Mist UI.
-
Click the link to the Mist Cloud to see the router in the Mist inventory.
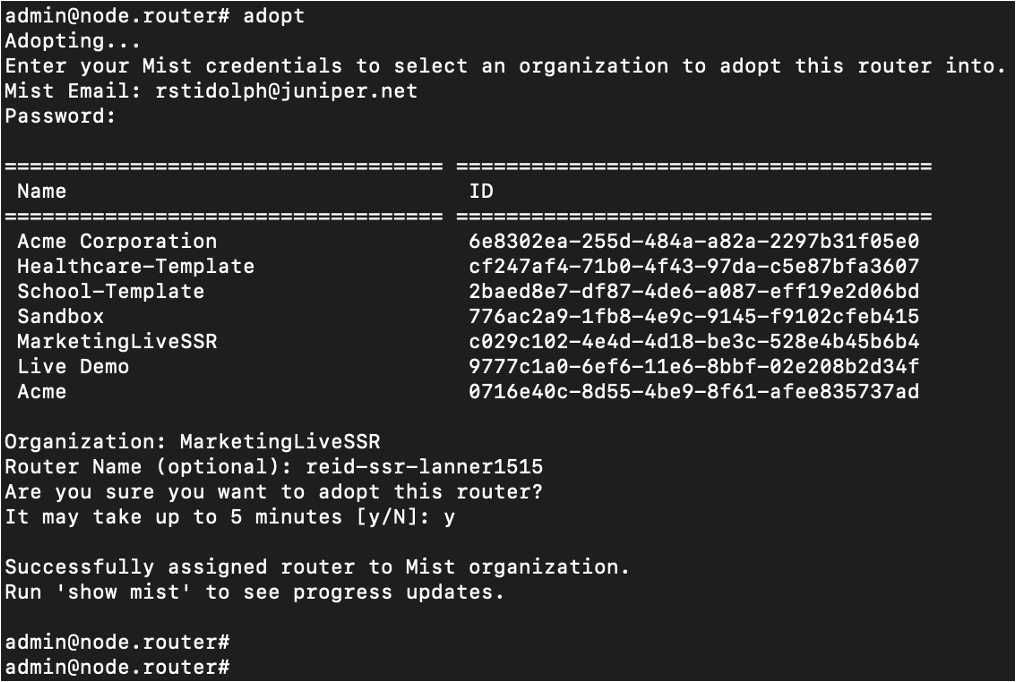
Adopt the Router from the SSR PCLI
If you prefer to work from the PCLI, you can use the adopt command to associate the router with Mist.