QuickStart From the OTP ISO
If you are installing SSR Version 6.3.x, use the Universal ISO Installation process.
Use this procedure to set up a typical standalone branch router leveraging the QuickStart capabilities of the SSR Networking Platform.
SSR Configuration
The SSR router will need to be provisioned on the conductor. This procedure presumes you are familiar with the concepts and configuration of the SSR platform.
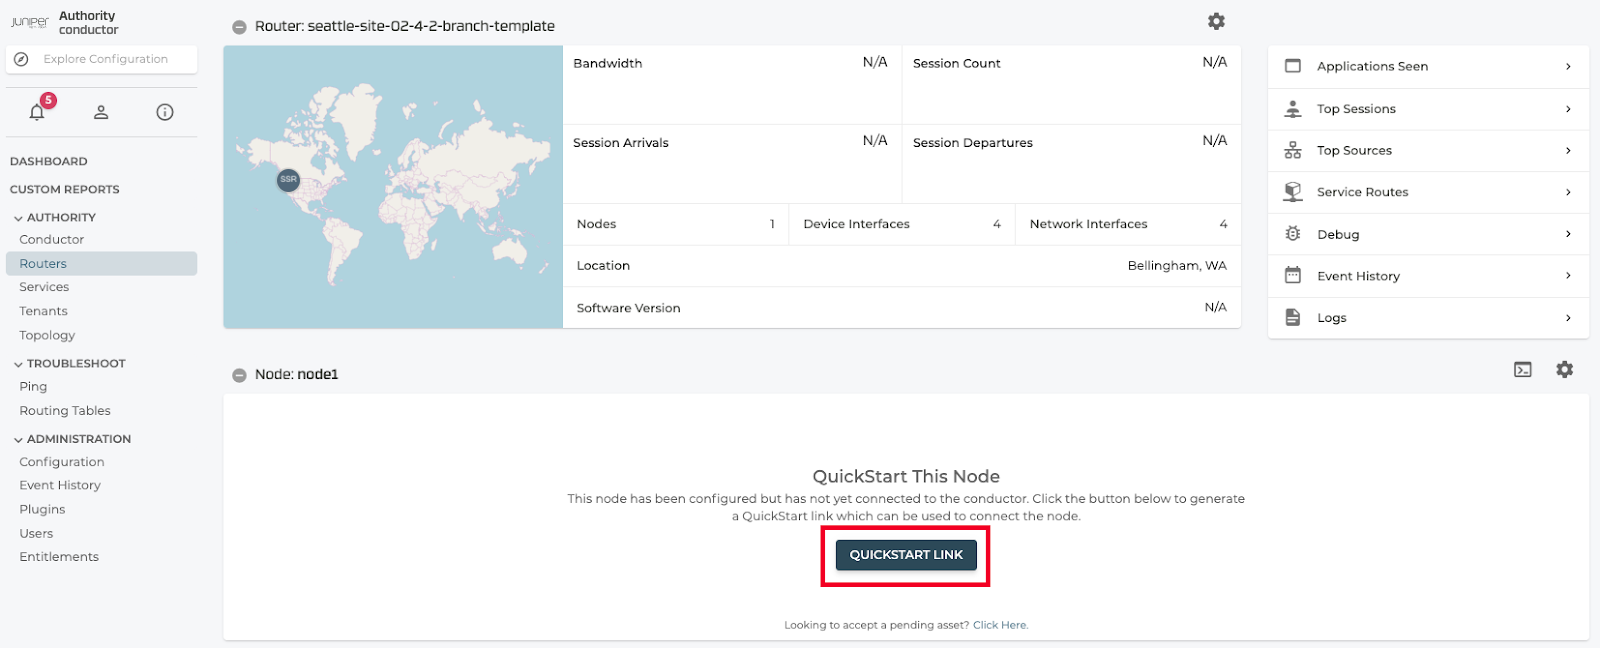
When a router configuration has been added to the conductor, but the device has not yet connected, in place of device-specific information, QuickStart instructions will be displayed.
After the configuration has been added to the authority on the conductor:
- On the Conductor, go to the UI to start the QuickStart process for the newly created SSR Router by accessing “Routers” -> “Router Name” -> “QUICKSTART LINK”
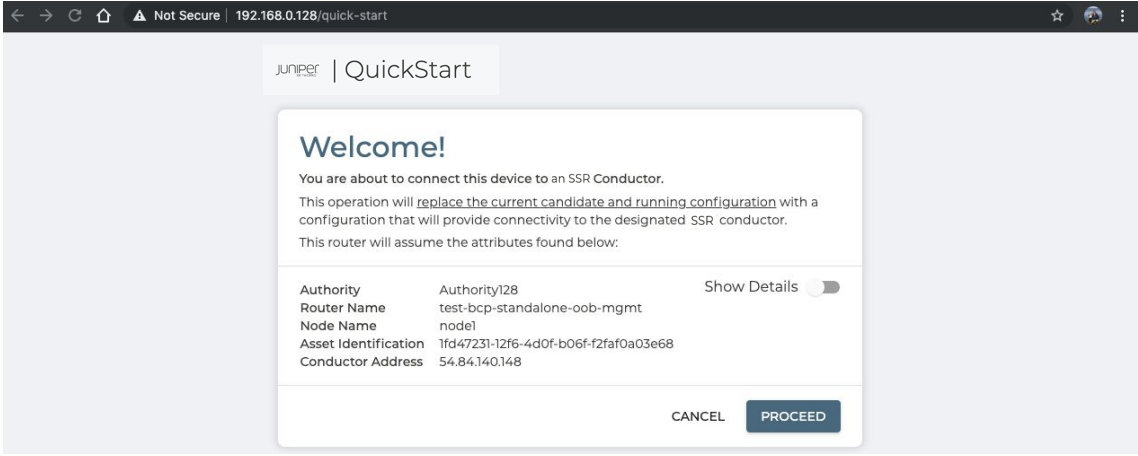
Clicking on the generate "QuickStart Link" will present you with a dialog box confirming some basic information about the target platform. Notably the router name, node name, and asset ID.
The device host address is the IP address that is assigned to the SSR router during the staging process. By default this is set to 192.168.0.128.
A password is used to encrypt the contents of the QuickStart file. This password will be required when applying the file to the target platform.
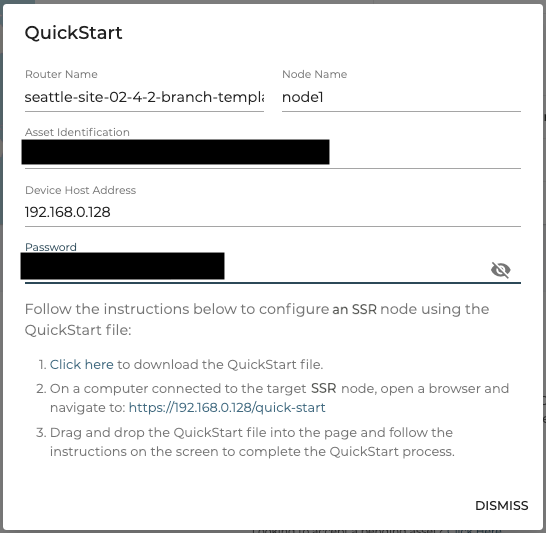
- Copy the auto generated “Password” (this can be set to a different value)
- Follow step 1 to download the QuickStart file locally by selecting the “Click Here” link
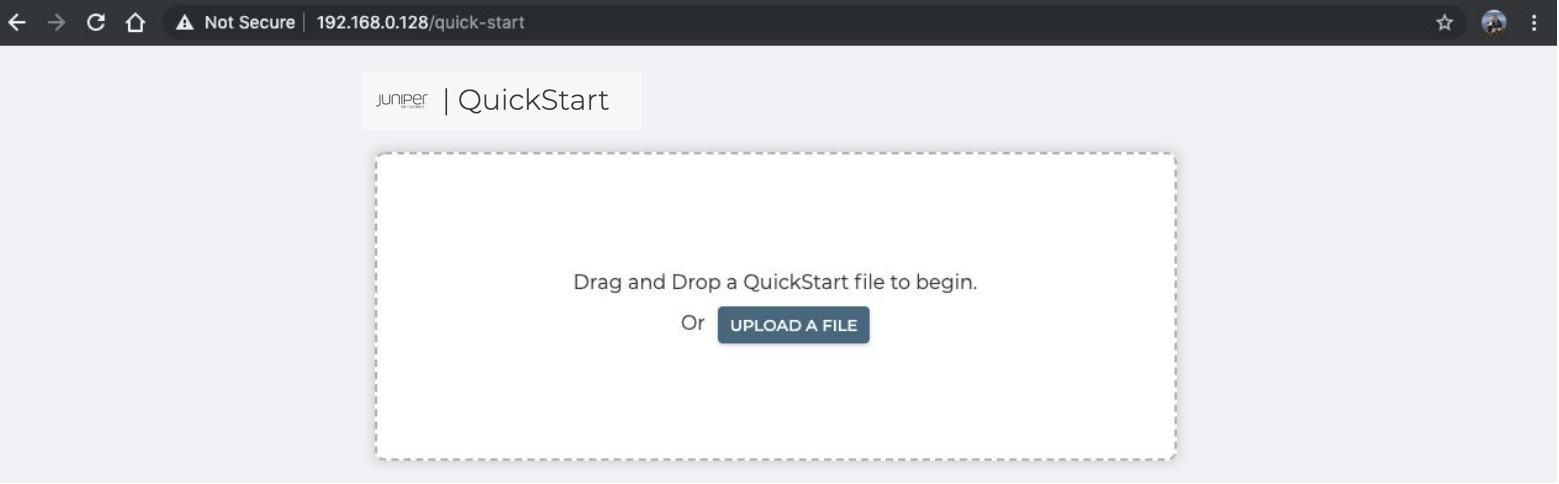
- Plug in the computer that contains the QuickStart file to any ethernet port except for port 1 on the router. Ensure DHCP is enabled on the computer connecting to the router.
- Follow step 2 and click the link to start the QuickStart URL process
- Login locally to the new router with the default username
adminand password128Tadmin - Drag and drop the QuickStart file and click “Proceed”
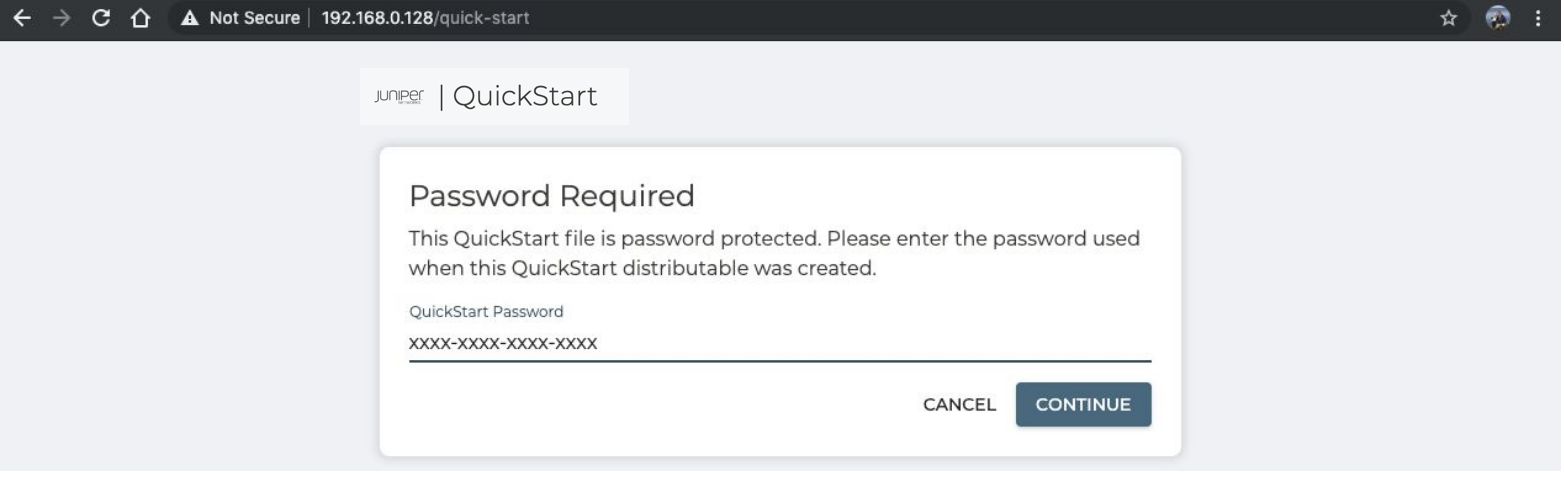
- Paste the “Password” previously copied to unencrypt the QuickStart file and click “Continue”
- Click “Proceed” to start this process
- Optionally, select the “Show Details” slider to view the full config that will be configured
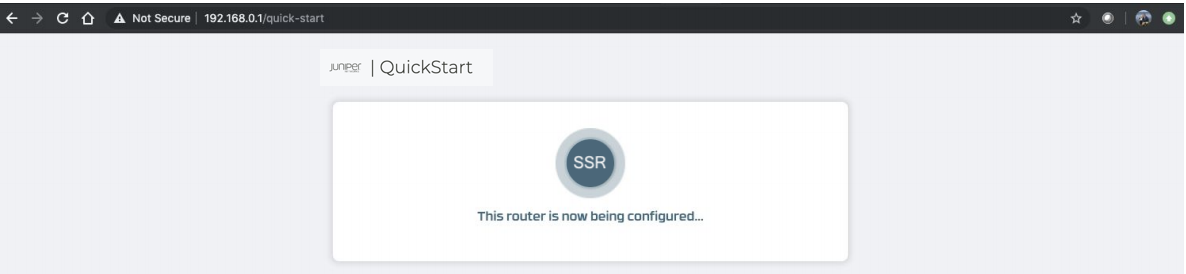
- After a couple minutes, this process will complete and your SSR Router will be fully configured.
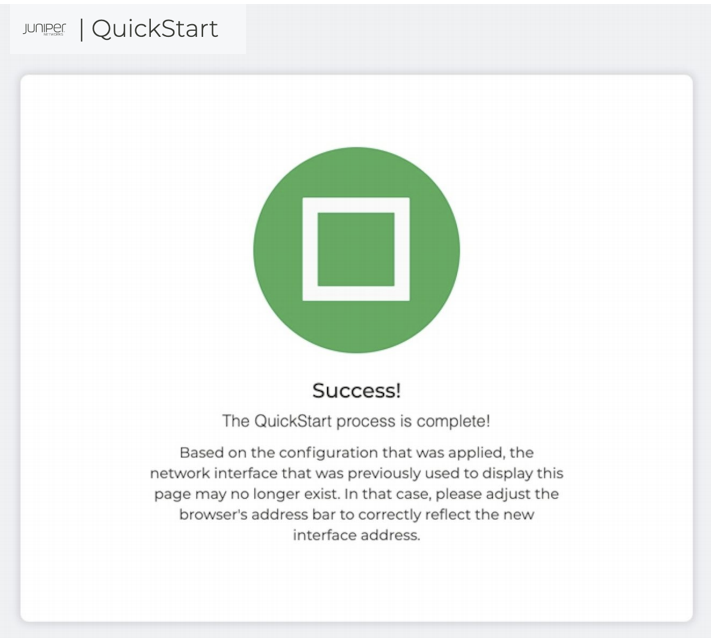
- After a few more minutes, the router QuickStart webpage will show a message that the router was successfully configured.
Change the Default Passwords after Installation
The following user accounts and passwords are created during the ISO installation process:
| Username | Password |
|---|---|
| root | 128tRoutes |
| t128 | 128tRoutes |
Change these passwords immediately. Use the passwd command from the UNIX window.
[t128@test-router ~]$ passwd
Changing password for user t128
Changing password for t128
(current)UNIX password:
New password:
Retype new password:
passwd: all authentication tokens updated successfully.
[t128@test-router ~]$ su -
Password:
[root@test-router ~]# passwd
Changing password for user root.
New password:
Retype new password:
passwd: all authentication tokens updated successfully.
[root@test-router ~]#
Verifying Operation
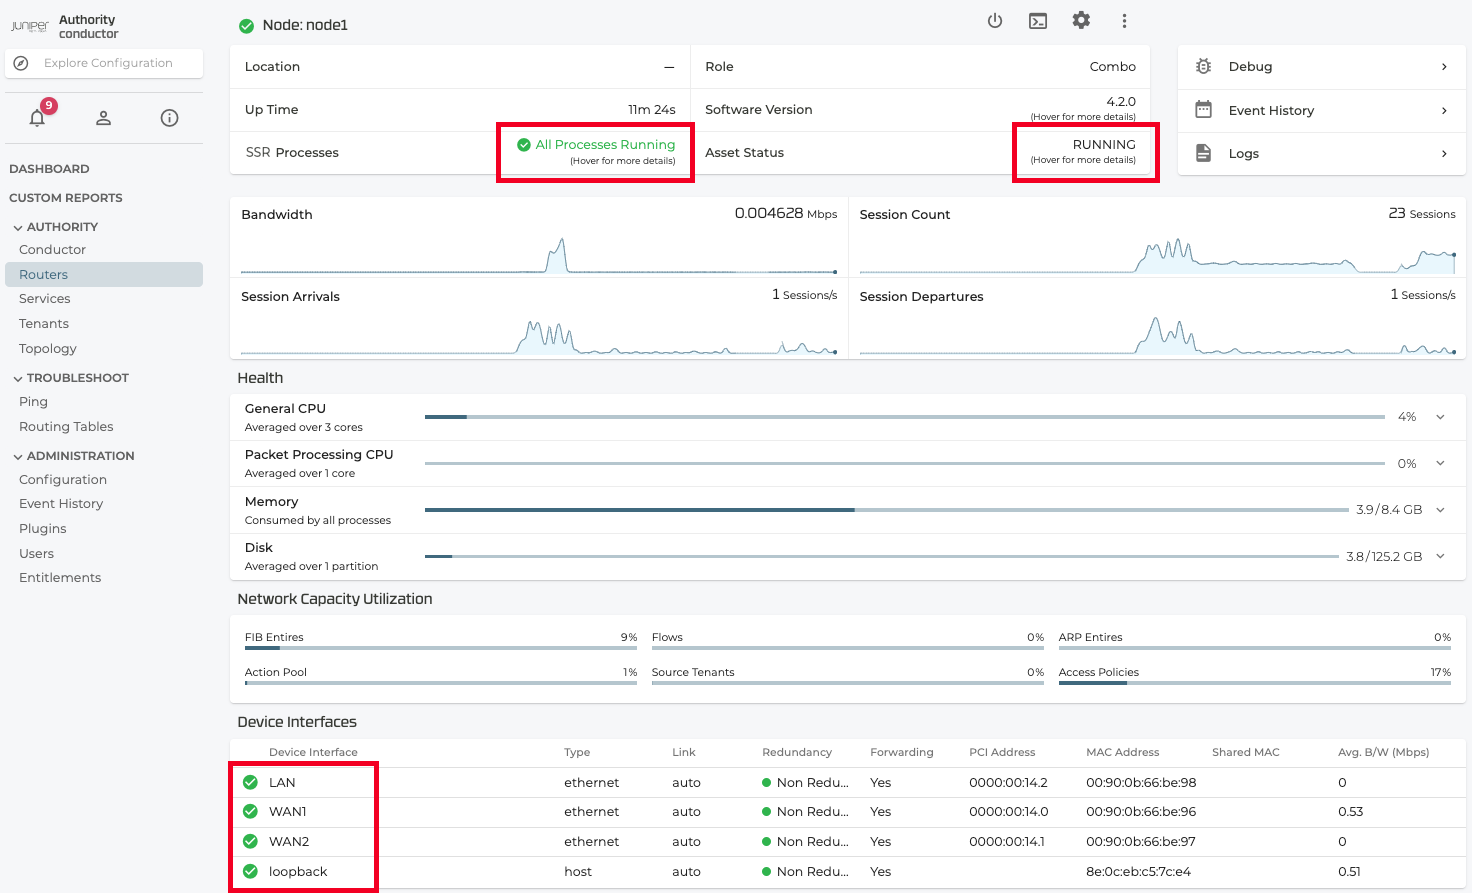
The SSR router will have connected to the conductor. The Router page that was previously empty should now be populated with information about the system. Go to the SSR Conductor UI to verify the process completed for this newly created SSR Router by accessing “Routers” -> “Router Name” -> “Node Name”
- Verify “SSR Processes” -> “All Processes Running”
- Verify “Asset Status” -> “RUNNING”
- Verify all 4 interfaces are “Up”
Congratulations, you have setup your SSR router.