Configure a Virtual Chassis Using EX2300, EX4650, or QFX5120 Switches
Follow these steps to configure Virtual Chassis on Juniper switches that don't have a dedicated VC port. Note that the screenshots used in this procedure are for reference only.
The Juniper Networks EX2300, EX4650, and QFX5120 switches do not form a Virtual Chassis by default, as these switches don’t have dedicated Virtual Chassis ports (VCPs). Therefore, to create a Virtual Chassis with these switches, you need to use the Form Virtual Chassis option on the Juniper Mist™ portal. The Form Virtual Chassis option applies only to the EX2300, EX4650, and QFX5120 switches. This workflow creates a preprovisioned Virtual Chassis configuration. Mist supports only the preprovisioned Virtual Chassis configuration.
The procedure to configure a Virtual Chassis using the EX3400, EX4100, EX4100-F, EX4300, or EX4400 switches is different, as those switches have dedicated Virtual Chassis ports (VCPs). For more information, see Configure a Virtual Chassis Using EX3400, EX4100, EX4100-F, EX4100-H, EX4300, EX4000, or EX4400.
Ensure that you use the Mist portal interfaces to manage all Virtual Chassis configurations. Avoid using CLIs or Additional CLIs for managing Virtual Chassis settings.
To configure a Virtual Chassis using EX2300, EX4650, or QFX5120 switches:
-
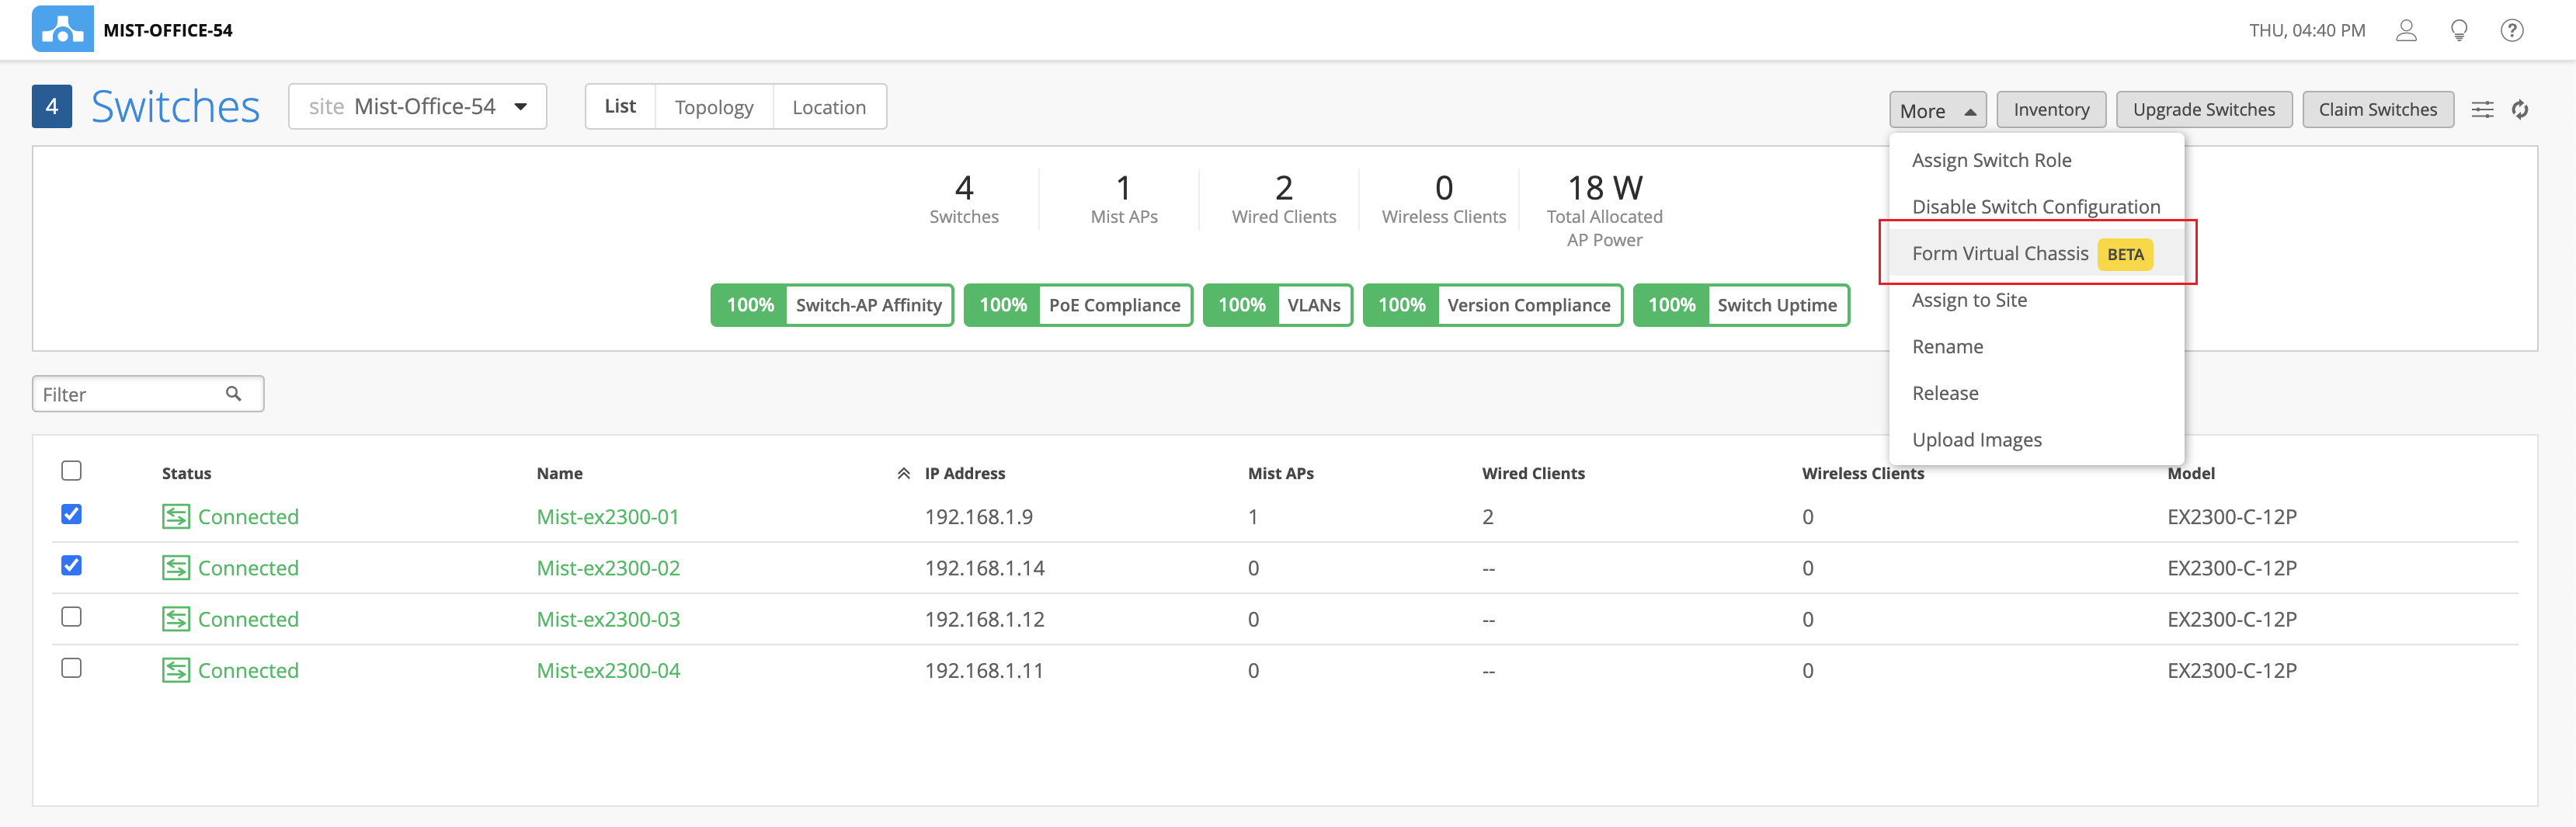
Click More > Form Virtual
Chassis.
 Note:
Note:You can see the Form Virtual Chassis option only if:
-
The selected switches are running the same Junos version and have the configuration management option enabled.
-
All the selected switch models are supported by the Virtual Chassis.
You can also create Virtual Chassis from the switch details page by using the Utilities > Form Virtual Chassis option.
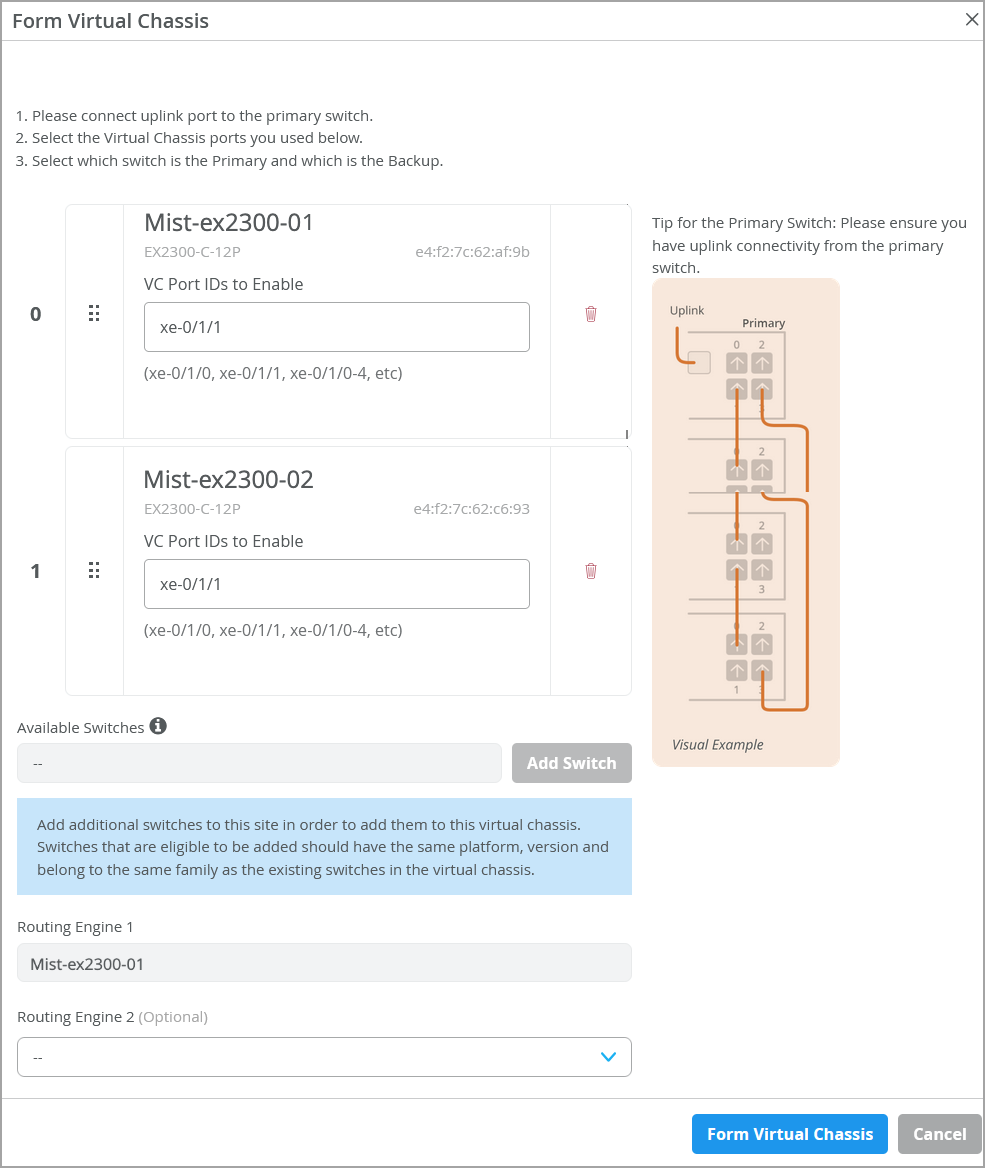
The Form Virtual Chassis window appears, as shown in the following example.
 Note:
Note:This example shows two switches included in the Virtual Chassis. A Virtual Chassis device created using EX2300 or EX4650 switches supports up to 4 switches. All switches, except those assigned Routing Engine roles, function as linecard members.
-
-
Click Form Virtual Chassis and wait
for
the Virtual Chassis to be created.
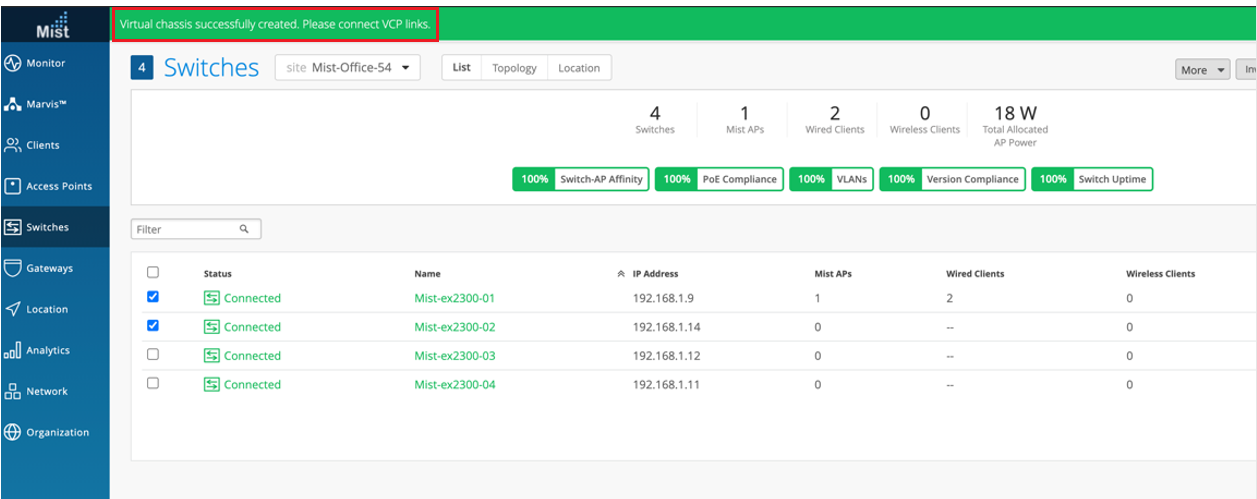
The switches page shows a message indicating that you must connect the switches to each other using the VCPs.
-
Connect the switches to each other using the VCPs
mentioned
earlier.
When the Virtual Chassis formation is in progress, the Switches page shows the switch status as VC forming.

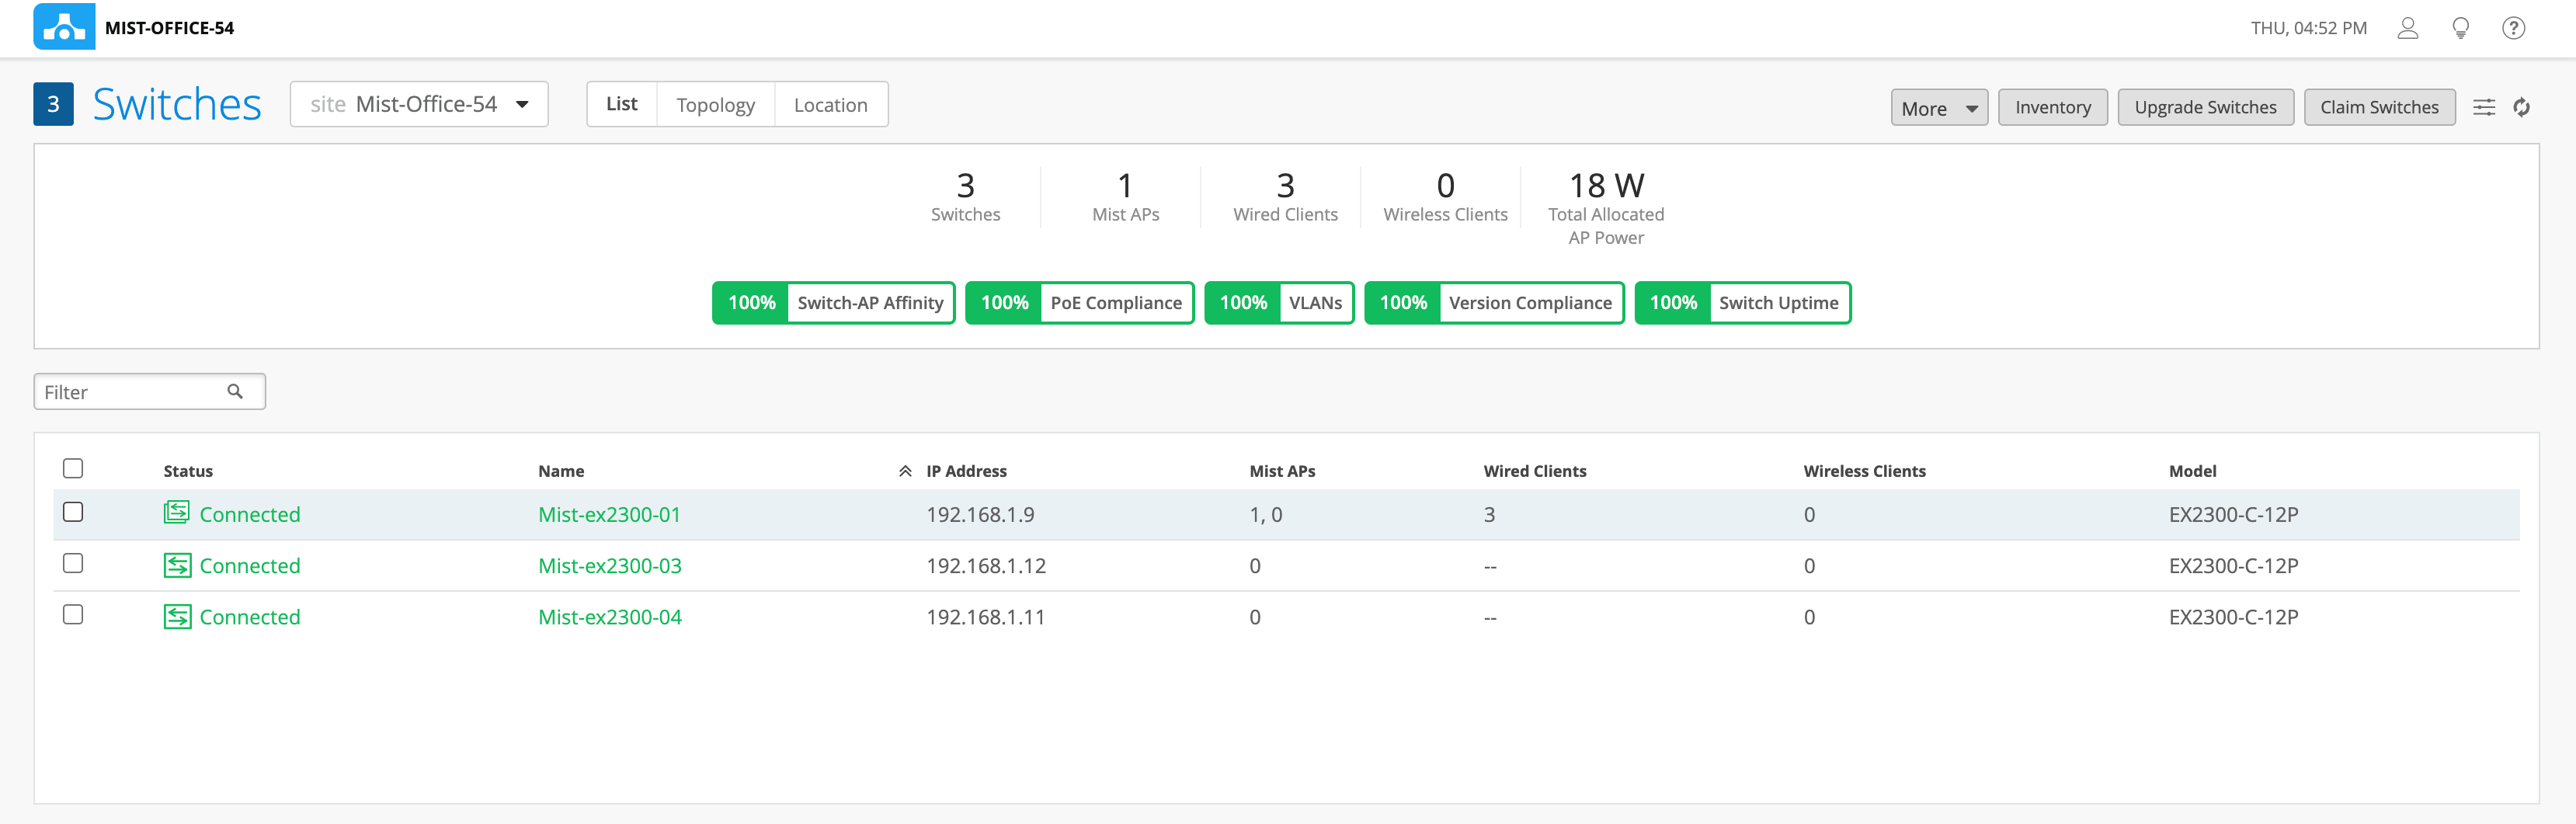
After the Virtual Chassis formation is successful, the Switches page displays only one entry for the Virtual Chassis with the name of the primary switch. However, the MIST APs column displays one AP for each Virtual Chassis member in a comma-separated format.
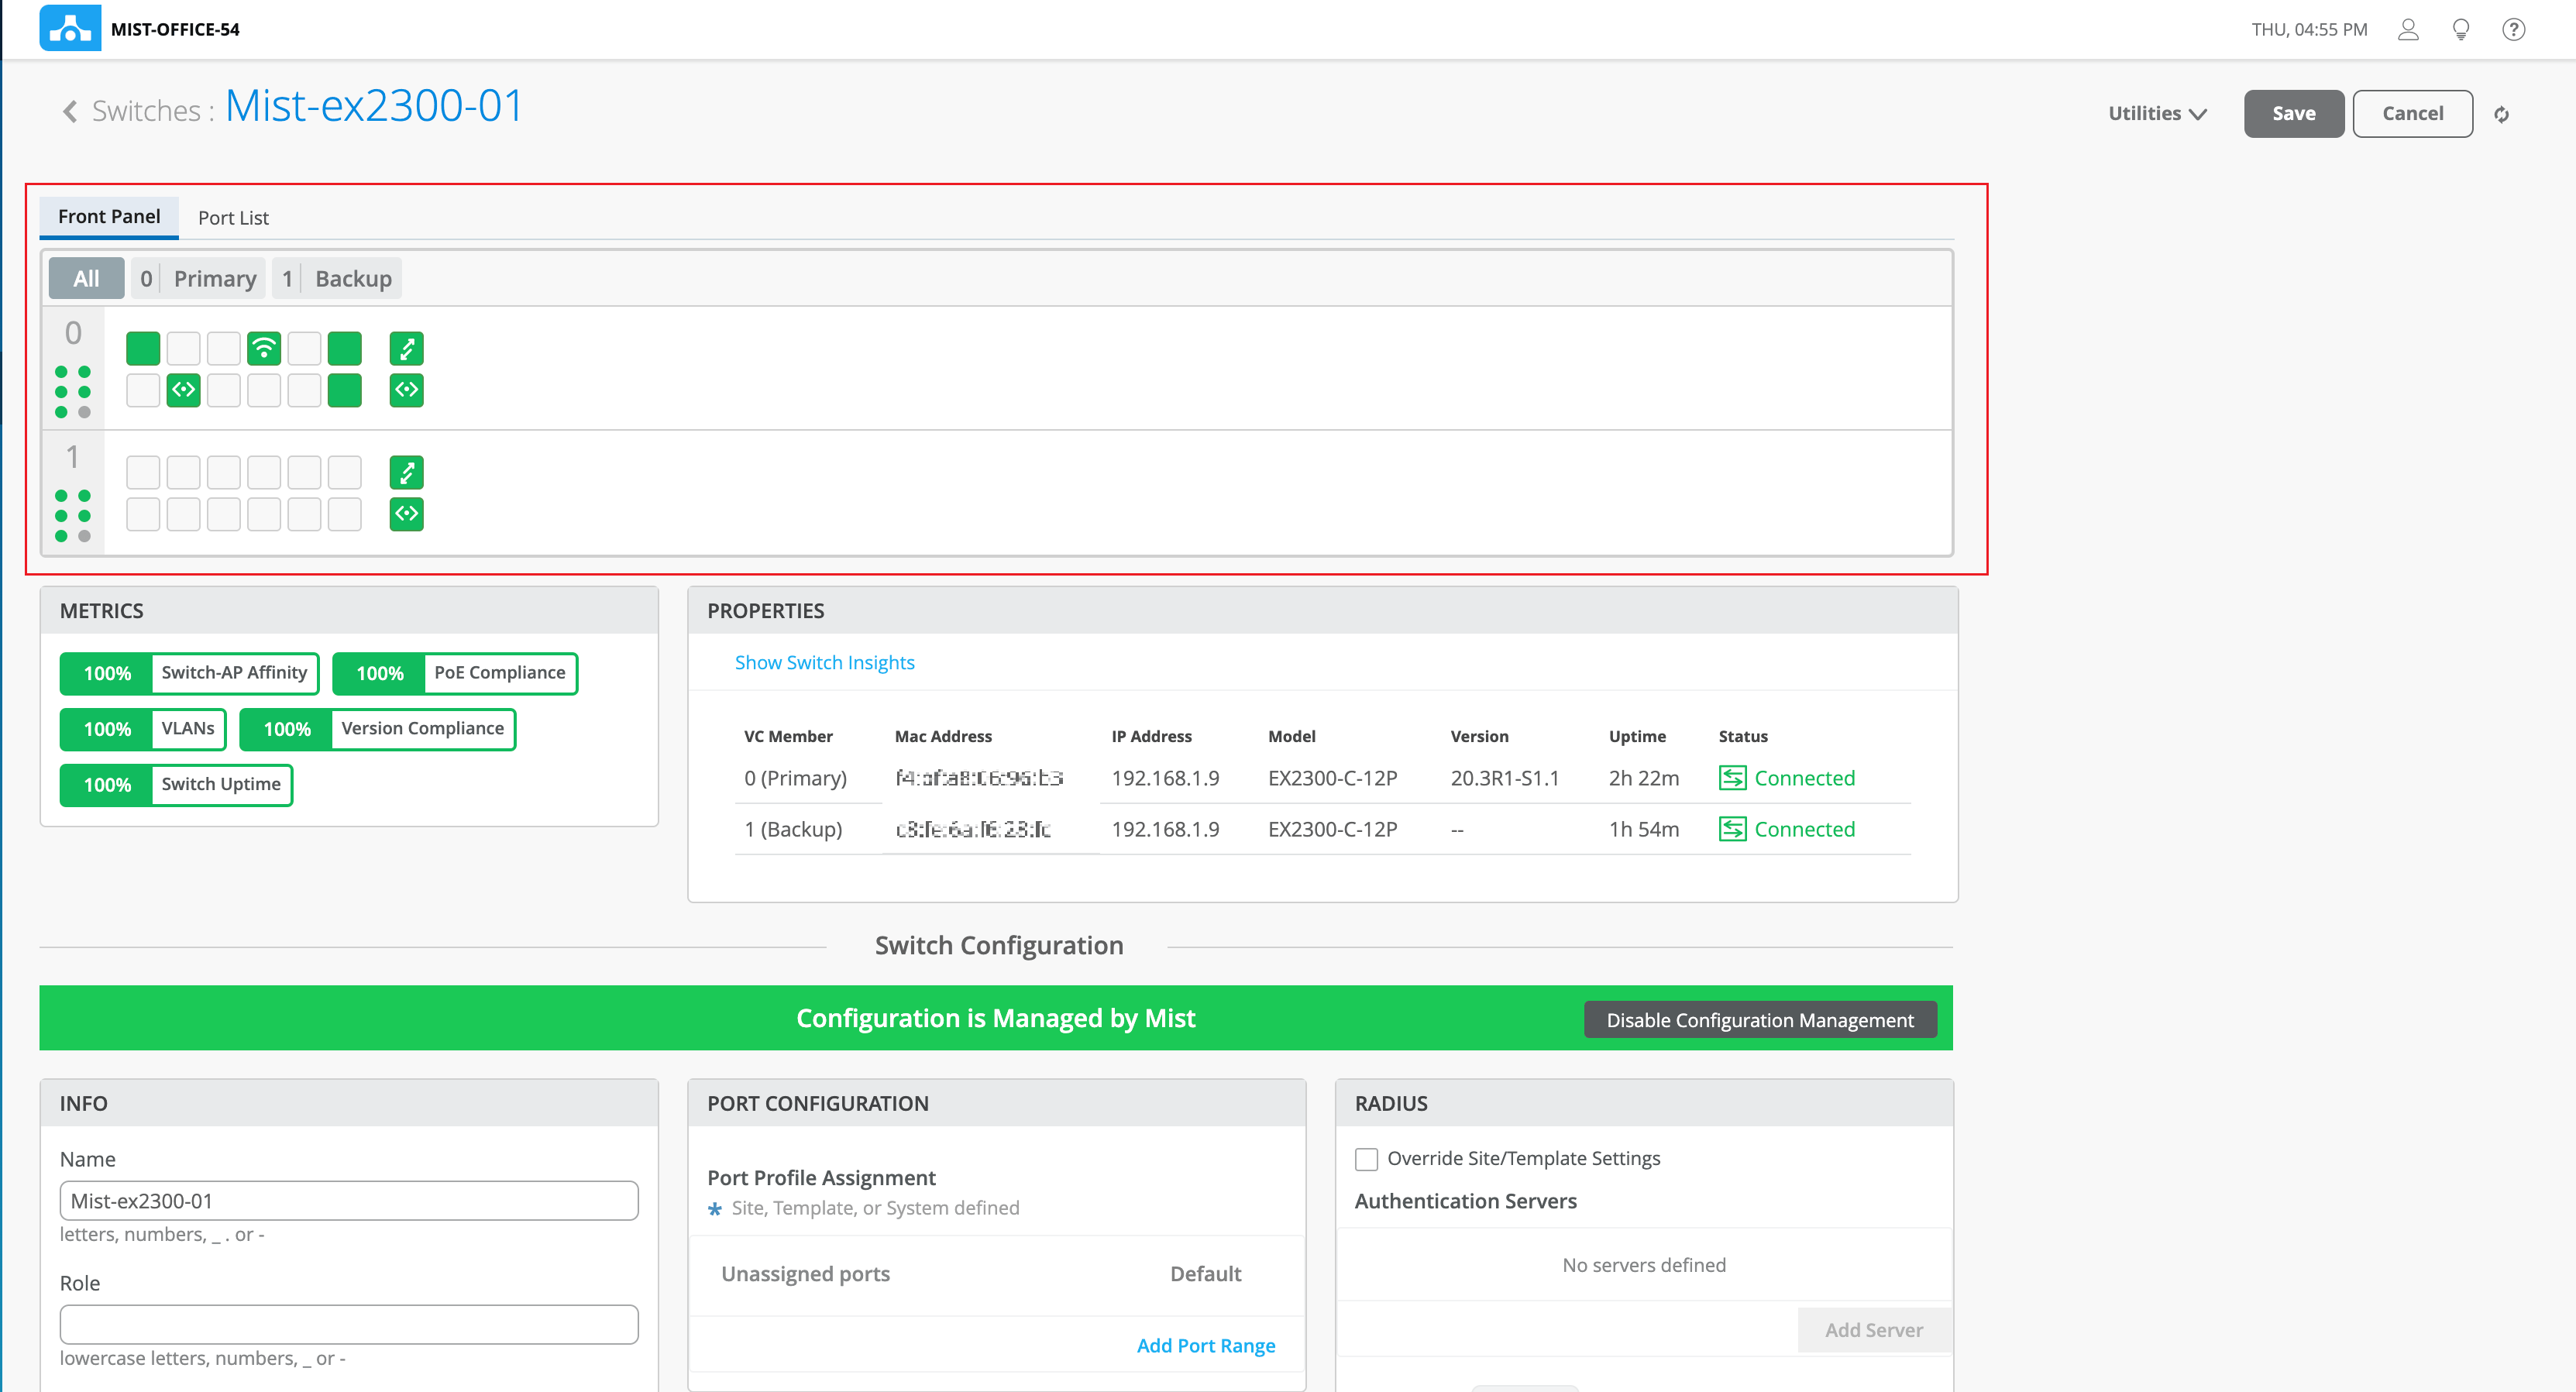
The switch details page displays the front panel of all the Virtual Chassis members.
Once the Virtual Chassis is formed, if you need only one uplink to the Virtual Chassis, maintain the uplink to primary switch and remove uplinks from other switches.
You can use the Modify Virtual Chassis option on the switch details page to renumber and replace Virtual Chassis members and add members to a Virtual Chassis connected to the Mist cloud. For more information, see Manage a Virtual Chassis Using Mist.