
Switches Page
Use the Switches page to gain comprehensive visibility into your wired network.
Click Switches on the left navigation menu on the Mist portal to navigate to this page. It lists the switches that have been onboarded to Mist and assigned to a specific site.
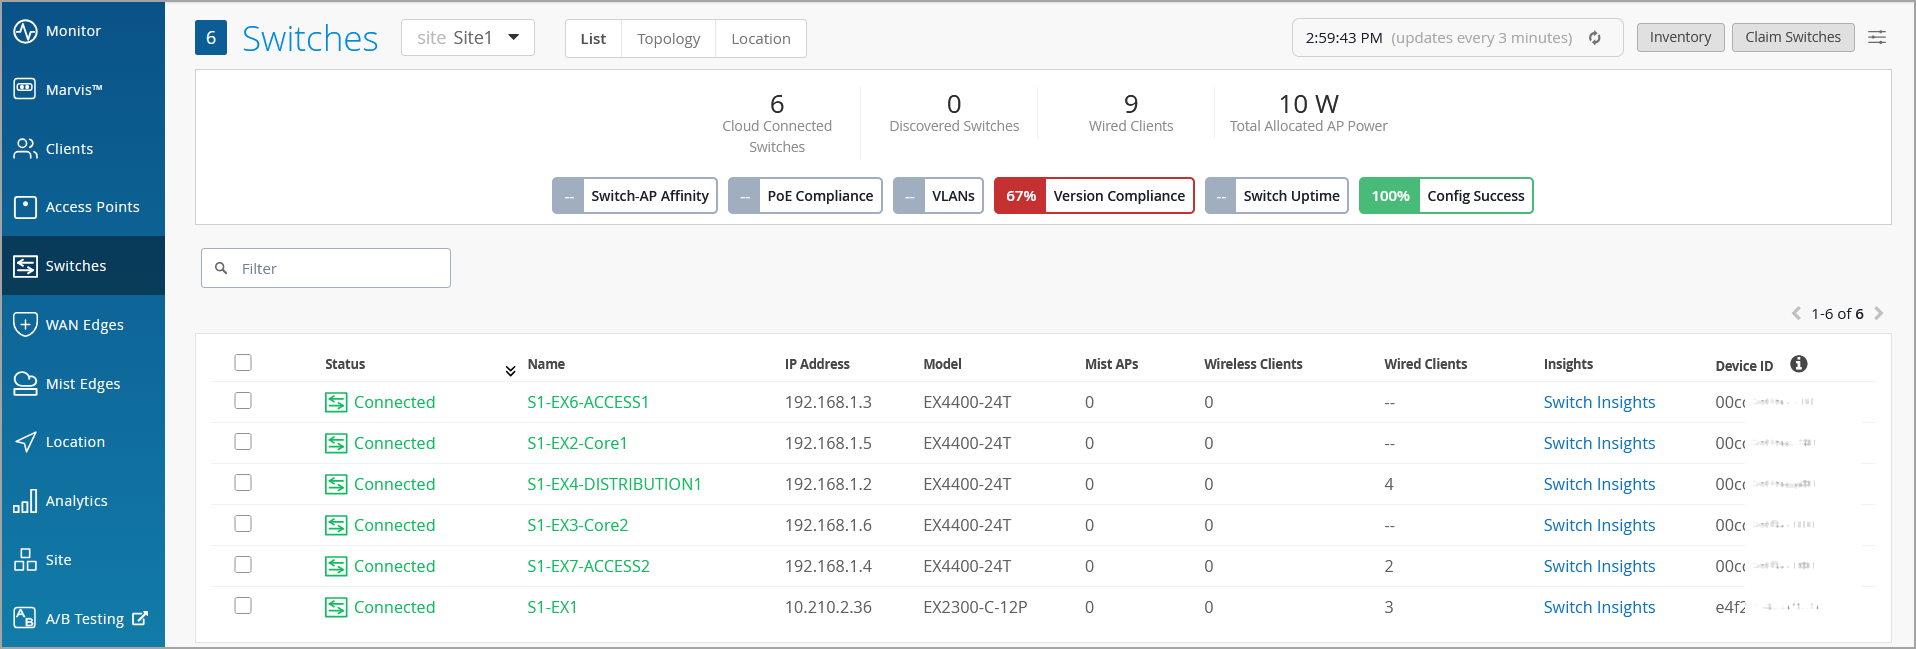
The Switches page has a switch list view, a topology view, and a location view.
The list view includes the key switch details such as connection status, switch name, IP address, MAC address, switch model, connected APs, wired and wireless clients, device ID, and loopback IP address. You can also access Switch Insights from this page.
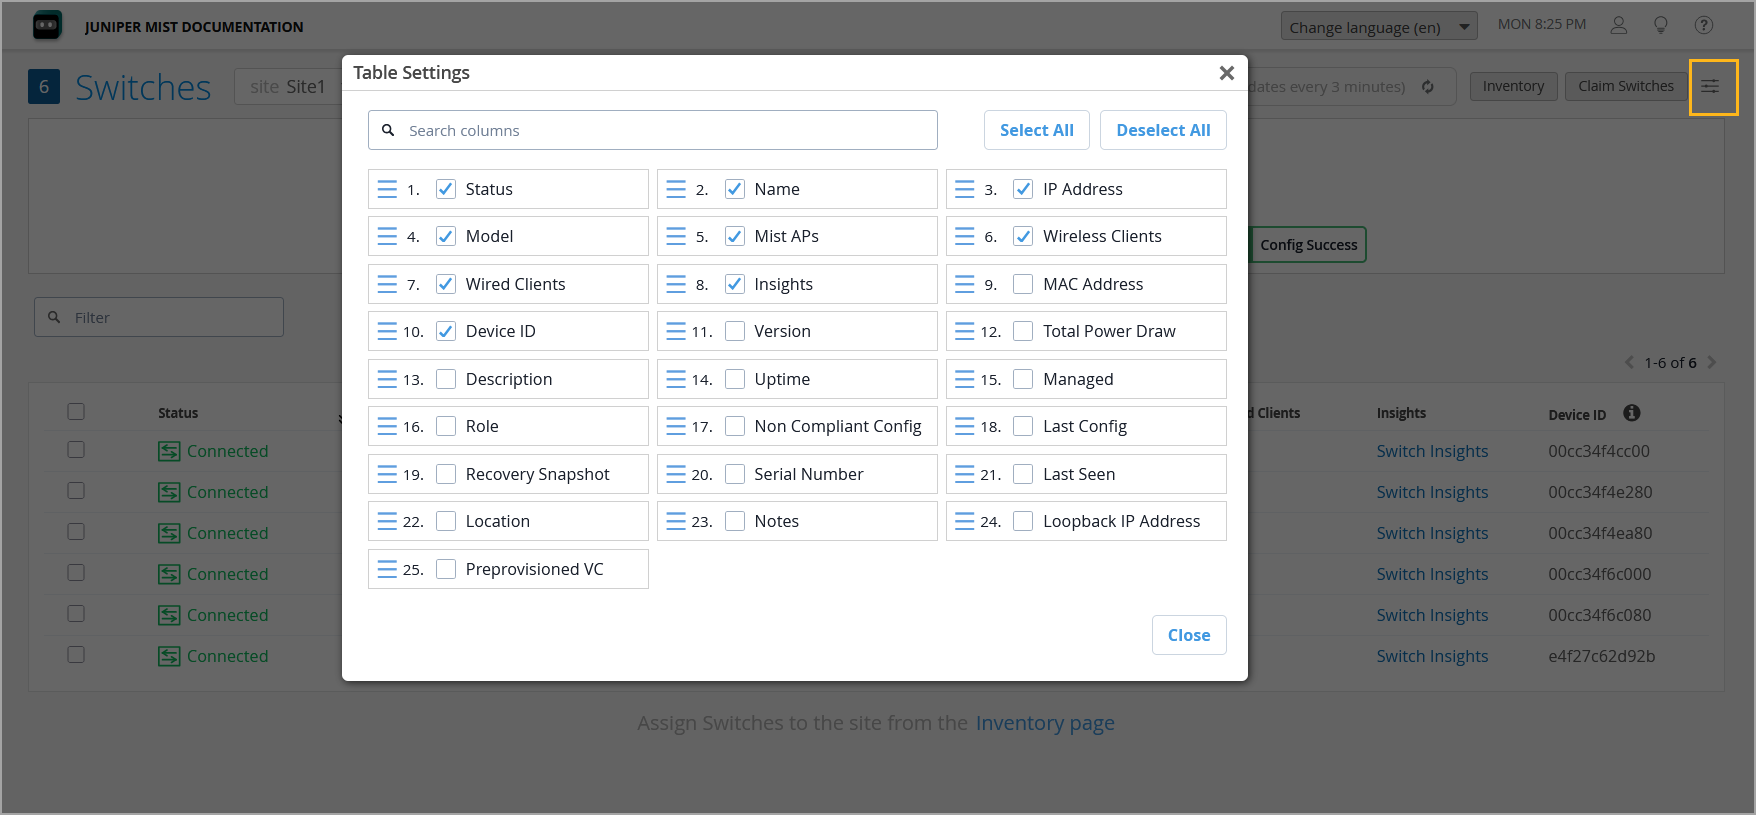
You can customize the switch list view by adding or removing columns. To do that, click the Table Settings button on the upper right of the page, select or clear the fields based on your requirement, and then click Close.
The topology view provides an interactive visualization of all switches and the endpoints connected to them.You can click each switch to quickly assess the impact of a possible switch down-time event.
The location view shows how switches are distributed across your site. This view also provides visibility into any redundancy.
At the top of the Switches page, you can find Switch Metrics, which help you track the switch performance against certain compliance parameters.
The Switches page also allows you to perform multiple operations on switches, including the following:
-
Filter Data—Use the filter field at the upper-left corner of the list view to quickly refine the switch data. You can filter using any value shown in the switch list view. For example, you can search by IP address (such as 192.168.1.67) or by a user-defined switch name, which is displayed in the Name column.
Note:When filtering the switch list by uptime, enter the value in total seconds, not in formatted time units such as days, hours, or minutes. Although the Uptime column displays values in a human-readable format (for example, 2d 4h 12m), the filter uses the switch's raw uptime value in seconds. For example, enter 86400 to filter for switches with 1 day (24 hours) of uptime.
-
Monitor Switch Metrics—Track switch performance against certain compliance parameters. For information, refer to Switch Metrics.
-
Upgrade Firmware—Upgrade the Junos OS software on switches. Fore more information, refer to Upgrade Switch Firmware.
-
Bulk Upload Configuration—Configure switch settings by uploading them through a CSV file. Fore more information, refer to Configure Switch-Specific Settings Using the Bulk Upload Option.
-
Assign Switch Role—(Available from the More menu in the switch list view) Assign a role to a switch so that it can be managed by role-based configuration rules in your configuration template. Fore more information, refer to Assign a Role to Switches.
-
Enable/Disable Switch Configuration—(Available from the More menu in the switch list view) Toggle switch configuration management in Mist. When you disable a switch configuration, the switch can no longer be managed through Mist.
-
Assign to Site—(Available from the More menu in the switch list view) Assign switches to a site.
-
Rename—(Available from the More menu in the switch list view) Rename switches.
-
Release—(Available from the More menu in the switch list view) Release the switch from your inventory. For more information, refer to Release a Switch from Inventory.
-
Upload Images—(Available only in the switch list view) Upload switch photos. These photos get associated with the switch and can be managed from the PROPERTIES section on the switch details page.