Configure Secure Edge Connector with Juniper Secure Edge (Auto)
Follow this workflow to set up and verify auto-provisioning for Juniper® Secure Edge.
The Juniper Mist cloud integrates with Juniper Secure Edge (JSE) to inspect traffic from WAN Edge devices. The Secure Edge Connector configuration in Mist enables Session Smart Routers and SRX Series Firewalls deployed as a WAN Edge device to send a portion of traffic to JSE for inspection.
Mist now offers automated Juniper Secure Edge connector tunnel provisioning. This feature allows you to effortlessly establish connections using predefined settings.
Prerequisites
- Activate your Juniper Secure Edge account and check licenses, subscriptions, certificates. See Access Juniper Security Director Cloud and Check Active Subscriptions.
- Launch the required number of service locations (with required capacity). See Configure Service Locations.
Configure Secure Edge Connector Auto-Provisioning
Watch the following video to understand how to set up Secure Edge Connector auto provisioning:
- Add Juniper Secure Edge Connector Credentials in Juniper Mist Portal
- Configure Juniper Secure Edge Tunnel Auto-Provisioning
Add Juniper Secure Edge Connector Credentials in Juniper Mist Portal
Provide the Juniper Secure Edge credential details in the Mist portal.
- From the left menu, select Organization > Settings.
- Scroll down to the Secure WAN Edge Integration section and click Add Credentials.
- In the Add Credentials window, enter the details.Figure 1: Add Credentials for Juniper Secure Edge
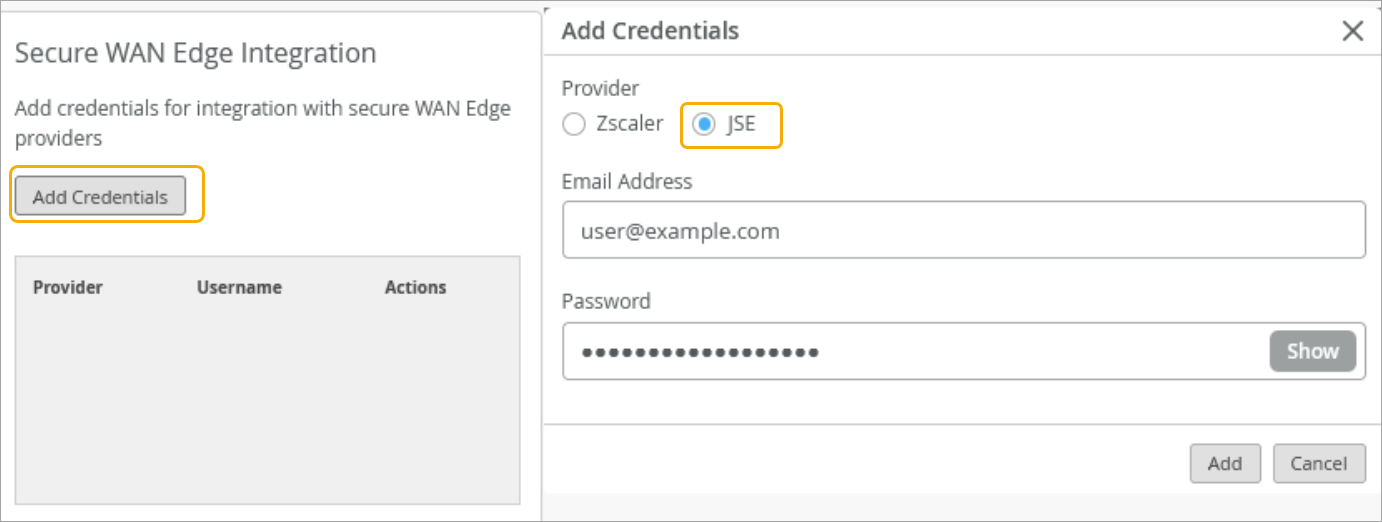
- Provider—Select JSE.
- Email Address—Enter an e-mail address. There are the credentials of the user created on the Juniper Security Director Cloud portal.
- Password—Enter password for the e-mail address you provided.
- Click Save to continue.
Configure Juniper Secure Edge Tunnel Auto-Provisioning
- On the Mist portal, go to Organization > WAN Edge Templates and click an existing template.
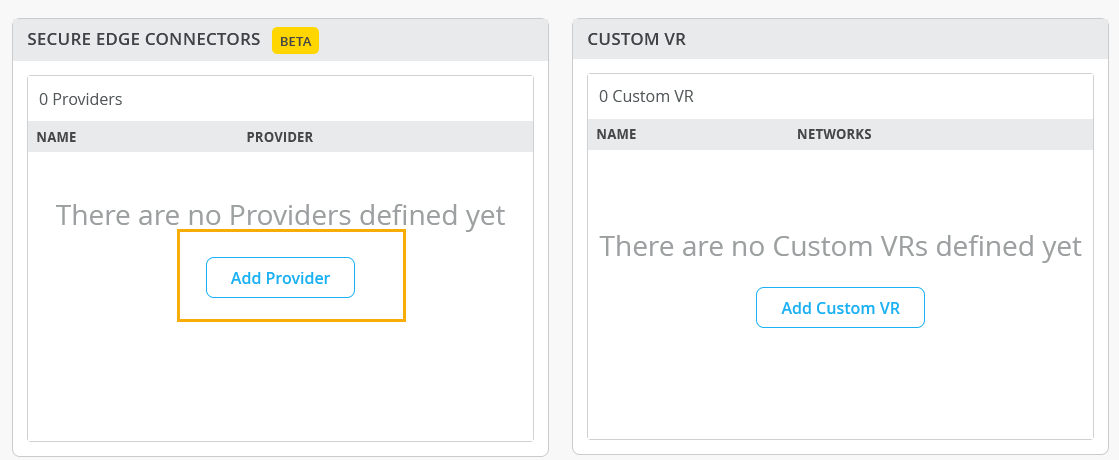
- Scroll to the Secure Edge Connectors section.
- Click Add Provider.Figure 2: Add Provider
- In Add Provider side panel, select Juniper
Secure Edge (Auto) as the Provider
for automatic provisioning. Figure 3: Select Juniper Secure Edge as ProviderEnter the following details:
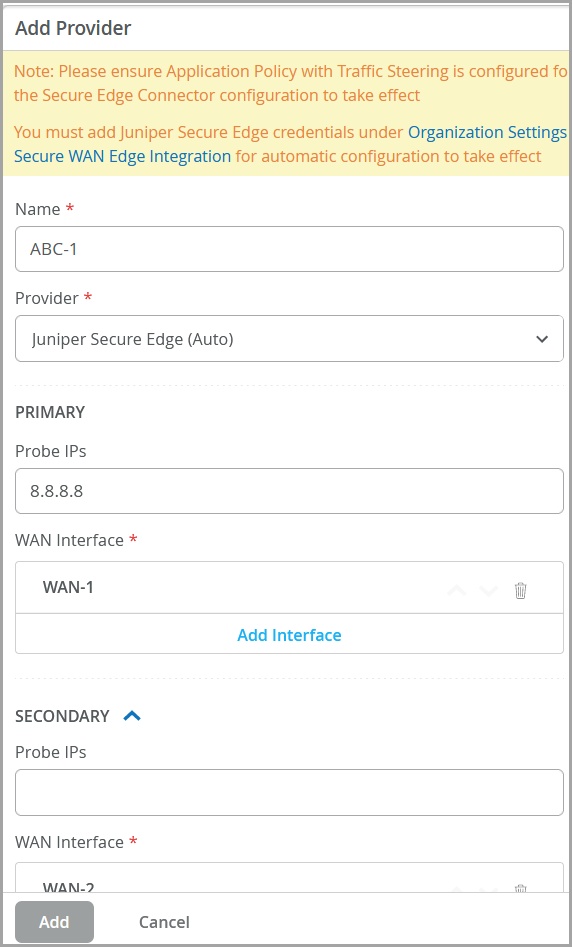
- Name—Enter a name for the JSE tunnel.
- Provider—Select Juniper Secure Edge (Auto).
- Probe IP—Enter probe IPs (primary and secondary). Enter probe IP 8.8.8.8 or any other well-known probe IP address.
- WAN Interface—Assign WAN interfaces under Primary and Secondary for provisioning of primary and secondary tunnels.
- Click Add.
- In the Secure Edge Connector Auto Provision Settings
section, click JSE, then enter the details. This
option is available only if you have configured Juniper Secure Edge as
provider in the previous step. Figure 4: Secure Edge Connector Auto Provision Settings
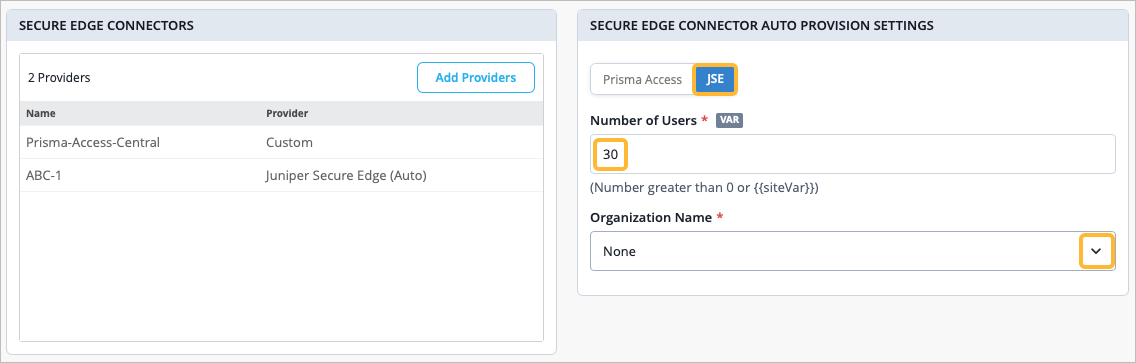
Number of Users—Enter the maximum number of users supported by the JSE tunnel.
Organization Name—Enter the organization name. The drop-down box displays all organizations associated with the user name in Juniper Secure Edge account. This is the same user name that you have entered in Juniper Secure Edge credential in Organization > Settings > Secure WAN Edge Integration > Add Credentials. See step 1 for details.
- Click Add to continue.
When a WAN Edge template enabled with the Juniper Secure Edge (Auto) gets assigned to a site, an associated JSE site (location object) is automatically created and a tunnel from the device to the closest network point of presence (POP) is brought up.
For the Secure Edge Connector configuration to take effect, you must create an application policy directs traffic from the Mist Secure Edge Connector to the Juniper Secure Edge via the appropriate traffic steering. See Traffic Steering and Configure an Application Policy for more information.
See Also
Verify Juniper Secure Edge Tunnels
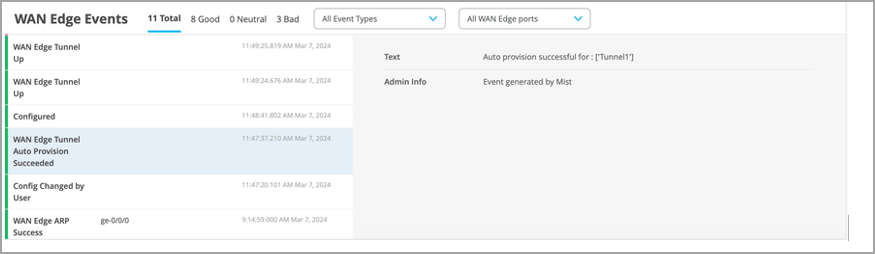
On the Mist portal, you can verify the established tunnel's details in WAN Edges > WAN Edges, then click WAN Edge Insights. You should see the WAN Edge Tunnel Auto Provision Succeeded event under WAN Edge Events.
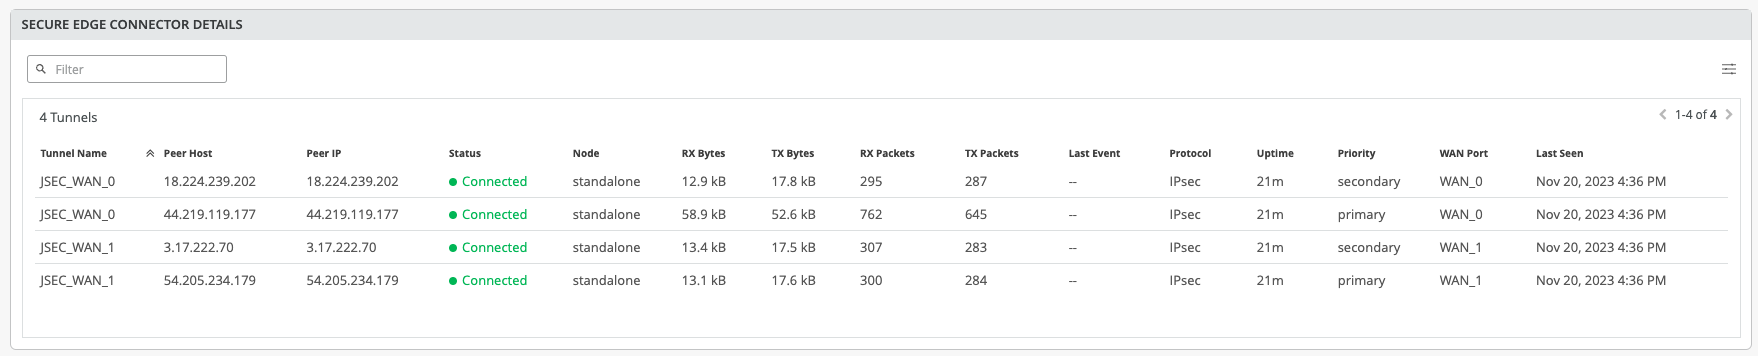
Get the established tunnel's status details by navigating to WAN Edges > WAN Edges, then scroll down to the Secure Edge Connector Details section.
You can view the tunnel statistics under Probe Stats on the WAN Edge Insights page. To view an example of this, see Tunnel Statistics
You can check the established tunnels in the Juniper Security Director Cloud dashboard and in the service location.