
Step 1: Begin
This guide walks you through the simple steps that you should complete to set up Juniper Data Center Assurance (DC Assurance) and monitor data center events received from a data center managed by Apstra Data Center Director.
DC Assurance monitors data centers in real-time, and notifies administrators when there is a network event. It analyzes events and provides actionable recommendations. The DC Assurance Dashboard provides a bird's-eye view of the data center network. The dashboard provides information about the health and performance of the data center at the organization-level, site-level, and at the site group-level.
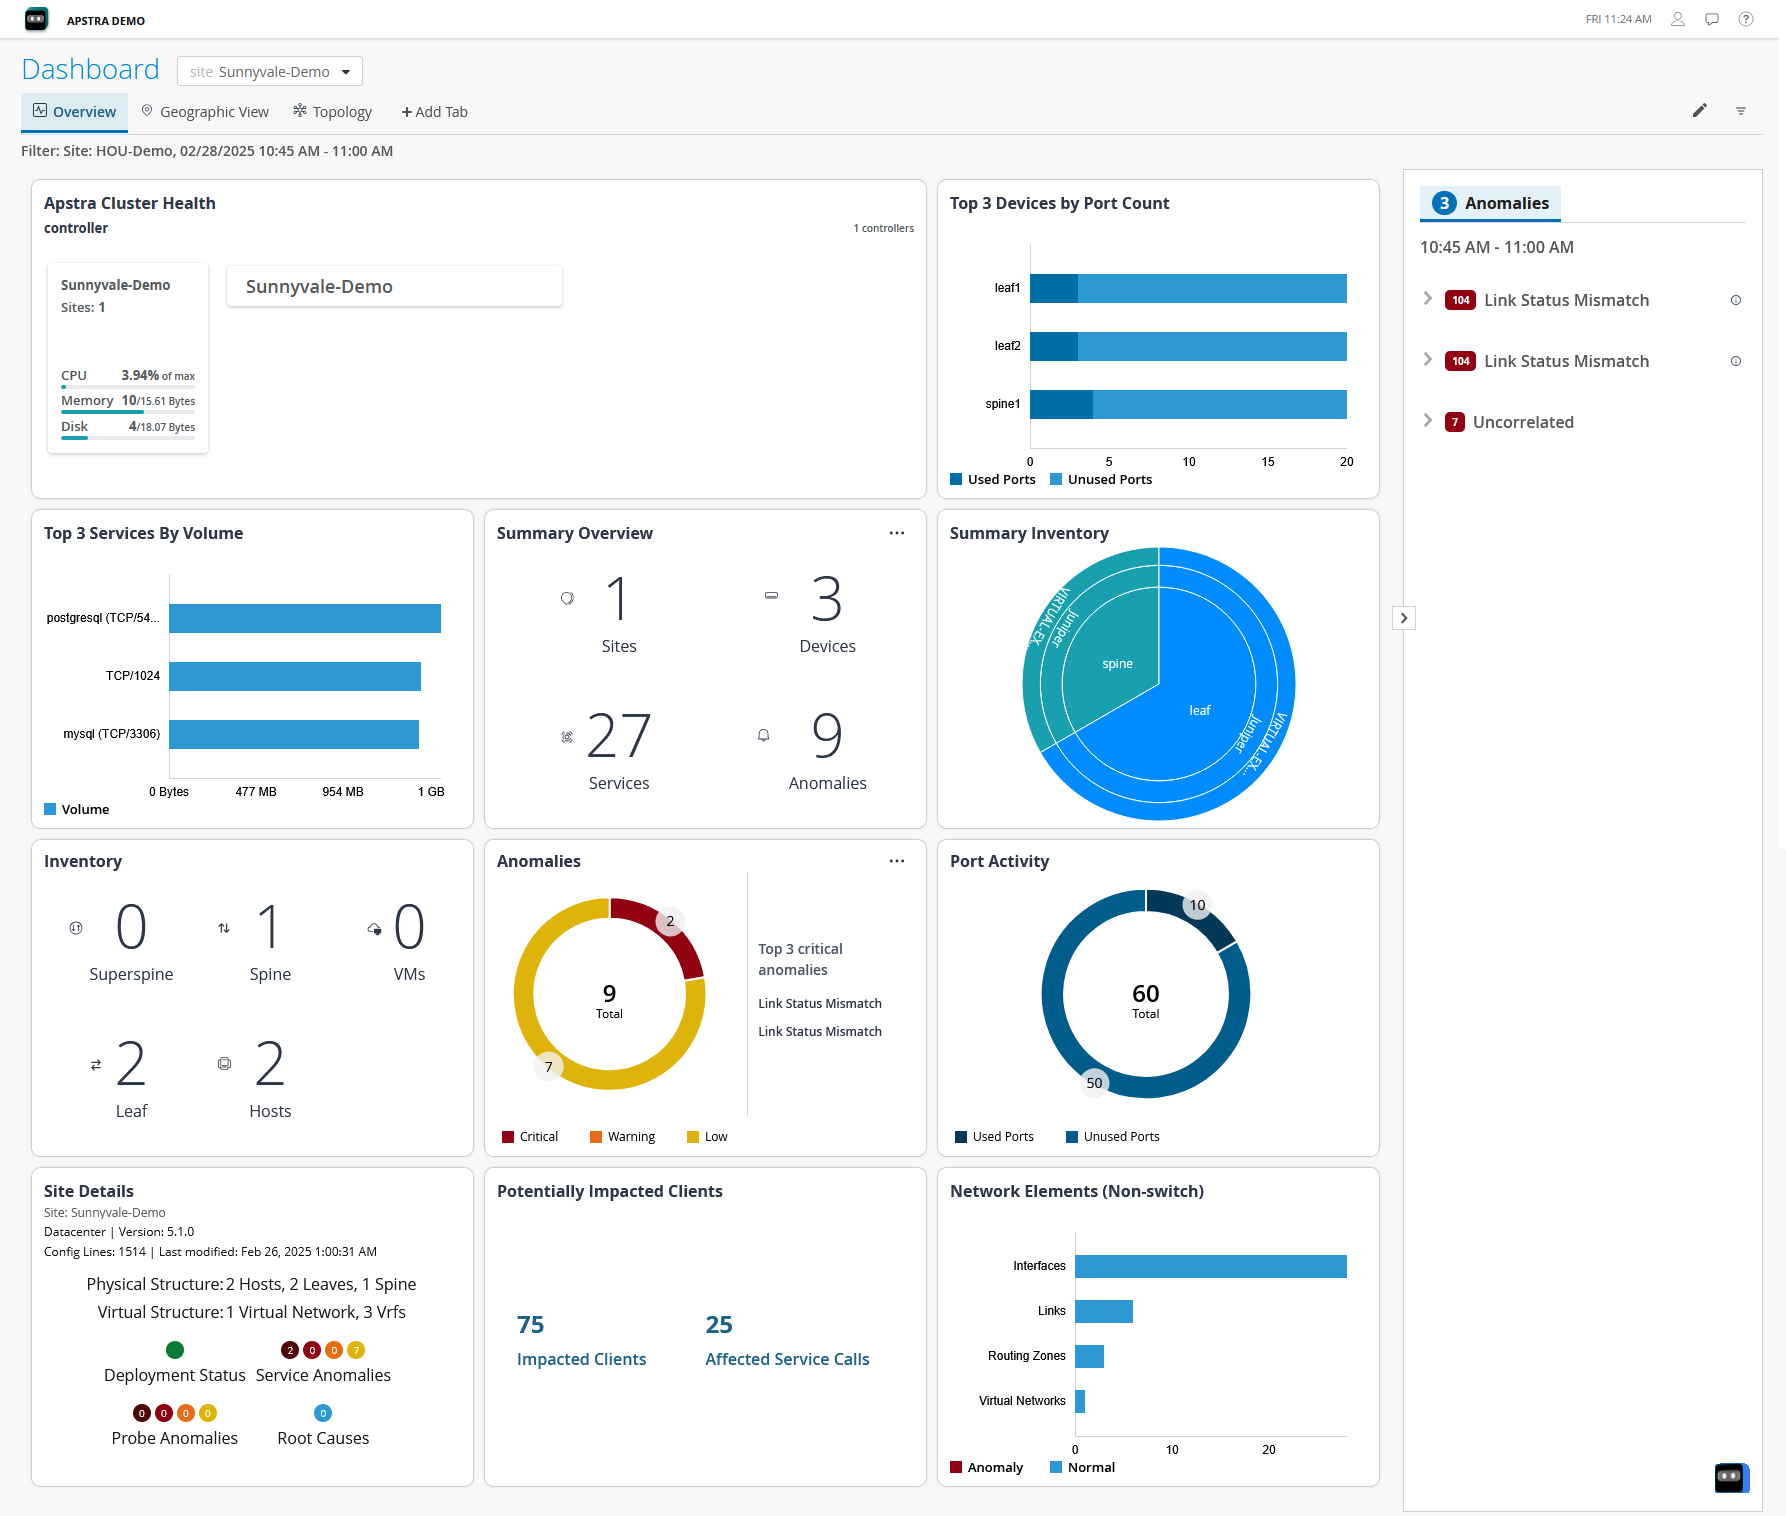
DC Assurance also provides the Marvis AI Assistant, which administrators can use to troubleshoot issues and to search documentation.
Prerequisites
Make sure that you complete the following prerequisites to set up DC Assurance successfully:
-
Obtain Apstra premium license. See Software Licenses for Juniper Apstra for more information.
-
Configure Flow Collector in Apstra Data Center Director. See Configure the Flow Collector using SSH and Configure the Flow Collector for more information.
-
Deploy Flow Data Configlet. See Import the Junos OS Apstra Flow Configlet for more information.
-
Deploy SNMP for Flow Data Interface Enrichment Configlet. See Import the SNMP Configlet for Interface Name Enrichment for more information.
-
Import DC Assurance Custom Probe. See Import a CPU and Memory Probe in Apstra for Data Center Assurance for more information.
-
Configure your firewall to allow inbound and outbound communication between Apstra DC Director, Data Center Assurance, and various cloud services. See Configure Ports for the complete list of ports to be enabled.
Create Juniper Data Center Assurance Account
To access DC Assurance, you must create an account in DC Assurance and activate your account. You can create an account in DC Assurance in one of the following ways:
-
Access the DC Assurance portal at https://dc.ai.juniper.net, create an account, and create your organization.
-
Use the invite received from an administrator in DC Assurance to join an organization.
To access DC Assurance and create an account:
-
Access DC Assurance at https://dc.ai.juniper.net from a web browser.
-
Click Create Account on the DC Assurance page.
-
On the My Account page, type your first name, last name, e-mail address, and password, and click Create Account.
The password can contain up to 32 characters, including special characters, based on the password policy of the organization.
DC Assurance sends you a confirmation e-mail to validate the account.
-
In the verification e-mail that you receive, click Validate Me.
The My Account page appears.
-
Click Create Organization.
The Create organization page appears.
-
Enter a unique name for your organization and click Create.
The New Account page appears displaying the organization that you created.
-
Select the organization you created.
You have successfully logged in to your organization in DC Assurance.
To access DC Assurance using the invite from an administrator:
-
Click Access organization-name in the e-mail body of the invite that you received.
The Invite to Organization page appears.
-
Click Register to Accept.
The My Account page appears.
-
Enter your first name, last name, e-mail address, and the password that you'll use to access your account.
The password can contain up to 32 characters, including special characters, based on the password policy of the organization.
-
Click Create Account.
-
In the verification e-mail that you received, click Validate Me.
The My Account page appears.
-
Select the organization for which you received the invite.
You can access the organization in DC Assurance. The tasks you can perform in this organization depends on the role assigned to you.
By default, the first user who creates an account and the organization has the superuser privileges in that organization. The Super User can perform functions such as create organization, add sites, add users to various roles, and so on. For more information about roles, see Predefined User Roles Overview
Install Apstra Edge
To receive data center network data in DC Assurance, you must install and register Apstra Edge in the Apstra Data Center Director instance. For Juniper Apstra releases 5.0 and earlier, follow the instructions provided in Juniper Apstra Edge Setup Guide to install Apstra Edge.
For Juniper Apstra release 5.1 and later, you can install Apstra Edge from within Juniper Apstra. Refer Data Assurance Onboarding Guide for more information.
Adopt Apstra Edge in Juniper Data Center Assurance
To receive data center events from the Apstra Data Center Director-managed data center, you need to install Apstra Edge and then adopt it in DC Assurance. Apstra Edge maintains connectivity with the cloud and sends the event information it receives from Apstra Data Center Director to DC Assurance.
To adopt Juniper Apstra Edge in DC Assurance:
-
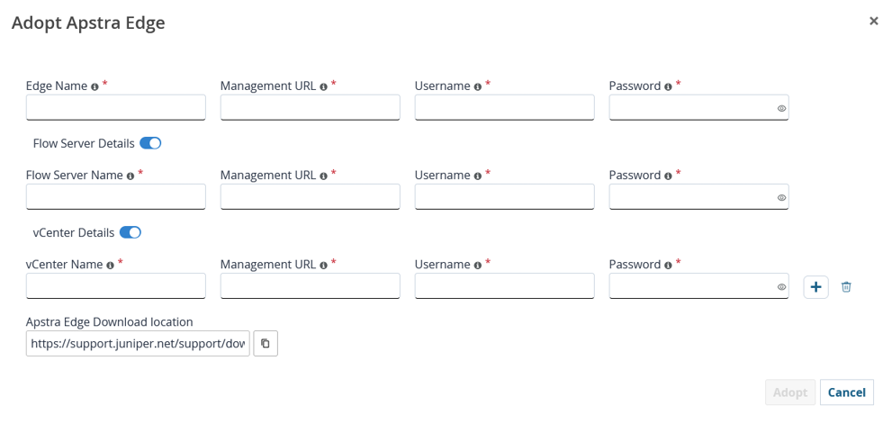
Click Adopt Apstra Edge.
The Adopt Apstra Edge page is displayed.Figure 2: Adopt Apstra Edge
Run Pre-Flight Checks
Pre-flight checks verify whether certain prerequisites and configuration requirements are met and provides actionable guidance on how to resolve potential issues. These checks enable you to validate the environment, identify issues that might affect the performance of DC Assurance features, and resolve them. For more information, see Pre-Flight Checks.