Install Juniper Secure Connect on Windows
Learn about how to create rollout packages for Juniper Secure Connect application software and step-by-step procedures to install Juniper Secure Connect on Windows. If you want to install Juniper Secure Connect application, see Manual Installation of Juniper Secure Connect. If you are an administrator, see Create Windows Deployment Configuration for Juniper Secure Connect Rollout section to prepare the installer for software rollout.
What's Next
Download the Juniper Secure Connect application software from here. See release notes for more details.
For more information on Juniper Secure Connect GUI elements, see Juniper Secure Connect GUI Elements.
For more information on Juniper Secure Connect features and how to configure the options, see Connection Menu, View Menu, and Help Menu.
Manual Installation of Juniper Secure Connect
Following are the steps to install the Juniper Secure Connect on your Windows machine.
-
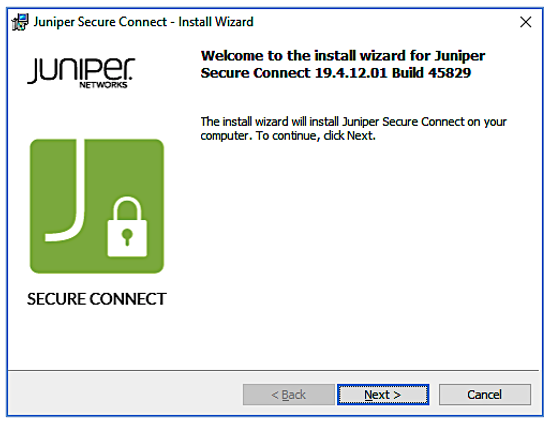
Run the Windows installer (.exe) for Juniper Secure Connect . See Figure 1.
The
version that you see on the figure is dependent on the Juniper Secure Connect
application release number.
Figure 1: Installer Welcome Window
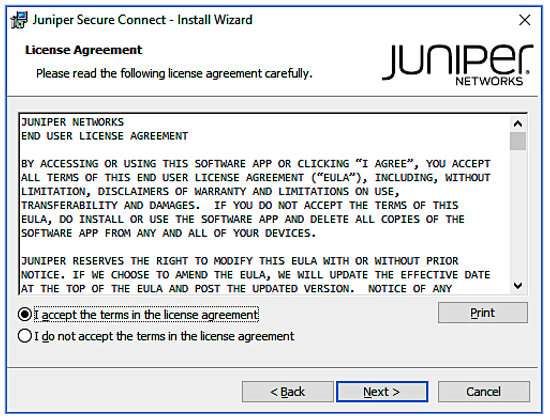
- Read the license agreement carefully. If you accept the
terms, then select I accept the terms in the license agreement check box to accept the license agreement. See Figure 2.Figure 2: License Agreement Window
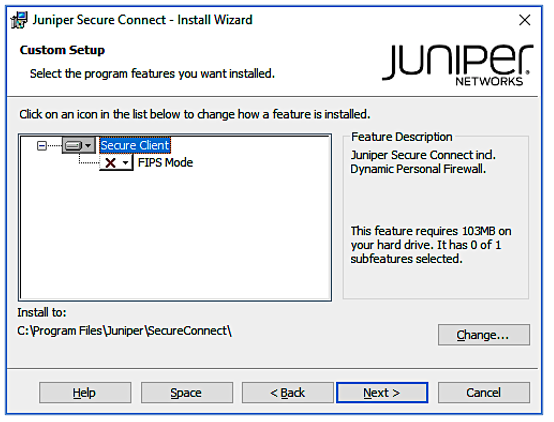
- Click Next and choose the installation folder
for downloading the Juniper Secure Connect software. See Figure 3.Figure 3: Choose Installation Folder
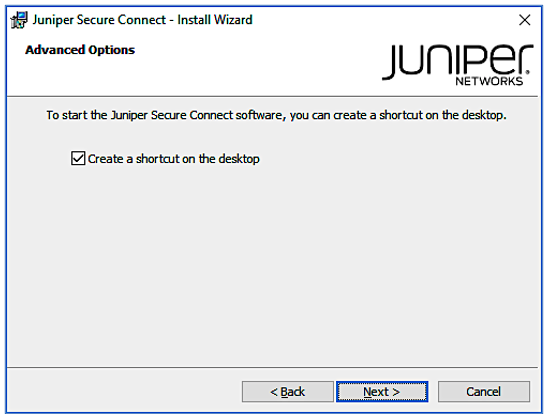
- Click Next and select Create a shortcut
on the desktop to create a shortcut for Juniper Secure Connect
on your desktop. See Figure 4.Figure 4: Create Juniper Secure Connect Shortcut on Desktop
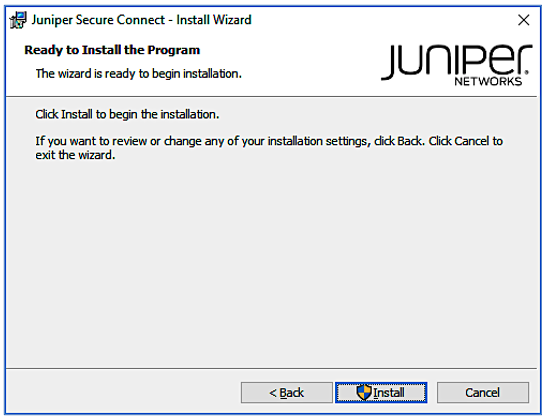
- Click Next and the installation page screen
appears. Verify that you have enough space on your system. Click Install to begin the installation process. See Figure 5.Figure 5: Start Juniper Secure Connect Installation
The installation takes several minutes to complete. Please wait till the installation is completed. See Figure 6.
Figure 6: Juniper Secure Connect Installation Status Display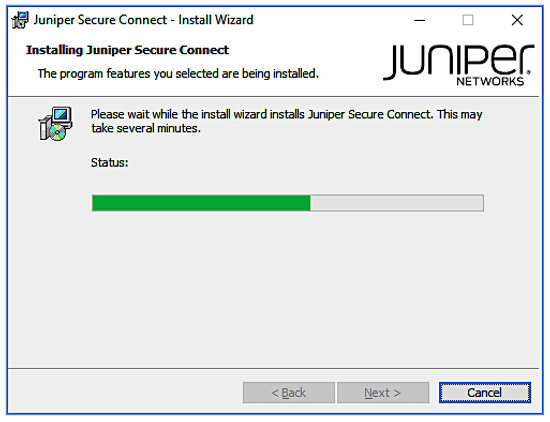
- Once the installation is complete, click Finish. See Figure 7.Figure 7: Juniper Secure Connect Installation Completed
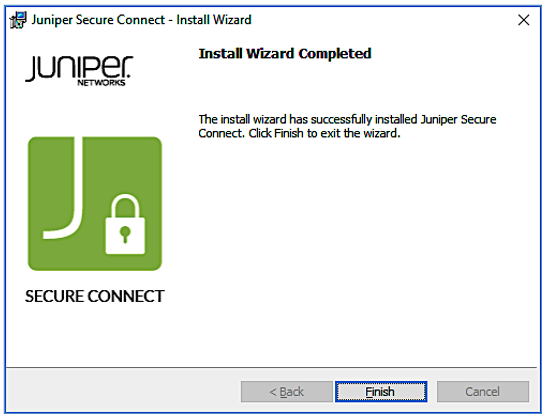
Congratulations! The Juniper Secure Connect application is successfully installed in your Windows machine.
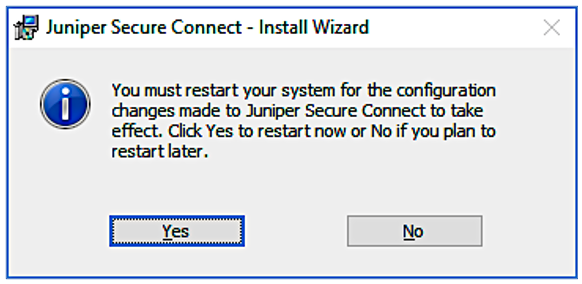
- To use the application, you must first restart your system.
See Figure 8.Figure 8: System Restart Notification
-
You can now launch the Juniper Secure Connect and enter the Gateway
Address URL to connect with the SRX Series Firewall. Figure 9 shows an example to enter the gateway address to the SRX Series Firewall.
You can also enter a fully qualified domain name (FQDN) in the Gateway Address URL to connect with the SRX Series Firewall. For example: https://vpn.example.net.
After entering the gateway address, click the connection toggle button to establish connection manually to the destination system. You can also select Connection > Connect from the menu bar to manually establish a VPN connection. When the connection is established successfully, the application window minimizes in the task bar.
Figure 9: Launch Juniper Secure Connect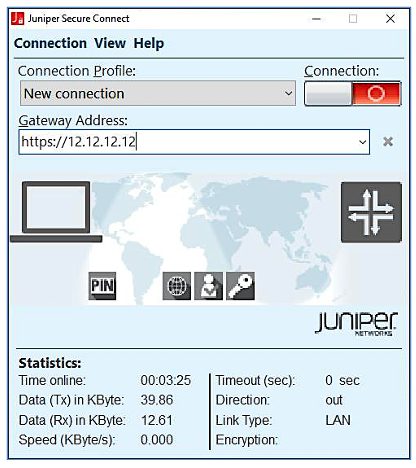
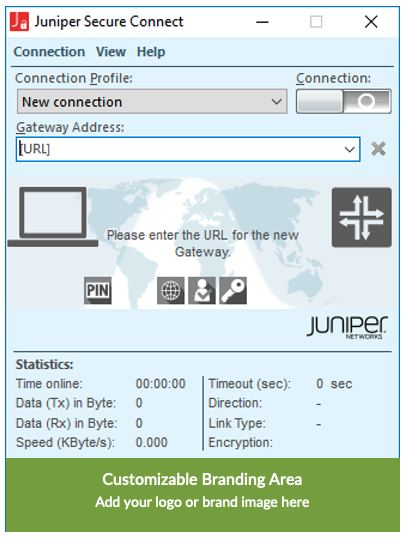
Custom Branding Option
Juniper Secure Connect for windows allows you to add your own logo or branding image. It also allows you to add HTML page for the branding image that would open when you click on the branding area in the Juniper Secure Connect. The HTML page is optional where you can provide any information you want. You should customise the installation package for branding your client. For detailed instructions, see Create Installation Packages for Juniper Secure Connect Rollout (Windows).
Figure 10 is the sample screen, where the customizable branding area is highlighted:
Create Windows Deployment Configuration for Juniper Secure Connect Rollout
Read this topic to learn how system administrator can optionally create rollout configuration to deploy Juniper Secure Connect application across your organization.
On Windows, Juniper Secure Connect doesn't provide a single, self-contained deployment package. Instead, the rollout process customizes installer behavior but still relies on the standard Windows installer for deployment. You must have administrator privileges to perform the task. Follow the below steps to prepare the installer configuration for the rollout of Juniper Secure Connect application:
Install the Juniper Secure Connect application manually on one Windows device. After the installation is complete, initiate a connection to the profiles you want to save for users.
-
Create a folder with name JuniperSecureConnect including the sub-directories as shown below (all directories are case-sensitive):
C:\JuniperSecureConnect
C:\JuniperSecureConnect\ImportDir\cacerts
C:\JuniperSecureConnect\ImportDir\certs
C:\JuniperSecureConnect\ImportDir\config
C:\JuniperSecureConnect\ImportDir\Data
To enable logging functionality in the Windows Command Line using the
/logparameter, ensure the directory C:\RemoteAccess exists. This directory is required for the log file C:\RemoteAccess\installlog.log.
-
Copy the ncpphone.cfg file from C:\ProgramData\Juniper\SecureConnect\Data folder to the following folder:
C:\JuniperSecureConnect\ImportDir\Data
Copy your CA certificates to the following folder:
C:\JuniperSecureConnect\ImportDir\cacerts
Copy the Name_of_juniper_secure_connect_filename.exe to the following folder:
C:\JuniperSecureConnect
Open the command prompt using cmd command and navigate to C:\JuniperSecureConnect folder path and execute the following command:
Name_of_juniper_secure_connect_filename.exe /b"C:\JuniperSecureConnect" /v"/qn EXTRACT_MSI_ONLY=1"
(Optional) To add a custom branding option, follow these steps:
Create an .ini file named cbo.ini that contains the following information:
[GENERAL]
Picture=C:\ProgramData\Juniper\SecureConnect\config\cbo.bmp
HtmlLocal=C:\ProgramData\Juniper\SecureConnect\config\cbo.html
Create a logo in .bmp file format and with cbo.bmp filename. The width of the image must be 328 pixels only. You can adjust the height of the image from 24 pixels and above.
You can optionally create an HTML file with cbo.html as a filename that will open if the user clicks the logo in the application.
Now copy these three files (cbo.ini, cbo.bmp, and cbo.html) into the following folder:
C:\JuniperSecureConnect\ImportDir\config
Skip this step, if you are using preshared key (PSK) authentication method.
For EAP-TLS authentication, you must save the user certificates only with name user.p12 in below directory.
C:\JuniperSecureConnect\ImportDir\certs
Ensure that user certificate is unique for each installation package.
You can optionally start the installation using the .exe or the .msi installer. Based on your choice you can also remove one of the installers (.exe or .msi) from the folder if you want to reduce the amount of data distributed:
C:\JuniperSecureConnect\
exe installer prompts for an interactive installation
msi installer can be silent. Following are your options for the msi installer:
Table 1: msi Installer Options Function/Parameters
Description
msiexec.exe /IInstall the application
msiexec.exe
                                                  /uninstall
Uninstall the application
xxx.msiMSI installer package
/
qnSilent installation
ProductLanguage=1033English
NCP_CREATE_DESKTOPICON=10=No shortcut on desktop, 1=Shortcut on desktop
/
log
                                                  path
Path for installation log
/
forcerestartForces a reboot of the system automatically without any user notification
/
norestartPrevents a reboot from happening, a reboot is mandatory to use the application
/
promptrestartUsers will be prompted to reboot their device, a reboot is mandatory to use the application
Following is the example syntax to install the client silently with a forced reboot and save a shortcut to the application on the desktop:
msiexec.exe /I Juniper_Secure_Connect_Windows_x86-64.msi ProductLanguage=1033 NCP_CREATE_DESKTOPICON=1 /log c:\RemoteAccess\installlog.log /forcerestart