Connection Menu
Juniper Secure Connect Connection menu provides you the options to establish remote access connection and secure the connection with certificates. Use the Connection menu for connection related options to view the certificates, enter PIN, reset PIN, or change PIN.
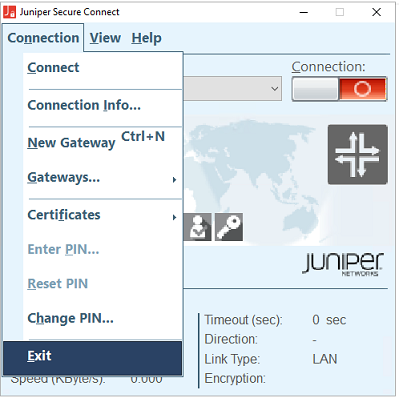
Connect Menu Option
Following are the steps to establish a connection:
- Click the Connection toggle button to establish
connection manually to the destination system. You can also select Connection > Connect from the menu bar to manually establish
a VPN connection as shown in Figure 2.Warning:
If the following the warning message is displayed, your application is missing the CA certificate from the VPN gateway (SRX Series Firewall). If you are a remote user, contact your IT organization for appropriate action. If you are a system administrator, place the cacerts in the respective location for the platform.
Figure 1 is a sample warning message on Windows platform that is displayed when CA certificate is not present.
Figure 1: Sample Certificate Warning Message on Windows Platform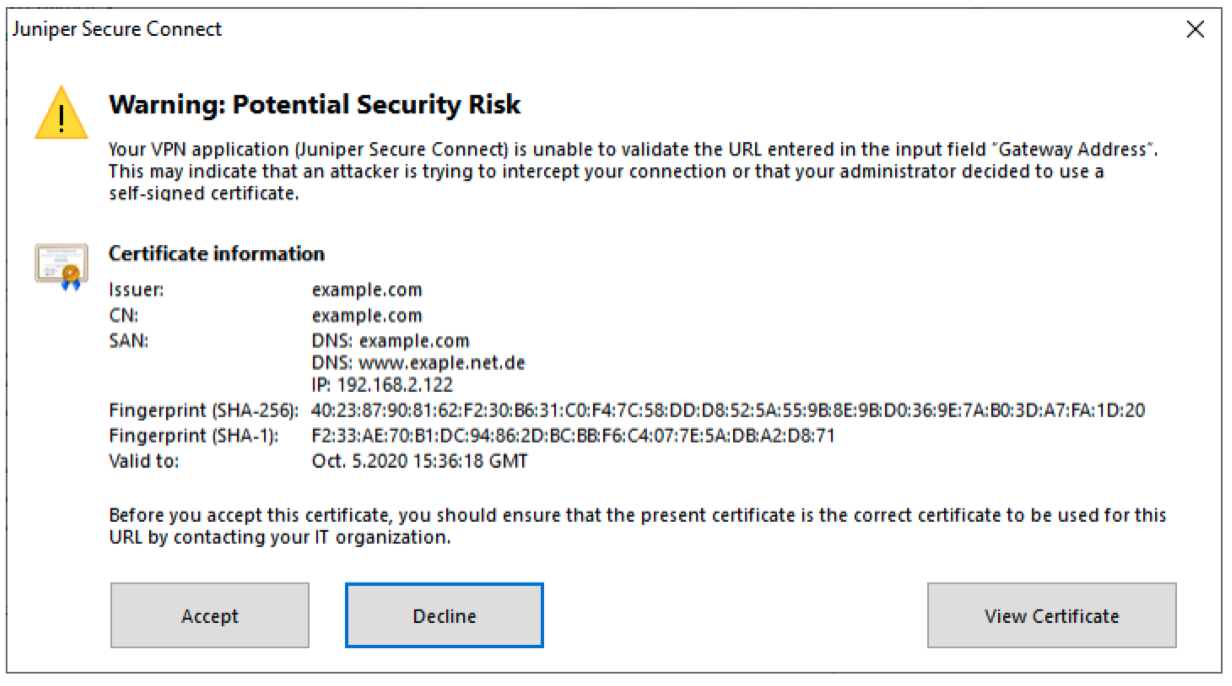

Connection Info Menu Option
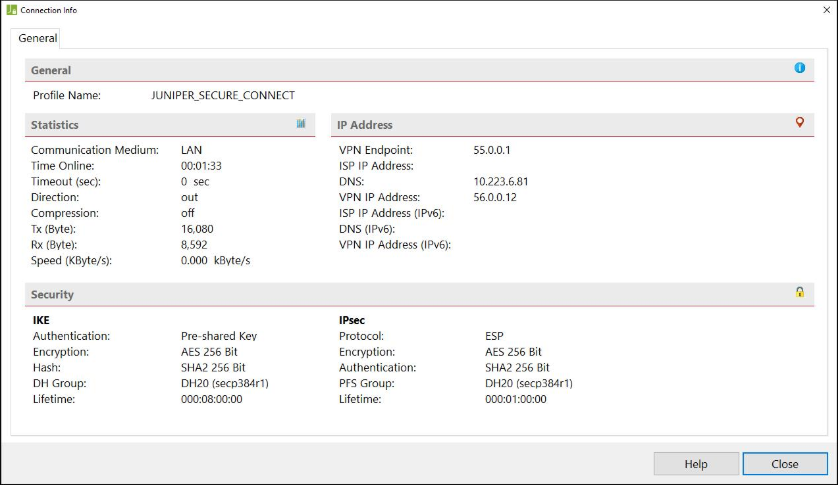
In the menu bar, navigate to Connect > Connection Info to get the following information on your connection as shown in Figure 3:
Name of the currently selected profile
Statistics information (for example, time online and value of timeout)
IP addresses (VPN IP address, DNS server, VPN Endpoint)
Security mode
Security keys used
Quality of Service provides the following information:
QoS groups available for the currently selected profile. You can switch on or off the QoS groups.
Graphical representation of the bandwidth used.
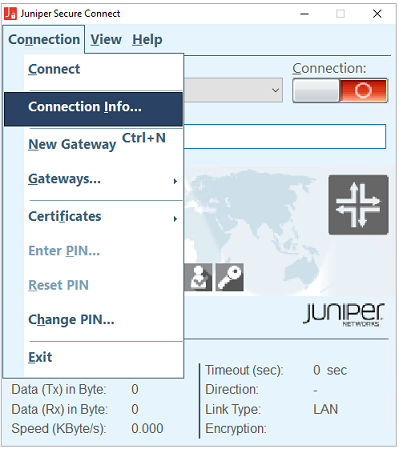
Figure 4 shows an example of connection information for a VPN connection.
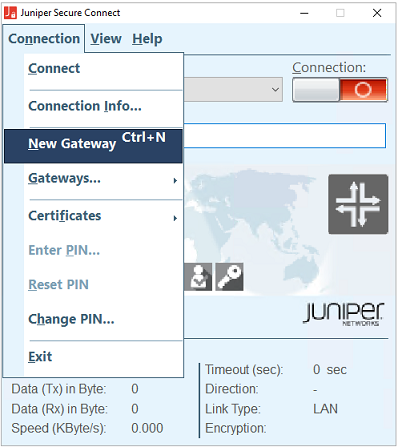
New Gateway Menu Option
To connect to a new gateway:
- Navigate to Connection > New Gateway from the Connection menu. See Figure 5.
- When you select New Gateway option, the Gateway Address field appears. Enter the URL for the new gateway address. Alternatively, you can also press Ctrl+N to enter the gateway address.
- After entering the gateway address, click on the Connection button to establish the connection to the specified SRX gateway address.
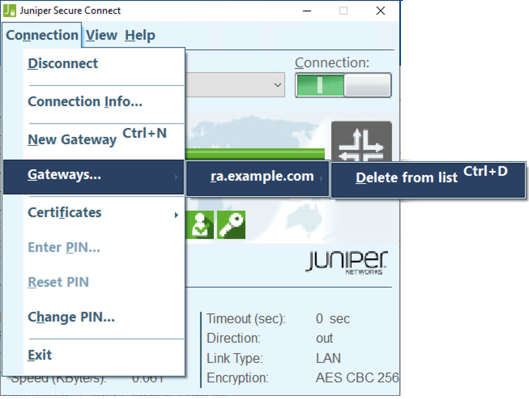
Gateways Menu Option
If you wish to remove a gateway address from the gateways list, follow these steps:
- Navigate to Connection > Gateways from the Connection menu. See Figure 6.
- Select Gateways and the list of gateway address appears.
- Select the gateway address you wish to remove from the list and select delete from the list. Alternatively, you can also delete the gateway address from the list by pressing Ctrl+D.
Certificates Menu Option
Certification Authority (CA) (also referred as the Issuer) creates and issues certificates using a PKI manager (software) and stores as a soft certificate.
User and CA certificates are stored in the following directory locations:
User certificates are stored as a PKCS#12 file under C:\ProgramData\Juniper\SecureConnect\certs directory, like C:\ProgramData\Juniper\SecureConnect\certs\user.p12.
CA or issuer certificates are stored under C:\ProgramData\Juniper\SecureConnect\cacerts.
Juniper Secure Connect supports *.pem and *.crt formats for CA certificates.
As shown in Figure 7, navigate to Connection > Certificates to view certificates related menu options.
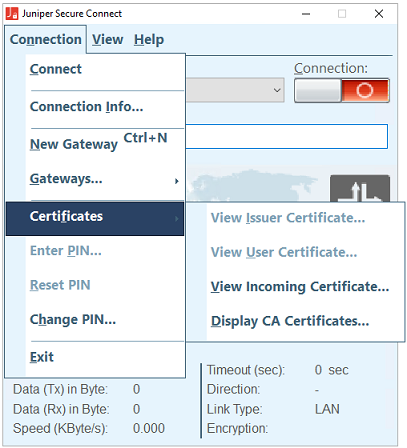
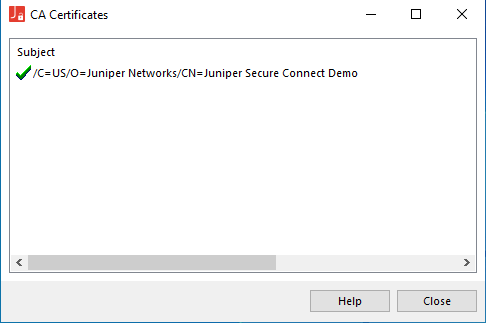
Figure 8 shows an example of CA certificates window, after selecting Display CA Certificates option from the Certificates menu.
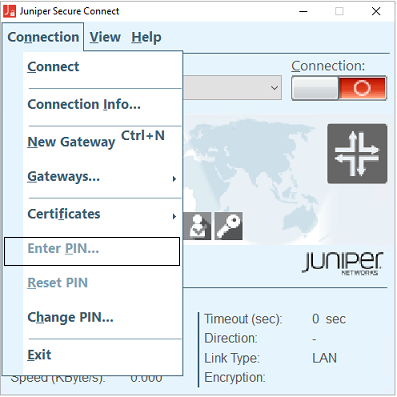
Enter PIN Menu Option
You can enter the PIN after starting the Juniper Secure Connect and before establishing a connection. If you want to establish a connection using a certificate at a later time, then you can skip the PIN entry unless the certificate configuration requires it.
To enter your PIN:
- Navigate to Connection> Enter PIN from the menu. See Figure 9.
- Enter the PIN. PIN must be a minimum of six digits in length.
- Click OK.
You need a PIN to establish the connection with certificates successfully. At the first time of establishing a connection manually, you must enter the PIN. For subsequent manual connections, you can skip entering the PIN again. A correct PIN entry is indicated by a green PIN symbol.
Change PIN Menu Option
In Juniper Secure Connect, if you want to enter the PIN only before establishing the connection, your administrator needs to enable PIN request at each connection option for Certificate Based Authentication method. Administrator can enable PIN request at each connection option to prevent an unauthorized user from setting up an unauthorized connection when the PIN has already been entered. When PIN request at each connection option is enabled, whenever you establish a connection, you are prompted to enter the PIN.
If you select Connection > Change PIN, the PIN that has already been requested in connection with other functions is no longer used, that is, when setting up a connection, or in the Enter PIN connection menu. Instead you can always select the Connection > Change PIN and the new PIN will be automatically reset immediately after the change. This ensures that when configuring PIN request at each connection (by your administrator) on an unauthorized Juniper Secure Client, an unauthorized user’s PIN cannot be used at anytime to establish a connection.
Figure 10 shows the connection menu options.
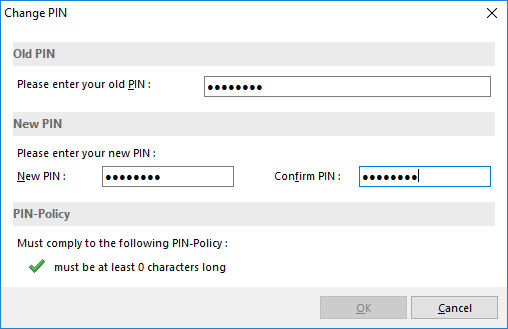
To change your PIN for a smartcard or token or soft certificate:
- Navigate to Connection > Change PIN in the menu bar. See Figure 11.
- Enter the correct PIN number has been entered previously.
- Enter your new PIN and confirm it by repeating it.
- Click on OK. You have now changed your PIN.
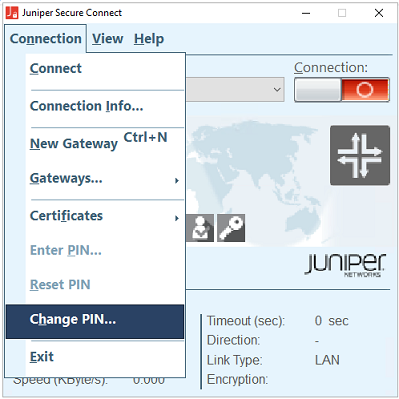
Figure 12 shows an example Change PIN window.
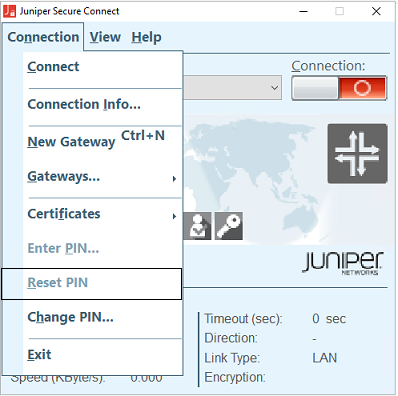
Reset PIN Menu Option
To reset your PIN:
- You can select Connection > Reset PIN to reset the PIN. See Figure 13.
- You must enter the correct PIN to reset the PIN, because, the certificate is used to establish the connection.
- If the PIN is reset, you cannot use this certificate to establish a connection, until the correct PIN is entered again.
Exit Menu Option
To exit Juniper Secure Connect: