
Security Policies Overview
Security Policies define how network traffic is managed across SRX Series Firewalls. These policies are centrally created in Juniper Security Director Cloud and enforced consistently across devices.
Security policies define rules that determine whether traffic to devices is allowed, blocked, inspected, or limited based on conditions. Beyond allowing or denying traffic, security policies can combine multiple criteria listed in this table from the Transport Layer (Layer 4) and Application Layer (Layer 7) of the OSI model into a single rule.
| Layer | Information |
|---|---|
| Network transport (Layer 4) |
|
| Application (Layer 7) |
|
This combination of Layer 4 and Layer 7 criteria allows organizations to create more precise, context‑aware controls than traditional port‑based rules alone.
Security policies can directly match traffic based on applications, such as web, e-mail, or collaboration apps, in addition to basic conditions such as IP addresses and ports. This means you can control application traffic within the same policy rule, instead of creating separate configurations for applications.
Security Policy Workflow
This workflow shows how to create security policies.
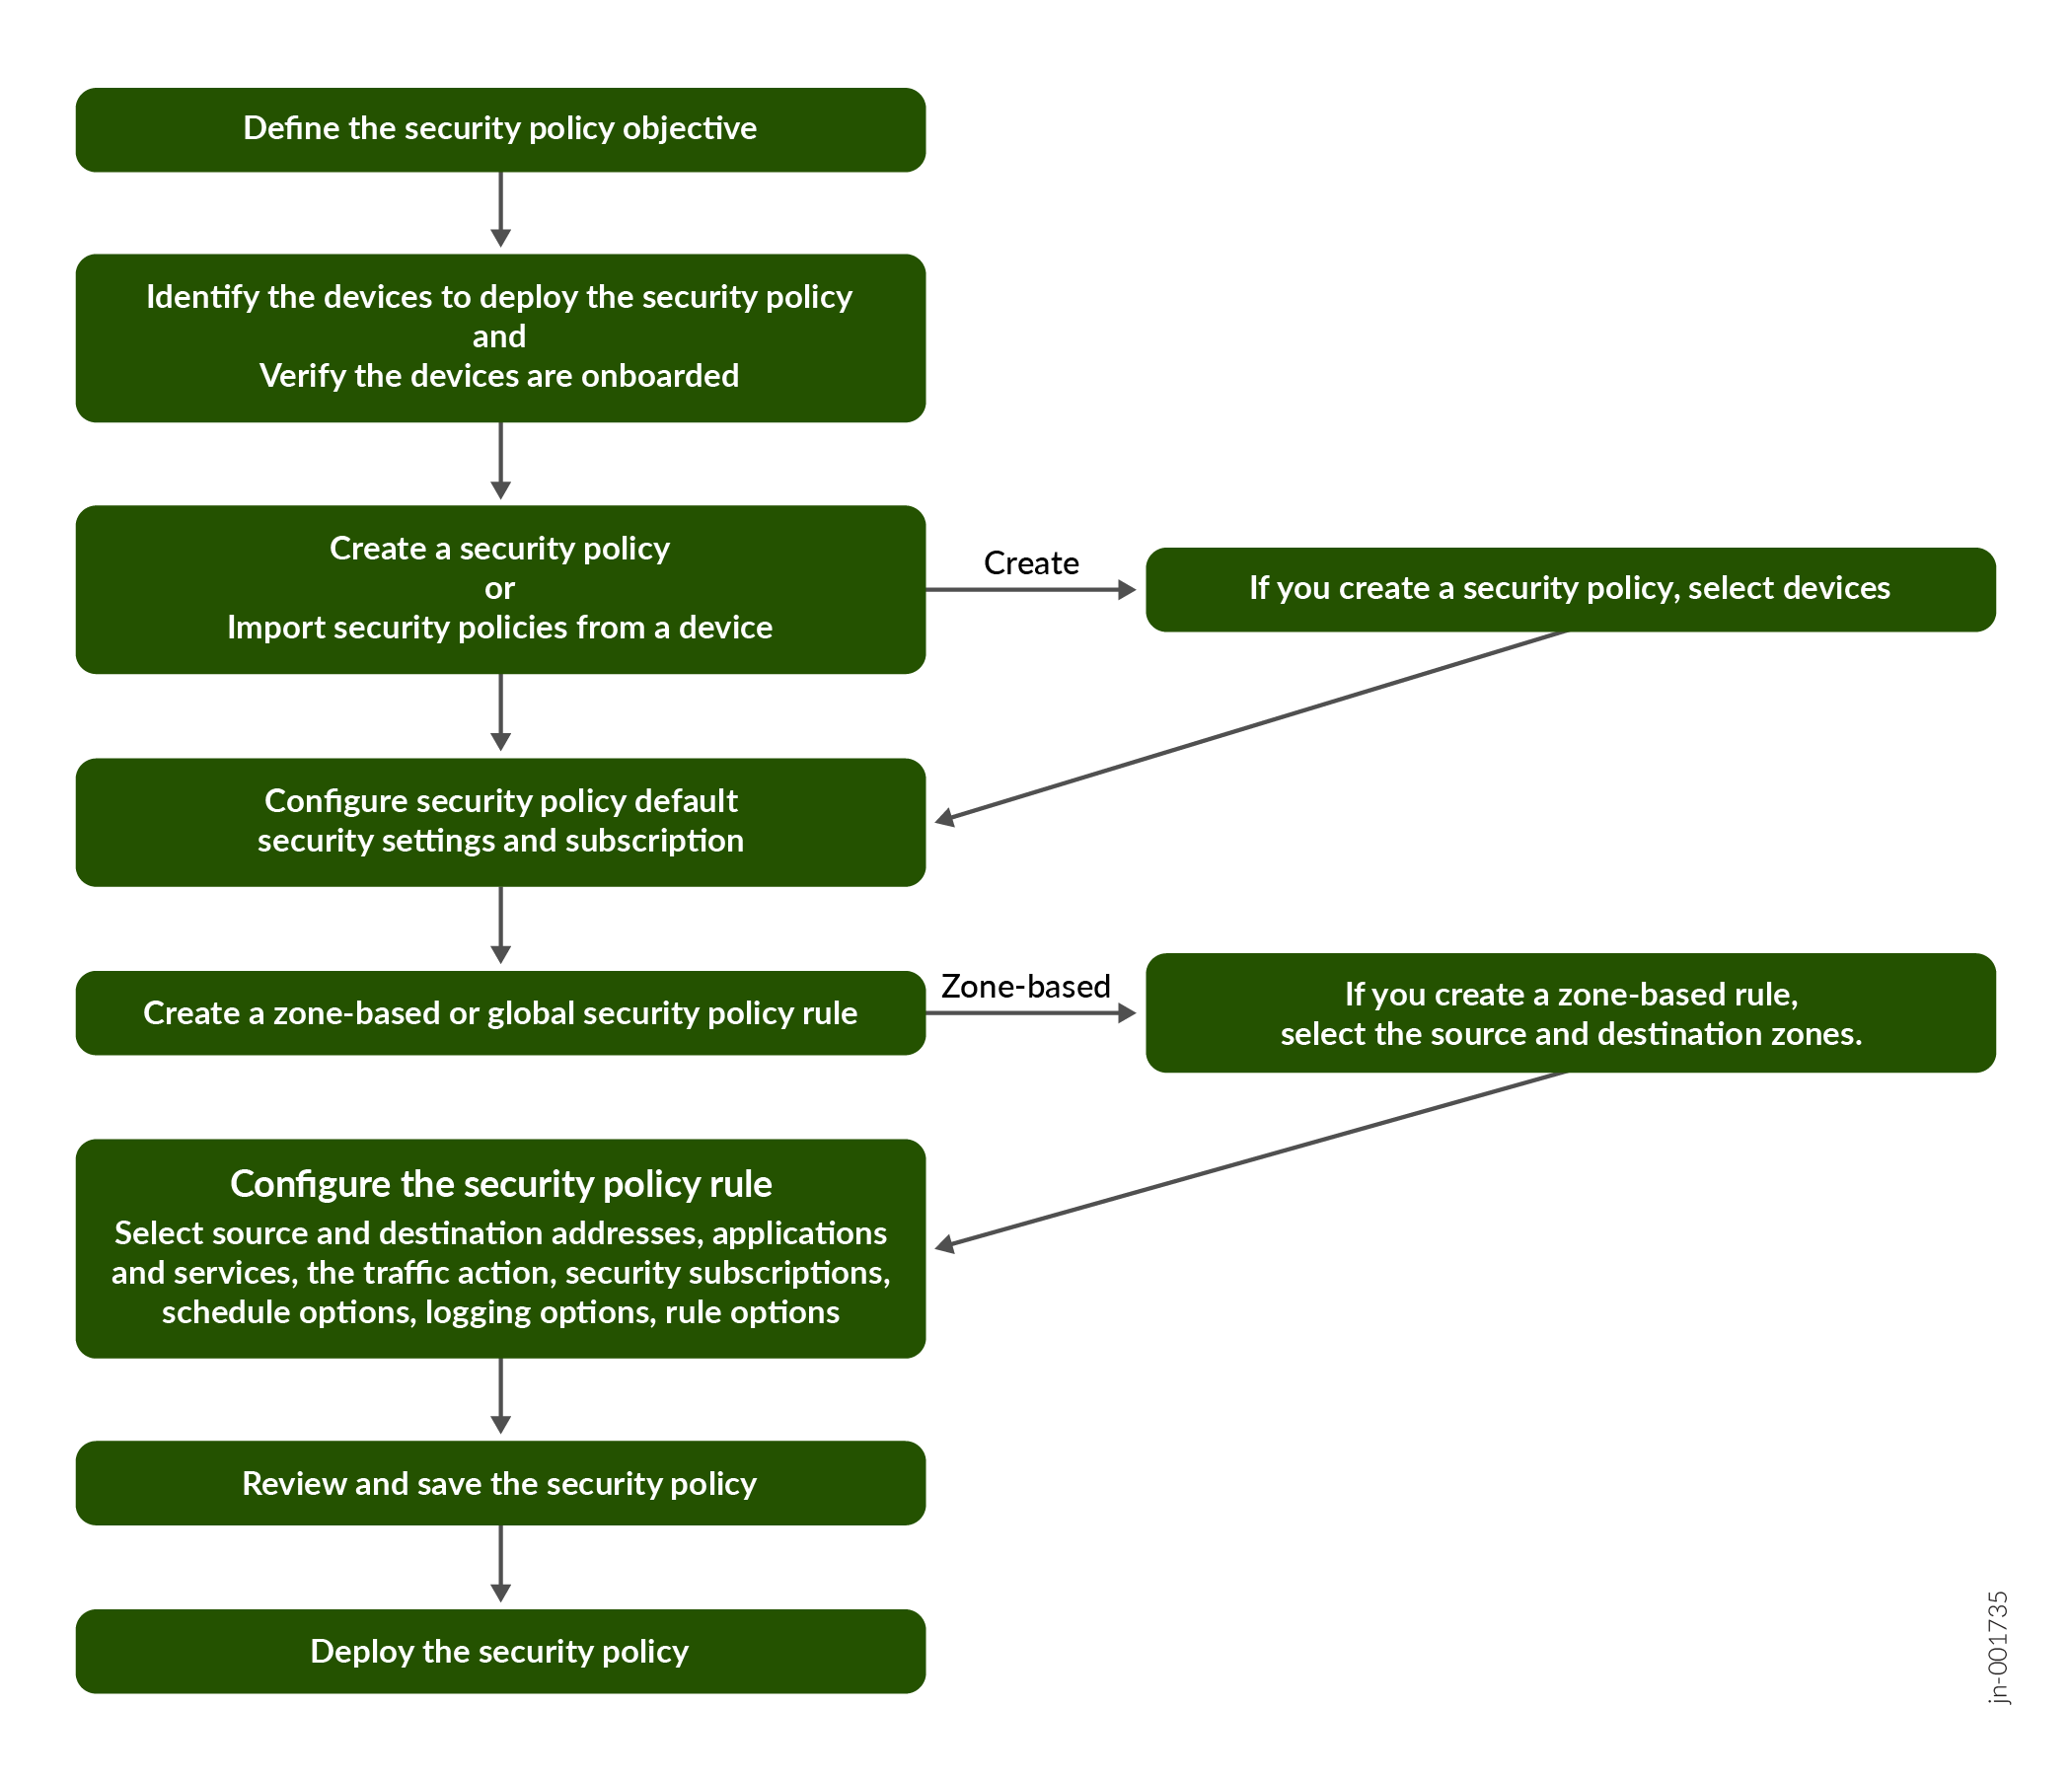
| Category | Task | More Information |
|---|---|---|
|
Prerequisites |
Before you add a security policy, complete these tasks.
|
— |
|
Configure a security policy |
|
|
|
Configure a security policy rule |
|
Add and Manage Security Policy Rules |
| Review the security policy |
|
— |
| Deploy the security policy |
Choose whether to deploy the policy on all devices or only those devices that require the policy update. |
Deploy Security Policies |
Security Policy Benefits
- Traffic action control—Permits, rejects, denies, redirects, or tunnels the traffic based on the identified application.
- Application-aware traffic recognition—Recognizes not just HTTP traffic but also any applications operating over it, which helps in enforcing policies effectively. For instance, a security rule for applications might block HTTP traffic originating from Facebook while permitting HTTP web access to Microsoft Outlook.
- Advanced security services integration—Provides advanced security protection by specifying the following profiles—Intrusion prevention system (IPS) profile, Content security profile, SSL proxy profile.
-
Flexible rule categorization—Categorizes rules as zone-based rules and global rules.
-
Zone-based-rules are rules with zones as source and destination endpoints.
-
Global rules give the flexibility to perform actions on the traffic without any zonal restrictions.
-
Security Policy Placement
Security policies and security policy rules execute in the sequence they are displayed on the Security Policies page.
- Policy order is important.
- New policies go to the end of the policy list.
- The last policy is the default policy, which has the default action of denying all traffic.
When you configure multiple security policies, one policy might eclipse, or shadow, another policy. In such cases, change the order of the policies and place more specific policies before generic policies.
Example
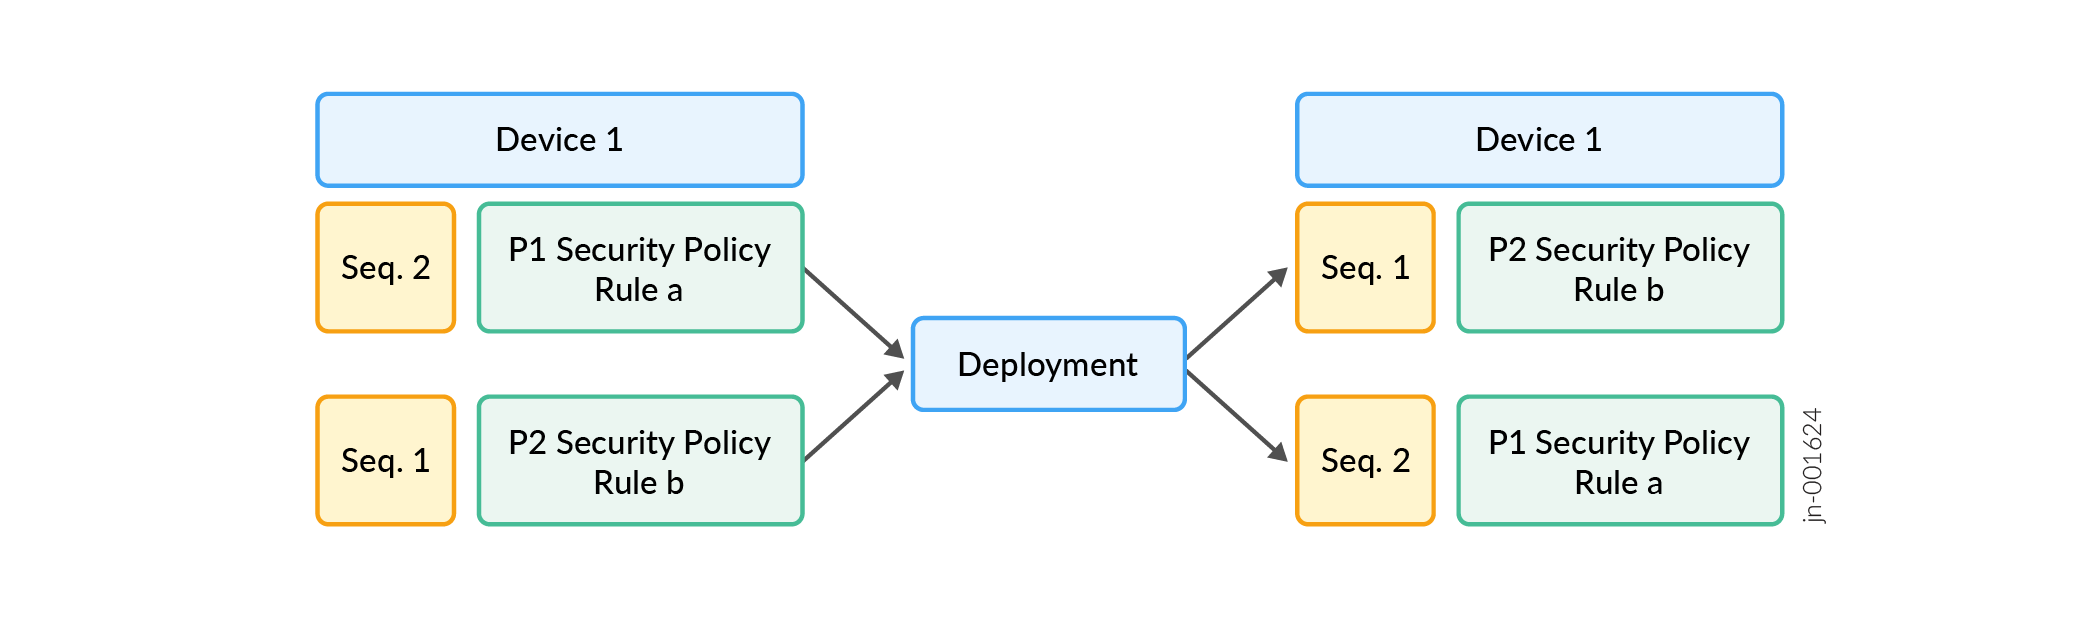
As shown in the illustration, on a device with multiple security policies, deployment follows the ascending sequence number for the zone pair. For example, consider two security policies, P1 and P2, assigned to Device 1.
-
On Device 1, policy P2 has sequence 1 and policy P1 has sequence 2.
-
Both policies operate from the untrust zone to the trust zone—P1 includes Rule a, and P2 includes Rule b.
-
When you deploy the policies, the deployment order is P2 (sequence 1) first, then P1 (sequence 2).
Security Policies Field Descriptions
You can create, edit, and remove security policies that are linked to devices. To access this page, select .
|
Field |
Description |
|---|---|
|
Seq. |
The order number of the security policy. |
|
Name |
The name of the security policy. |
|
Rules |
The number of rules associated with the security policy. If no rule is associated with the policy, Add Rule is displayed. See Add and Manage Security Policy Rules |
|
Devices |
The number of devices associated with the security policy. |
|
Status |
The deployment status of the security policy.
|
|
Modified By |
The user who modified the security policy. |
|
Last Modified |
The date and time when the security policy was modified. |
|
Description |
The description of the security policy. |