Intrusion Detection and Prevention
Enhance network security by applying Intrusion Detection and Prevention (IDP) profiles.
Getting Started with IDP Profiles
Intrusion detection involves monitoring network events and identifying incidents and threats. Intrusion prevention follows up on the findings of the detection process by taking countermeasures. IDP profiles consist of many attack signatures, each with their own severity and recommended actions. When you apply a profile to an application policy, you enable that appropriate safeguards.
With the required licenses, IDP is available for all WAN Edge devices that are configured as spokes. IDP is also supported on SRX devices that are configured as hubs (SRX only).
-
IDP is a calculation-heavy feature. You will likely see performance degradation on entry-level WAN Edge devices if you enable IDP in your policies.
-
IDP requires licenses. For help, see IDP Basic Configuration (in the Junos OS Intrusion Detection and Prevention User Guide).
When you activate the IDP feature for the first time on a spoke-device, we recommend you to plan it in a maintenance window. The start of the IDP engine and inclusion into the path from LAN to WAN (that is, service-chaining) might take a few minutes and might also interrupt ongoing communications.
Add an IDP Profile to an Application Policy
To enable intrusion detection and prevention, apply an IDP profile to an application policy.
Before You Begin: Configure your networks, templates, profiles, devices, and application policies. For help, see WAN Assurance Configuration Overview.
To add an IDP profile to an application policy:
-
In the IDP column, select an IDP profile.

Options include:
Table 1: IDP Options IDP Option Description None No IDP profile applied. Standard Standard profile is the default profile and represents the set of IDP signatures and rules recommended by Juniper Networks. The actions include:
-
Close the client and server TCP connection.
-
Drop current packet and all subsequent packets.
Strict Strict profile contains a similar set of IDP signatures and rules as the standard profile does. However, when the system detects an attack, the strict profile actively blocks any malicious traffic or other attacks detected in the network. Alert Alert profile generates alerts only and does not take any additional action. Alert profiles are suitable only for low severity attacks. The IDP signature and rules are the same as in the standard profile. Critical Only - SRX The Critical-Only profile is suitable for critical-severity attacks. When the system detects a critical attack, this profile takes appropriate action. We recommend the Critical – Only SRX profile for SRX300 line of firewalls. Recommended - SRX Contains only the attack objects tagged as recommended by Juniper Networks. All rules have their Actions column set to take the recommended action for each attack object. Server-Protection - SRX Designed to protect servers. To be used on high memory devices with 2 GB or more of memory. Client-Protection - SRX Designed to protect clients. To be used on high memory devices with 2 GB or more of memory. Client-And-Server-Protection - SRX Designed to protect both clients and servers. To be used on high memory devices with 2 GB or more of memory. Custom Select one of your custom profiles, as listed in the drop-down menu. For help creating profiles, see Configure Advanced Threat Prevention Features (SRX Only). Note: If you've created bypass profiles, they also appear in the Custom Profiles section of the IDP drop-down list. For help, see Customize IDP with Bypass Profiles(later in this topic). -
The selected IDP profile is applied.
Running a Simulator to Test Your IDP Settings
You can test the effects of your IDP-based policies by launching sample attacks. You can use tools such as Nikto in Kali Linux, which has a variety of options available for security-penetration testing.
Before You Begin: Set up a virtual machine (VM) desktop (desktop1) in a sandbox or lab environment, and install a simple security scanner for web servers, such as Nikto. Nikto is an open-source webserver and web application scanner. For example, you can run Nikto against an unhardened Apache Tomcat webserver (or its equivalent) that is local to your lab. In this test, you can send plain or unencrypted HTTP requests for IDP inspection.
The following sample shows a process where you install the tool, check the presence of the HTTP server, and then launch the attacks.
virsh console desktop1
apt-get update
apt-get install -y nikto
# Using your individual Lab-Access-IP we test if the labinternal
# Apache Tomcat Server of the Apache guacamole container is avail
wget http://172.16.77.155:8080
–2022-09-16 15:47:32– http://172.16.77.155:8080/
Connecting to 172.16.77.155:8080… connected.
HTTP request sent, awaiting response… 200
Length: unspecified [text/html]
Saving to: ‘index.html’

index.html [ <=> ] 10.92K –.-KB/s in 0s

2022-09-16 15:47:32 (85.3 MB/s) – ‘index.html’ saved [11184]

# Now start our security scanner for the first time
nikto -h http://172.16.77.155:8080
– Nikto v2.1.5
—————————————————————————
+ Target IP: 172.16.77.155
+ Target Hostname: 172.16.77.155
+ Target Port: 8080
+ Start Time: 2022-09-16 15:48:22 (GMT0)
—————————————————————————
+ Server: No banner retrieved
+ The anti-clickjacking X-Frame-Options header is not present.
+ No CGI Directories found (use ‘-C all’ to force check all possible dirs)
+ Server leaks inodes via ETags, header found with file /favicon.ico, fields: 0xW/21630 0x1556961512000
+ OSVDB-39272: favicon.ico file identifies this server as: Apache Tomcat
+ Allowed HTTP Methods: GET, HEAD, POST, PUT, DELETE, OPTIONS
+ OSVDB-397: HTTP method (‘Allow’ Header): ‘PUT’ method could allow clients to save files on the web server.
+ OSVDB-5646: HTTP method (‘Allow’ Header): ‘DELETE’ may allow clients to remove files on the web server.
+ /examples/servlets/index.html: Apache Tomcat default JSP pages present.
+ Cookie JSESSIONID created without the httponly flag
+ OSVDB-3720: /examples/jsp/snp/snoop.jsp: Displays information about page retrievals, including other users.
+ OSVDB-3233: /manager/manager-howto.html: Tomcat documentation found.
+ /manager/html: Default Tomcat Manager interface found
+ 6544 items checked: 1 error(s) and 10 item(s) reported on remote host
+ End Time: 2022-09-16 15:50:03 (GMT0) (101 seconds)
—————————————————————————
+ 1 host(s) tested
Run the security scanner. You'll notice that the scanner takes longer to run because it detects more errors and less events.
nikto -h http://172.16.77.155:8080
– Nikto v2.1.5
—————————————————————————
+ Target IP: 172.16.77.155
+ Target Hostname: 172.16.77.155
+ Target Port: 8080
+ Start Time: 2022-09-16 16:01:51 (GMT0)
—————————————————————————
+ Server: No banner retrieved
+ The anti-clickjacking X-Frame-Options header is not present.
+ No CGI Directories found (use ‘-C all’ to force check all possible dirs)
+ Server leaks inodes via ETags, header found with file /favicon.ico, fields: 0xW/21630 0x1556961512000
+ OSVDB-39272: favicon.ico file identifies this server as: Apache Tomcat
+ Allowed HTTP Methods: GET, HEAD, POST, PUT, DELETE, OPTIONS
+ OSVDB-397: HTTP method (‘Allow’ Header): ‘PUT’ method could allow clients to save files on the web server.
+ OSVDB-5646: HTTP method (‘Allow’ Header): ‘DELETE’ may allow clients to remove files on the web server.
+ /examples/servlets/index.html: Apache Tomcat default JSP pages present.
+ 6544 items checked: 5657 error(s) and 6 item(s) reported on remote host
+ End Time: 2022-09-16 16:05:27 (GMT0) (216 seconds)
—————————————————————————
+ 1 host(s) tested
Viewing Event Information
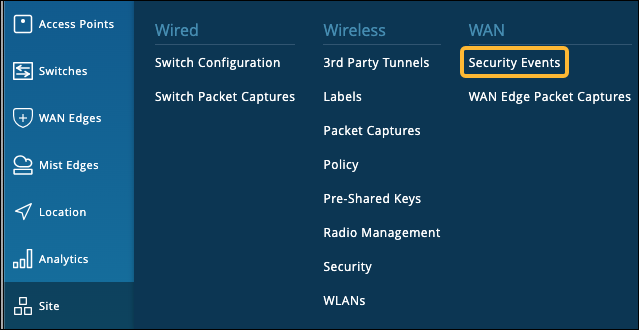
You can view the generated events by navigating to Site > WAN > Security Events.
On the Security Events page, you'll see all generated events, as shown in this example.
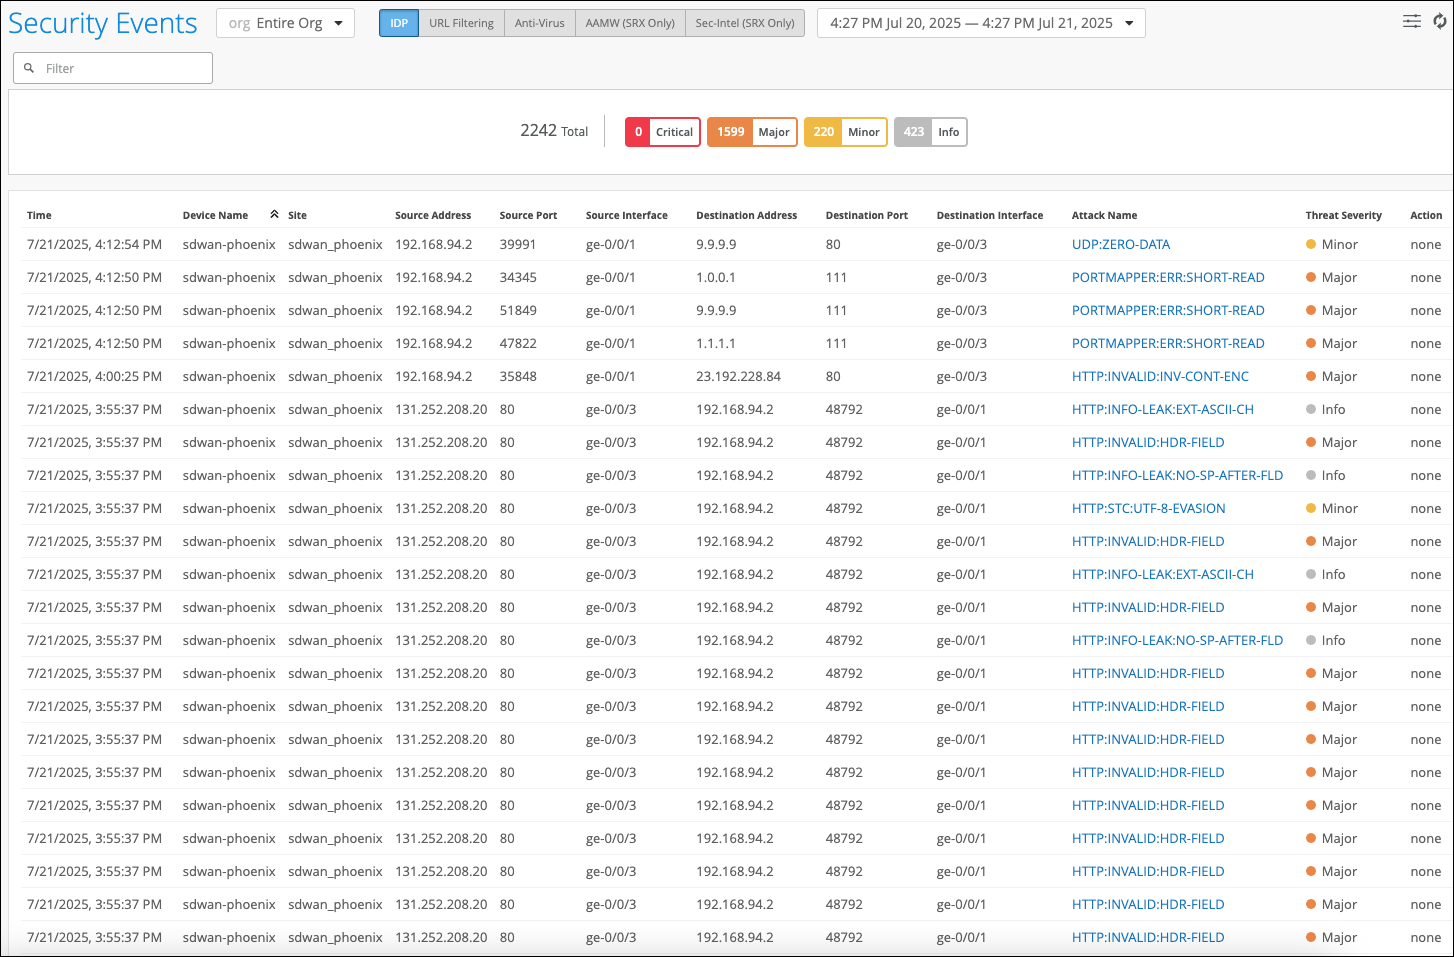
The Security Events page includes these helpful features:
-
To filter the table—Above the table, click a button to filter the list by severity level, such as Critical or Minor.
-
To view attack details—Click the hyperlink in the Attack Name column to see information about the attack and the default actions.
You can view more information about an event and the IDP actions by clicking the hyperlink.
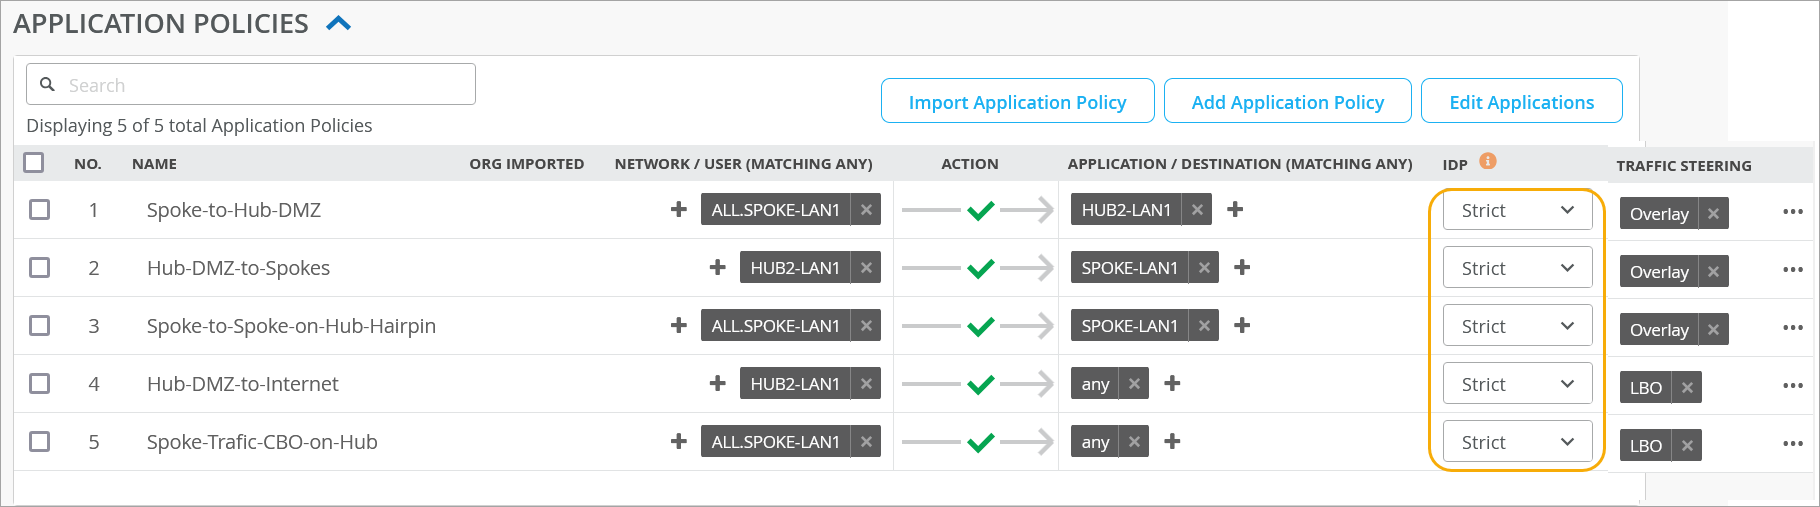
In the previous example, you used passive logging for the events by using IDP profile type Alerts. Next, use IDP profile type Strict to stop or mitigate the events. When you use the Strict profile, the IDP engine closes TCP connections against the detected attacks.
You can follow the same process as shown in the sample. However, this time you change the spoke device template and change the IDP profile from Alert to Strict, as shown in this example.
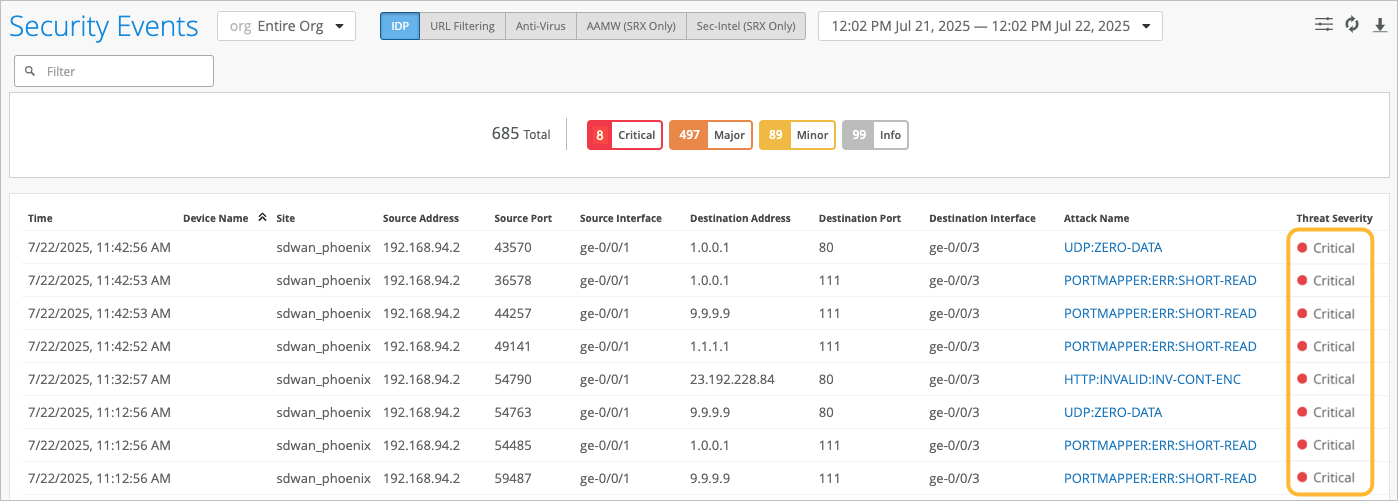
This example shows that for some events, the action is to close the session to mitigate the threats.
Customize IDP with Bypass Profiles
If you're seeing unnecessary alarms ("false positives"), you can create IDP bypass profiles as a counter-measure. For example, exclude a specific destination or attack type from IDP.
An IDP profile can have multiple bypass profiles, each with multiple bypass rules.
To create an IDP bypass profile:
-
Click Next at the bottom of the Create Bypass
Profile pop-up window.
The IDP Bypass Profiles page appears, showing your profile's name at the top of the page.
