
Global Login and MSP Dashboard
MSP admins can create a single, global login to manage Mist users and organizations on all of their regional clouds.
About the Global MSP Dashboard
HPE Mist™ Managed Service Provider (MSP) super users who operate across multiple regional HPE Mist clouds can create a global login account. With global login, you log in once and can then access any of your HPE Mist organizations without having to log in again.
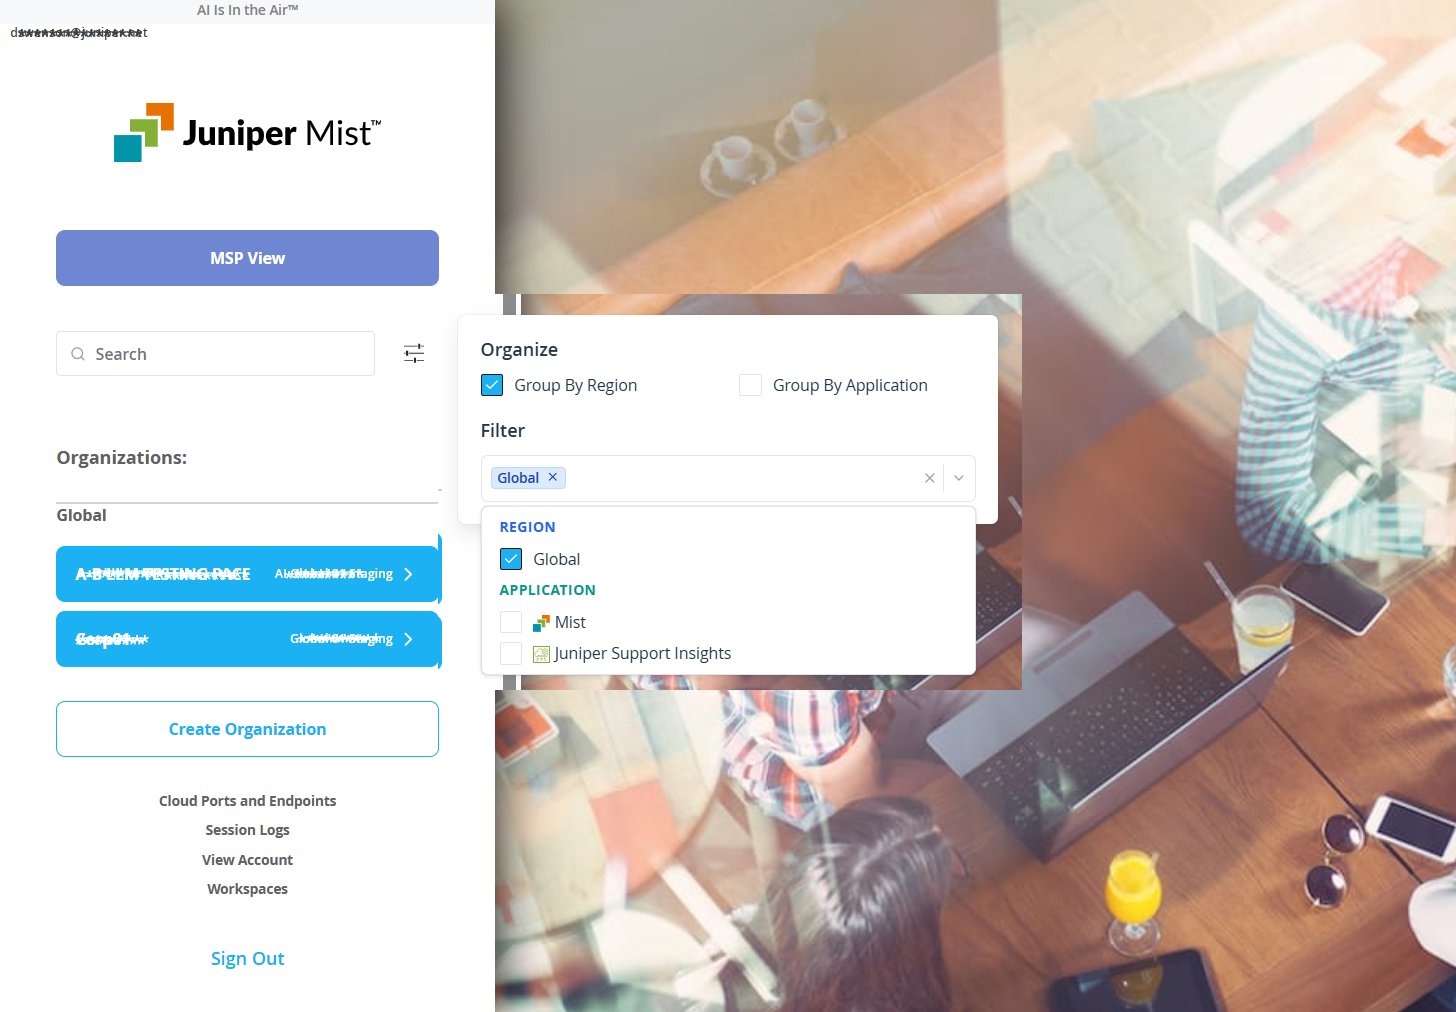
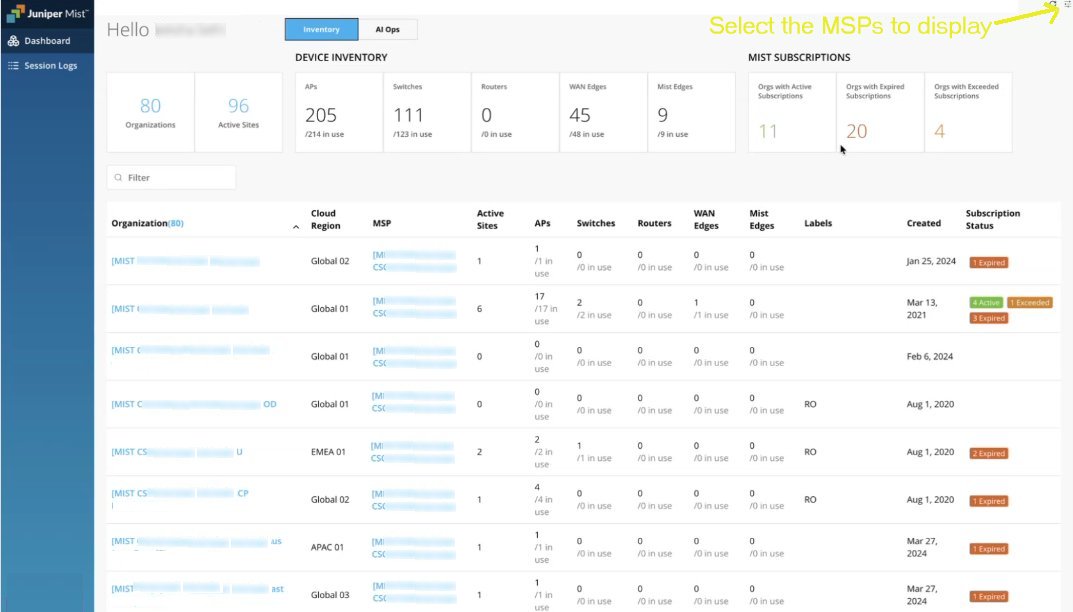
The global account provides access to a global MSP dashboard, which offers a unified view of your inventory across regional clouds. It includes your organizations, MSP accounts, and details for each site. You'll also find a device-count summary, and information about all your HPE Mist subscriptions.
For advanced-tier MSPs operating across multiple regional clouds, AIOps data is aggregated under the AIOps tab. The first time you open the AIOps tab, must choose which MSPs you want to display in the summary page. Do this by clicking the hamburger menu (as shown in the upper right corner of Figure 2) and selecting the MSPs you want to include.
Creating a global login does not alter the underlying HPE Mist architecture. Your organizations and data remain in the same regional cloud where they were created; any existing user roles and organization settings remain unchanged.
See Global Login FAQs and Global Login Options for more information.
Global Login Options
To set up a global login, you first need to create a global account, which is distinct from your local accounts. This account can use a standard username and password for authentication (best for individual users). Or you can use Google sign-on (best for individual users who don't want to create a new account). A third option is to set up a domain-based single sign-on account (Global SSO, best for multiple users from the same company).
- HPE Mist Account—Requires multi-factor authentication (MFA, or 2FA), which can be
enabled using the MFA app of your choice, or, alternatively, by choosing the option to
have a one-time password emailed to you each time you log in.
-
If you already have an HPE Mist account, you just need to link it to your global account: click the User icon in the upper right corner of the HPE Mist management portal, and then open the My Account screen where you'll see a Link button in the Link to Global Account section. You'll need to verify your email address and create a password for the global account, after which you'll be automatically redirected to sign in to your global account rather than a regional account.
-
If you're a new HPE Mist user, you'll need to register and create an account. After you've been verified and authenticated, you'll be redirected to the Mist dashboard where you can link to a global account.
-
- Sign in with Google—If you have a Google account, you can link it with the global account and thereby sign in without entering a password. Do this by clicking the HPE Mist Account icon in the upper right corner of the HPE Mist management portal. Then click Sign in with Google, and follow the on-screen instructions.
- Global SSO—This option lets you associate the global account with a domain, so multiple users from that domain can login using the same method and security standards. In addition, global SSO preserves your existing HPE Mist user roles as a part of the authentication process. Begin by setting up an HPE Mist workspace, which is a container where you can associate your domain, IdP(s), and HPE Mist user roles.
Setting Up Global SSO
Once you have a global HPE Mist account, setting it up for global SSO starts by building an HPE Mist workspace, which is where you associate the global account with a domain, IdP, and HPE Mist users.
As a part of setting up the workspace, you'll need to verify the domain you're going to use. Do this using DNS records from your domain provider, which can take anywhere from a few minutes to a few hours (and maybe as long as 72 hours, depending on the provider). You'll also be prompted to provide a copy of the security certificate your IdP uses to encrypt web traffic, and to specify the URL that authenticated users will be redirected to.
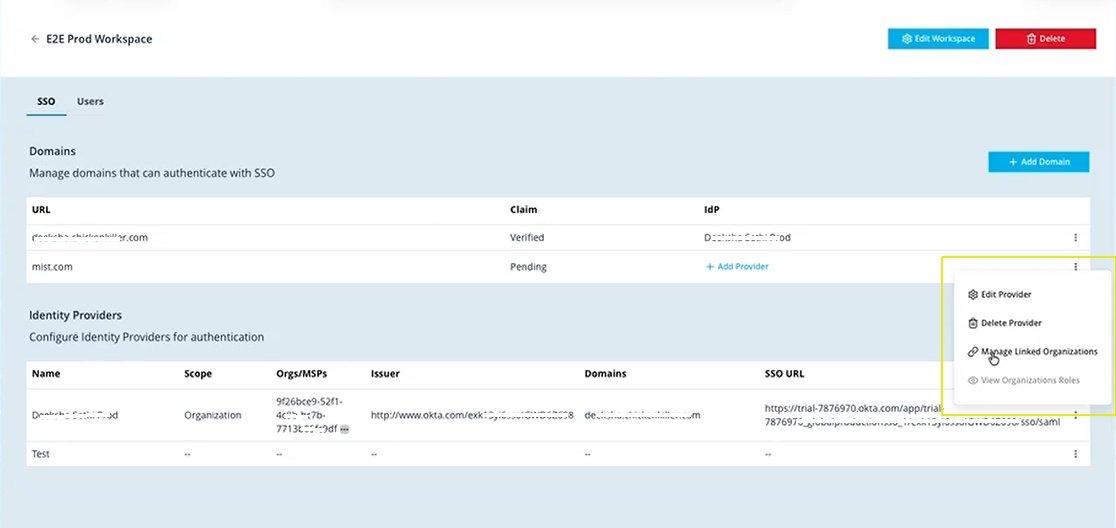
To create a workspace for setting up global SSO,
Open the HPE Mist sign-on page, and then click the Workspace link that appears below the list of Organizations.
In the page that opens, click Create New Workspace, and give your workspace a name.
- Open the workspace you just created.
Select "+ Add Domain" to add the domain to the HPE Mist workspace and follow the on-screen instructions for verification. We use DNS records to verify that you are the owner of the domain.
The workspace will show the domain as “pending” until verification is complete.
After your DNS provider has confirmed the domain, click the three vertical dots next to the domain parameters (as shown in Figure 3) and select Verify Domain from the pop-up menu.
Click + Add Provider to configure your IdP and set up a security certificate:
Name: IdP service provider
Scope: Specify your HPE Mist account type, Organization or MSP
Type: Specify the type of IdP, for example Security Assertion Markup Language (SAML)
Issuer: For the IdP security certificate, specify who issued it
NameID format: Default is Email.
Signing algorithm: The default is SHA-256, or select a different value from the drop-down.
Certificate: Paste the X.509 certificate (that is,
.pemor.cert) code copied from the IdP (used to verify the authenticity of login responses).SSO URL: Specify the IdP redirect page where you want to send HPE Mist users.
Custom Logout URL: Specify the redirect page you want users to land on after logging out from the HPE Mist portal.
ACS URL (Assertion Consumer Service URL): Specify the IdP location where HPE Mist will send its SAML assertion.
Single Logout URL:
- After adding the IdP, link it to the HPE Mist account by selecting the three vertical
dots at the end of the IdP parameters row. To add an HPE Mist account, you need to have
administrator, or super user privileges for that account.
To subsequently edit or delete your IdP settings, click the three dots to reopen the page.
Only HPE Mist super users can link or unlink an MSP account, and that is only for accounts where they have super user privileges.
(Optional) If other users need to be added to the workspace, click the User tab and then the + Add User button to invite additional users.
Only workspace admins can add, update, or delete workspace users.
Each workspace must have at least one admin, but multiple admins are allowed.
Linking an organization to the IdP requires an HPE Mist admin account for the organization.
Only users with a global SSO account can be invited.
After configuring the workspace and verifying the domain, HPE Mist users within the domain will be redirected to the global SSO page to sign in using the configured IdP. If the global SSO option is unavailable, users can sign in using their regional account.