Use Postman to Make Your First API Call
Postman is a platform that is designed to make it easy to work with APIs. This topic walks you through how to use Postman to make your first API call.
Postman is an API platform that makes it easy for you to make and test API calls. You can use Postman for most everything API related, such as testing webhooks, sending and receiving data from a WebSocket server, and more. This topic covers the steps you need to complete in Postman prior to making your first API call and how to use Postman to make your first API call to the Juniper Mist RESTful API.
See
Postman Setup
To use Postman, you can use the Postman website or download the Postman application as described in Download Postman.
- Sign in to Postman (or create an account) from the Postman website or application. This allows you to save your environment. See the Create Your Environment section further down in this topic.
- Once your account is created, you get access to your workspace. This is where you can save your API calls and configure your environment to interact with the Mist API.
Import the Mist API Collection
Next, import the Mist API Collection. Juniper Mist has built a list of Postman API calls that you can import directly into your Postman workspace. This list is maintained and matches what the API documentation lists.
- Navigate to the Juniper Mist Postman collections page and select the Mist Cloud APIs collection.
- Once the collection is opened, click on Fork as described in Fork collections and environments in Postman. This enables you to create a copy of the collection in your own workspace and still receive updates when the main collection is updated.
- In the top left corner of Postman, you should see that the collection has now been forked into your workspace. Expand the collection and its subsections to see how the RESTful API calls are organized.
Create Your Environment
A postman environment allows you to store variables in a profile that you can reuse across multiple API calls and collections. You must create an environment and define variables before you begin making API calls in Postman.
Test Your First API Call
Now that you have set up Postman with your collections and environments, it's
time to make your first API call. In this example, you make an API call to test
the connection to the API. This is done using the GET
/api/v1/self call.
In order to test your first API call to the Juniper Mist API, follow these steps:
-
Select the Send button.
Note:
The
GET /api/v1/selfrequest uses the{{apitoken}}and{{host}}variables from your environment.You should receive a
200response code from the Mist API indicating that the request was successful. In response to theGET /api/v1/selfrequest, you receive information about your account and privileges in a JSON payload.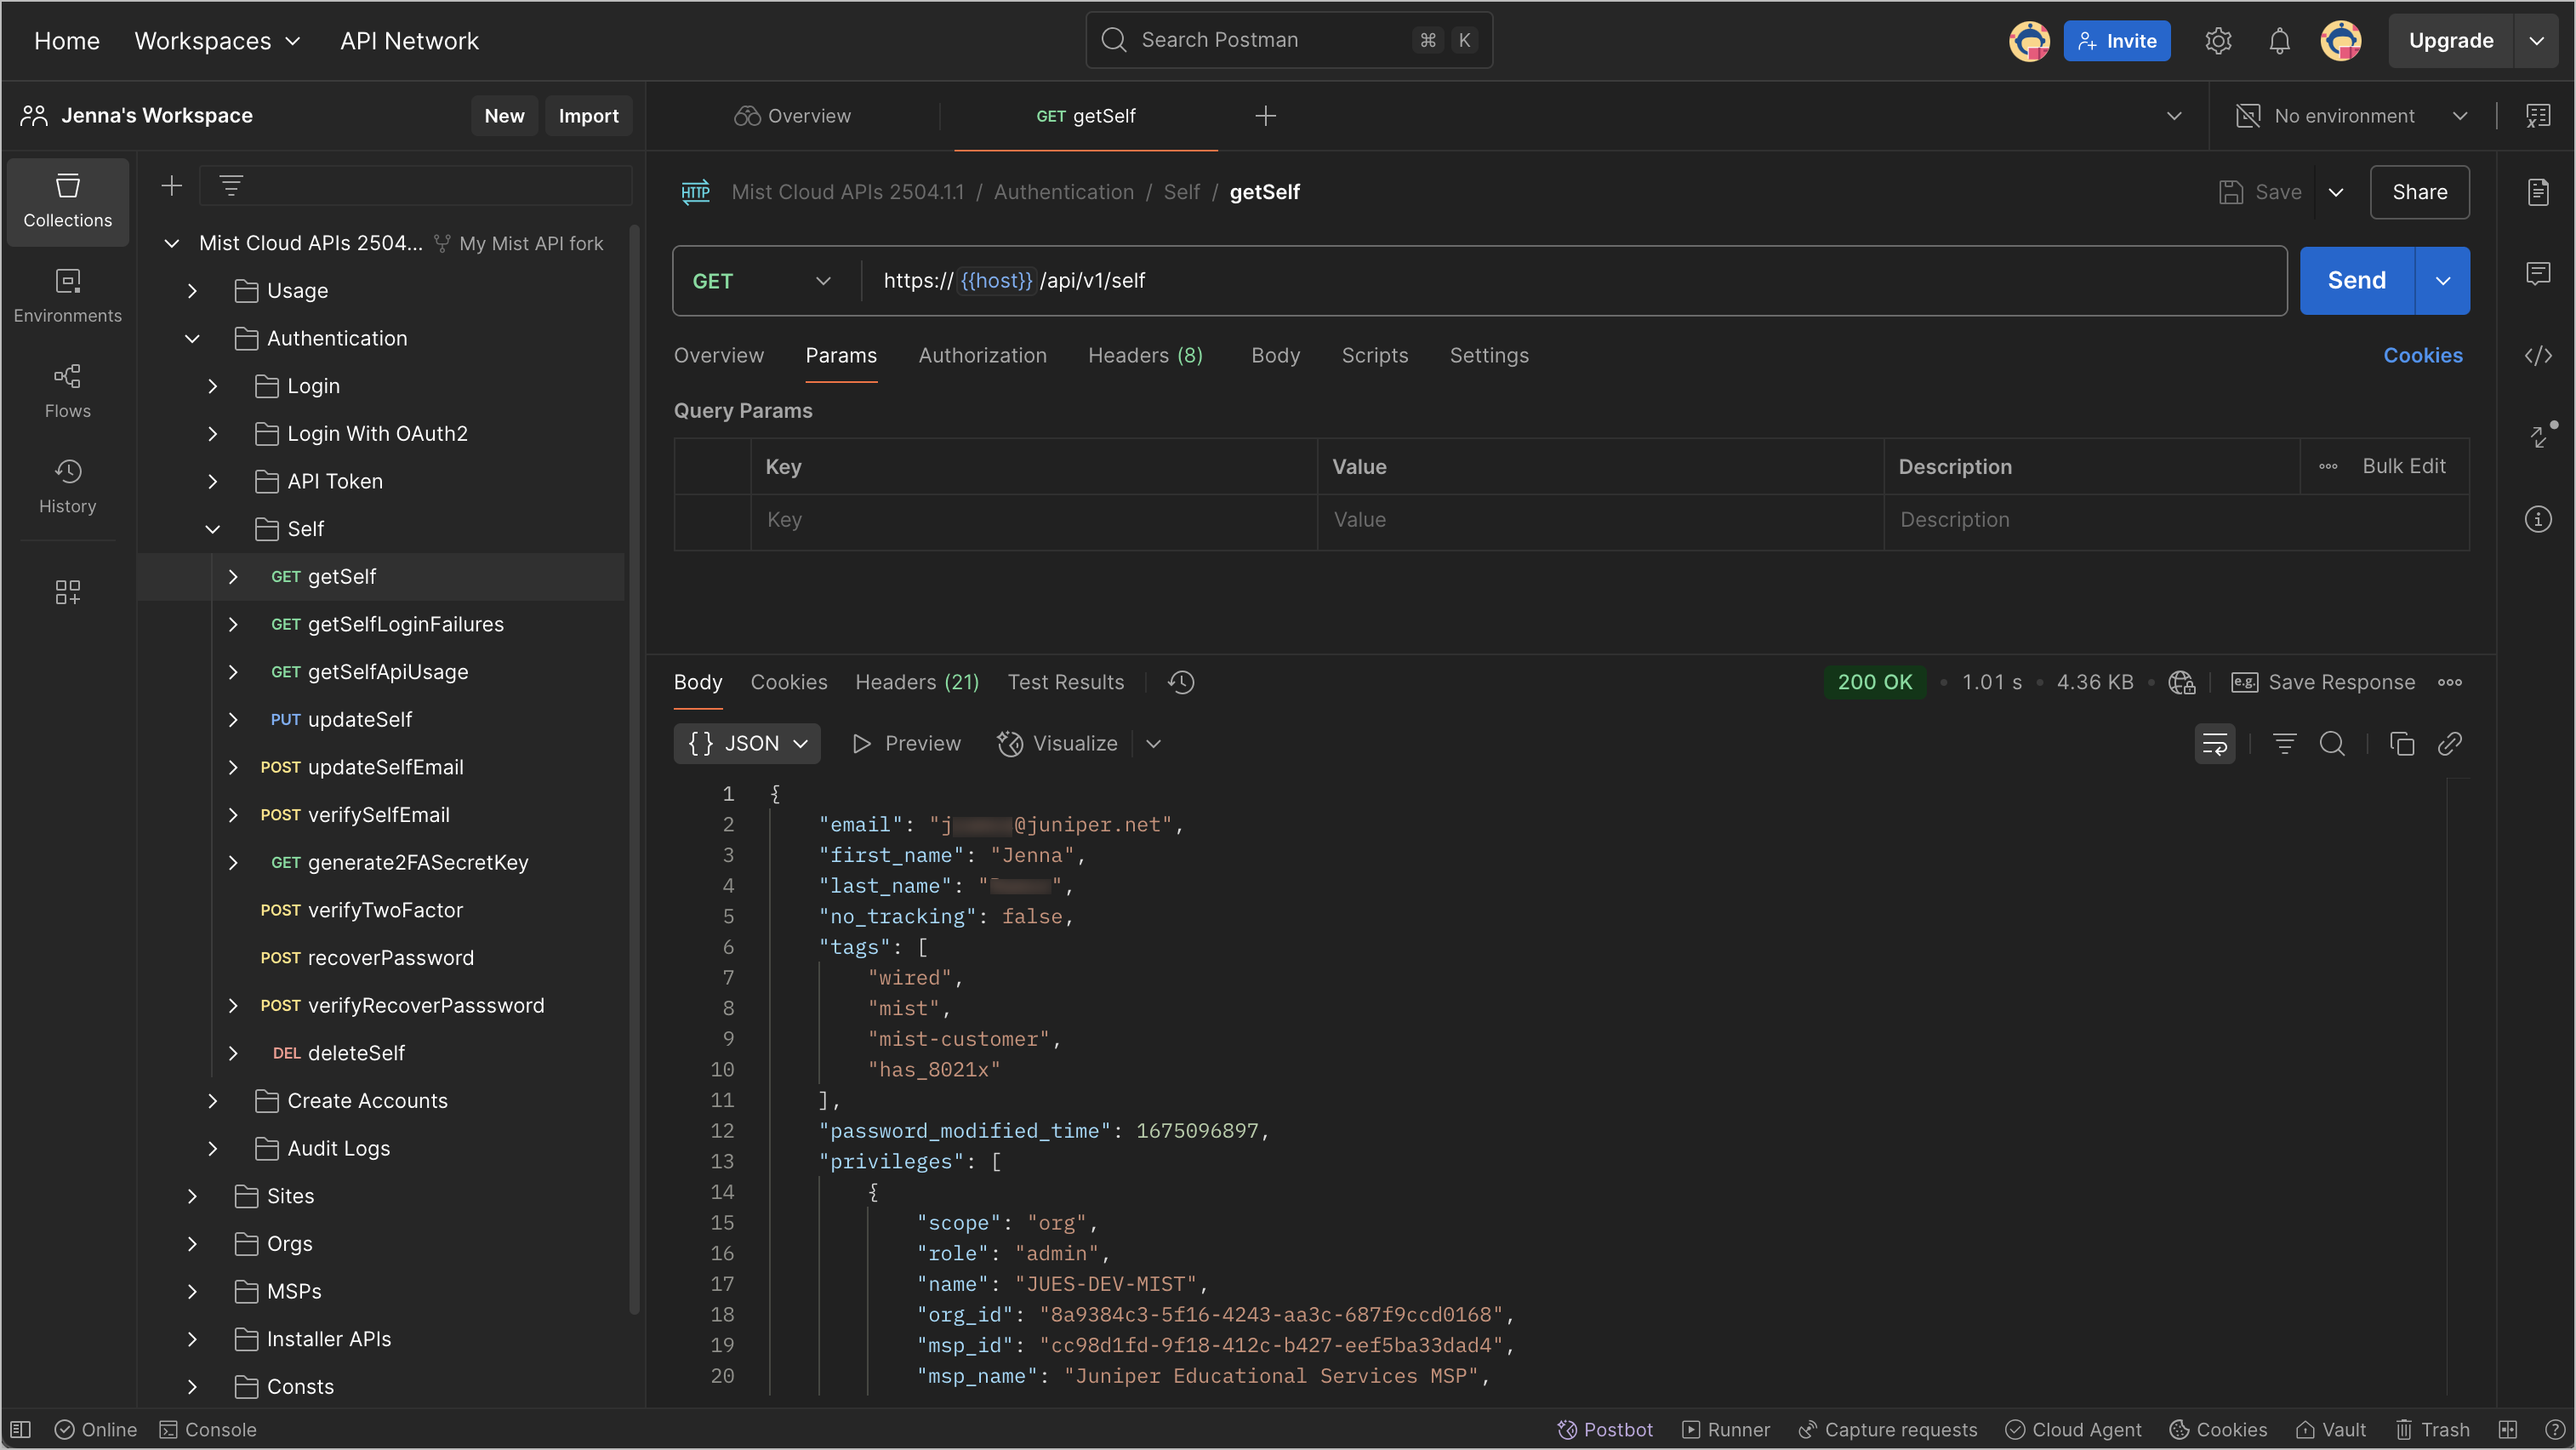
If you did not receive a response, select the Console button in the bottom left corner of Postman to gather more information about the sent request and received response. Study the HTML response code to understand why you received the response. Below are some example error codes:
-
Error 404—This means that the endpoint URL does not exist. Validate that your{{host}}variable is configured properly. For example, an additional/in the URL would result in anError 404response code. -
Error 401—This means that you are not authorized to send the API call. Review the response of the Mist API to understand what is not setup properly. Validate that your{{apitoken}}variable is configured properly.
For more information about HTML response codes, see REST API HTTP Response Codes.
You have just sent your first API call to the Mist API. Now you are ready to explore and test other calls. Here are a few suggestions that you can test next:
Orgs / Sites / getOrgSitesOrgs / Devices Stats / getOrgDevicesStatsOrgs / Templates / getOrgsTemplatesOrgs / Inventory / getOrgInventory
-