Configure SSL Forward Proxy
SSL Forward Proxy uses signed, trusted certificates to allow the SSR to perform a man-in-the-middle (MitM) function that decrypts and re-encrypts HTTPS traffic. This allows IDP and AV scans of the traffic to be performed at that time. By installing CA signed certificates into the Trusted Root Certification Authorities store of all client end-users' browsers and devices, malicious servers are prevented from performing MITM impersonation attacks against the client endpoints.
SSL Forward Proxy is used in conjuction with the IDP and Anti-Virus features available with the SSR, and can be applied on the same access policy and service. Configuring an SSL forward proxy security profile (Strong, Medium, or Weak) indicates which security cipher suite is used. For more information about the available security cipher suites, see the Supported SSL Ciper List.
The following are the high level steps necessary to configure SSL Forward Proxy:
- Acquire a CA-Signed Certificate: For use with SSL Forward Proxy, a self-signed certificate will not work. It must be signed by a public, trusted CA.
- Distribute Certificates: Install the proxy's CA certificate into the Trusted Root Certification Authorities store of all client end-users' browsers and devices. If this step is missed, users will receive severe certificate trust warnings.
- Configure Security Policies: Create an SSL Proxy profile and attach it to your WAN edge. The device will begin intercepting designated HTTPS traffic.
Conductor-managed deplpoyments using SSL Forward Proxy are currently only supported on SSR1200, SSR1300, SSR1400, and SSR1500.
Configuration Using the Conductor GUI
Use the following steps to configure SSL Forward Proxy using the SSR Conductor GUI.
- From the Configuration menu, select Authority, and then click on the Authority tile.
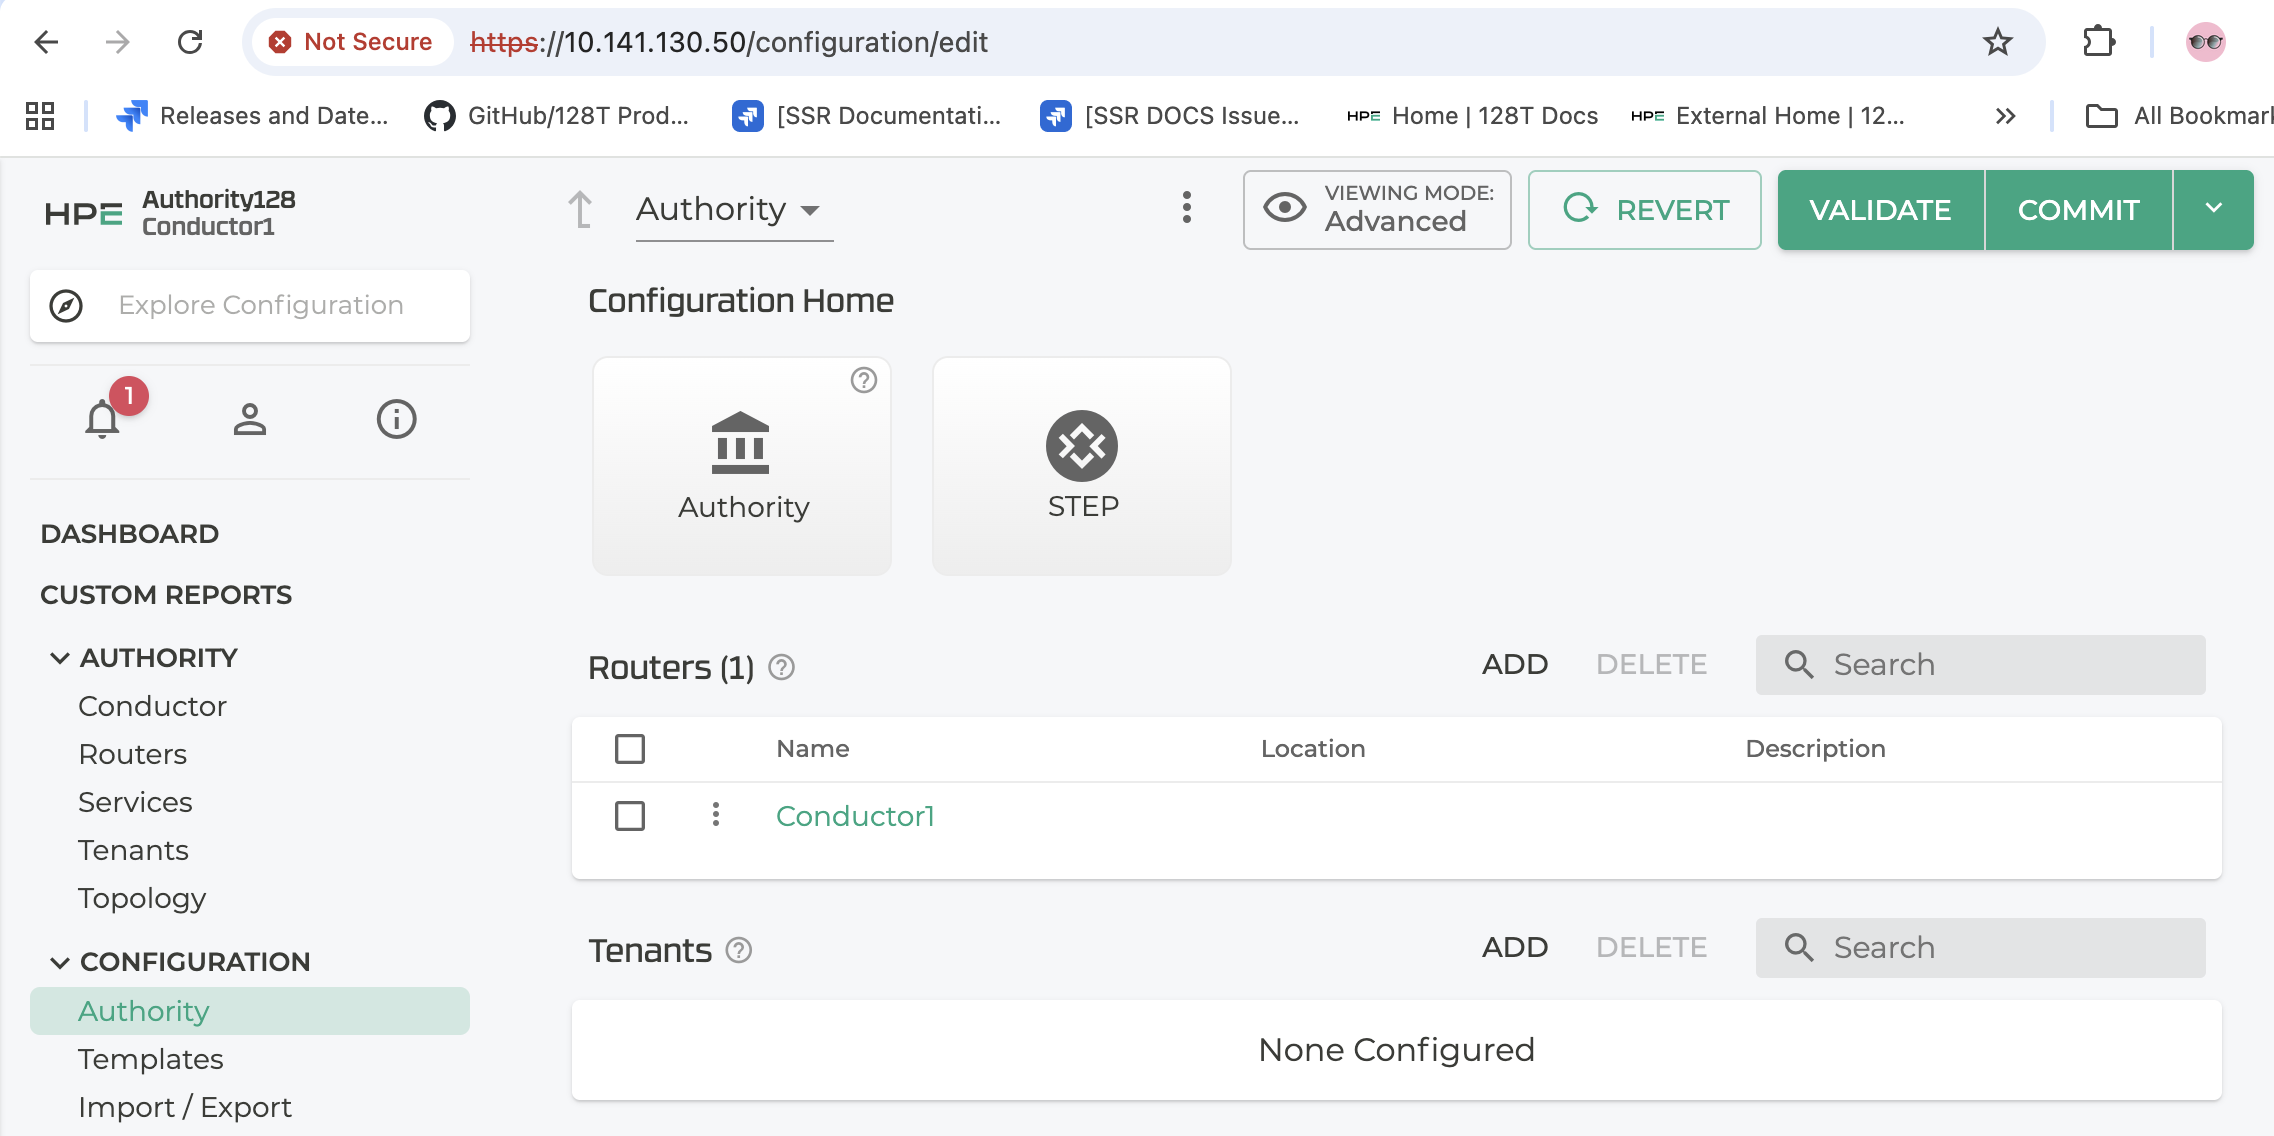
- Scroll down to the Trusted CA Certificate, and click ADD.
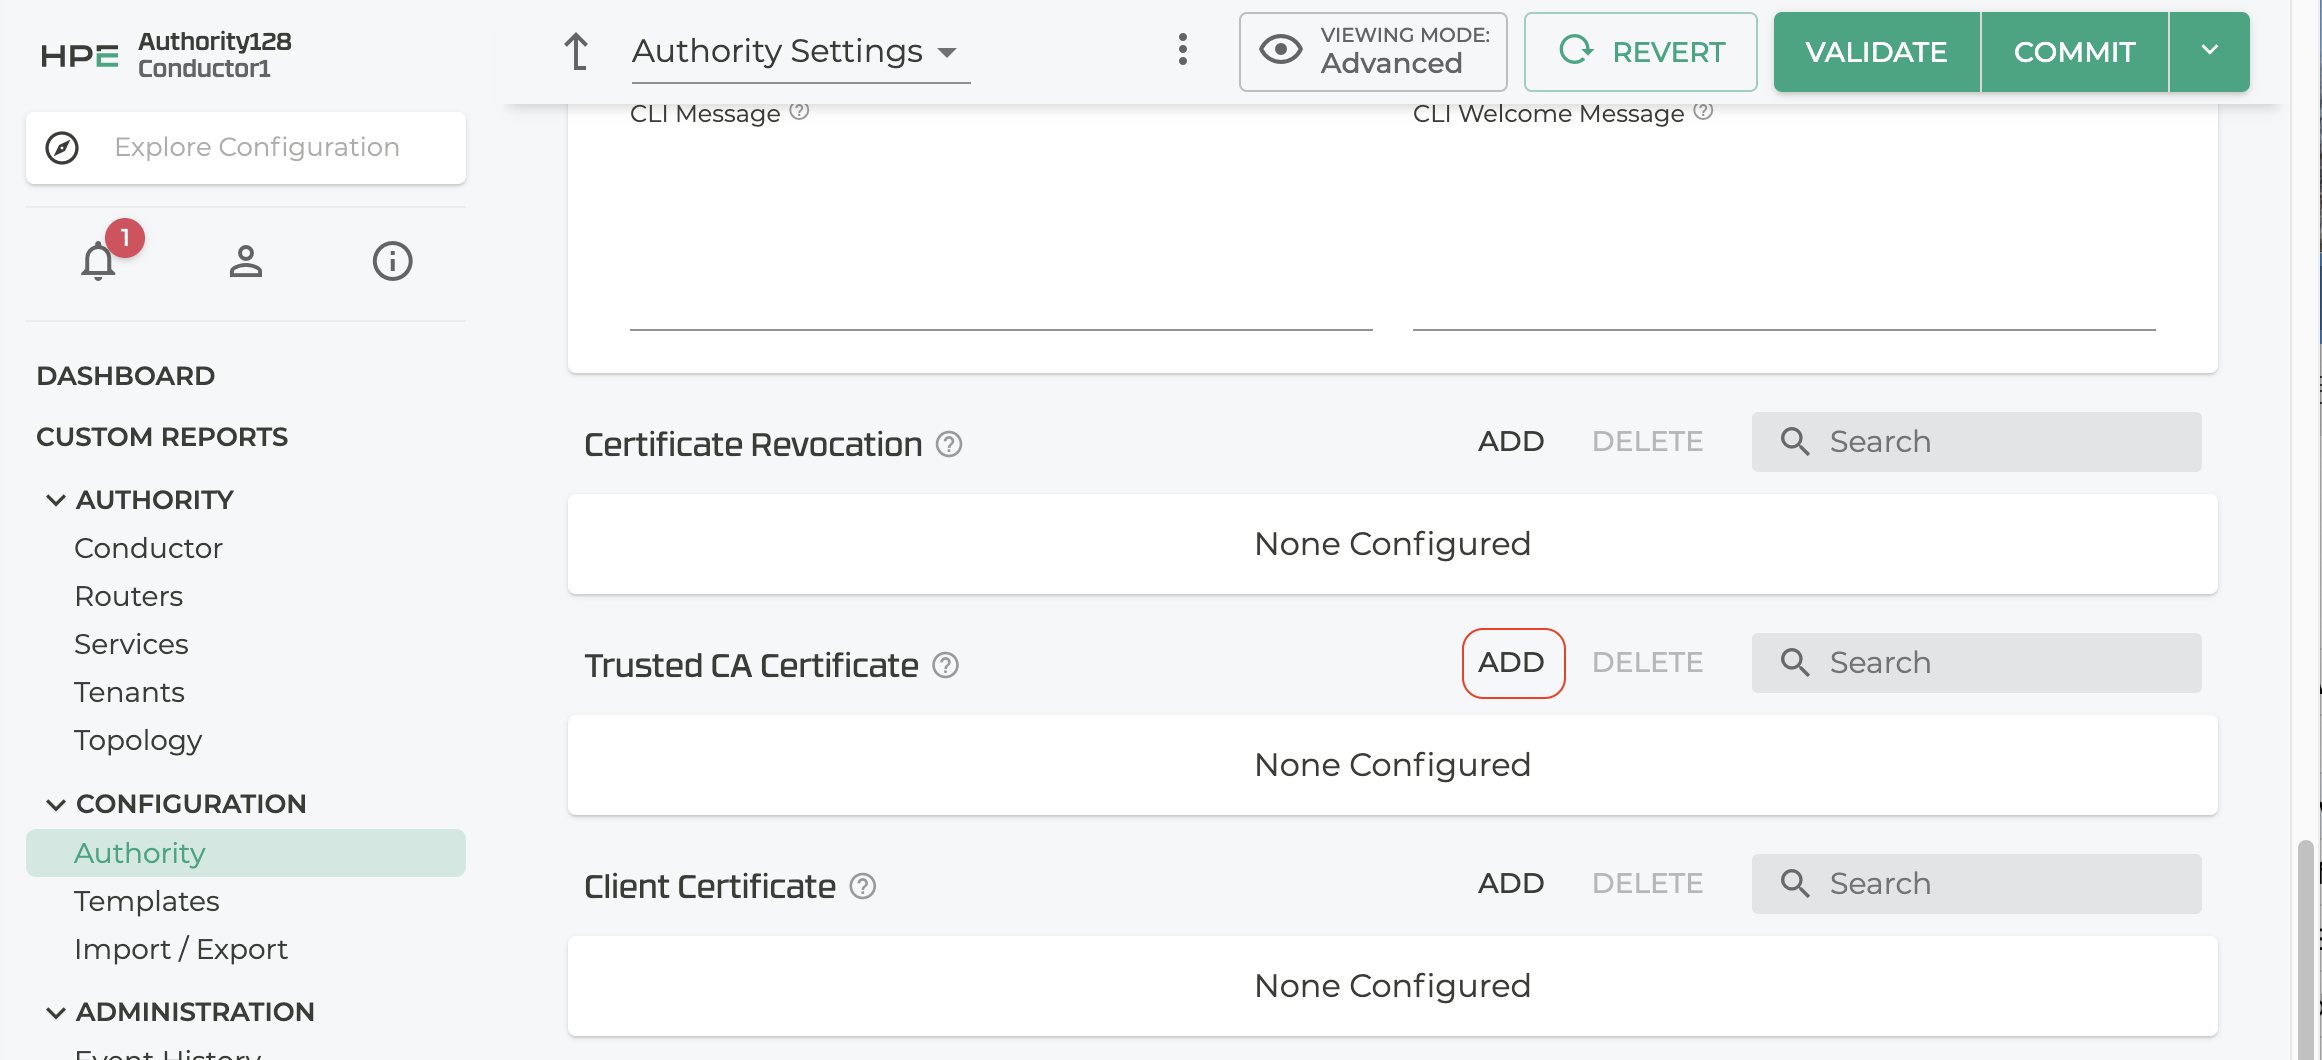
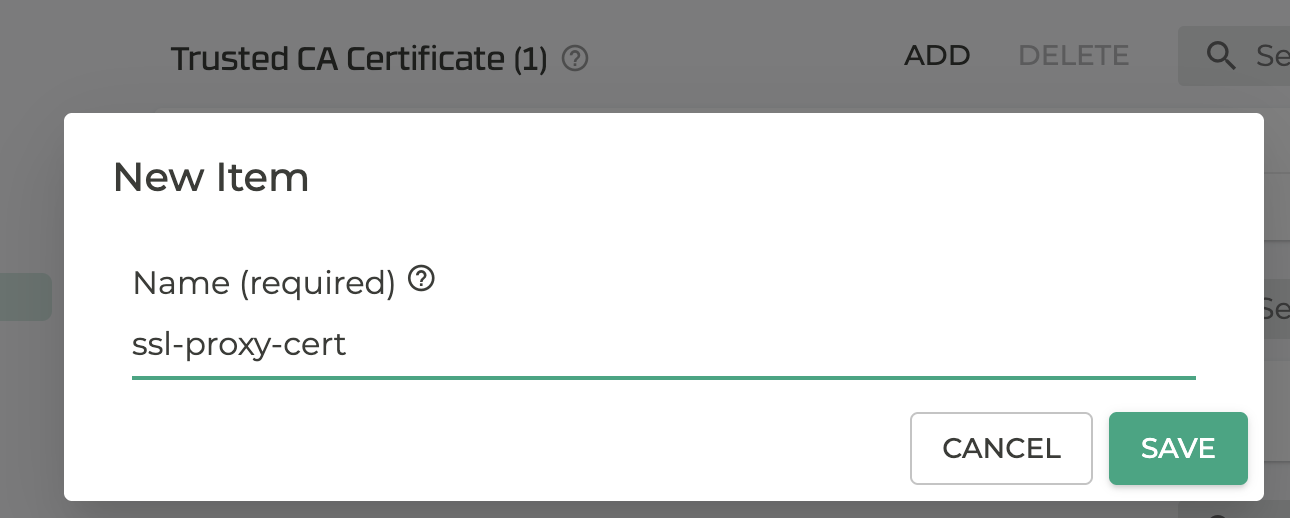
- Enter a name for the certificate and click SAVE.
-
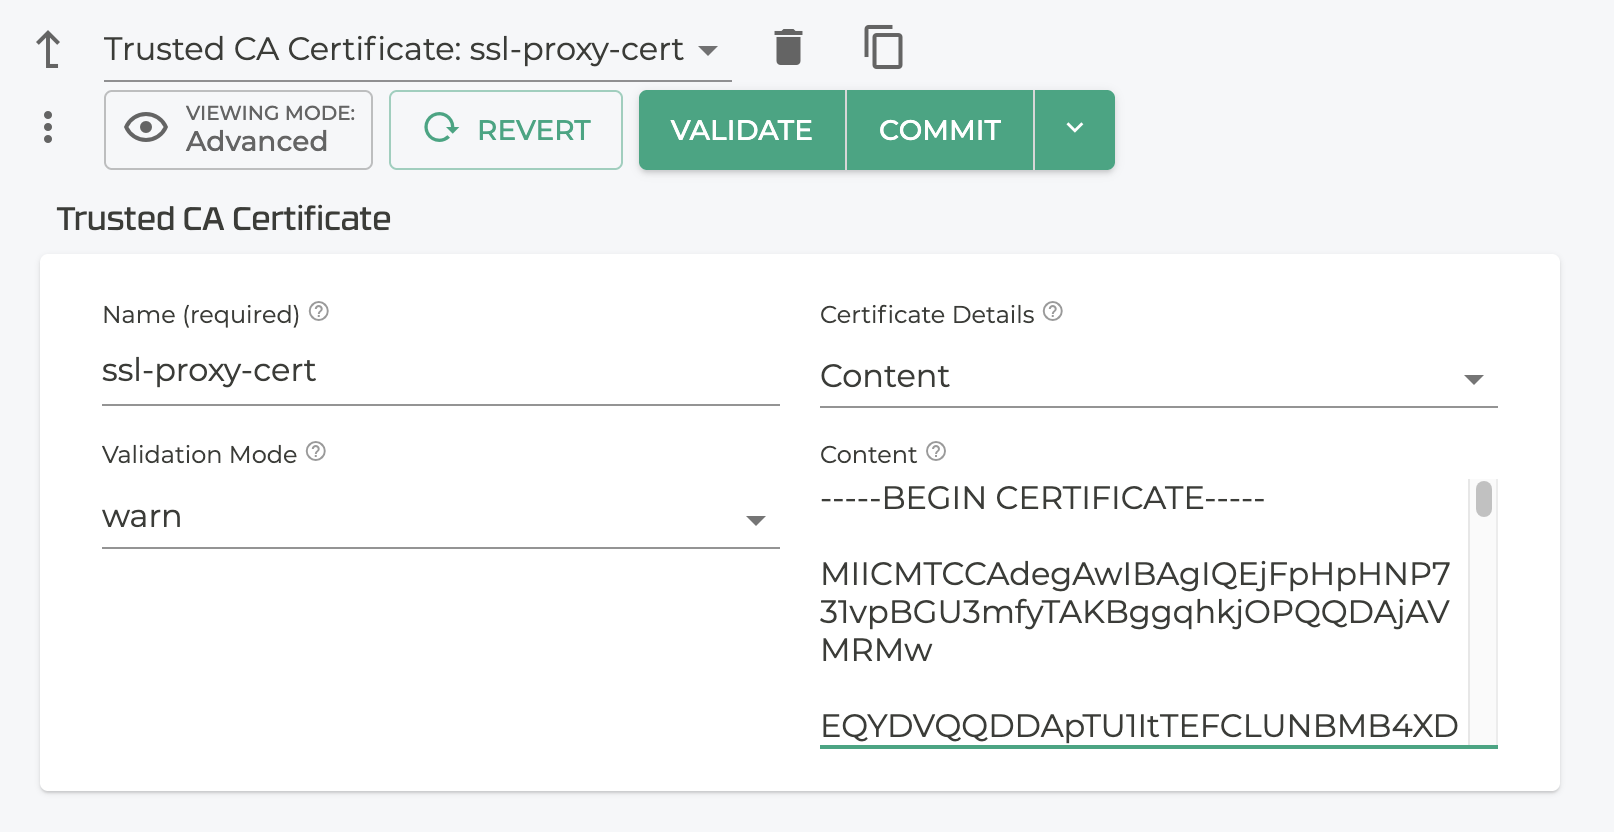
In the Trusted CA Certificate details, under Validation Mode select
warnfrom the drop down. -
Select Content from the drop down under Certificate Details
-
In the Certififcate Content field, paste the contents of the certificate, including the
-----BEGIN CERTIFICATE-----and-----END CERTIFICATE-----lines.
-
Click Validate and Commit.
-
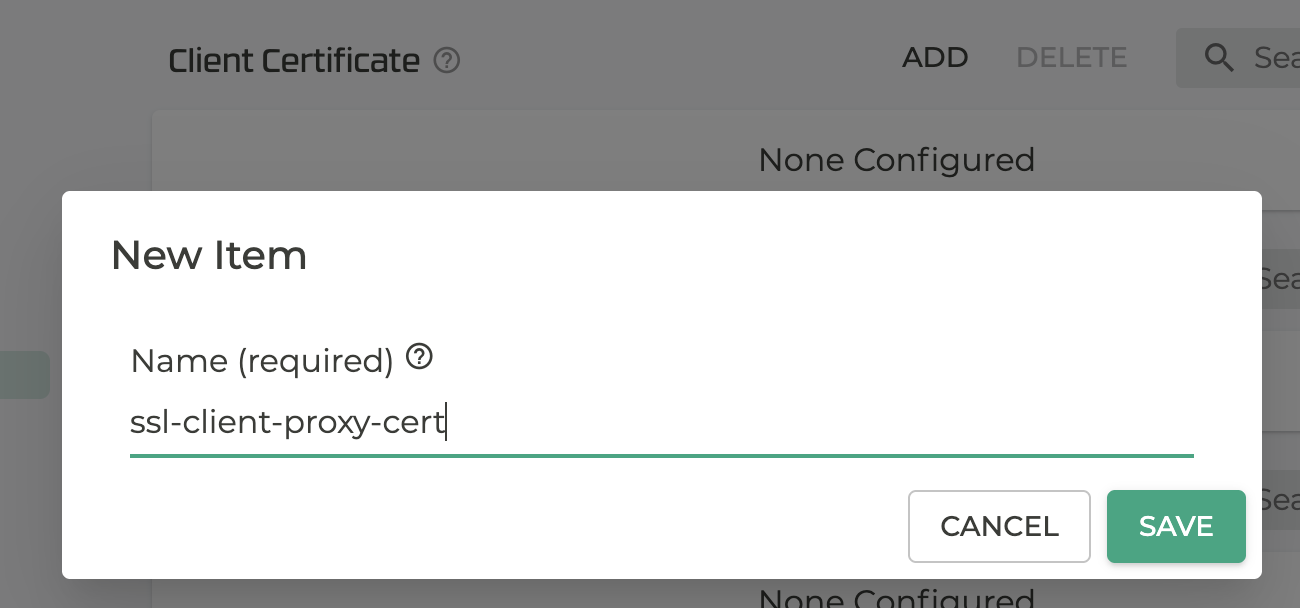
Scroll down to the Client Certificate field below Trusted CA Certificate, and click ADD.
-
Enter a Name for the client certificate.
-
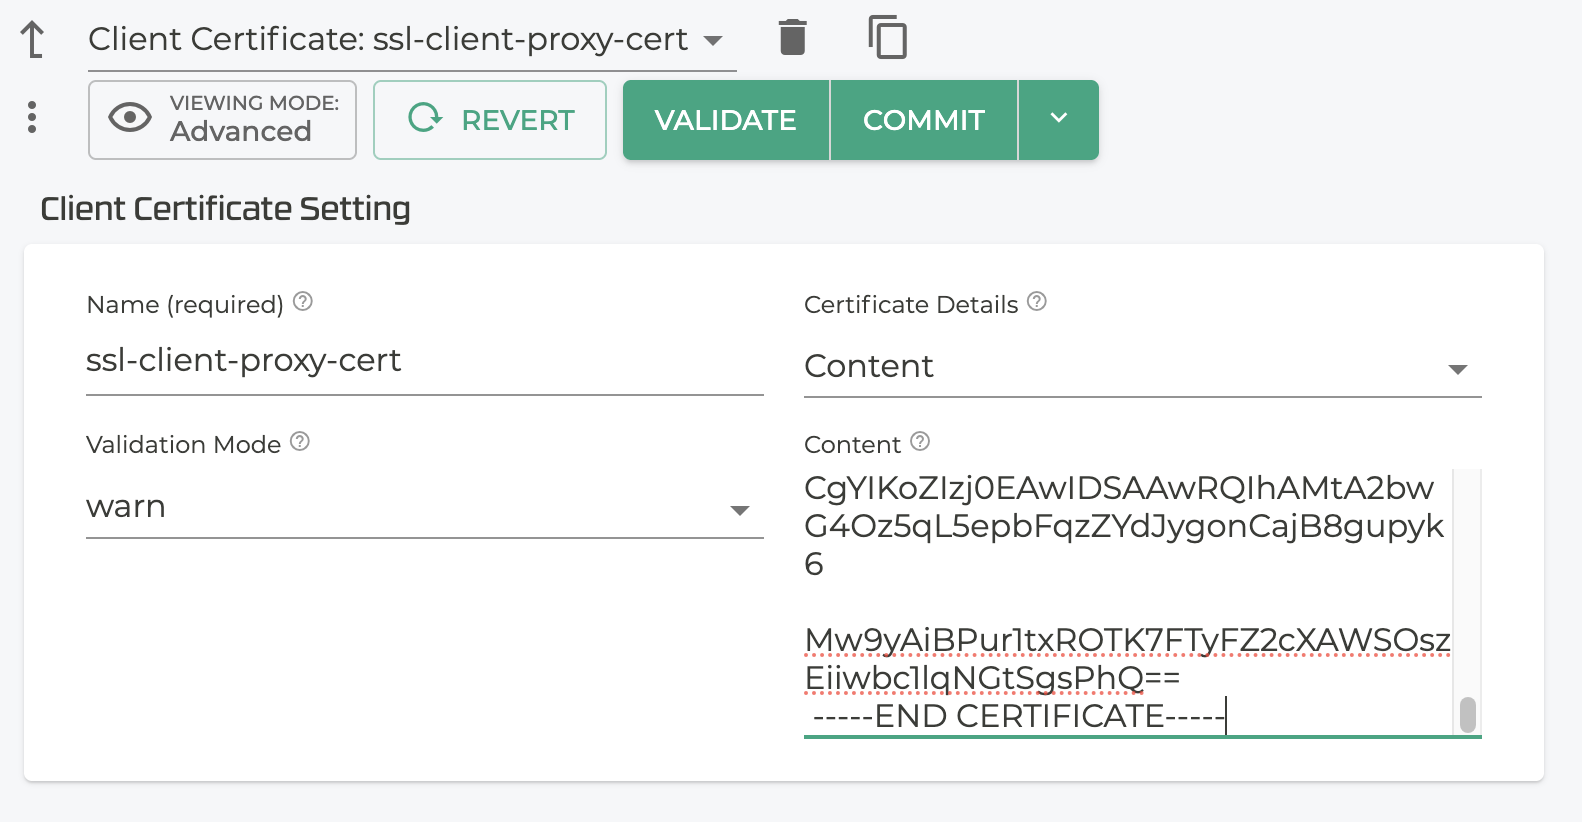
In the Client Certificate details, under Validation Mode select
warnfrom the drop down. -
Select Content from the drop down under Certificate Details
-
In the Certififcate Content field, paste the contents of the certificate, including the
-----BEGIN CERTIFICATE-----and-----END CERTIFICATE-----lines.
Create the Profile
Create SSL-Proxy Profile using the uploaded certificates and other details.
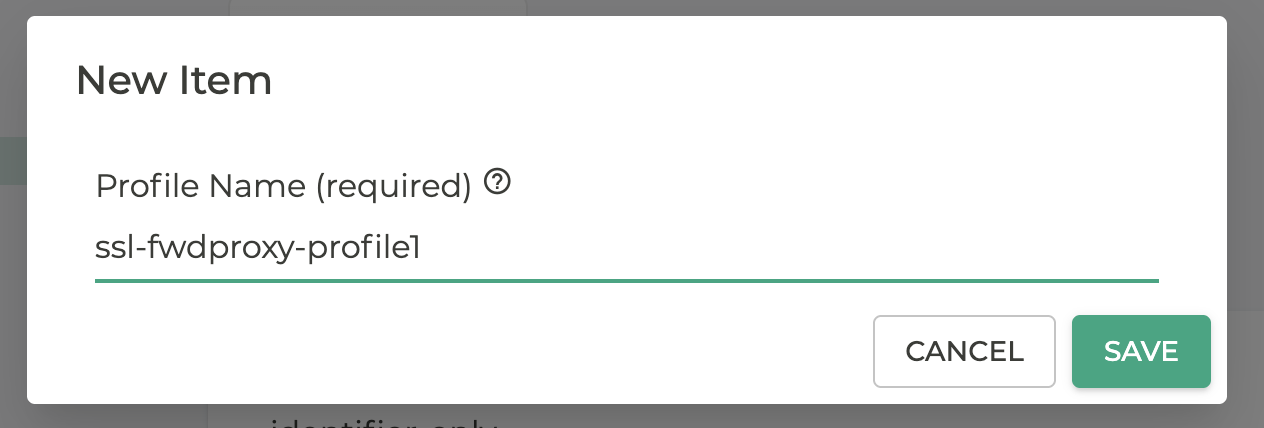
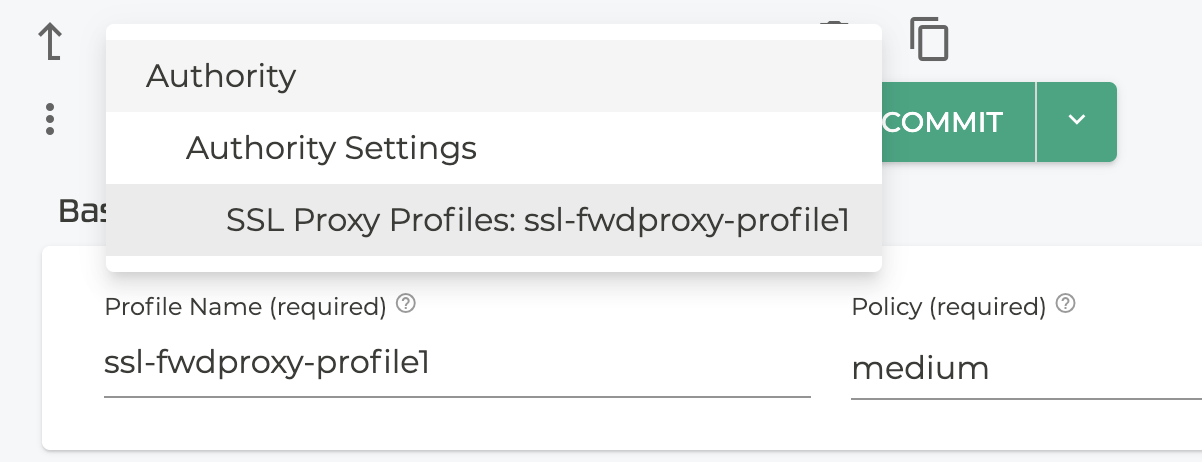
- Scroll down to SSL Profiles and click ADD.

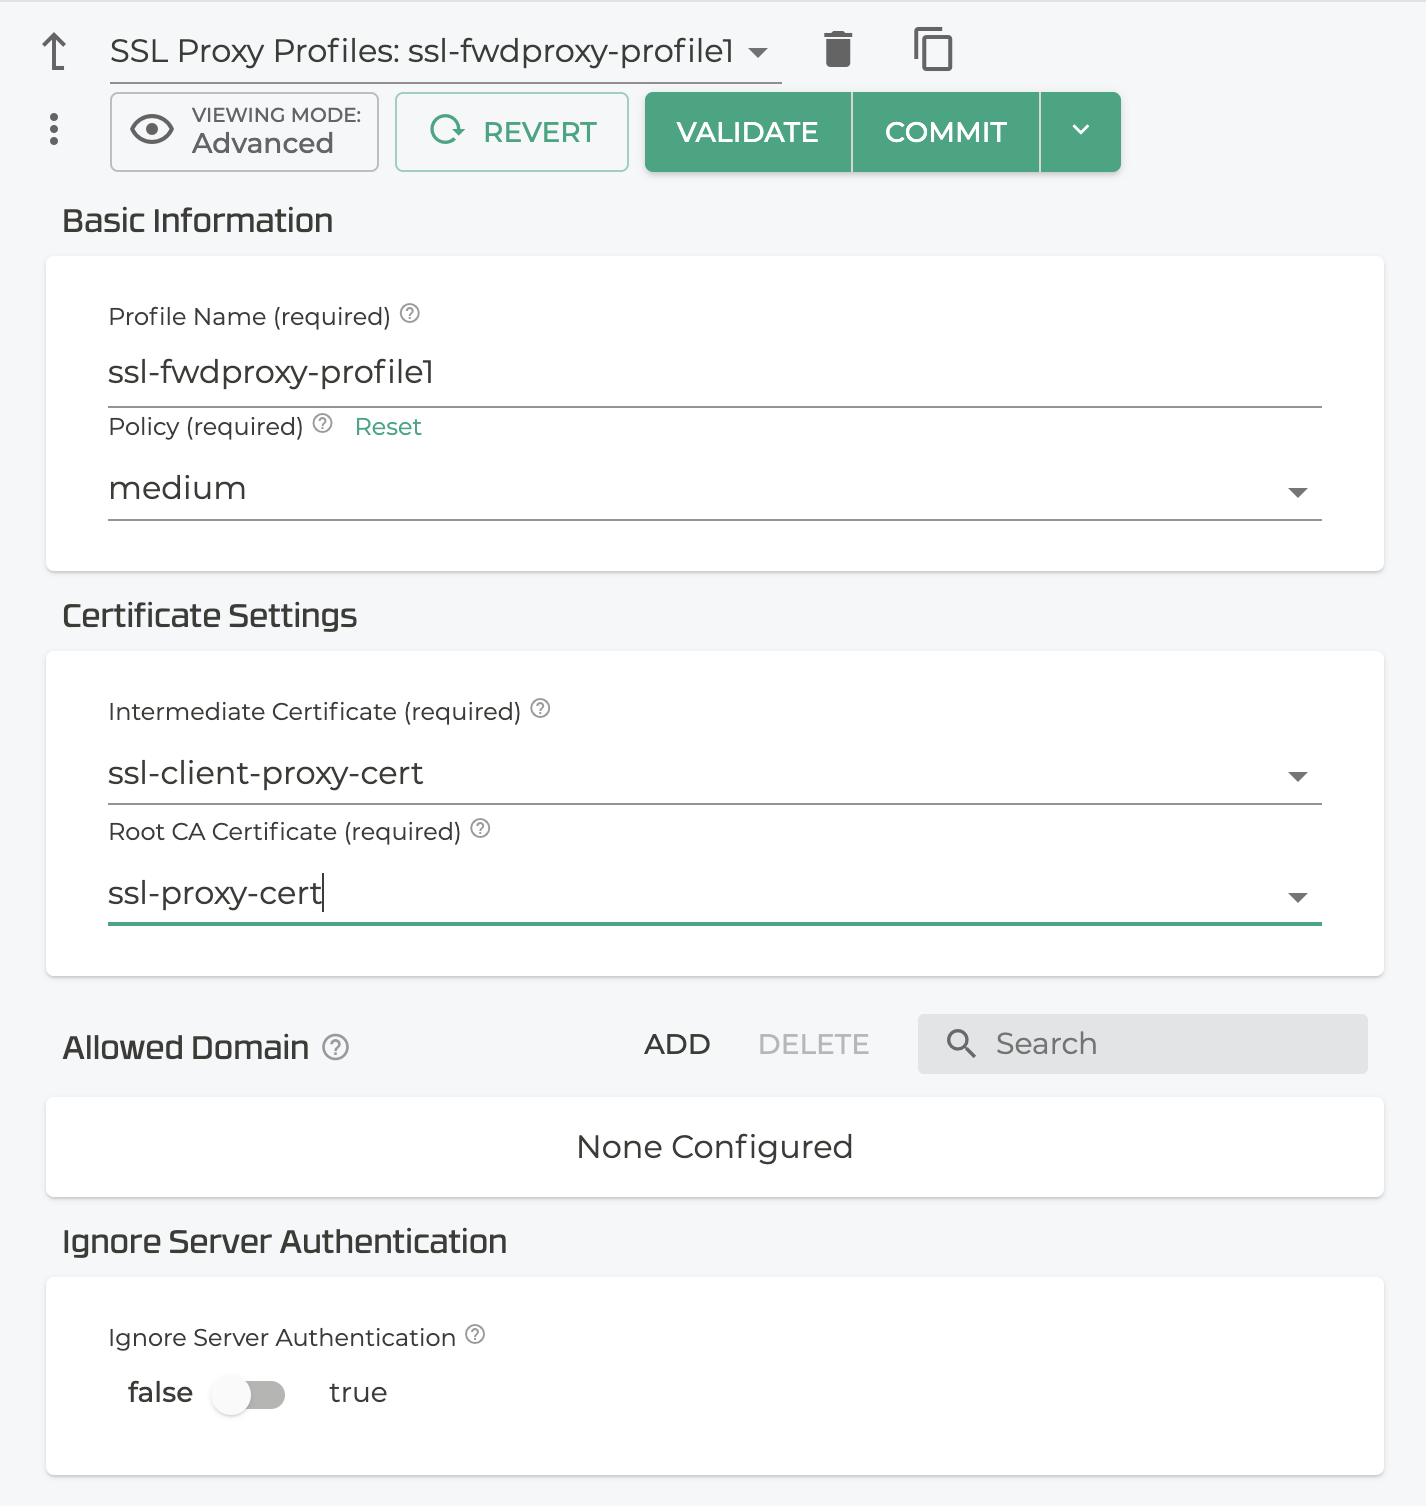
- Enter the profile name.
- In the SSL Proxy Profile screen, select the policy level for the profile, and add the Root CA and Intermediate Certificates. These are available under the drop down for each field.
Add the SSL Profile to the Access Policy
Add the SSL Profile to the Access Policy of the service.
- Return to the Authority level.
-
Scroll down to Services. Select or create the Service that will use the SSL forward proxy.
-
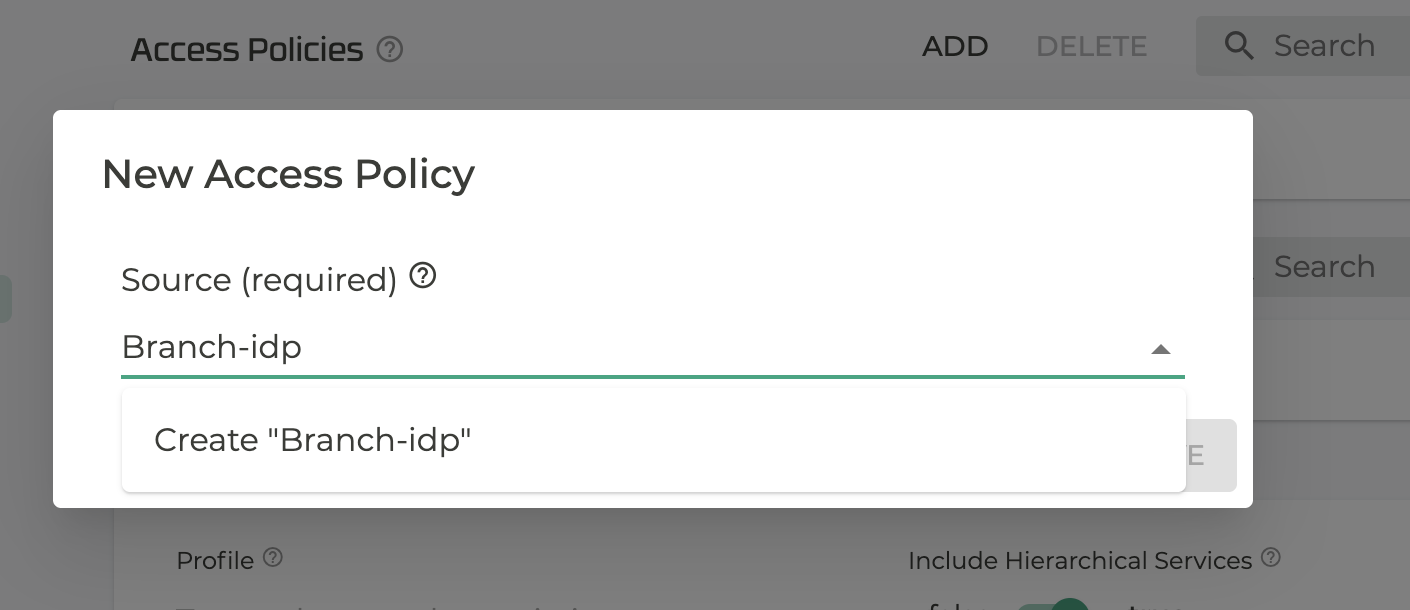
Under the Service, scroll down to Access Policies and click ADD.
-
In the New Access Policy window, enter the Source name.
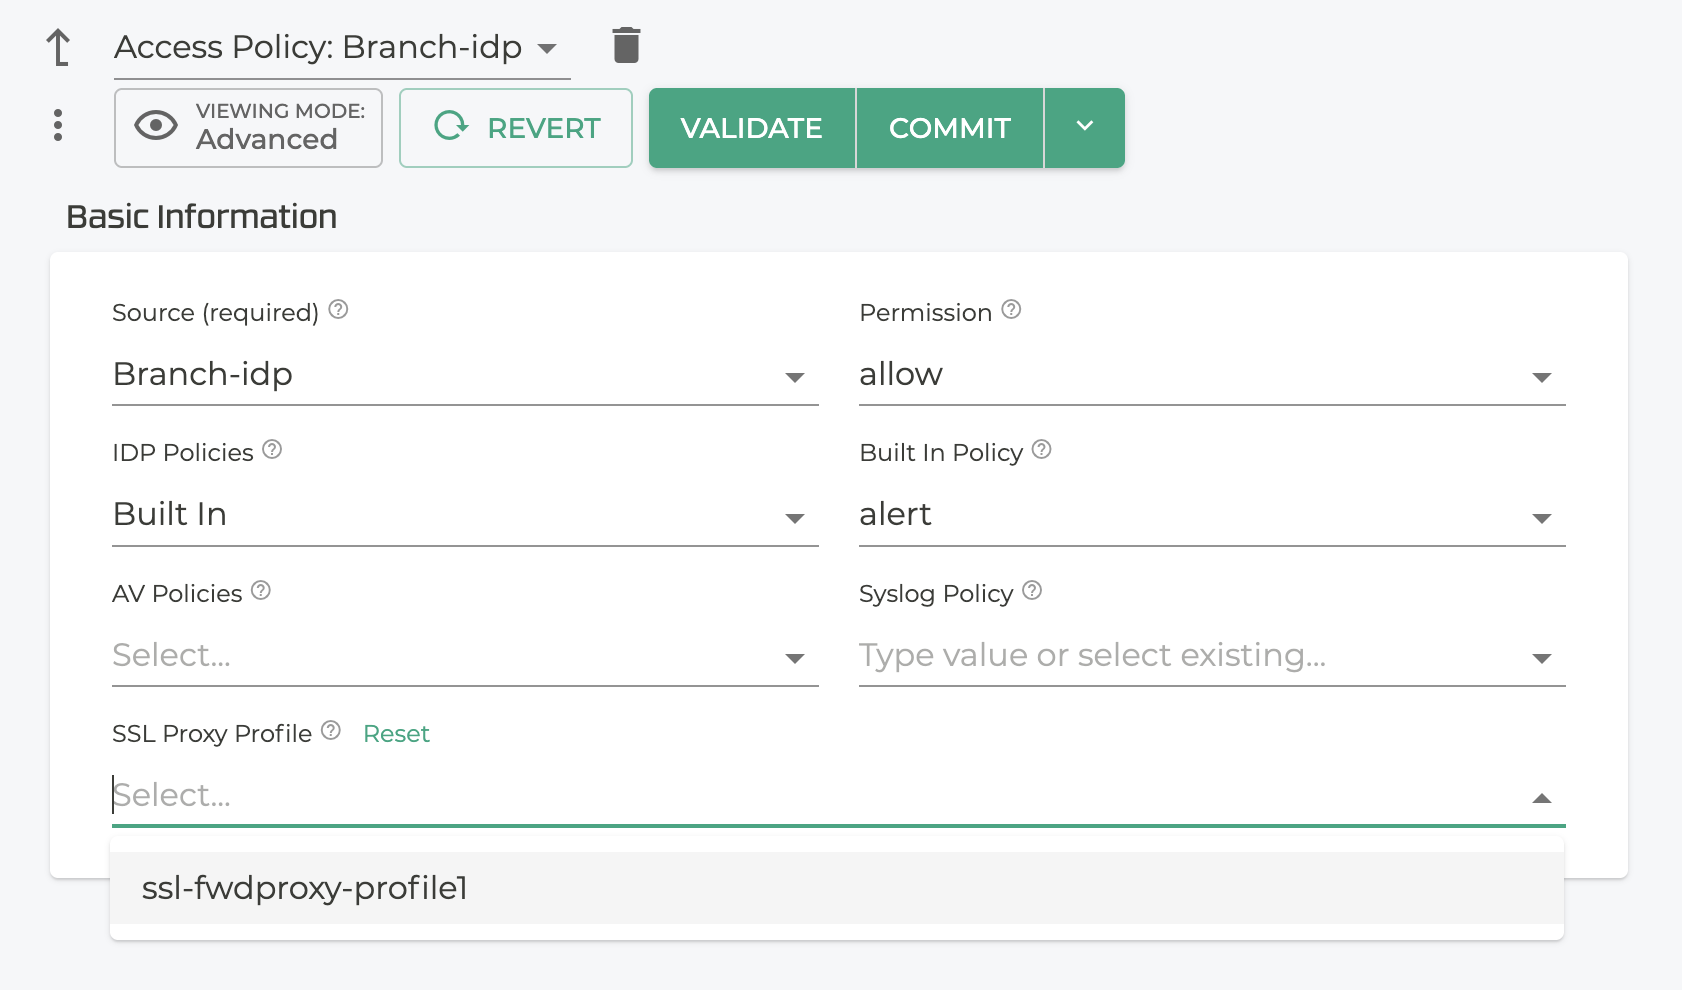
- Define the Access policy to suit your needs, and under SSL Proxy Profile select the proxy profile defined earlier.
-
If the Access policy you want to associate with the SSL proxy profile already exists, select it, and under SSL Proxy Profile select the proxy profile defined earlier.
-
Click Validate, and Commit.
CLI Configuration Example
The following is the above configuration shown in the CLI.
config
    authority
        trusted-ca-certificate      ssl-proxy-cert
            name                    ssl-proxy-cert
            content
                (text/plain)
            validation-mode         warn
		exit

        client-certificate          ssl-client-proxy-cert
            name                    ssl-client-proxy-cert
            content
                (text/plain)
            validation-mode         warn
        exit

        ssl-proxy-profile           ssl-fwdproxy-profile1
            name                    ssl-fwdproxy-profile1
            policy                  medium
            client-certificate      ssl-client-proxy-cert
            root-ca-certificate     ssl-proxy-cert
            ignore-server-authentication    false
        exit

        service                     idp-service
            name                    idp-service
            enabled                 true
            scope                   private

            access-policy           Branch-idp
                ssl-proxy-profile   ssl-fwdproxy-profile1
                source              Branch-idp
                permission          allow
            exit
        exit