Installing in VMWare
This guide describes the process for deploying a Session Smart Conductor or a Session Smart Router (SSR) in VMWare ESXi. The process consists of the following steps:
- Download the SSR package-based ISO. Refer to Downloading ISOs
- Log into VMware ESXi with Administrative rights
- Create a new Virtual Machine and configure
- Boot Virtual Machine to run the Juniper SSR ISO and install software
VMWare Configuration
In order to perform the configuration and installation of the SSR software, you must have a properly installed and working configuration of VMware ESXi. This documentation references VMware ESXi version 7.0.0, however, the software has been tested on earlier versions. Additionally, you must have administrator access to the ESXi platform.
Procedure
-
Log in to your VMWare ESXi instance as the Administrator.
-
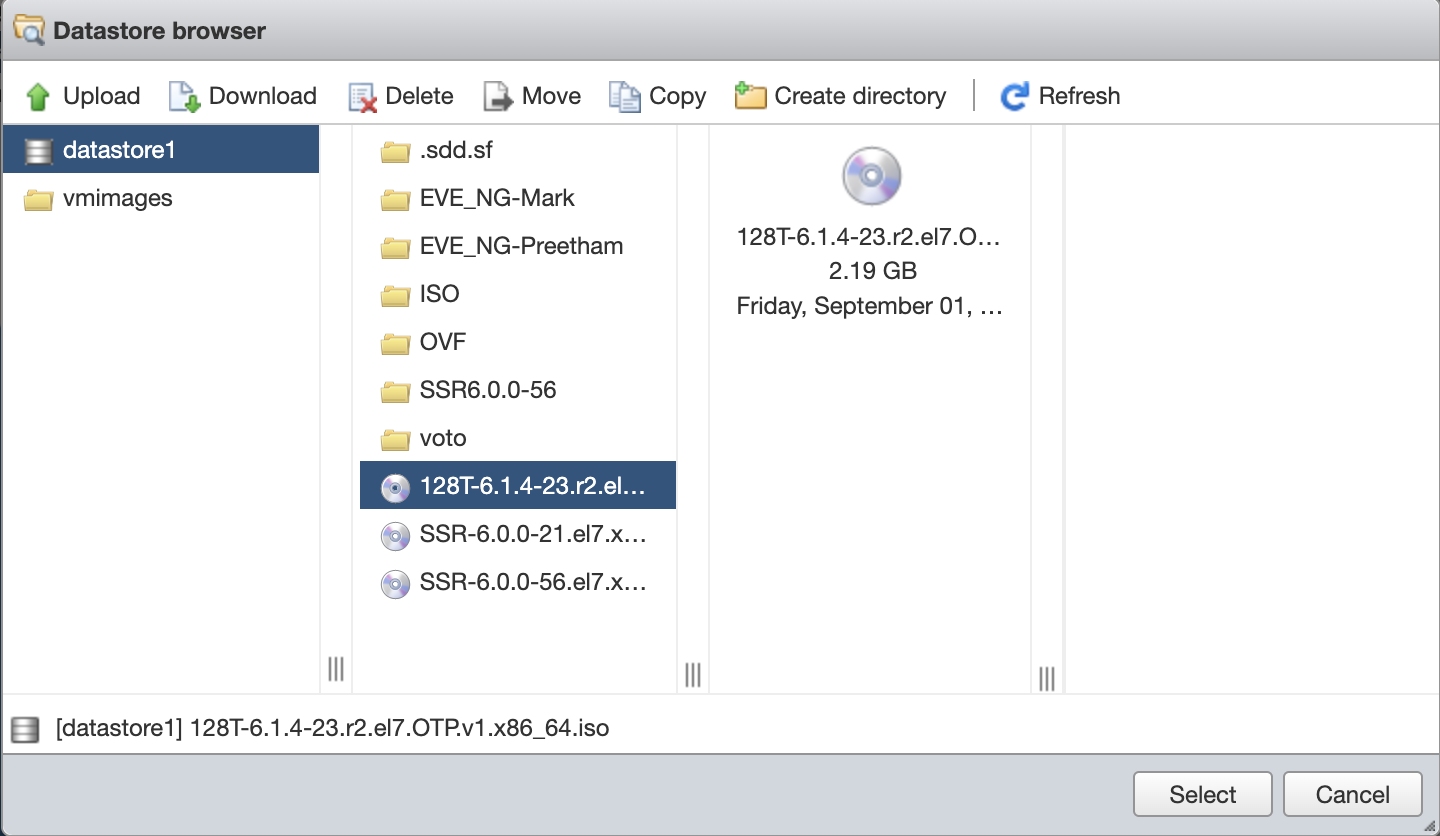
Load the SSR ISO into the ESXi Data Store.
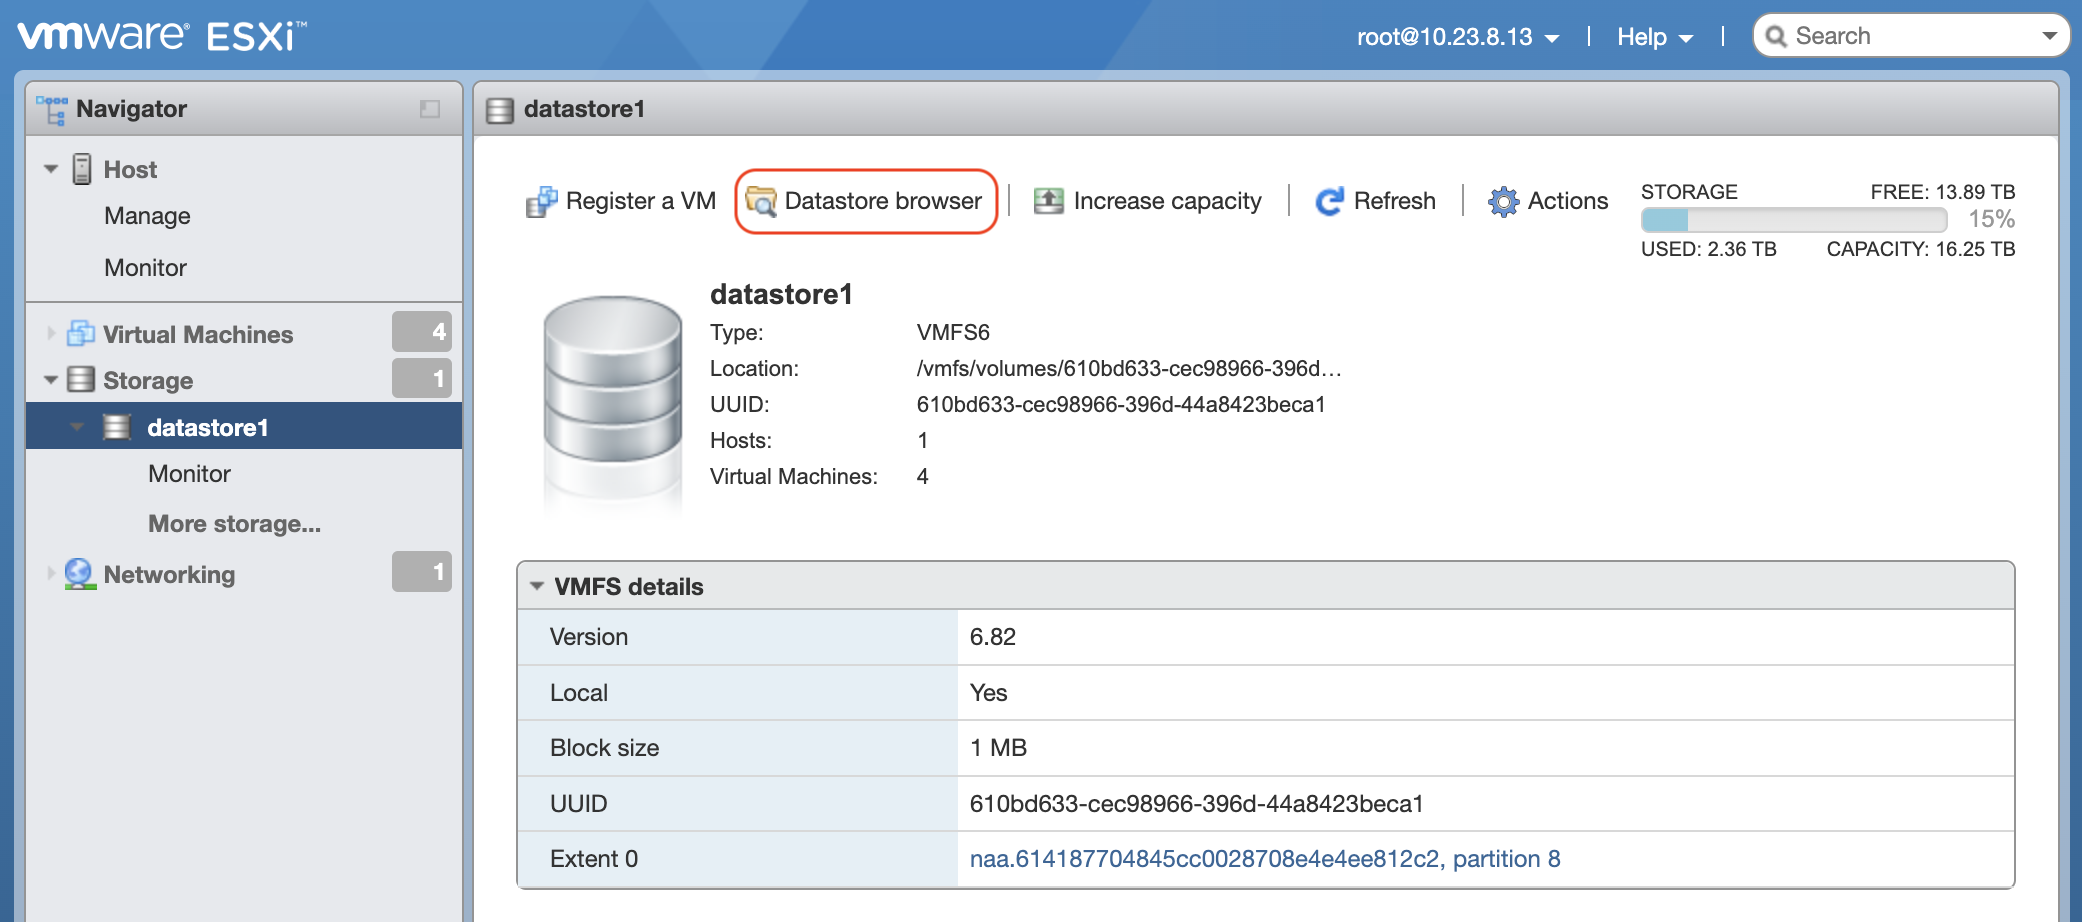
- From the ESXi Navigator in the left hand pane, select Storage.

- Select the Datastore Browser button.
- From the Datastore Browser window, select Upload.
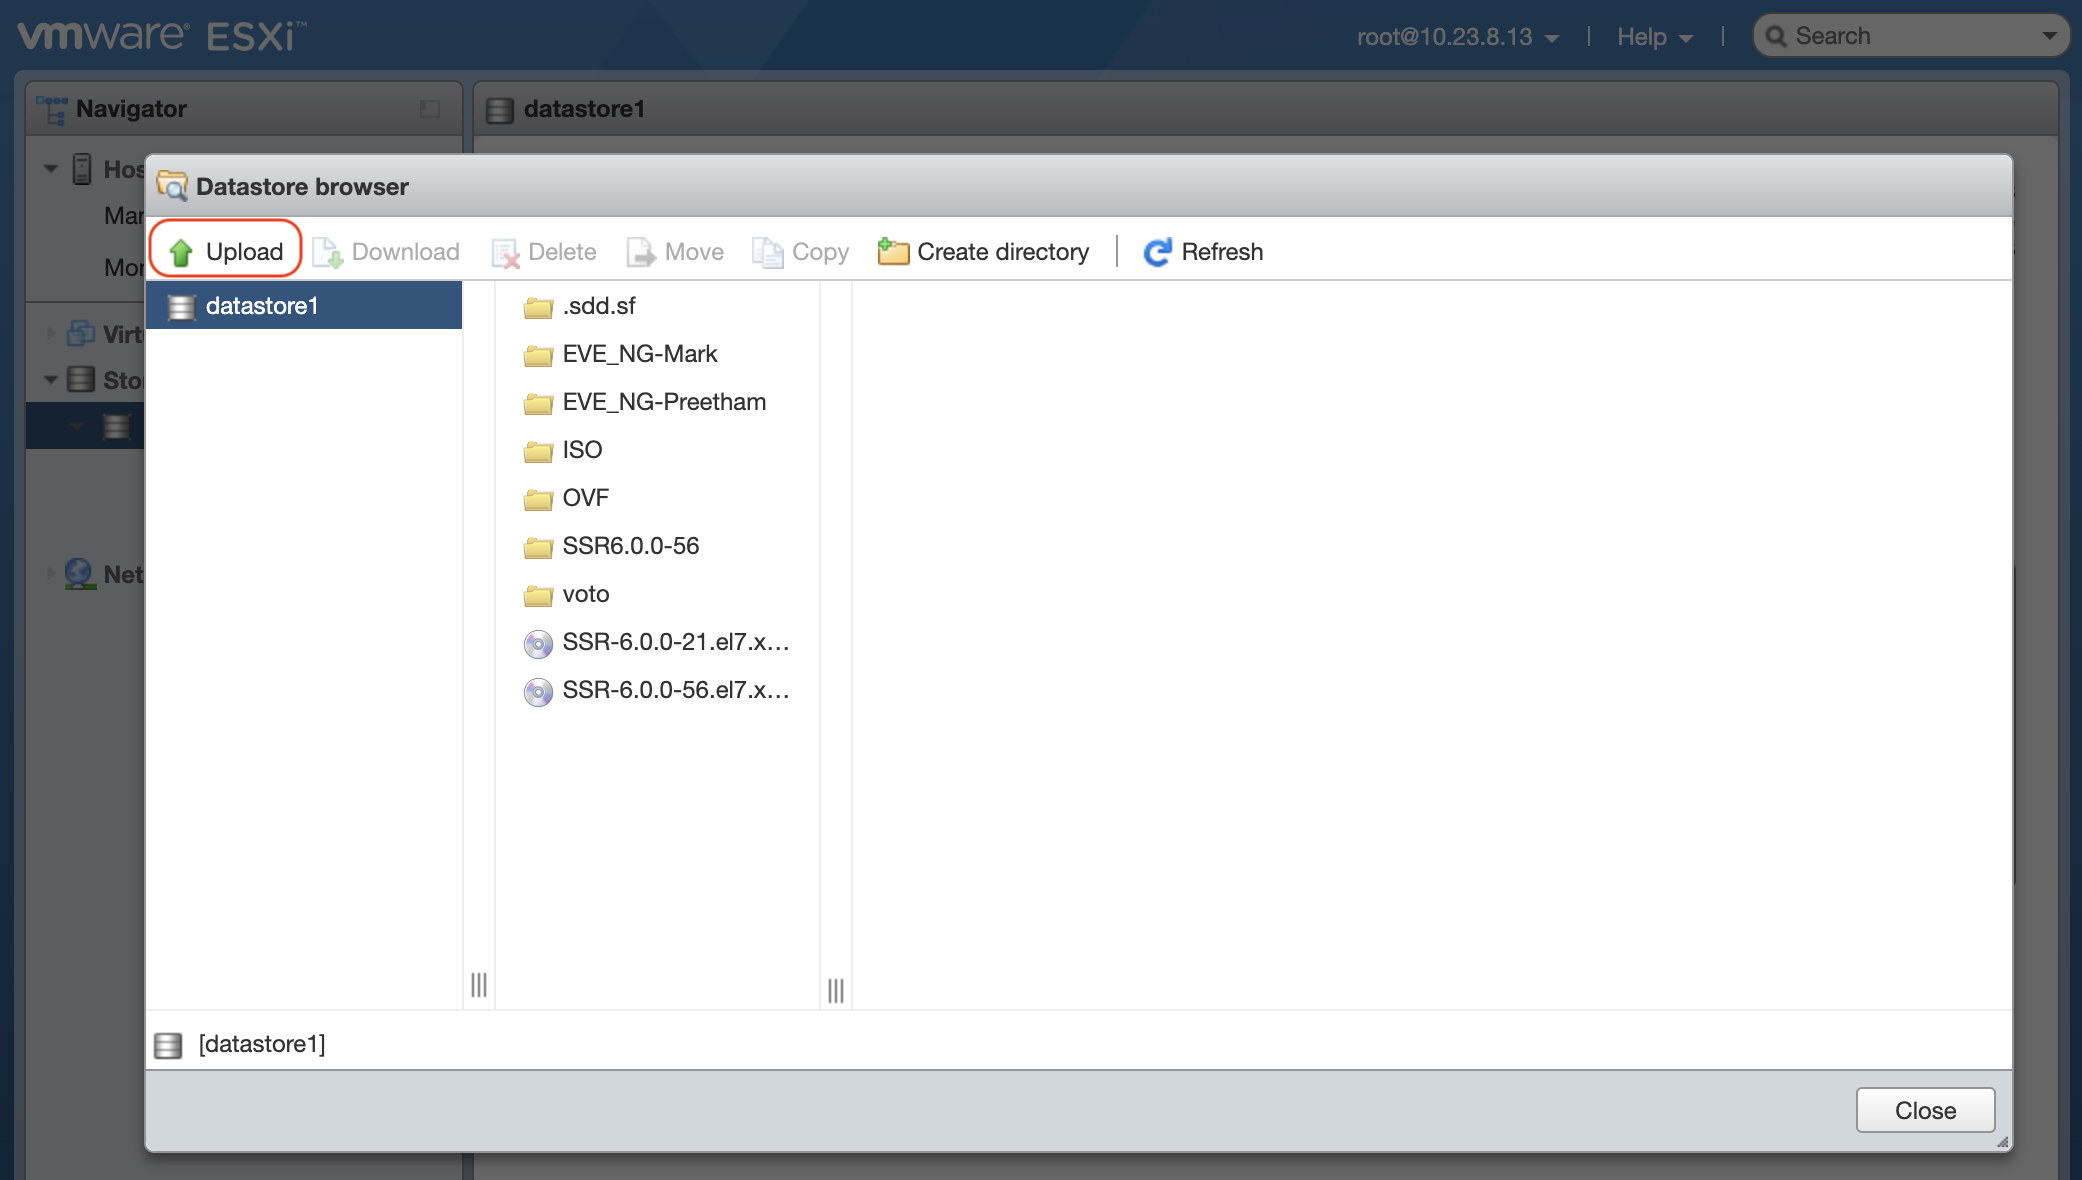
- Navigate to the directory containing the Juniper SSR ISO.
- Select the ISO and click Open. The Datastore browser now shows the ISO.
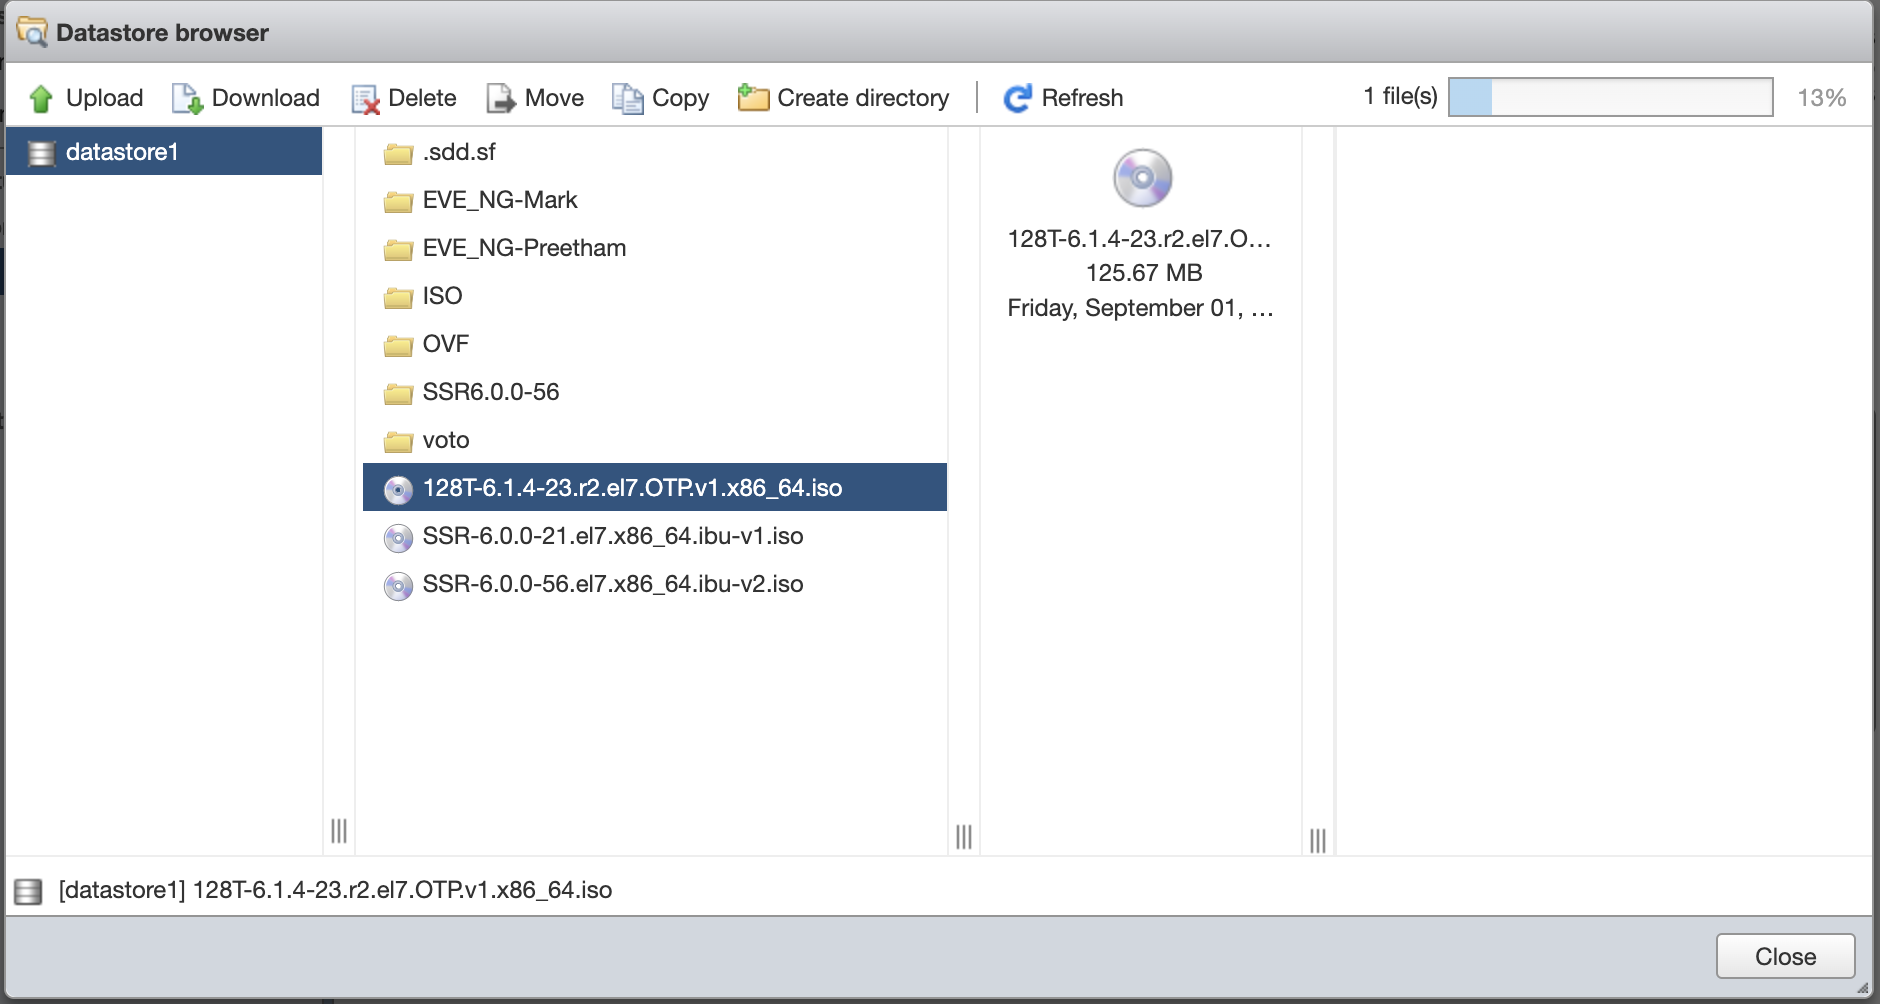
- Click Close to continue.
- From the ESXi Navigator in the left hand pane, select Storage.
-
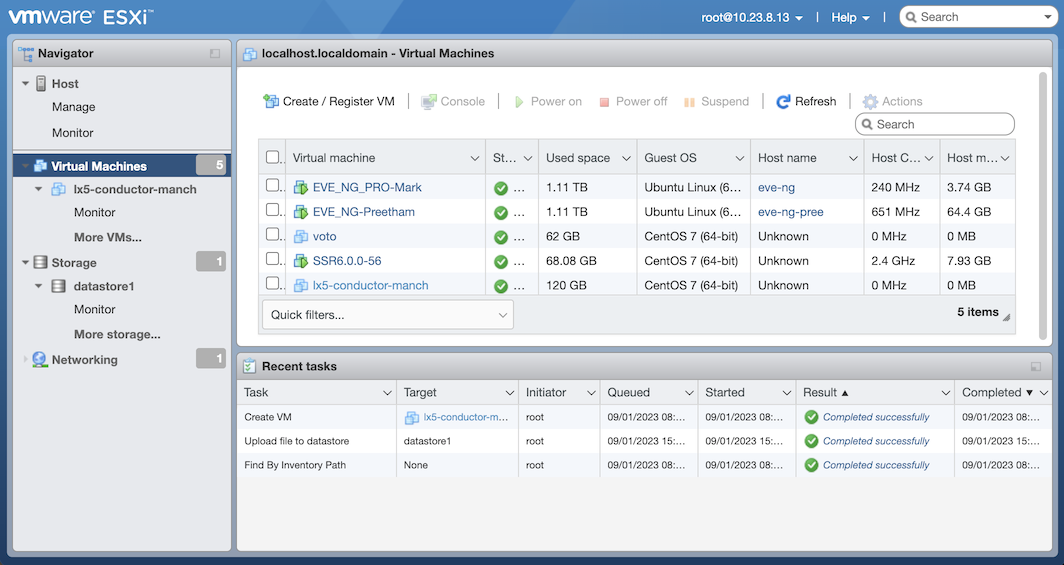
From the ESXi Navigator select Virtual Machines.
Define the Virtual Machine
-
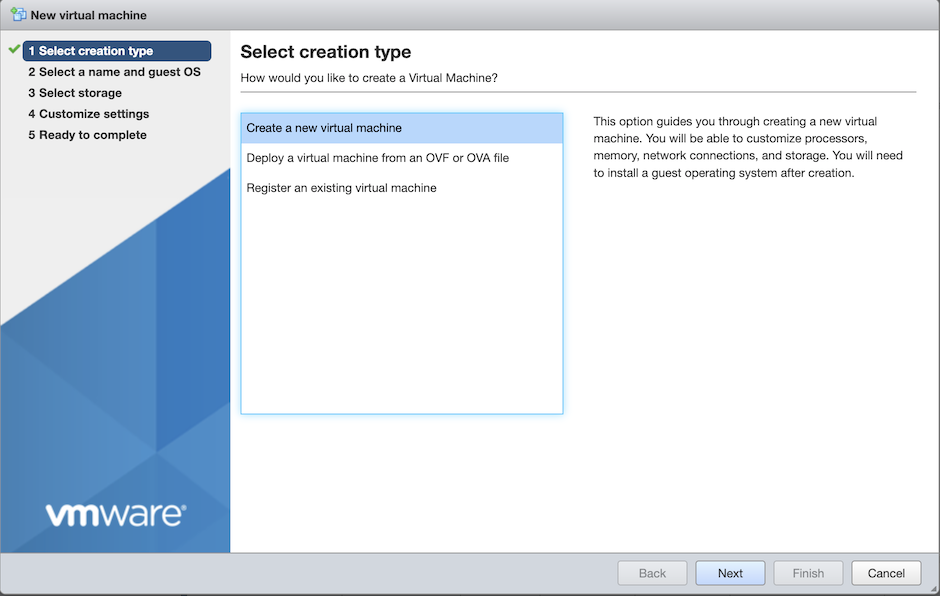
Click on Create / Register VM.
-
Select Create a new virtual machine and click Next.
Virtual Machine Name and OS
-
Enter a name for the virtual machine. The name should indicate whether the instance is a router or conductor, and provide other information such as the physical location.
-
Set compatibility to ESXi 7.0 U2 virtual machine.
-
Set the Guest OS family to:
Linux. -
Set the Guest OS version to:
CentOS 7 (64-bit)and click Next.
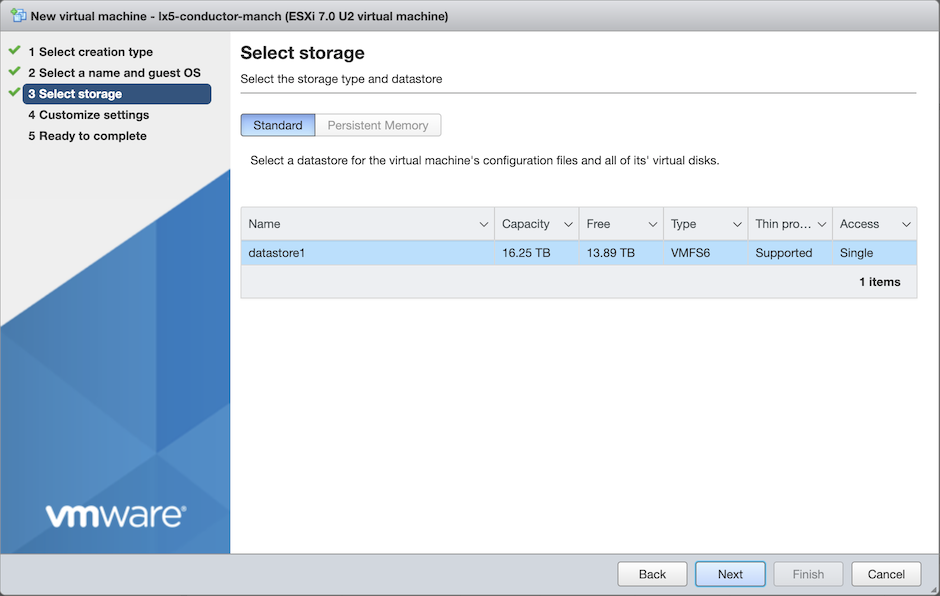
Storage Type
-
Select the storage type and datastore to be used and then click Next.
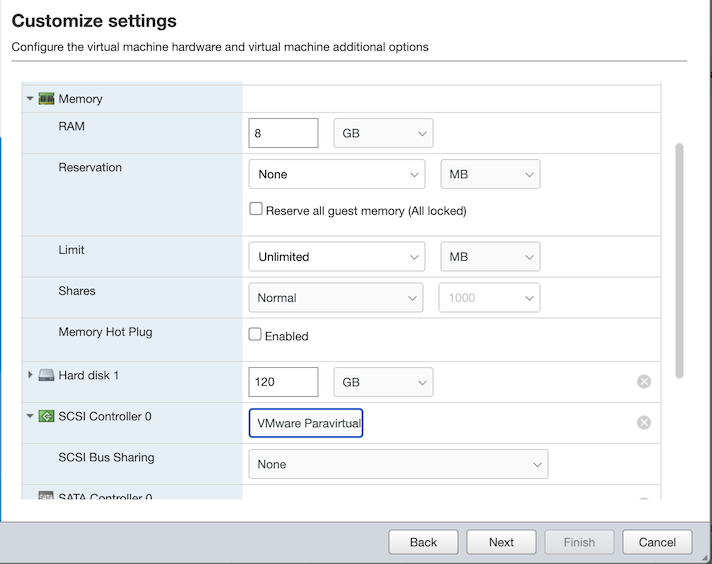
Customize Settings
-
Select Virtual Hardware.
-
Expand the CPU selection, and configure the following settings. Refer to the Minimum Platform Specifications and the Scaling Guidelines for additional requirements.
- Set the number of CPU’s to at least 4.
- Update the Scheduling Affinity to
0-3.
Close the CPU list and configure the following under Virtual Hardware:
- Set memory to a minimum of 8GB.
- Set hard disk 1 to a minimum of 60GB.
- Set the SCSI Controller 0 to
VMWare Paravirtual.
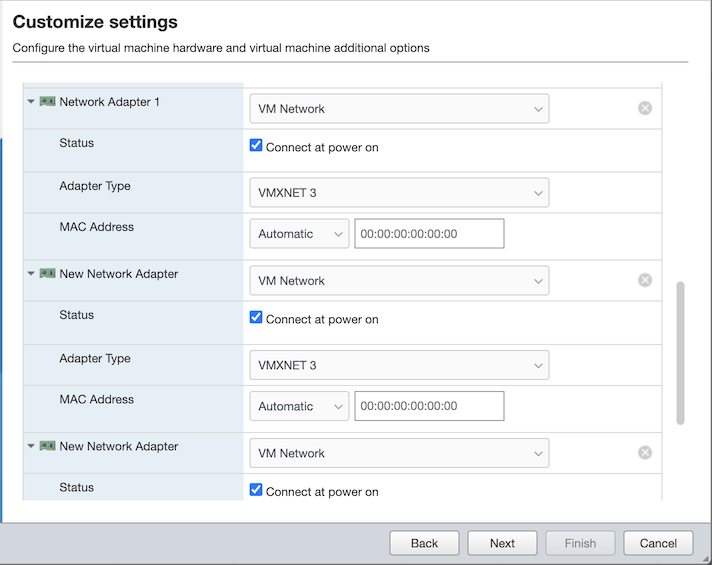
Configure Network Adapters
-
Click the Add network adapter button twice to define three network adapters. It is a best practice to have a minimum of three network adapters available. Configure as many as necessary for your deployment.
- Expand each network adapter by clicking the small triangle and set the Adapter Type on each network adapter to be VMXNet3.
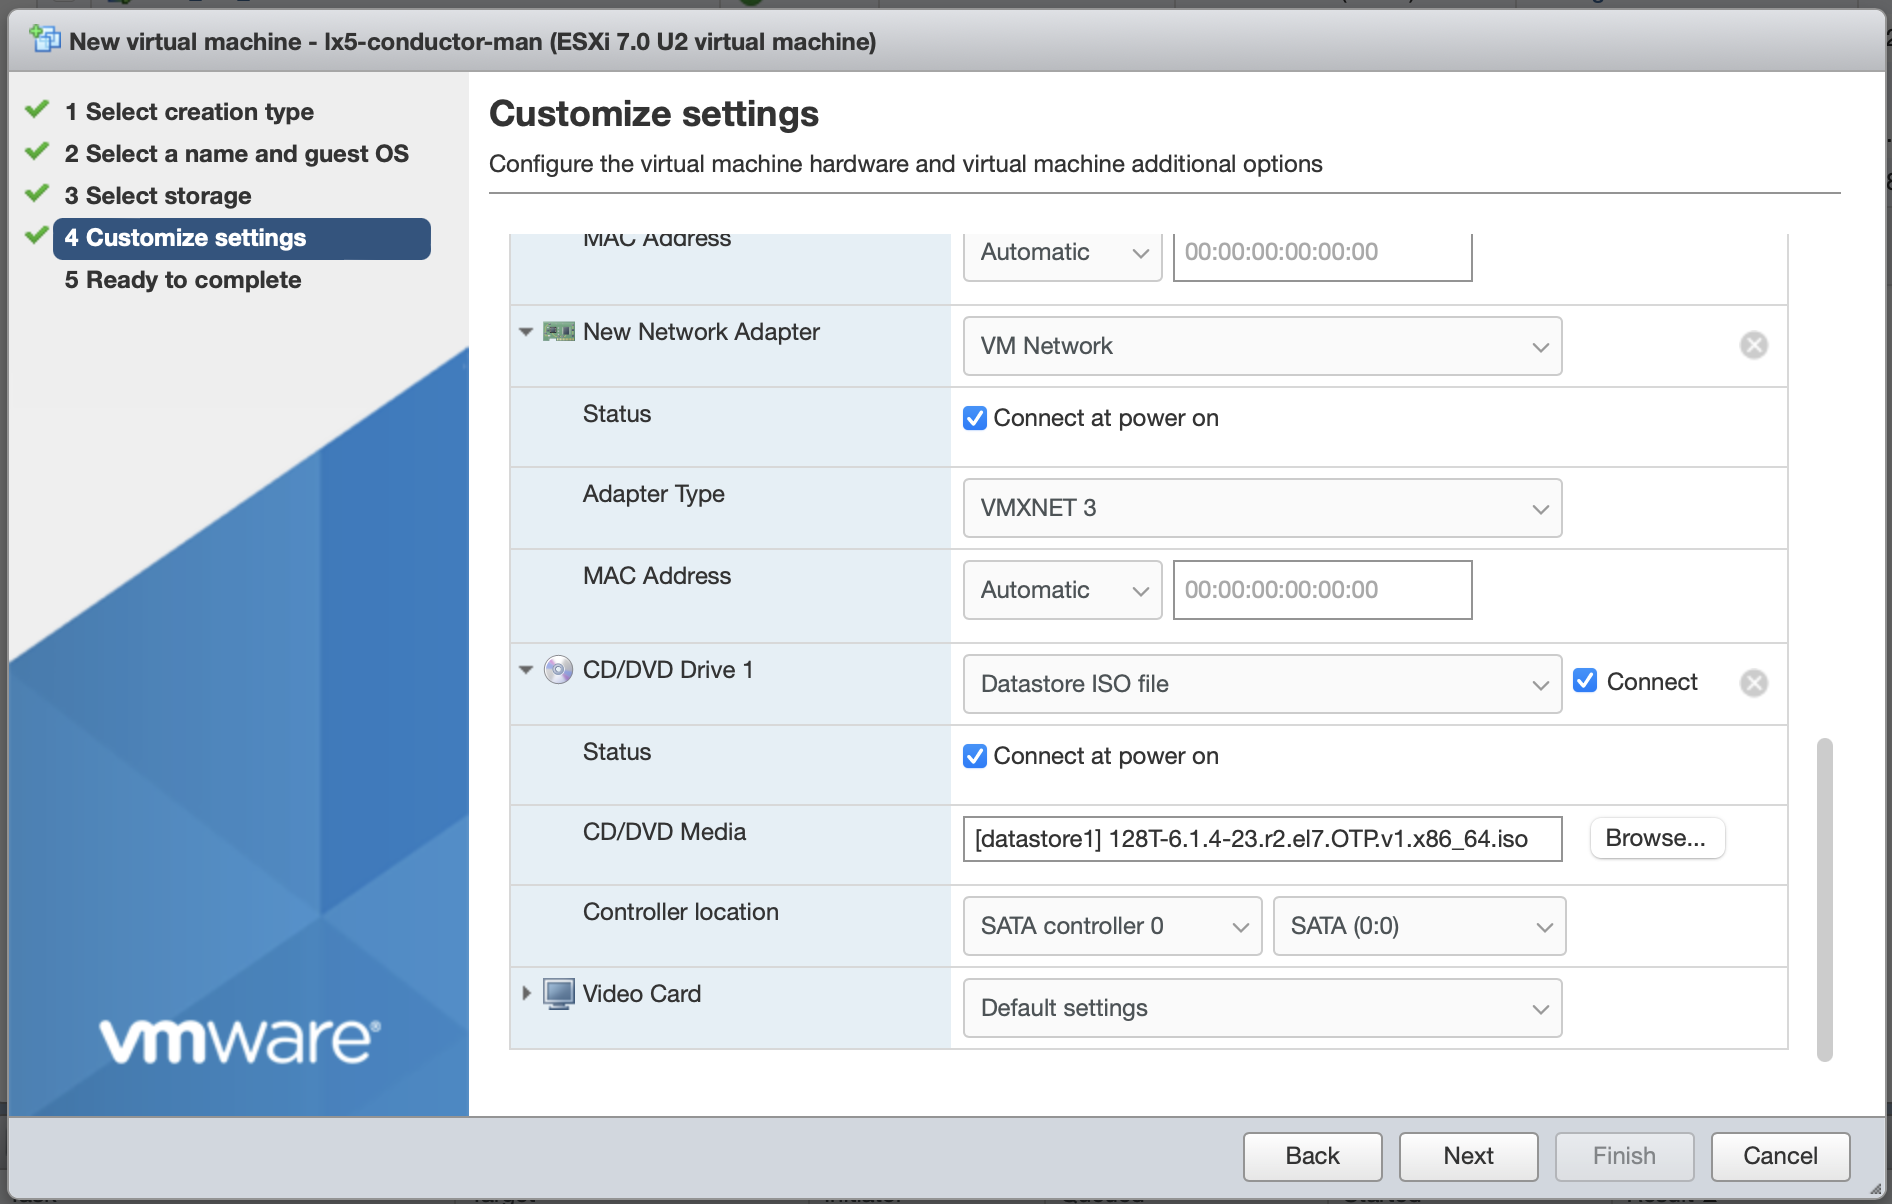
Configure the CD/DVD Media (ISO)
-
Expand the CD/DVD Media selection.
-
In the CD/DVD Drive 1 dropdown, select Datastore ISO file and select Connect. The Datastore browser appears.
-
Choose the SSR ISO file you uploaded earlier, and click Select.
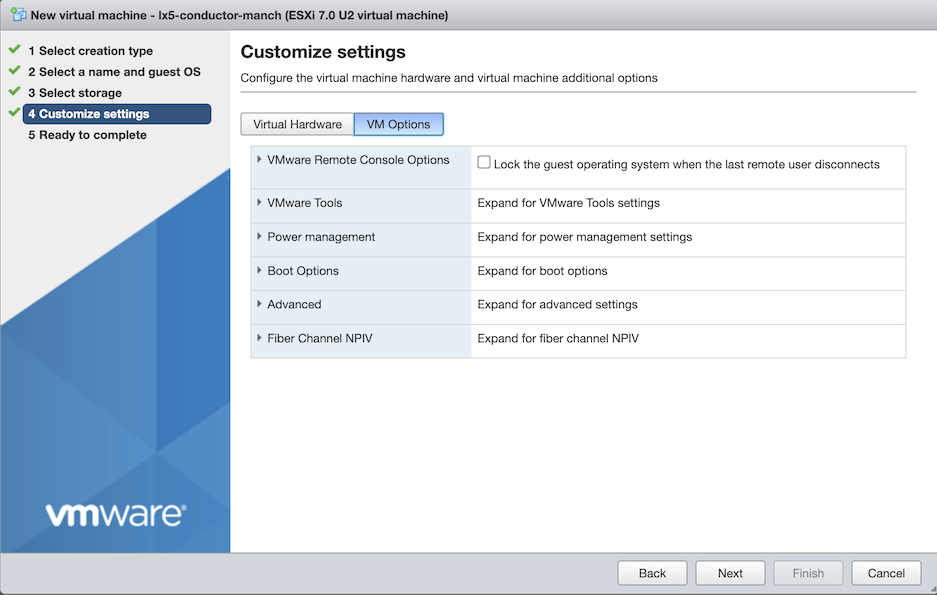
Configure VM Options
-
Click on the VM Options button at the top of the screen.
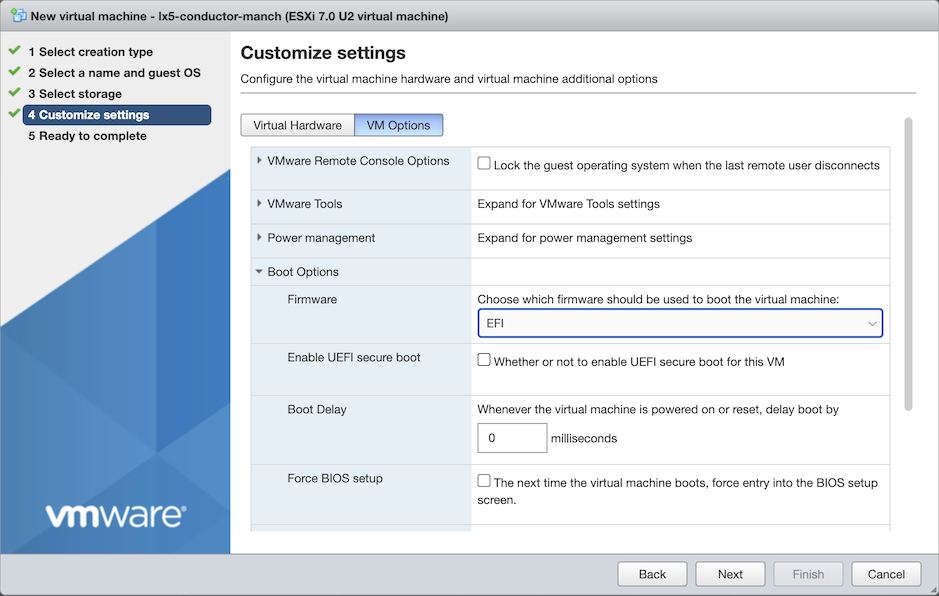
-
Expand Boot Options.
-
Set firmware to EFI.
-
Disable Enable UEFI secure boot (no check mark).
-
Click Next.
Ready to Complete
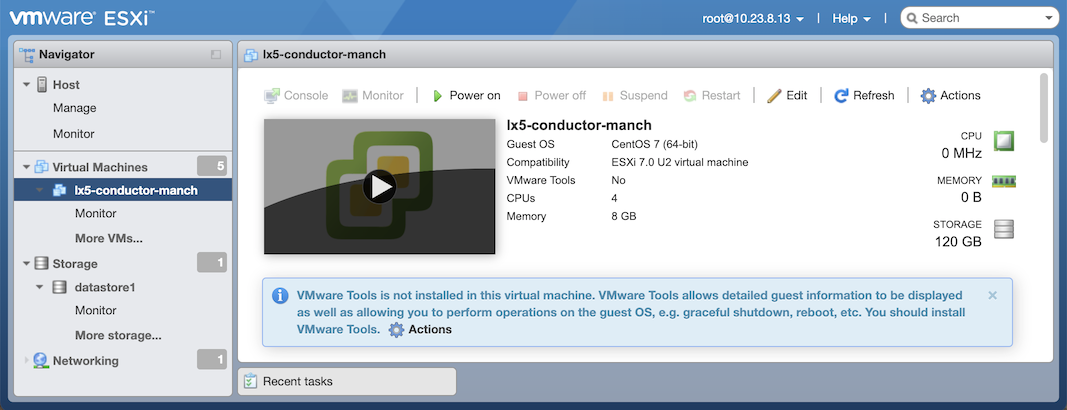
Take a minute to review the summary of the new virtual machine configuration. Verify all settings. Click Back if you need to modify anything. If everything is correct, click Next to finalize the setup of the new virtual machine.
Launch the VM and Begin the Install
After creating a new virtual machine, the screen returns to the VMware navigator.
Ensure that the new virtual machine is selected and click the “Play” icon or the “Power on” button.
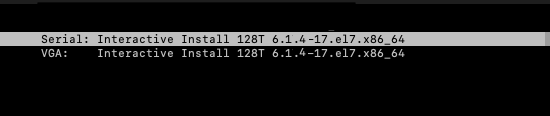
The virtual machine boots into the Juniper Install menu. Click in the Play window to expand it, and click in the window to activate the up and down arrows. Use the arrows to select VGA: Interactive Install 128T (your version number). If you do not make a selection, the system will default to booting into the Serial Console mode.
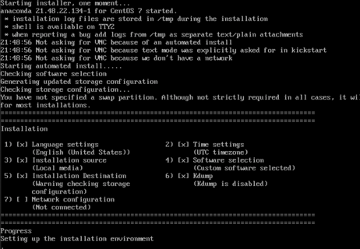
During the install process, the status is displayed on the screen.
After the Linux installation completes, the SSR software installation begins. Note that this may take several minutes to complete (approximately 20 minutes). After the installation has completed, the following screen is displayed: Select “Yes” and press enter.
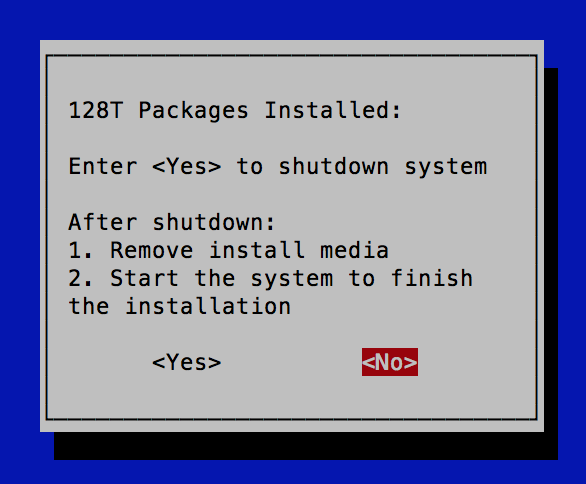
If the Installed Packages screen does not automatically display, select the window and press the Enter key.
Initial Boot and Next Steps
From the VMware Navigator, select the new virtual machine and click the Play icon or the Power on button to launch the virtual machine.
When the system boots from the Install 128T Routing Software... Interactive Installation work flow, the system asks whether to configure initial Linux Networking before the SSR Initializer is started.
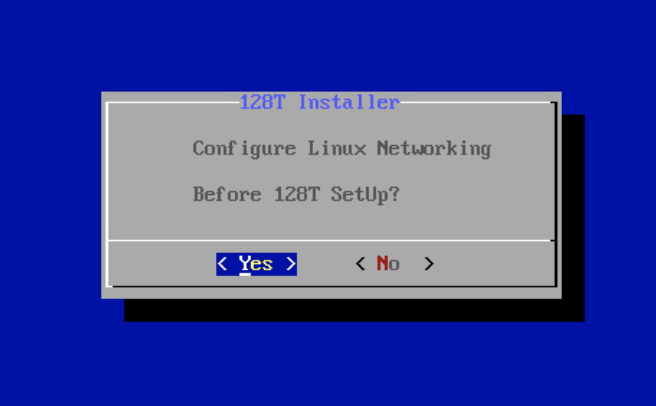
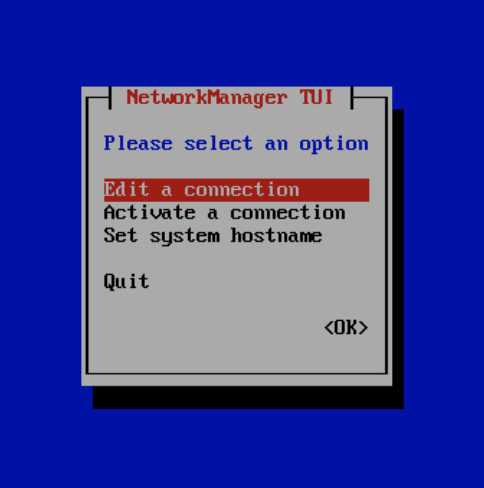
Selecting Yes launches the NMTUI application to perform an initial network interface setup.
 )
)
If you are installing a Conductor, please refer to the following documentation to complete the Linux configuration and Conductor initialization.
For Router installation information, see Router Interactive Installation.