Onboard Greenfield SRX Series Firewalls to Juniper Security Director Cloud Using QR Code
This topic walks you through the steps to onboard a new cloud-ready Juniper Networks® SRX Series Firewall to Juniper Security Director Cloud using a QR code.
To begin onboarding SRX Series Firewalls to Juniper Security Director Cloud, it is essential to first determine whether the device is cloud-ready or non-cloud-ready.
-
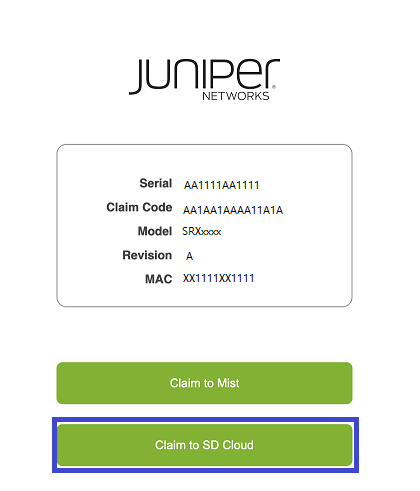
Cloud-ready SRX Series Firewalls have a QR or claim code on the chassis for quick onboarding to Juniper Security Director Cloud. Cloud-ready SRX Series Firewalls offer advanced security services, seamless integration, and protection for cloud deployments. You can onboard the cloud-ready SRX Series Firewalls using your mobile phone by scanning the QR code and following the guided steps in the portal.
-
Non-cloud-ready SRX Series Firewalls do not have QR or claim codes and require manual onboarding. You can onboard the non-cloud-ready SRX Series Firewalls using CLI commands or Zero Touch Provisioning (ZTP).
For supported supported cloud-ready and non-cloud-ready SRX Series Firewalls, see Juniper Security Director Cloud Supported Firewalls.
Before You Begin
Install the rack and power on your cloud-ready SRX Series Firewall. For instructions specific to your device, see the applicable hardware guide.
DHCP is enabled on all interfaces on cloud-ready SRX Series Firewalls in the factory-default configuration. Make sure that you can connect to the Internet using one of the interfaces.
Workflow
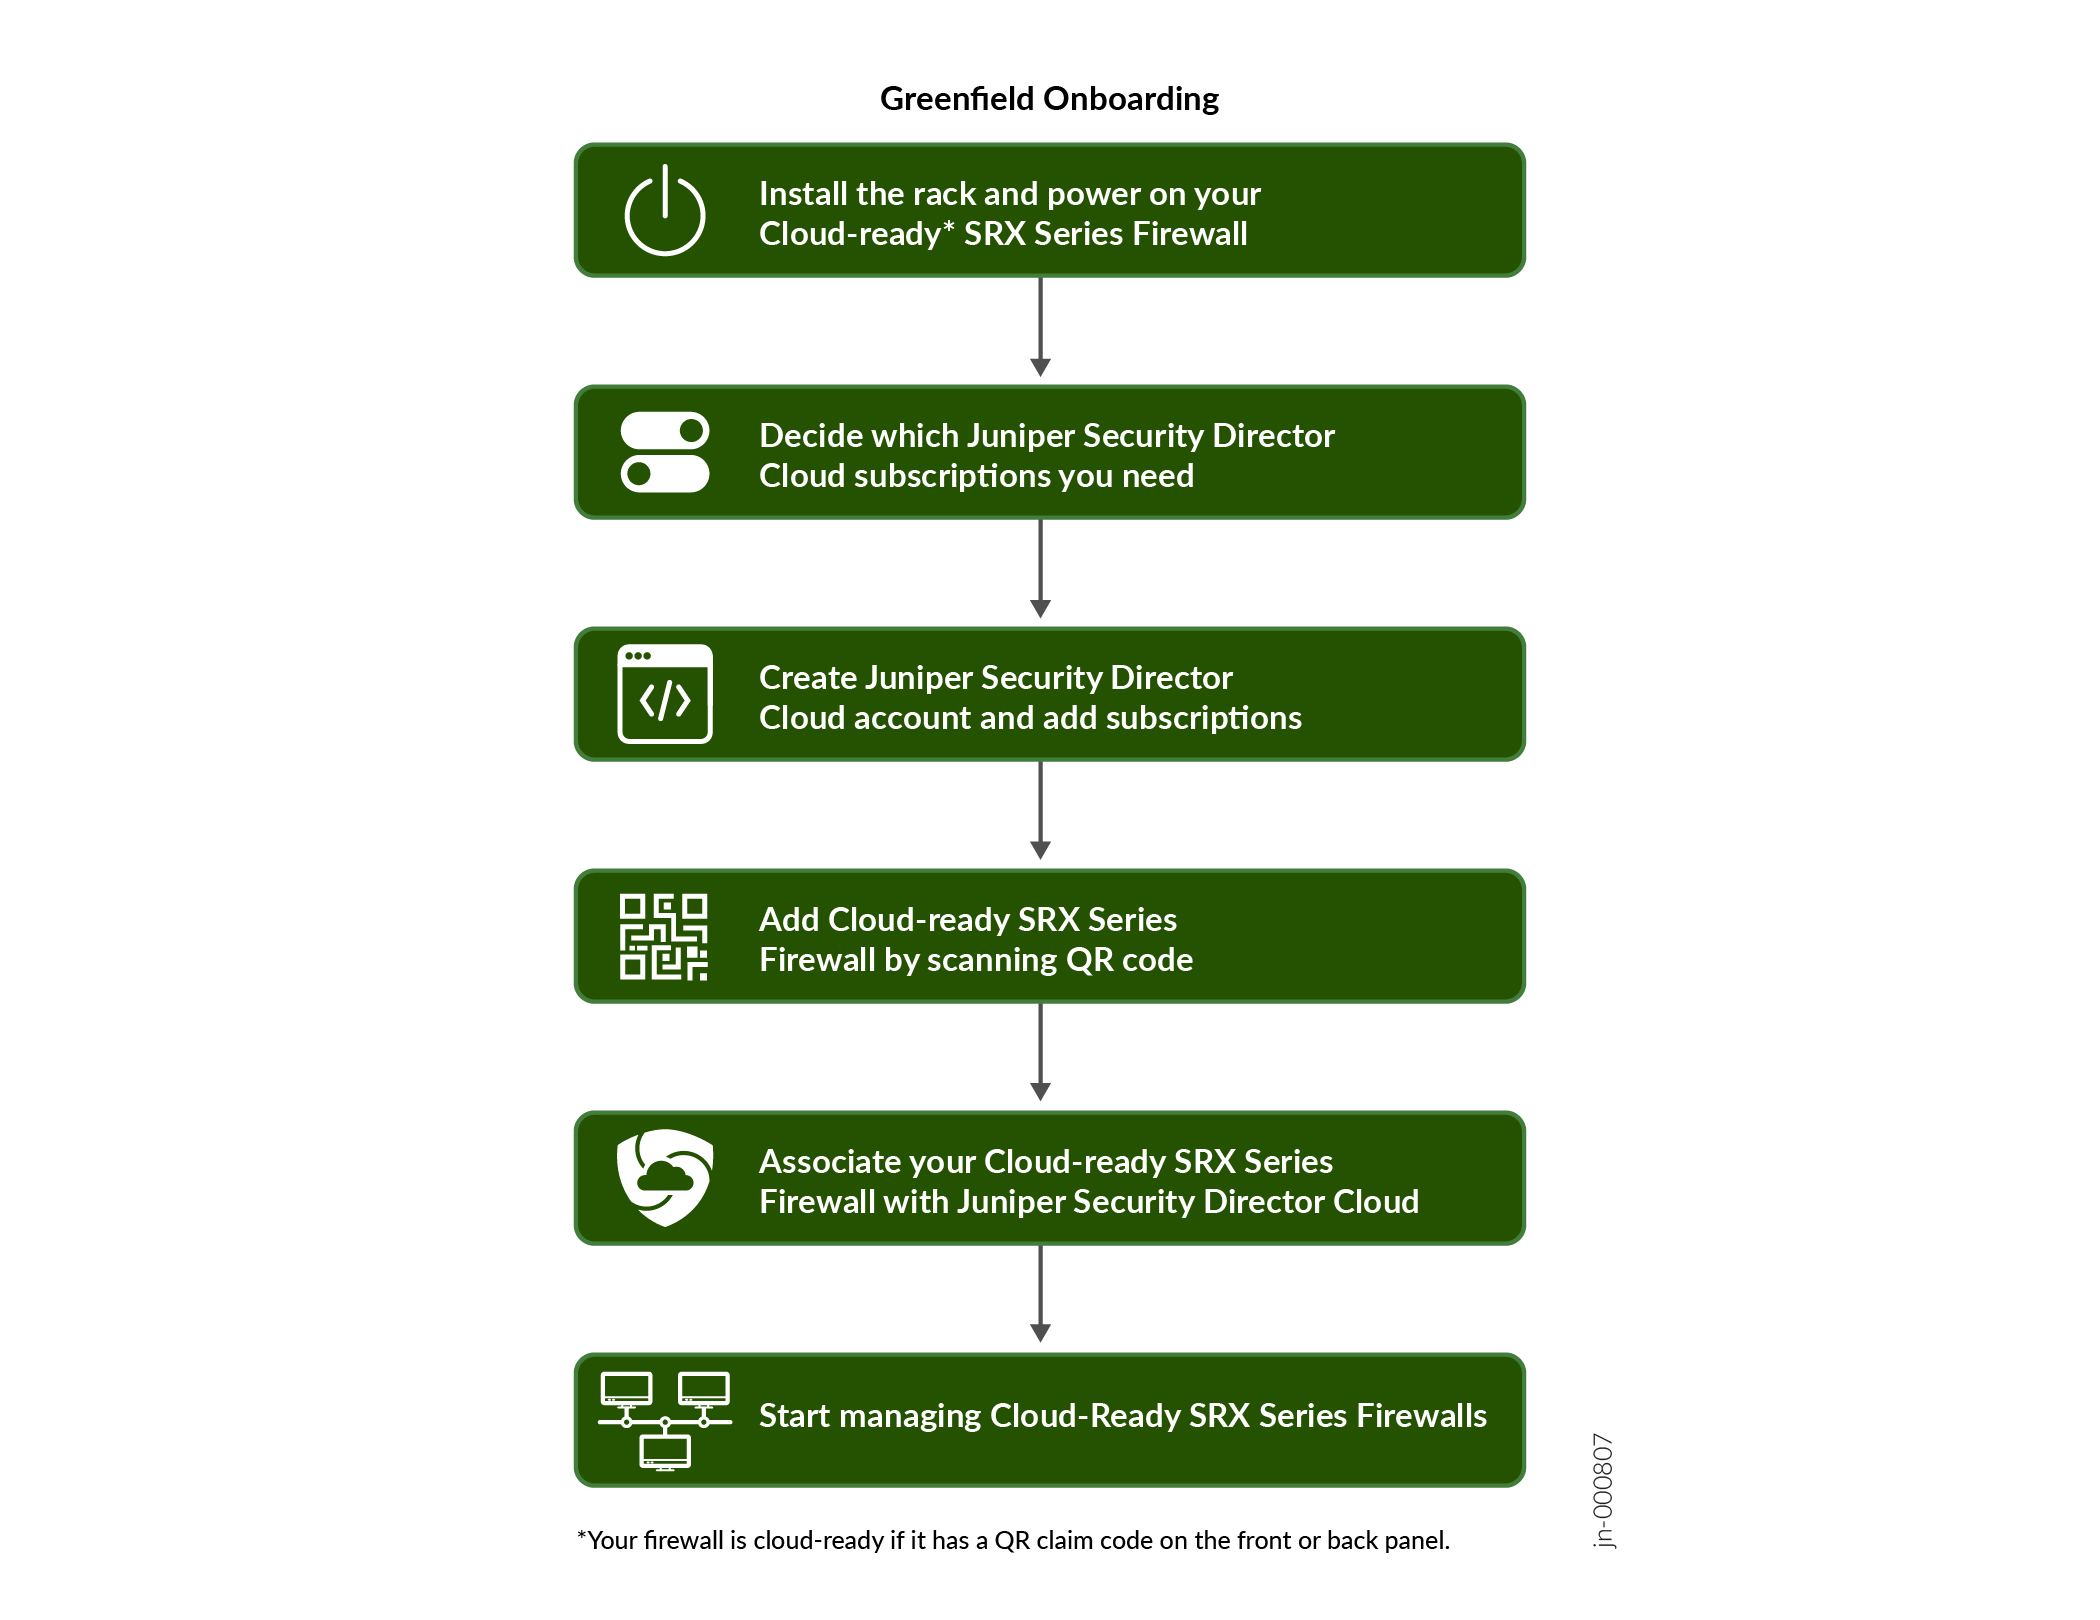
Onboard your SRX Series Firewall to Juniper Security Director Cloud
- Decide which Juniper Security Director Cloud Subscriptions you need. Contact your sales representative or account manager to purchase subscriptions. You can also use a 30-day trial subscription that is available in the portal by default.
- Go to https://sdcloud.juniperclouds.net/
and click Create an
organization account.
Follow the on-screen instructions to activate your account. It takes up to 7 working days to approve your account.
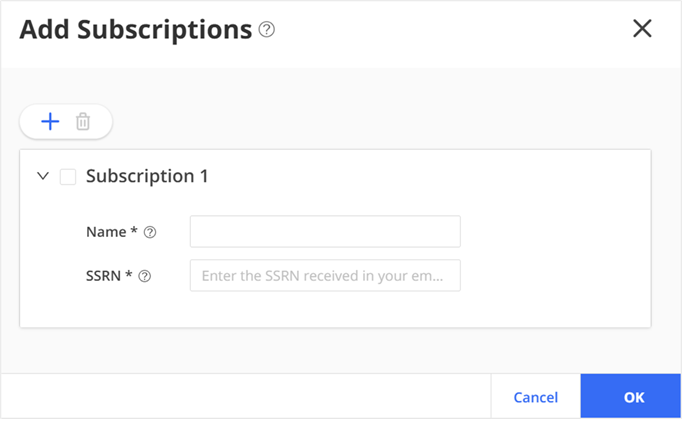
Log in to the Juniper Security Director Cloud portal, click Add Subscriptions, enter details, and click OK.
View your added subscriptions from . If you do not see your subscriptions, go to page to view the status.
- Use your mobile phone to scan the QR code on the cloud-ready SRX Series Firewall. Click
the displayed link and select Claim to SD Cloud to go to Juniper Security Director Cloud login page.
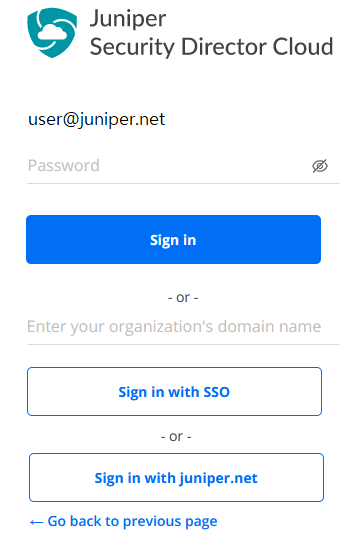
- Read the prerequisites, enter your e-mail address, and click
Next.
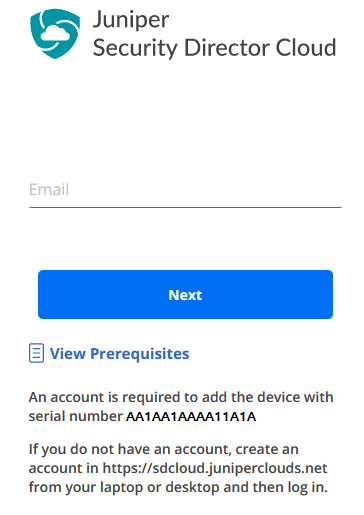
- Follow the on-screen instructions to sign in.
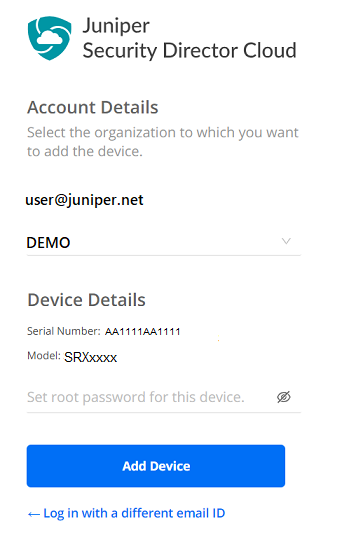
- Select the organization to add your device, enter the root password, and click
Add Device.
Congratulations! You've successfully registered your device to the organization and added your device to Juniper Security Director Cloud. Log out from the page in your mobile phone.
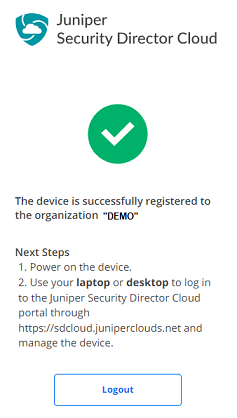
Power on your cloud-ready SRX Series Firewall and log in to Juniper Security Director Cloud portal using your laptop or desktop.
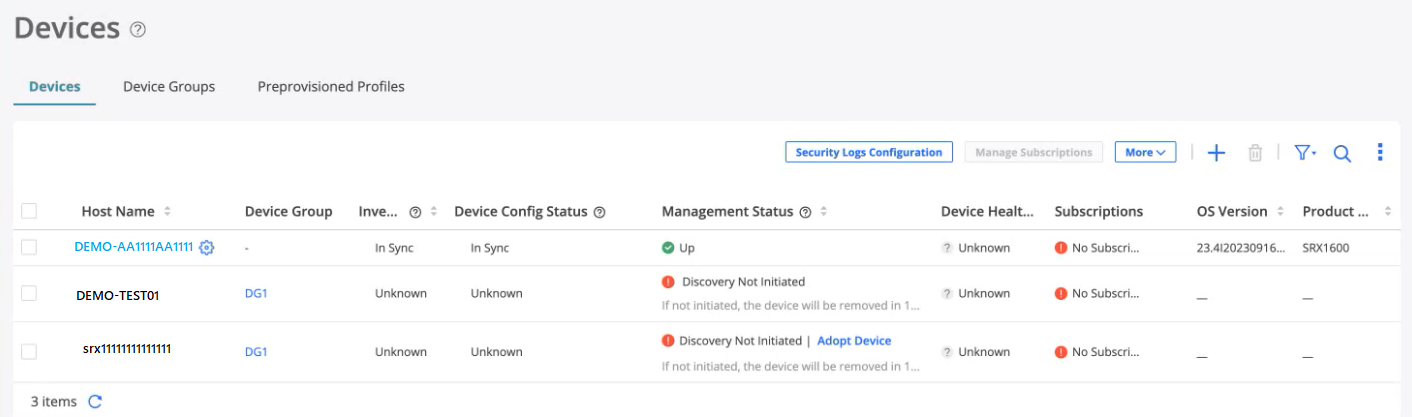
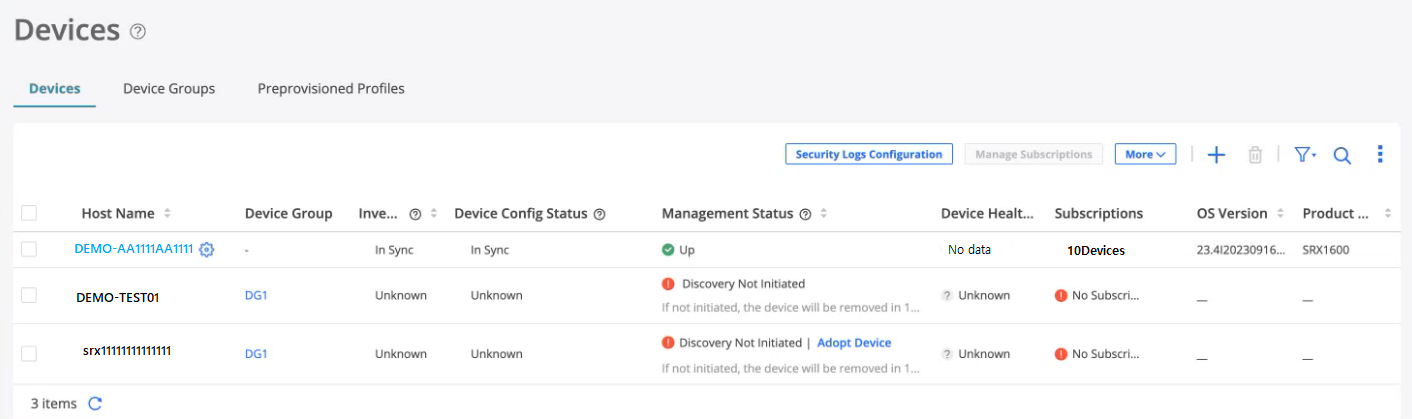
View the newly added device on the page.
 Note:
Note:Device discovery takes a few seconds to complete. After successful device discovery, you can see the following status updates:
Inventory Status: In Sync
Device Config Status: In Sync
Management Status: Up
Congratulations! You've successfully onboarded your cloud-ready SRX Series Firewall. You’re now ready to associate devices to your Juniper Security Director Cloud subscription.
Associate your SRX Series Firewall with Juniper Security Director Cloud Subscription
- Go to , select the device, and click Manage
Subscriptions. Follow the on-screen instructions.
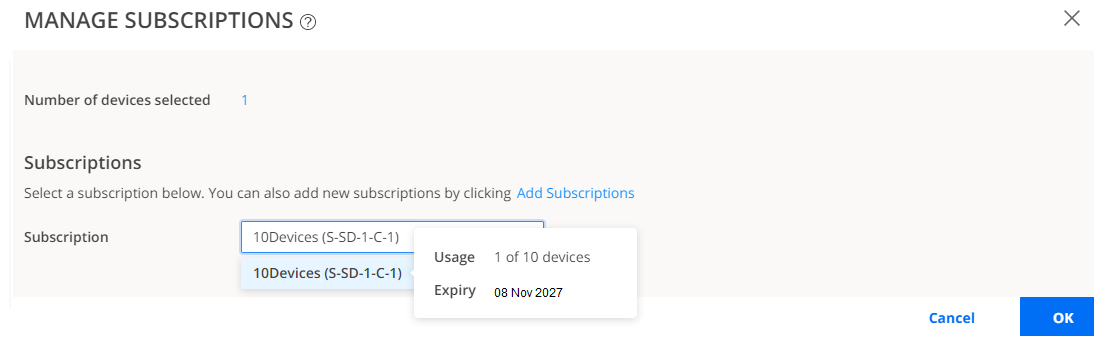
- Verify that the Subscriptions column displays the subscription
name for your device.
Congratulations! You have successfully associated your device to Juniper Security Director Cloud.
Explore Juniper Security Director Cloud Features
Now that your Juniper Security Director Cloud setup is up and running, explore other Juniper Security Director Cloud features to meet your business needs. Here are some features we think you'll find especially helpful.
| If You Want To | Then |
|---|---|
|
Create or import a security policy, add a rule to the security policy, and deploy the security policy on the devices |
See Security Policies Overview |
|
Set up the Content Security profiles to secure your network from multiple security threat types |
See Content Security Profiles Overview |
|
Configure ATP Cloud to protect all hosts in your network against evolving security threats |
See File Inspection Profiles Overview |
|
View the traffic logs and network events including viruses found, interfaces that are down, number of attacks, CPU spikes, system reboots, and sessions |
See Session Overview and All Security Events Overview |