Security Implementation
Access Assurance Configuration
Access Assurance Configuration is pivotal for establishing a robust Zero Trust security model that meticulously controls who and what can connect to the network. This involves defining granular network access policies based on a combination of factors, including user identity (for example, Active Directory groups), device posture (for example, compliance with security updates), and the specific application access. For external or temporary users, configuring secure guest access portals is essential, and allows controlled network entry while maintaining isolation from sensitive internal resources. These policies ensure that only authorized and compliant users and devices gain access to the appropriate network segments.
Juniper Mist Access Assurance configuration for both wired and wireless networks involves enabling 802.1X authentication, configuring authentication servers, and creating access policies. For wireless networks, this is done with WLAN templates. For wired networks, it's done with switch templates. Key steps include importing certificate authorities, creating rules for authorized clients, and assigning VLANs.
Wireless Configuration Steps:
- Enable 802.1X: Navigate to Organization > WLAN Templates and select WPA2 or WPA3 and Enterprise (802.1X) as the Security Type
- In the Authentication Servers block, Select Mist Auth as the authentication server
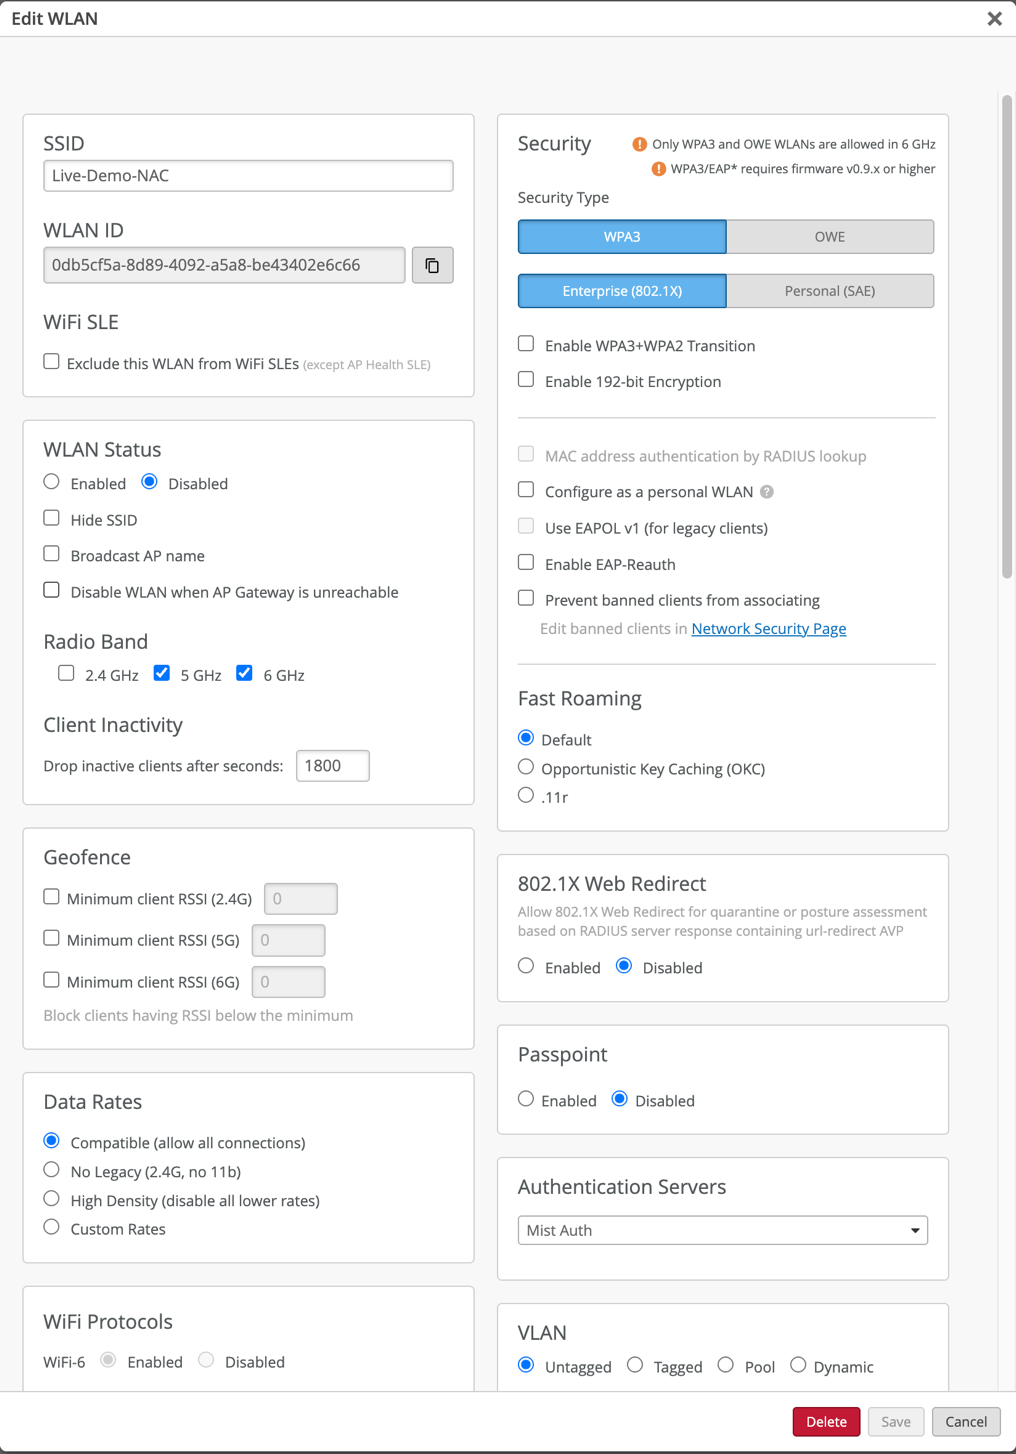
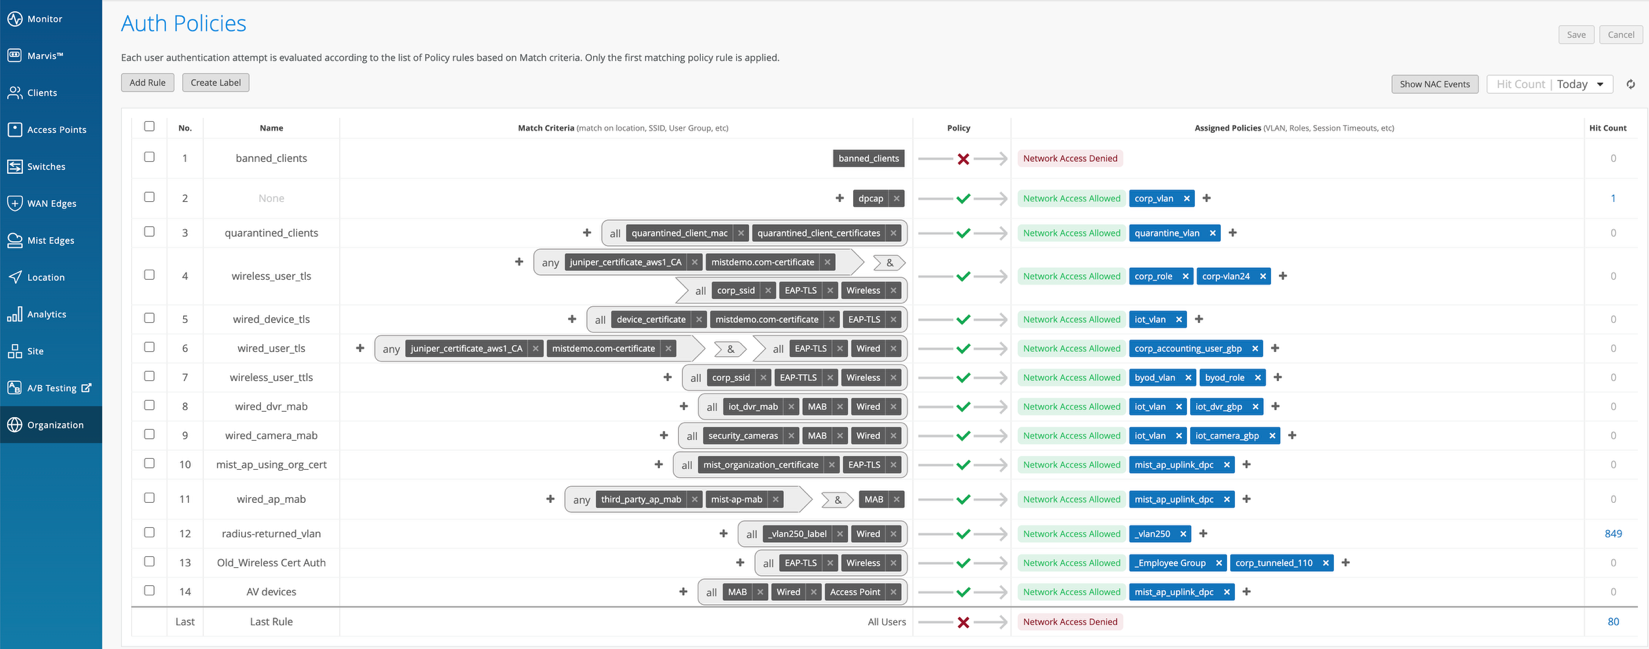
- Create Authentication Policies: Define rules based on labels, site, or site group to match client criteria and apply appropriate actions, like VLAN assignment or session timeout.
- Import Certificate Authority: If you intend to use certificate-based authentication, add your Certificate Authority under Organization > Access > Certificates.

- Assign VLANs: Configure VLANs based on your network design. Choose from Untagged, Tagged, Pool, or Dynamic VLAN.
Wired Configuration Steps:
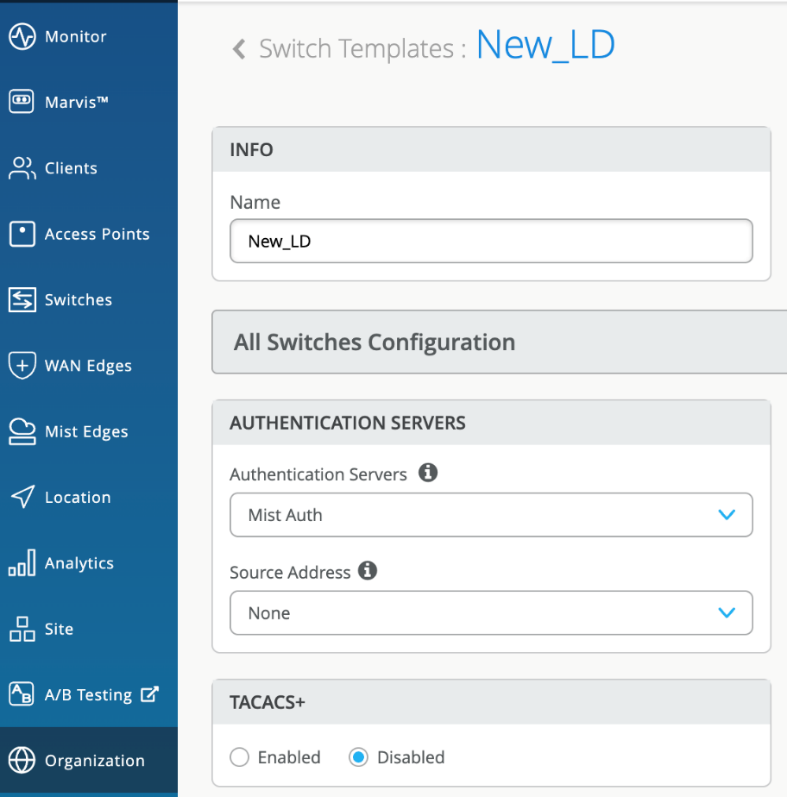
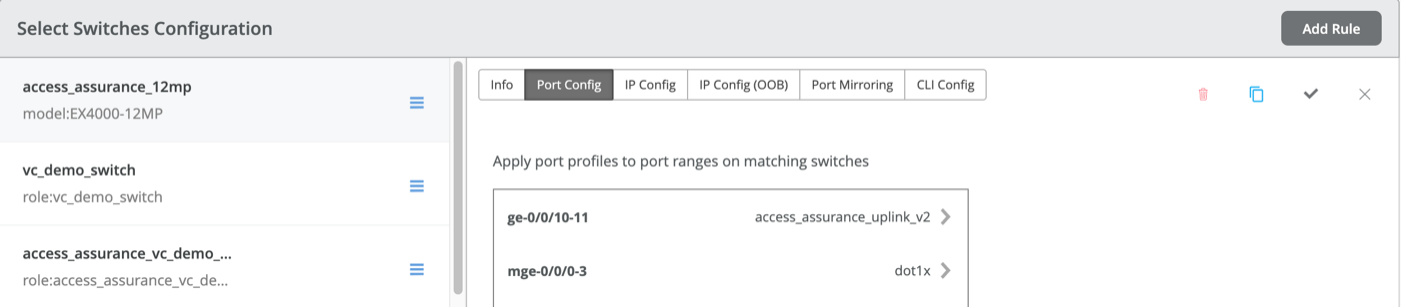
- Configure Switch Templates: Navigate to Organization > Wired > Switch Templates and either create a new template or edit an existing one.
- Enable Authentication Servers: In the Authentication Servers section, select Mist Auth as the authentication server.
- Configure Port Profiles: In the Port Profiles block, set the port mode to Access and enable dot1x authentication.
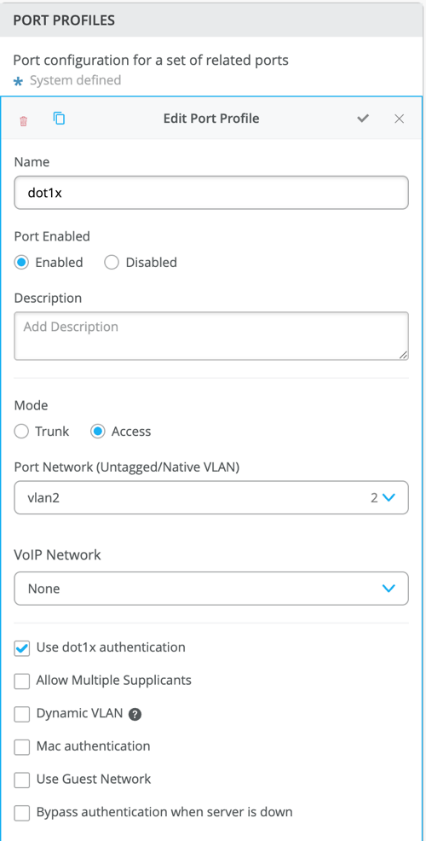
- Assign Port Profiles: Associate the created port profile (dot1x) with specific port ranges on the switch.
- Create Authentication Policies: Define rules using labels, site, or site groups to match criteria and apply appropriate actions such as VLAN assignment.

- Import Certificate Authority: If you intend to use certificates, add your Certificate Authority under Organization > Access > Certificates.

- Assign VLANs: Configure VLANs based on your network design.
Firewall Integration (SRX Series)
Firewall Integration, specifically with Juniper SRX Series Firewalls, is essential for providing robust perimeter and internal network security. This involves strategically deploying SRX Series Firewalls at key points, such as the network edge for Internet ingress and egress, or within the data center to protect critical applications and data. The configuration requires that you:
- define comprehensive firewall policies to control traffic flow
- set up Network Address Translation (NAT) rules
- establish secure VPNs for remote access or site-to-site connectivity
Furthermore, integrating the SRX Series with Juniper's Advanced Threat Prevention (ATP) services enhances its capabilities, providing protection against known and unknown threats through features like sandboxing and threat intelligence feeds.
- Deploy SRX Series Firewalls at the network edge or data center.
- Configure firewall policies, NAT, and VPNs.
- Integrate with Advanced Threat Prevention (ATP) services.
Juniper Mist-Based SRX Firewall Configuration for Wired and Wireless Networks
Configuring your Juniper SRX firewall to support both wired and wireless networks managed by Juniper Mist involves a series of steps to onboard the firewall, define networks and WLANs, and apply necessary policies. Here's a breakdown:
- Onboard the SRX Series Firewall to MistNote: The onboarding outline shown here is for new, unclaimed firewalls. For complete details about claiming or adopting SRX Series firewalls, see Cloud-Ready SRX Firewalls in Mist.
- You can onboard the SRX firewall using either the Mist AI Mobile App or a web browser. Both methods involve claiming the device and assigning it to a site. When using a web browser, you'll also select to manage the configuration with Mist and set a root password. After claiming, verify that the SRX is in your inventory.
Install the SRX Series Firewall in a Rack and Connect to the Network
- Install and power on the SRX according to your model's hardware guide. Connect the WAN interface (ge-0/0/0) to the Internet and another interface to your local network. Ensure the necessary outbound ports (like TCP 443, 2200, and 6514) are open on your Internet firewall for communication with the Mist cloud. Power on the device and let it boot.
Configure Networks and VLAN IDs
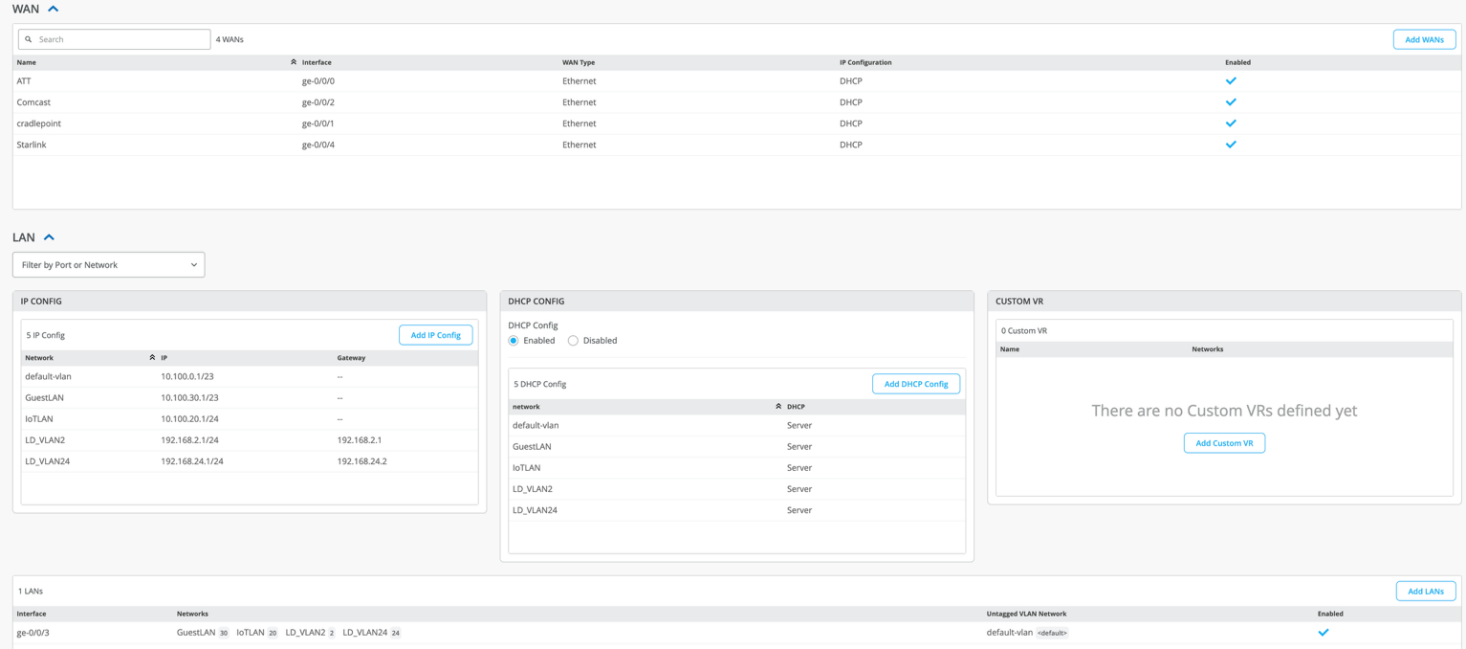
- In the Juniper Mist portal, navigate to Organization > WAN > Networks and add your L2 networks, defining subnet IP addresses, prefix lengths, and VLAN IDs. If you have variables defined, you can use them in the fields with the VAR designation. We recommend you use variables whenever possible. Select Enable Access to Mist Cloud for the appropriate network(s) so that communication is possible.
Configure Wireless Networks (WLANs)
- Go to Site > WLANs in the
Mist portal and click Add WLAN. Provide an SSID and choose
appropriate security settings. You can configure RADIUS settings
for NAC integration and set static or
dynamic VLANs.
Configure Security Policies
- Define application policies to manage traffic flow. We recommend that you place global policies last. You can configure application policies at the Organization level, within WAN Edge templates, or in Hub profiles.

Configure Routing Protocols
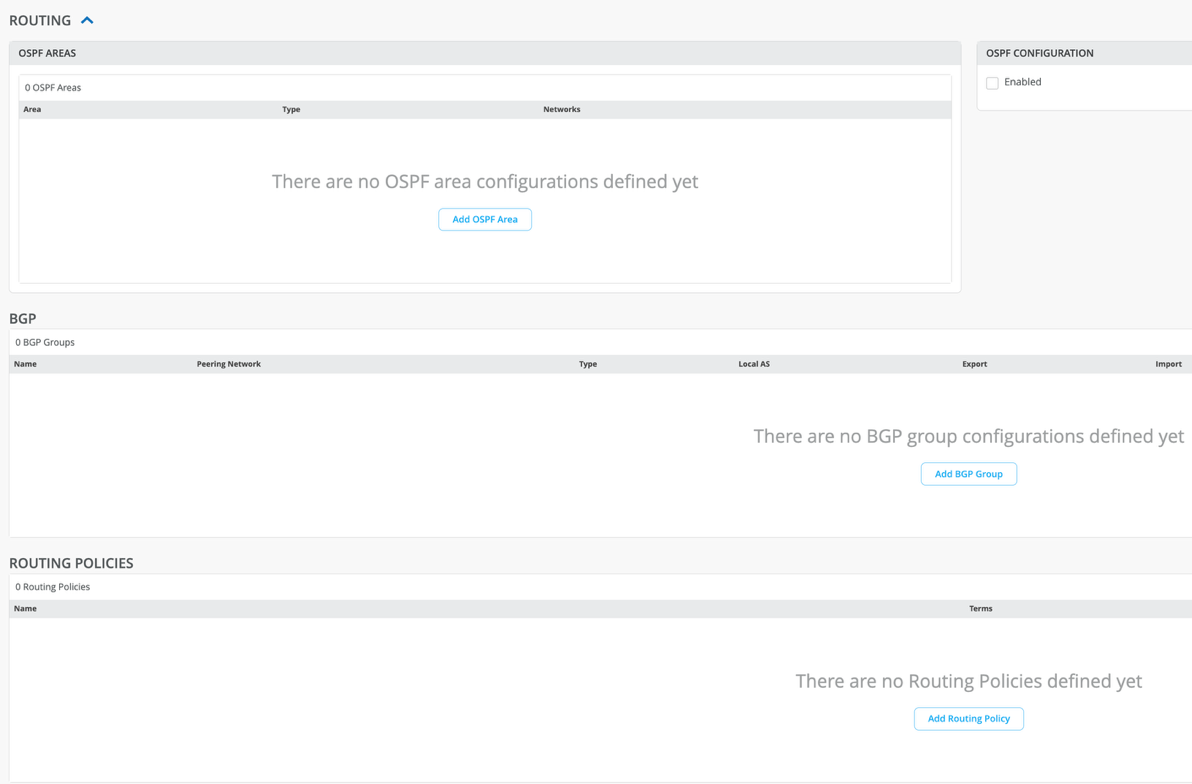
- If you use BGP or OSPF in your networks, go to Organization > WAN > WAN Edge Templates. Configure BGP groups and OSPF areas in the Routing section of any template.
Troubleshooting
- If the SRX appears disconnected in Mist, check the Junos OS version, IP address, gateway, and Internet connectivity, and the ability to resolve oc-term.mistsys.net. Verify that upstream firewalls have TCP ports 2200 or 443 open and that the system time is correct. Also, check the device's ID format and look for MTU issues. For host connectivity issues, check security flow sessions.
These steps provide a general guide. Refer to Juniper documentation for specific details related to your SRX model and configuration needs.