Configure Authentication Policy
Create authentication policies to control which users can access which resources on your network.
You must configure Juniper Mist Access Assurance with an authentication policy to authenticate end users or devices that attempt to access the network or applications.
The policy consists of a set of rules that devices and users must fulfill to get access to the network and use the network resources. Juniper Mist Access Assurance evaluates the authentication requests based on the specified policy conditions. If a user or device satisfies the conditions, Juniper Mist Access Assurance applies actions that either allow or deny access to the user or the device. These actions also apply attributes (VLAN. role) to the allowed users.
Juniper Mist Access Assurance uses "labels" as the policy matching criteria and also as a policy action for allowed users. You can create labels on the Authentication Policy Labels page or on the Authentication Policy page. See Configure Authentication Policy Labels for details.
Create an Authentication Policy Using Basic Options
To create an authentication policy using basic options:
-
Add match criteria policies, and actions (allow or deny).
The following figure shows the basic options to configure an authentication policy.
Figure 1: Authentication Policy Configuration Options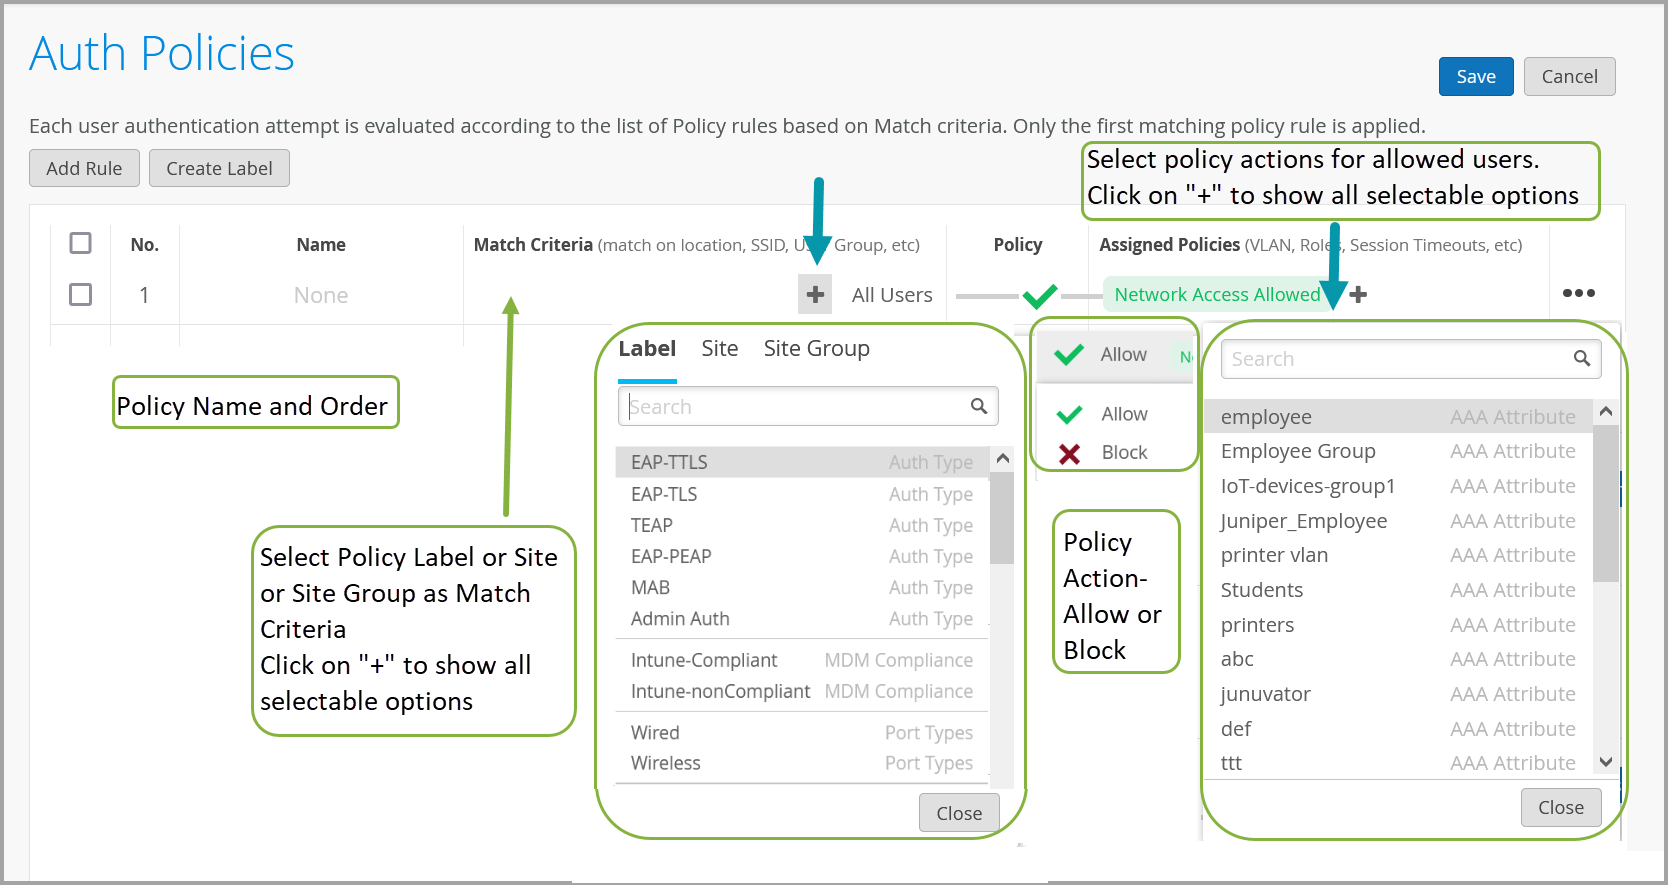
Select Policy Label, Site, or Site Groups as the the match criteria. Click Add (+) to see the available options.
Select Allow or Block to specify the policy action.
Specify the assigned policy for the allowed users. Click Add (+) to see the available options.
The following table explains the basic options that you use to configure an authentication policy.
Table 1: Authentication Policy Basic Options Field
Description
No.
The rule number.
Name
You can use up to 32 characters including alphanumeric characters and special characters underscore and dash.
Match Criteria
Match criteria for the policy. You can select labels, sites, or site groups from the available list. Click the + icon to display the drop-down list.
Alternatively, click the Assign Label button to add match criteria or policies. Advanced Options: Assign Labels Window
Policy
Policy actions. Select one of these policy actions:
-
Allow
-
Block
Assigned Policy
Apply policy actions for the allowed users. With policy actions, you can assign additional attributes such as roles or VLANs to the allowed users. If you have created policy labels, the Juniper Mist portal displays the labels when you click the + icon.
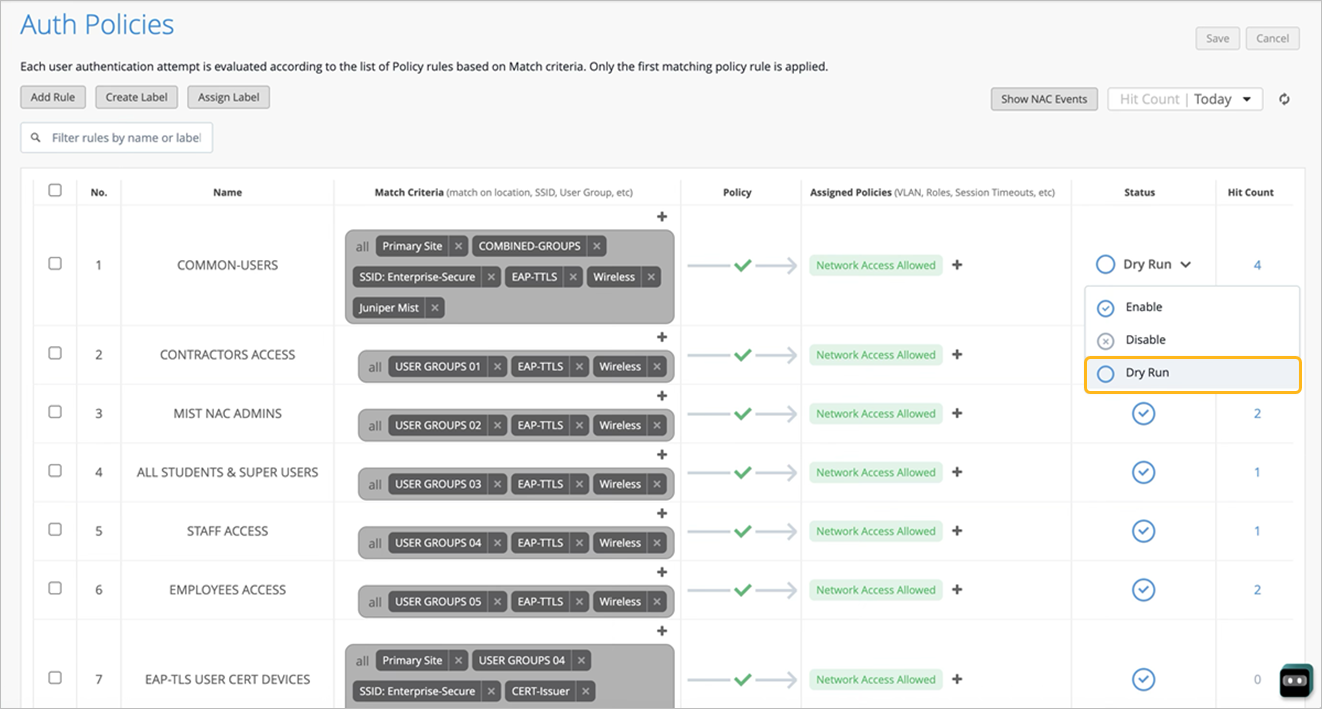
Status Set the status for the rule: -
Enable—The rule is evaluated against incoming authentication requests, and when a match occurs the corresponding enforcement action is applied.
-
Disable—The rule will not be evaluated.
-
Dry Run—The rule is evaluated against incoming authentication requests, but no enforcement action is taken if the rule is matched— the request processing continues to the next rule in the policy list as if the dry run rule did not exist.
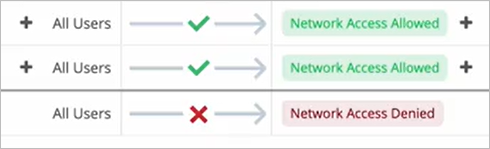
As you add rules and labels, the page displays a visual representation of your auth policies. Color-coding and other cues help you to interpret the display.
For example:
Green indicates that access is allowed and red indicates that access is denied.
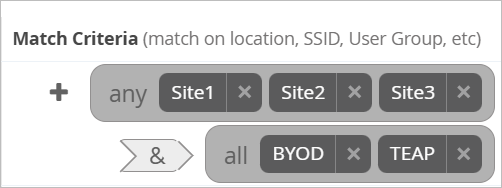
In the Match Criteria section, if you've added criteria for different types of entities, such as users or sites, the nested icons and word labels indicate which labels are "match all" or "match any" conditions.
-
Advanced Options: Assign Labels Window
Near the top-left corner of the Auth Policies page, click Assign Labels. Then use the following features:
Drag and drop a label onto a rule.
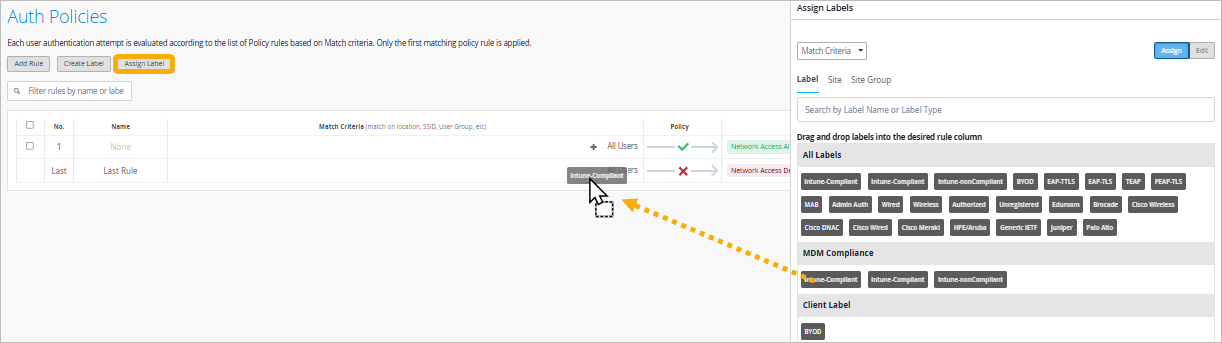
Batch-assign a label to multiple rules.

Change the selection to Assigned Policies, and then drag and drop or batch-assign policies.

Edit labels. Click the Edit button. You’ll see a pencil icon on every label. Click the one that you want to modify. You can change the label name and properties.
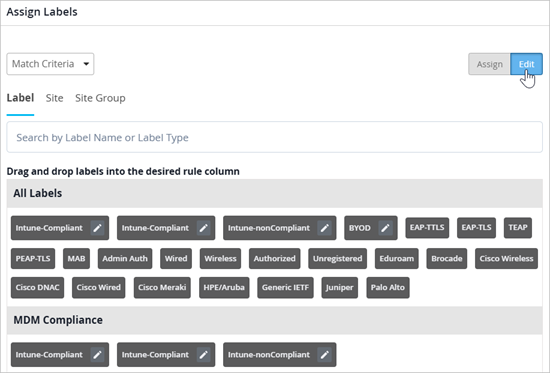
For help with label properties, see Configure Authentication Policy Labels.
Monitor NAC Events

-
Hit Count—This column shows the number of times that the rule has been applied during the specified time period, provided the status is Enabled. If the status of the rule is Dry Run, then the Hit Count indicates how many clients would have matched the rule. This helps you to evaluate the potential impact of a policy change before actually enforcing it in a live environment. You can change the time period by using the Hit Count drop-down menu near the top-right corner of the page.
-
Show NAC Events—Click this button to view without leaving the Auth Policies page. The events appear in an overlay window. After viewing the information, close the overlay, and resume working with your policies.