Help us improve your experience.
Let us know what you think.
Do you have time for a two-minute survey?
Help us improve your experience.
Let us know what you think.
Do you have time for a two-minute survey?
SUMMARY Learn about Unified Threat Management antivirus protection and how to configure UTM antivirus to prevent virus attacks on SRX Series devices by using J-Web. The UTM antivirus feature on the SRX Series device scans network traffic to protect your network from virus attacks and to prevent virus spread.
In today’s world, where cyber security threats are evolving and getting more sophisticated, protecting your network from virus attacks is extremely critical. The viruses, worms, and malware perform unwanted and malicious acts, such as damaging or deleting files, hacking personal data, affecting system performance, reformatting the hard disk, or using your computer to transmit viruses to other computers. The UTM antivirus software acts like a first line of defense against such security threats and prevents the spread of viruses into your network. It protects your network from virus attacks, unwanted computer malwares, spywares, rootkits, worms, phishing attacks, spam attacks, trojan horses, and so on.
You must always ensure that the antivirus software and virus pattern database are up to date.
Juniper Networks offers the following UTM antivirus solutions:
On-device antivirus protection
The on-device antivirus is an on-box solution. The on-device antivirus scan engine scans the data by accessing the virus pattern database that is locally stored on the device. It provides a full file-based antivirus scanning function that is available through a separately licensed subscription service.
The on-device Express or Kaspersky scan engine is not supported from Junos OS Release 15.1X49-D10 onwards; however, it is still applicable for Junos OS Release 12.3X48.
Starting in Junos OS Release 18.4R1, SRX Series devices support the Avira on-device antivirus scanning engine.
Avira on-device antivirus scanning engine is not supported on SRX300, SRX320, SRX340, SRX345, SRX380, and SRX550 HM devices.
Sophos antivirus protection
Sophos antivirus is an in-the-cloud antivirus solution. The virus pattern and malware database is located on external servers maintained by Sophos (Sophos Extensible List) servers. The Sophos antivirus scanner also uses a local internal cache to maintain query responses from the external list server. We offer the Sophos antivirus scanning as a less CPU-intensive alternative to the full file-based antivirus feature.
The on-device antivirus solution:
Scans the application traffic locally without connecting to the server to query whether the application traffic has virus.
Minimizes processing delays because the pattern database is locally stored and the scan engine is on-device.
The Sophos antivirus solution:
Avoids downloading and maintaining large pattern databases on the Juniper device because the virus pattern and malware database is located on external servers maintained by Sophos.
Improves lookup performance because the Sophos antivirus scanner uses a local internal cache to maintain query responses from the external list server.
Effectively prevents malicious content from reaching the endpoint client or server through the use of the Uniform Resource Identifier (URI) checking functionality.
Juniper Web (J-Web) Device Manager supports the UTM antivirus solution on SRX Series devices. In this example, you’ll use Sophos antivirus protection to do the following:
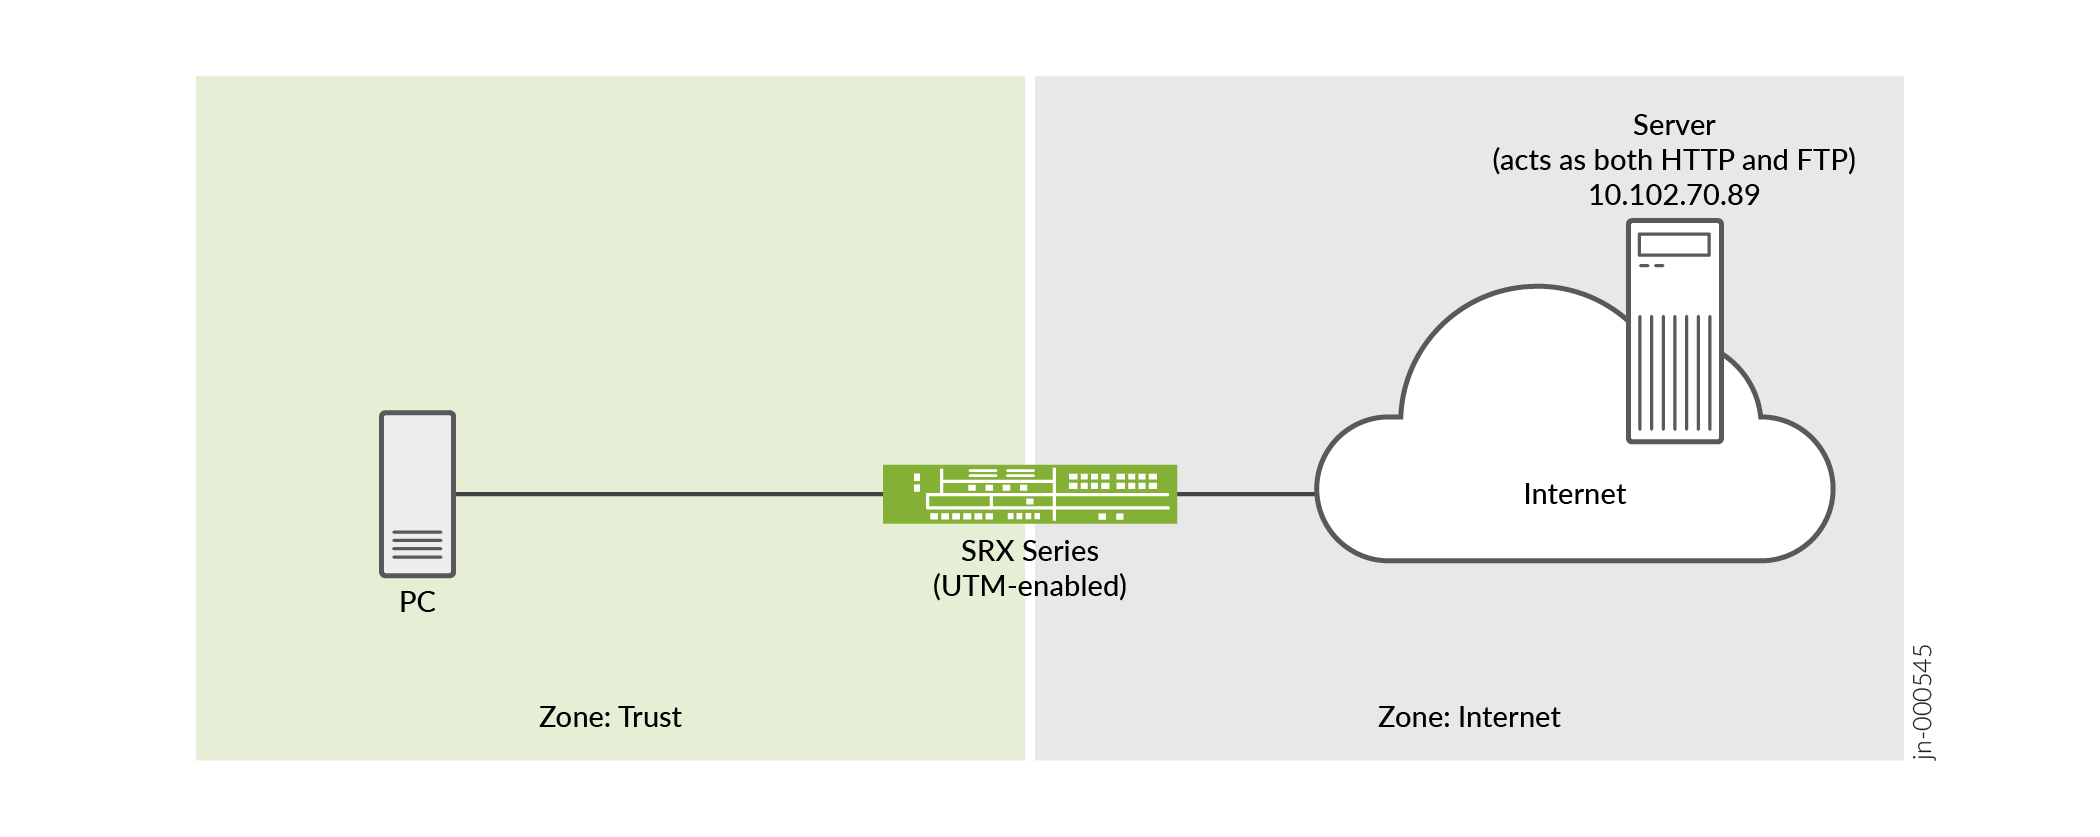
Scan HTTP and FTP traffic from a server (10.102.70.89) to your computer for virus attacks.
Define a custom message Virus Found! to be displayed when a virus is found while scanning the traffic.
Create Allowlist URL (http://10.102.70.89) where AV scanning is skipped.
Assumption is that you must be able to route to the example URLs.
Install a valid Sophos antivirus license and application identification feature license. See Installation and Upgrade Guide, Licensing Administration Guide, and Licensing User Guide.
Install an application signatures package for application identification. See Application Security User Guide for Security Devices.
Ensure that the SRX Series device you use in this example runs Junos OS Release 20.4R1.
The topology used in this example comprises a PC connected to a UTM-enabled SRX Series device that has access to the Internet and a server. You'll use J-Web to scan the HTTP and FTP requests sent to the server with this simple setup. You’ll then use Sophos antivirus protection to prevent virus attacks from the server to your PC.
See the following video to learn how to configure UTM antivirus using J-Web.

|
Step |
Action |
|---|---|
|
Step 1 |
Configure the Sophos engine in Default Configuration. Here, you first define the default engine as Sophos in Default Configuration. |
|
Step 2 |
Configure antivirus custom object. Here, you define the URL pattern list (allowlist) of URLs or addresses that will be bypassed by antivirus scanning. After you create the URL pattern list, you will create a custom URL category list and add the pattern list to it. |
|
Step 3 |
Configure an antivirus feature profile using the Sophos engine. After the default configuration, you define the parameters that will be used for virus scanning in the antivirus profile. Note: You must configure DNS servers before creating the antivirus profiles. To configure DNS servers, go to Device Administration > Basic Settings > System Identity > DNS servers. |
|
Step 4 |
Create a UTM policy for Sophos antivirus and apply the antivirus profile to the UTM policy. Here, you use a UTM policy to bind a set of protocols (for example, HTTP) to the Sophos UTM feature profile. You can scan other protocols as well by creating different profiles or adding other protocols to the profile, such as imap-profile, pop3-profile, and smtp-profile. |
|
Step 5 |
Create a security policy for Sophos antivirus and assign the UTM policy to the security policy. Here, you use the security firewall and antivirus profile settings to scan the traffic from the trust zone (trust) to the untrust zone (Internet). |
|
Step 6 |
Access a URL from the allowlist URL (http://10.102.70.89) and try to download a test virus file (eicar.txt) which is made available on the 10.102.70.89 server. |
You are here: Security Services > UTM > Default Configuration.
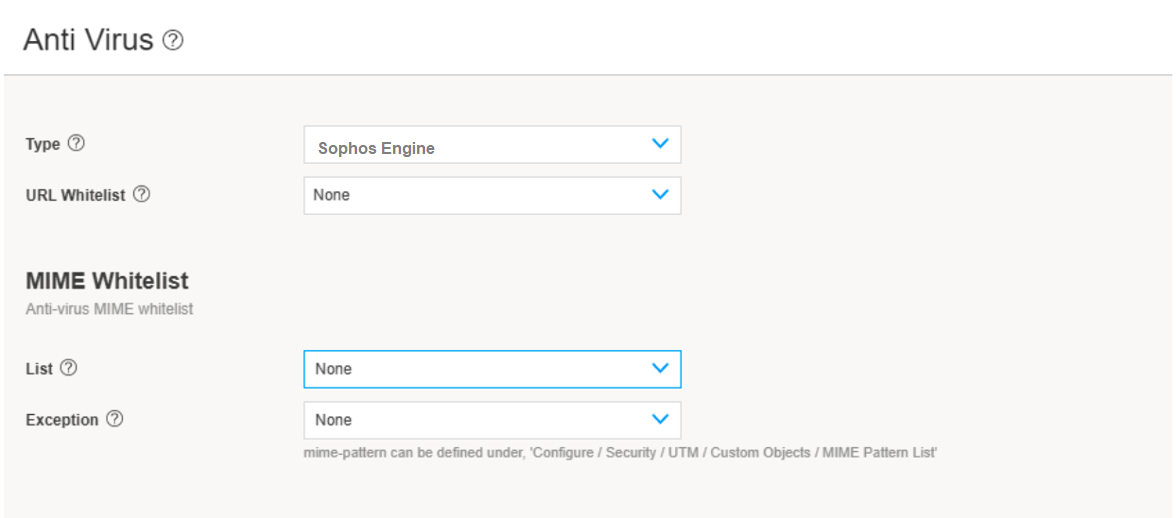
In this step, you’ll set up Sophos Engine as the default engine type.
To update the default antivirus profile:
|
Field |
Action |
|---|---|
|
Type |
Select the Sophos Engine type for the antivirus. |
|
URL Whitelist |
Select None. |
| MIME Whitelist | |
|
List |
Select None. |
|
Exception |
Select None. |
In this step, you define a URL pattern list (safelist) of URLs or addresses that will be bypassed by antivirus scanning.
You are here (in the J-Web UI): Security Services > UTM > Custom Objects.
To configure the safelist of URLs:
|
Field |
Action |
|---|---|
|
Name |
Type av-url-pattern. Note: Use a string beginning with a letter or underscore and consisting of alphanumeric characters and special characters such as dashes and underscores. You can use a maximum of 29 characters. |
|
Value |
|
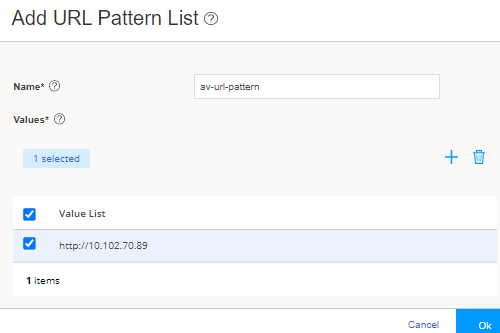
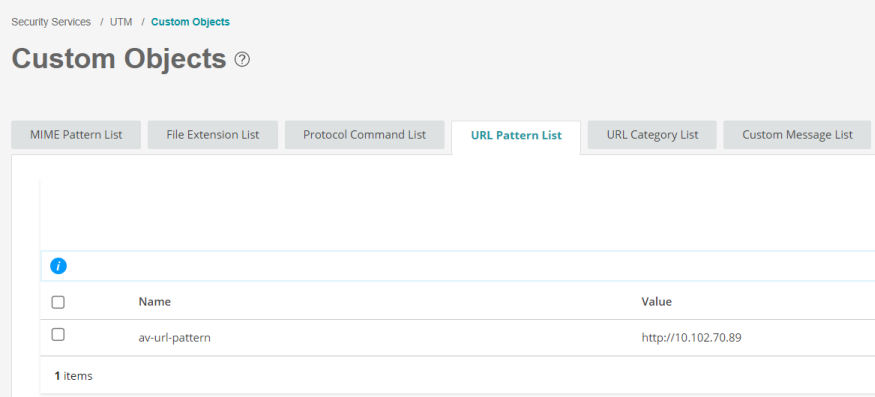
Good job! Here's the result of your configuration:

You'll now assign the created URL pattern to a URL category list. The category list defines the action of mapping. For example, the Safelist category should be permitted.
You are here: Security Services > UTM > Custom Objects.
To categorize URLs:
|
Field |
Action |
|---|---|
|
Name |
Type av-url as the URL category list name for the safelisted URL pattern. Note: Use a string beginning with a letter or underscore and consisting of alphanumeric characters and special characters such as dashes and underscores. You can use a maximum of 59 characters. |
|
URL Patterns |
Select the URL pattern value av-url-pattern from the Available column and click the right arrow to move the URL pattern values to the Selected column. By doing this, you associate the URL pattern value av-url-pattern with the URL category list av-url. |
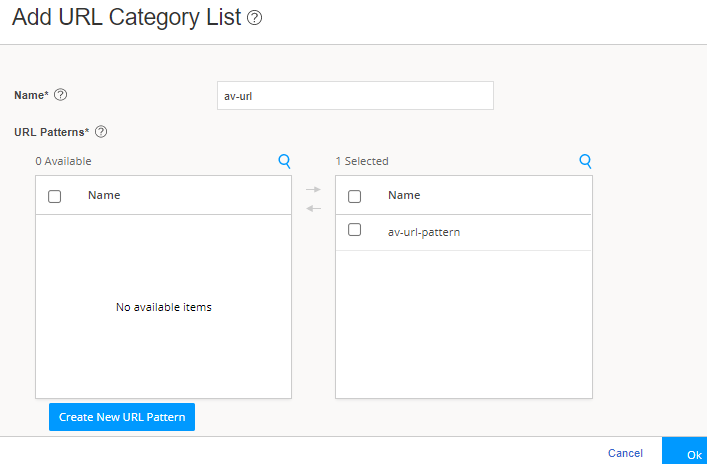
Good job! Here's the result of your configuration:


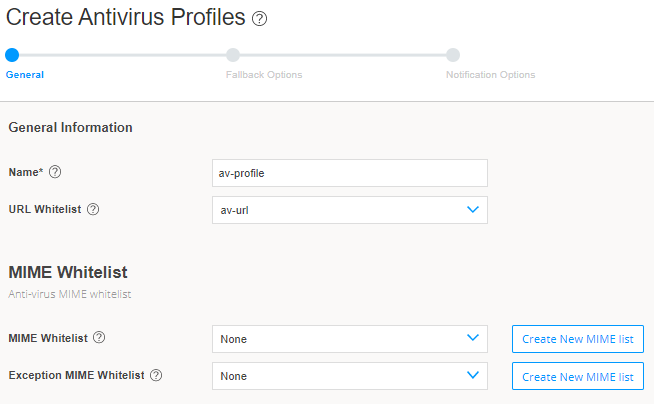
You are here: Security Services > UTM > Antivirus Profiles.
In this step, you’ll create a new UTM antivirus profile, refer the created URL objects (patterns and categories) to the profile, and specify the notification details.
To create the new antivirus profile:
|
Field |
Action |
|---|---|
| General | |
|
Name |
Type av-profile for the new antivirus profile. Note: You can use a maximum of 29 characters. |
|
URL Allowlist |
Select av-url from the drop-down list. |
| Fallback Options | |
|
Content Size |
Select Log and Permit. |
|
Default Action |
Select Log and Permit. |
| Notification Options | |
|
Virus Detection |
Select Notify Mail Sender. |
|
Notification Type |
Select Message. |
|
Custom Message Subject |
Type ***Antivirus Alert***. |
|
Custom Message |
Type Virus Found !. |
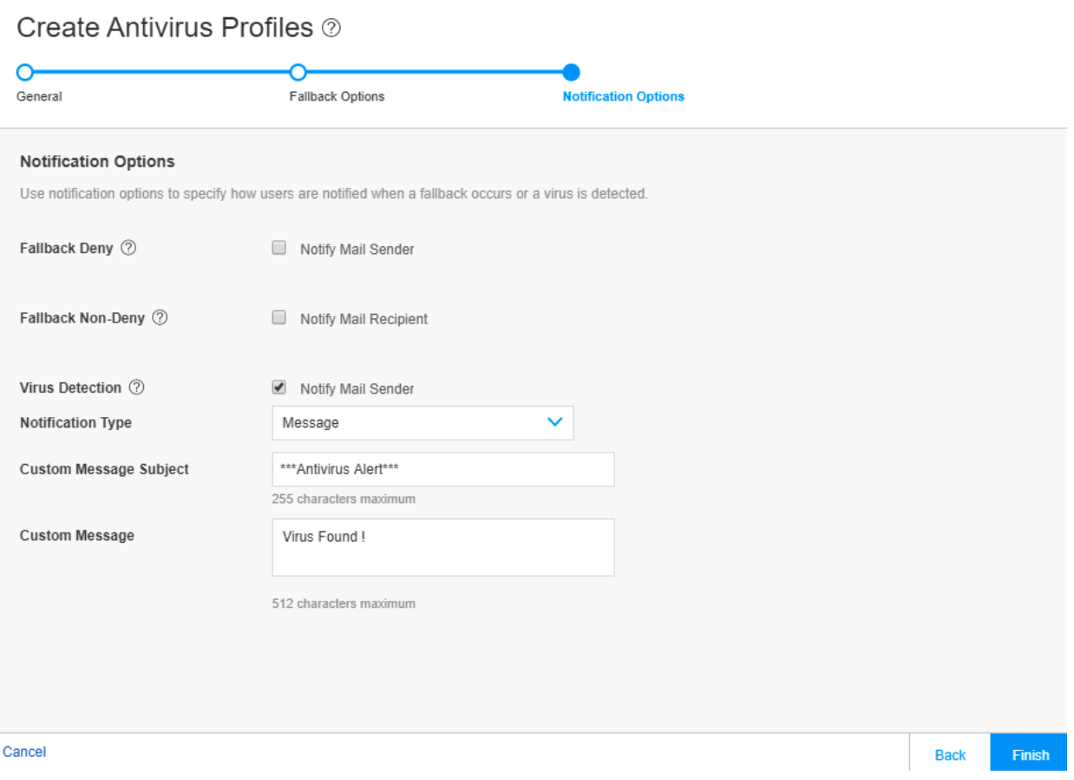
Good job! Here's the result of your configuration:

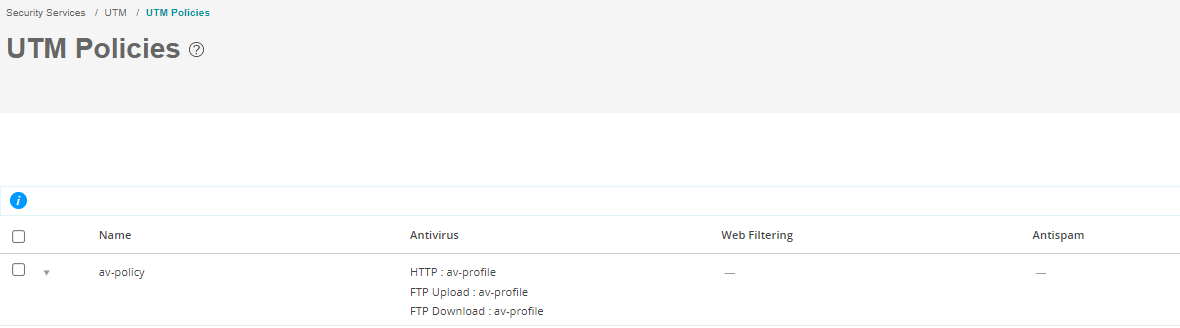
After you’ve created the antivirus feature profile, you configure a UTM policy for an antivirus scanning protocol and attach this policy to the antivirus profile created in Step 3: Create an Antivirus Profile. In this example, you’ll scan HTTP and FTP traffic for viruses.
You are here: Security Services > UTM > UTM Policies.
To create a UTM policy:
Almost there! Here's the result of your configuration:

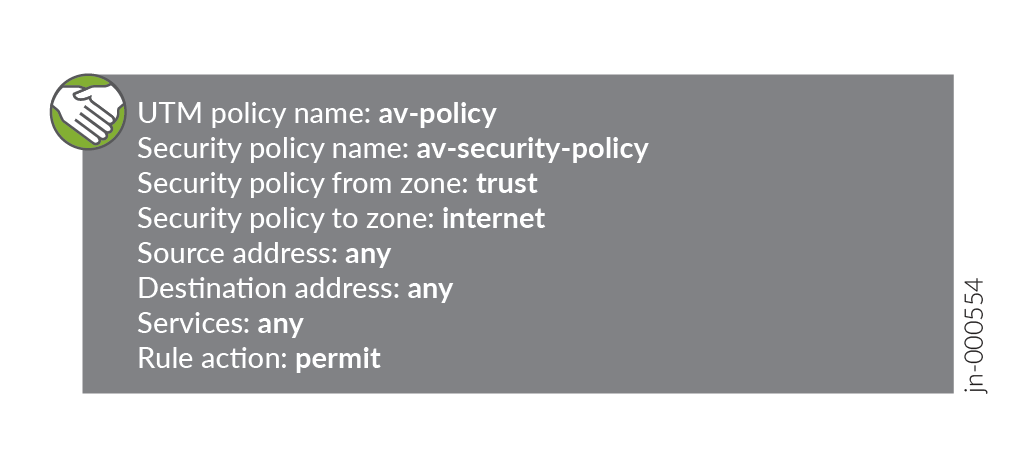
In this step, you create a firewall security policy that will cause traffic passing from the trust zone (trust) to the untrust zone (internet) to be scanned by Sophos antivirus using the feature profile settings.
You haven’t yet assigned the UTM configurations to the security policy from the trust zone to the internet zone. Filtering actions are taken only after you assign the UTM policy to security policy rules that act as the match criteria.
When the security policy rules are permitted, the SRX Series device:
Intercepts an HTTP connection and extracts each URL (in the HTTP request) or IP address.
For an HTTPS connection, antivirus is supported through SSL forward proxy.
Searches for URLs in the user-configured safelist under Antivirus (Security Services > UTM > Default Configuration). Then, if the URL is in the user-configured safelist, the device permits the URL.
Allows or blocks the URL (if a category is not configured) based on the default action configured in the antivirus profile.
You are here: Security Policies & Objects > Security Policies.
To create security policy rules for the UTM policy:
 to save changes.
Good job! Here's the result of your configuration: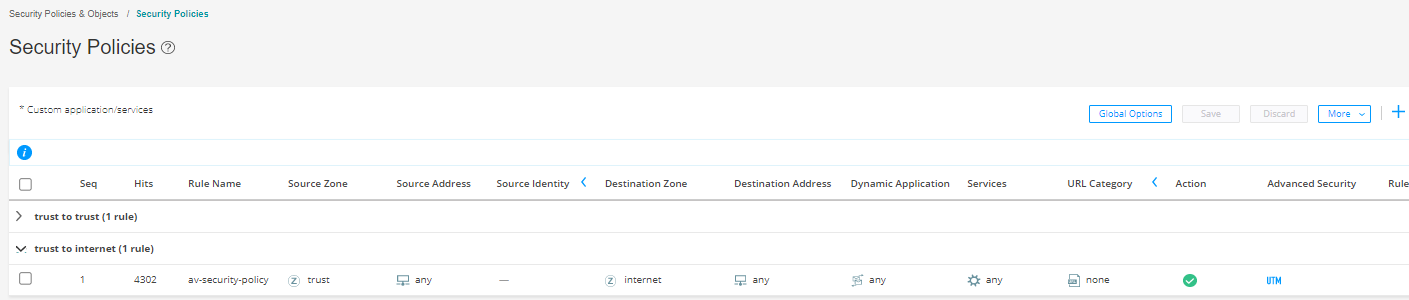
Verify that your configured UTM antivirus is allowing traffic from the Allowlist server and preventing virus attacks from the server.
Using the PC, send a HTTP request to http://10.102.70.89.
Good job! You can access the http://10.102.70.89 server.
Using the PC, send a FTP request to the 10.102.70.89 server to download the eicar.txt file. The eicar.txt file is a test virus file which is made available on the 10.102.70.89 server.
Sorry! The SRX Series device has blocked downloading the file and sent you a custom block message ***Antivirus Alert***- Virus Found!.
Here is an example output when you try to download the eicar.txt file and the SRX Series Firewall sends a virus alert:
[centos-01 ~]$ ftp 10.102.70.89
Connected to 10.102.70.89 (10.102.70.89).
220 XX FTP server (Version 6.00LS) ready.
Name (10.102.70.89:lab): root
331 Password required for root.
Password:
230 User root logged in.
Remote system type is UNIX.
Using binary mode to transfer files.
ftp> get eicar.txt
local: eicar.txt remote: eicar.txt
227 Entering Passive Mode (10,102,70,89,197,55)
150 Opening BINARY mode data connection for 'eicar.txt' (70 bytes).
netin: Connection reset by peer
426 10.102.70.89:21->10.0.1.1:36240 ***Antivirus Alert***- Virus Found!
Here is an example of the anti-virus statistics output when you find a threat:
[edit]
root@srx> show security utm anti-virus statistics
 UTM Anti Virus statistics:

 Intelligent-prescreening passed:      0
 MIME-whitelist passed:                0
 URL-whitelist passed:                 1
 Session abort:                        0
 Scan Request:

  Total           Clean         Threat-found    Fallback
       2               0              1               0

 Fallback:
                              Log-and-Permit    Block             Permit
 Engine not ready:                0                 0                 0
 Out of resources:                0                 0                 0
 Timeout:                         0                 0                 0
 Maximum content size:            0                 0                 0
 Too many requests:               0                 0                 0
 Decompress error:                0                 0                 0
Others: 0 0 0|
If you want to |
Then |
|---|---|
|
Monitor UTM antivirus details and statistics |
In J-Web, go to Monitor > Security Services > UTM > Anti Virus |
|
Generate and view reports on URLs allowed and blocked |
To generate and view reports:
|
|
Learn more about UTM features |
In this section, we present samples of configurations that block virus attacks from the websites defined in this example.
You configure the following UTM configurations at the [edit security
utm] hierarchy level.
Creating custom objects at the [edit security utm] hierarchy
level:
custom-objects {
    url-pattern {
        av-url-pattern {
            value http://10.102.70.89 ;
        }
    }
    custom-url-category {
        av-url {
            value av-url-pattern;
        }
    }
}
Creating the antivirus profile at the [edit security utm] hierarchy
level:
    default-configuration {
        anti-virus {
            type sophos-engine;
        }
    }
    feature-profile {
        anti-virus {
            profile av-profile {
                notification-options {
                    virus-detection {
                    type message;
                    notify-mail-sender;
                    custom-message “Virus-Found!”;
                    custom-message-subject “***Antivirus Alert***”;
                    }
                }
            }
        }
    }
Creating the UTM policy:
utm-policy av-policy {
            anti-virus {
                http-profile av-profile;
                ftp {
                    upload-profile av-profile;
                    download-profile av-profile;
                }
            }
        }
Creating rules for a security policy at the [edit security policies]
hierarchy level:
from-zone trust to-zone internet {
    policy av-security-policy {
        match {
            source-address any;
            destination-address any;
            application any;
        }
        then {
            permit {
                application-services {
                    utm-policy av-policy;
                }
            }
        }
    }
}