Routing Director Installation Overview
Juniper® Routing Director is a WAN automation solution that enables enterprise and service provider networks to meet the challenges posed by an increase in volume, velocity, and types of traffic. Routing Director delivers an experience-first and automation-driven network that provides a high-quality experience to network operators.
This guide describes how to install Routing Director and is intended for system administrators and network operators who install and manage the network infrastructure.
You deploy Routing Director as a set of on-premises (customer managed) nodes or virtual machines (VMs). A Kubernetes cluster is deployed inside these VMs during the installation of Routing Director. The Kubernetes cluster is a collection of microservices that interact with one another through APIs and that gets created automatically during Routing Director installation.
Inter-node communication within the cluster is implemented using APIs, and SSH, while the communication between Routing Director and the managed devices uses SSH, NETCONF, OpenConfig, and gNMI.
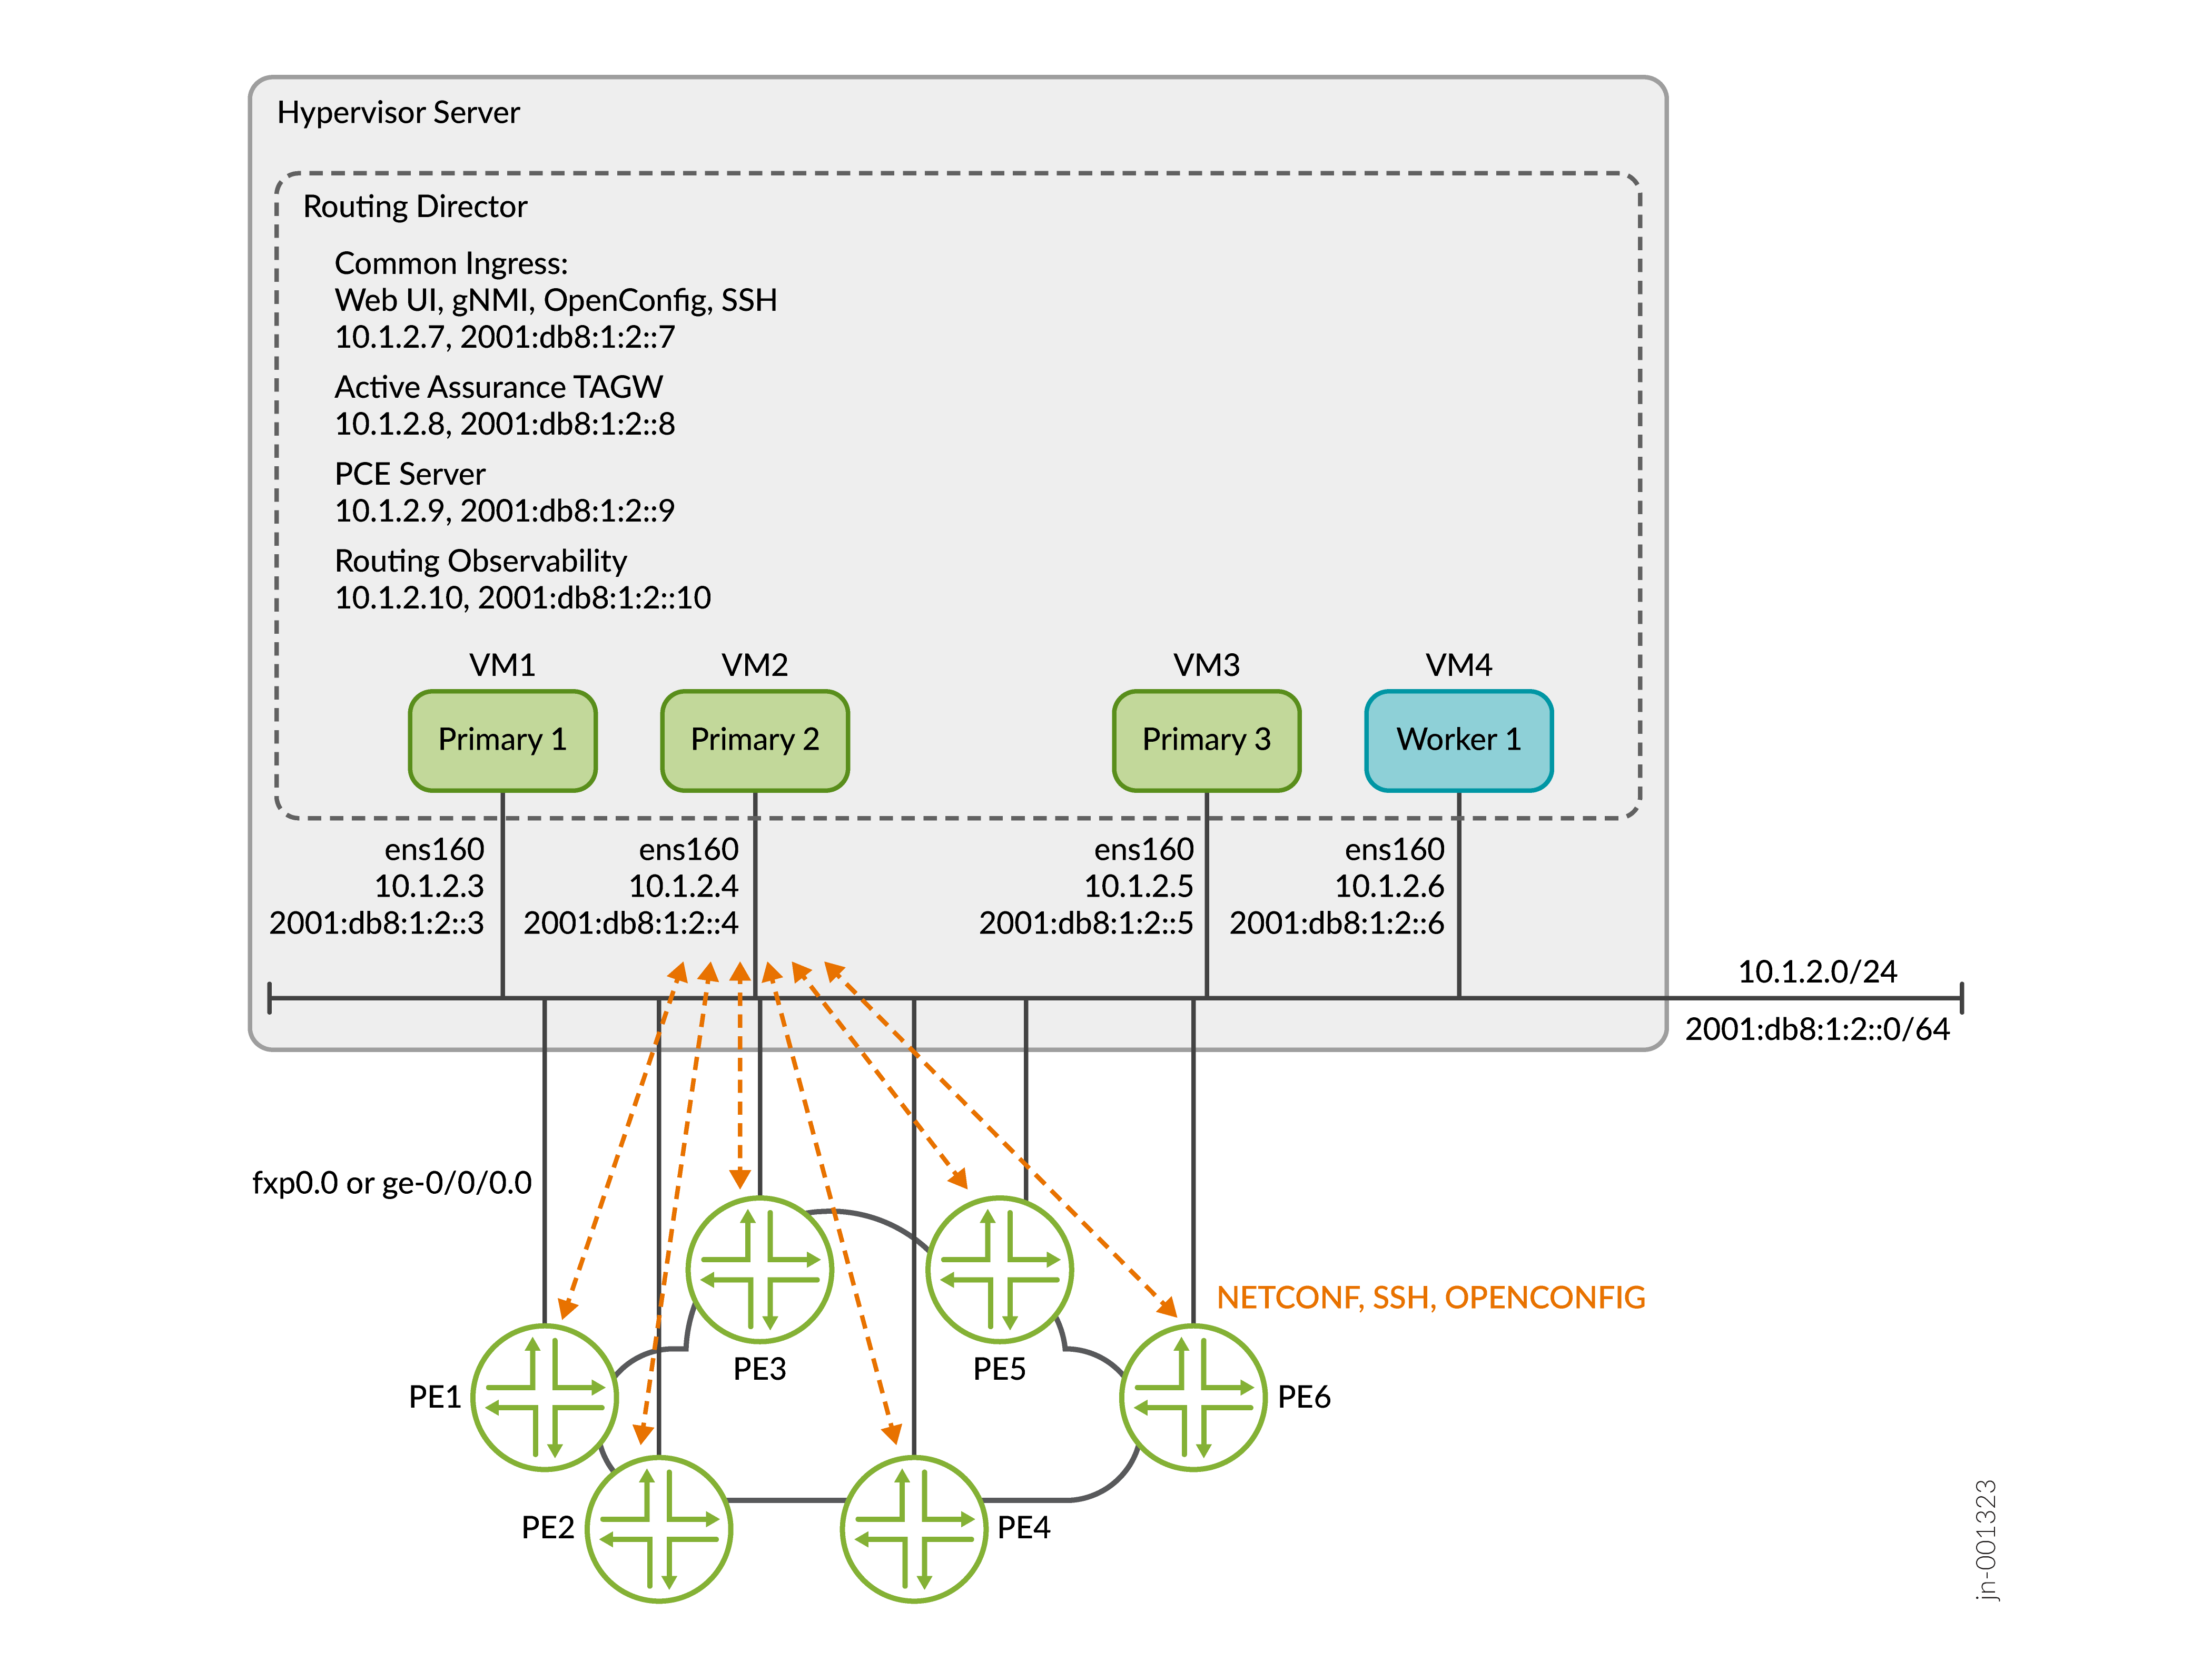
Figure 1 shows a typical Routing Director cluster deployment along with communication protocols. While the illustration shows two servers, you can deploy the cluster on a single server as well.
Routing Director Installation
To install Routing Director:
-
Download the installation bundle to your local desktop. The installation bundle comprises an OVA file. Use the OVA directly or extract the OVF and .vmdk files to create your VMs.
-
Create and configure the VMs on your bare-metal hypervisor using the OVA (or OVF and .vmdk) bundle.
-
Deploy a Routing Director cluster on the VMs using the Paragon Shell CLI.
-
Log in to the Routing Director Web GUI.
An IT or system administrator with permissions to create VMs in the hypervisor installs and maintains the Routing Director cluster. The IT or system administrator is responsible for tasks that are related to installation and administration. Routing Director can be deployed in an air-gap environment where there is no access to the Internet.
You do not have to create the VMs and then use the OVA (or OVF and .vmdk) bundle. You will be creating the VMs from the OVA (or OVF and .vmdk) bundle. In other words, you do not need to install the VMs with any particular operating system, deploy additional components such as Docker, create and configure the interfaces, configure NTP, and so on, separately. All these tasks are done automatically as part of the VM-creation process from the OVA (or OVF and .vmdk) bundle.
Paragon Shell CLI
Routing Director provides a custom containerized MGD (cMGD) user shell, called Paragon Shell. A system administrator can use Paragon Shell to deploy and configure the Routing Director cluster. The Paragon Shell CLI is installed and available after the VMs are created on the hypervisor server using the OVA (or OVF and .vmdk) bundle. The software bundle is prepackaged with all the packages that are required to create the node VMs and deploy the Routing Director cluster. Paragon Shell is installed on the Linux base OS.
You can use Paragon Shell to:
-
Deploy the Routing Director cluster.
-
Upgrade, back up, restore, and edit the cluster configuration.
-
Create and edit users.
-
Configure monitoring with the collection of metrics from different types of sources and forward the collected data to designated sinks or destinations.
-
Retrieve cluster information for troubleshooting.
VMs are appliances containing both the Linux base OS as well as all required application code. When you create and log in to the VMs, you are placed in Paragon Shell, by default. When you exit Paragon Shell, you are placed in the Linux root shell.
Exercise caution while executing commands from the Linux root shell. Commands executed from the Linux root shell are not supported unless explicitly mentioned in the documentation.
The configuration files used to deploy the cluster are stored in the /root/epic/config folder on the VM from which you deployed the cluster.
This guide explains how to:
-
Install and upgrade Routing Director.
-
Shut down and reboot the cluster.
-
Repair and replace nodes.
-
Back up and restore a configuration.