Install Routing Director
This topic describes at a high-level the steps that you must perform to install Routing Director on a hypervisor using an OVA file.
You (system administrator) can install Routing Director by downloading an OVA bundle. Use the OVA bundle to deploy the node virtual machines (VMs) on one or many servers. Alternatively, extract the OVF and .vmdk files from the OVA bundle and use the files to deploy the node VMs. Routing Director runs on a Kubernetes cluster with at least three primary and worker nodes and one worker-only node. The installation is air-gapped but you need Internet access to download the OVA bundle to your computer.
If you are installing from a remote machine, you can instead create a local desktop installer VM, either on the same server where you want to install Routing Director or on a different server. The local desktop installer VM can be a basic Ubuntu desktop VM. This avoids having to download the files into your remote machine, and then running the installation from the remote machine. This is described in the download the OVA section.
To install Routing Director, you must create the node VMs using the downloaded OVA (or OVF and .vmdk) files. The software download files come prepackaged with the base OS and all packages required to create the VMs and deploy your Routing Director cluster. The VMs have Ubuntu 22.04.5 LTS (Jammy Jellyfish) Linux base OS.
Once the VMs are created, you must configure each VM in the same way. When all the VMs are configured and prepared, you deploy the Routing Director cluster. You can deploy the cluster using Paragon Shell.
To install Routing Director, perform the following steps:
-
Prepare the nodes—Download the OVA and create the node VMs.
-
Deploy the cluster—Configure the node VMs and deploy the cluster.
-
Log in to the Web GUI—Verify the deployment and log in to the Web GUI.
Figure 1 illustrates the Routing Director installation process at a high-level.
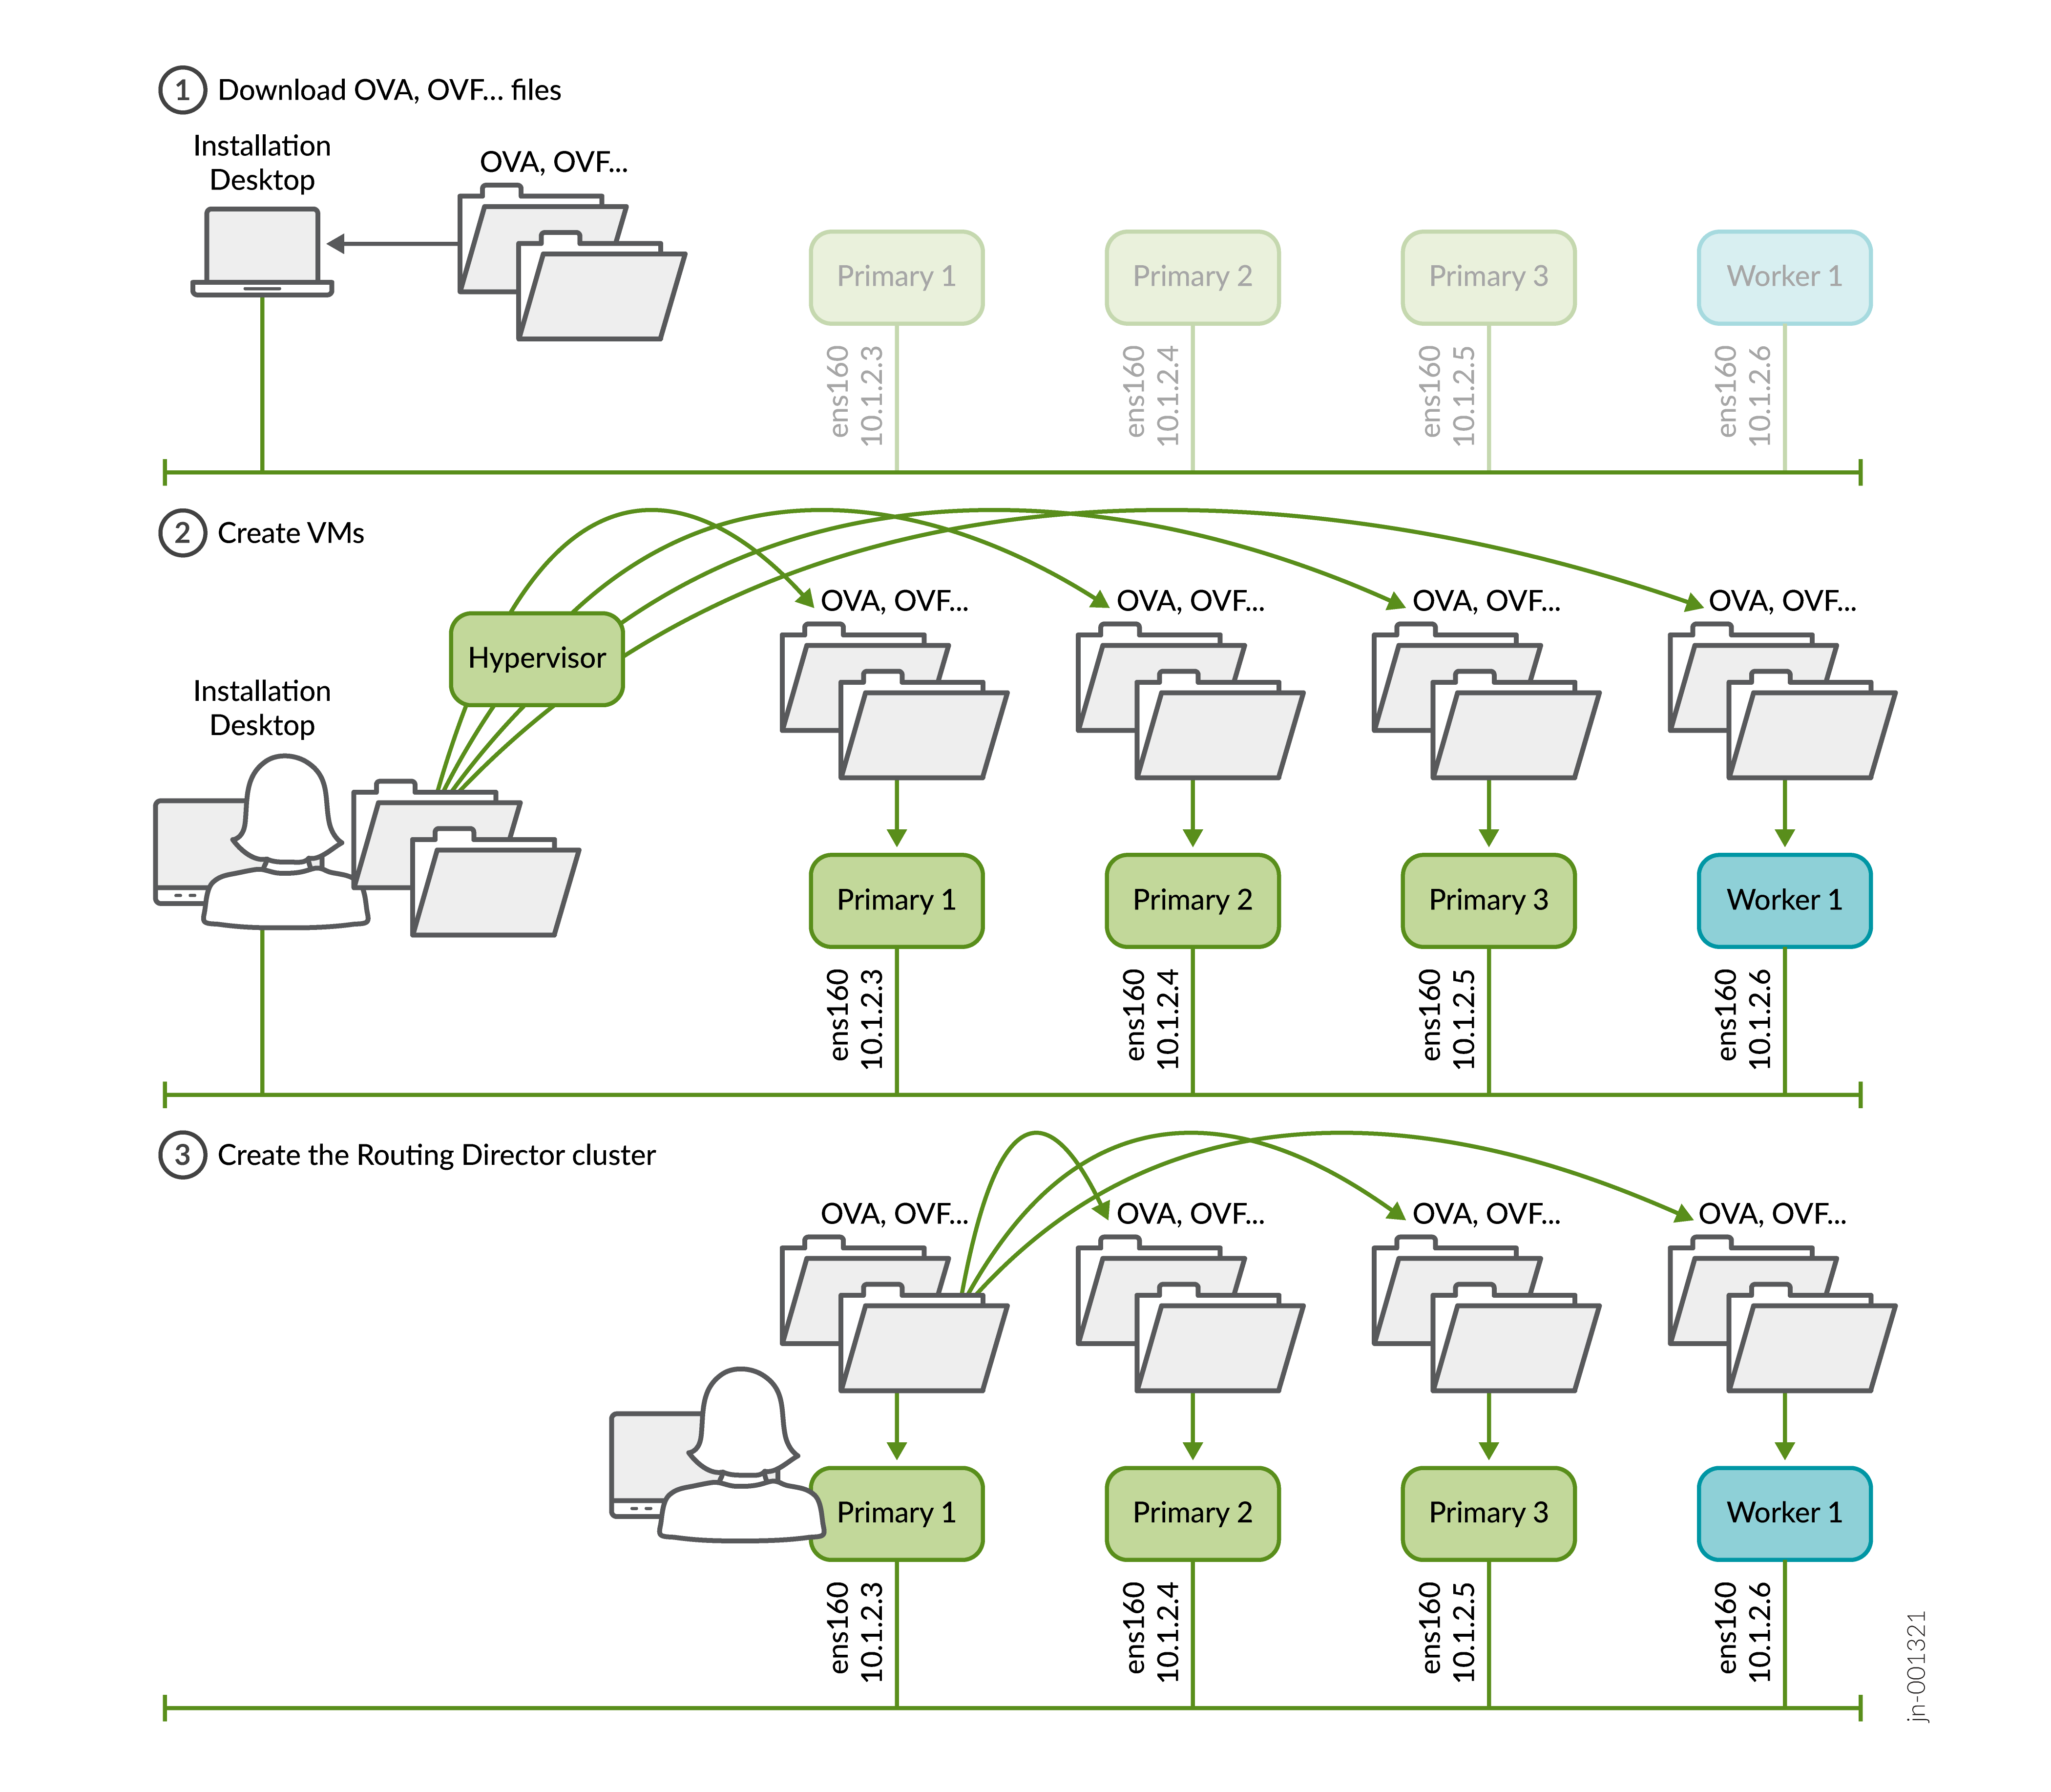
You create the VMs directly using the OVA (or OVF and .vmdk) bundle. You do not need to create the VMs separately with any running software (for example, Ubuntu), or explicitly create interfaces, install Docker separately and so on. These are all automatically created and configured when you create the VMs using the OVA (or OVF and .vmdk) bundle.
Go to Prepare the nodes to begin the installation process.