About This Guide
A Guided Setup to your secure branch office using Juniper SRX Firewalls.
Welcome back! You're the new owner of a SRX300 Line Firewall. In the companion Day One+ guide, you learned how to install and power on the SRX. We also showed you how to perform basic initial configuration using the CLI.
If you’re eager to start using your SRX to provide secure branch connectivity, then you've come to the right place. In this guide, we'll walk you through a typical "Day in the Life" of an SRX administrator who's tasked with securely bringing a new branch office online.
In just a few quick steps, we'll have your branch office up, running, and secured! Here's what your SRX based branch office will soon look like:
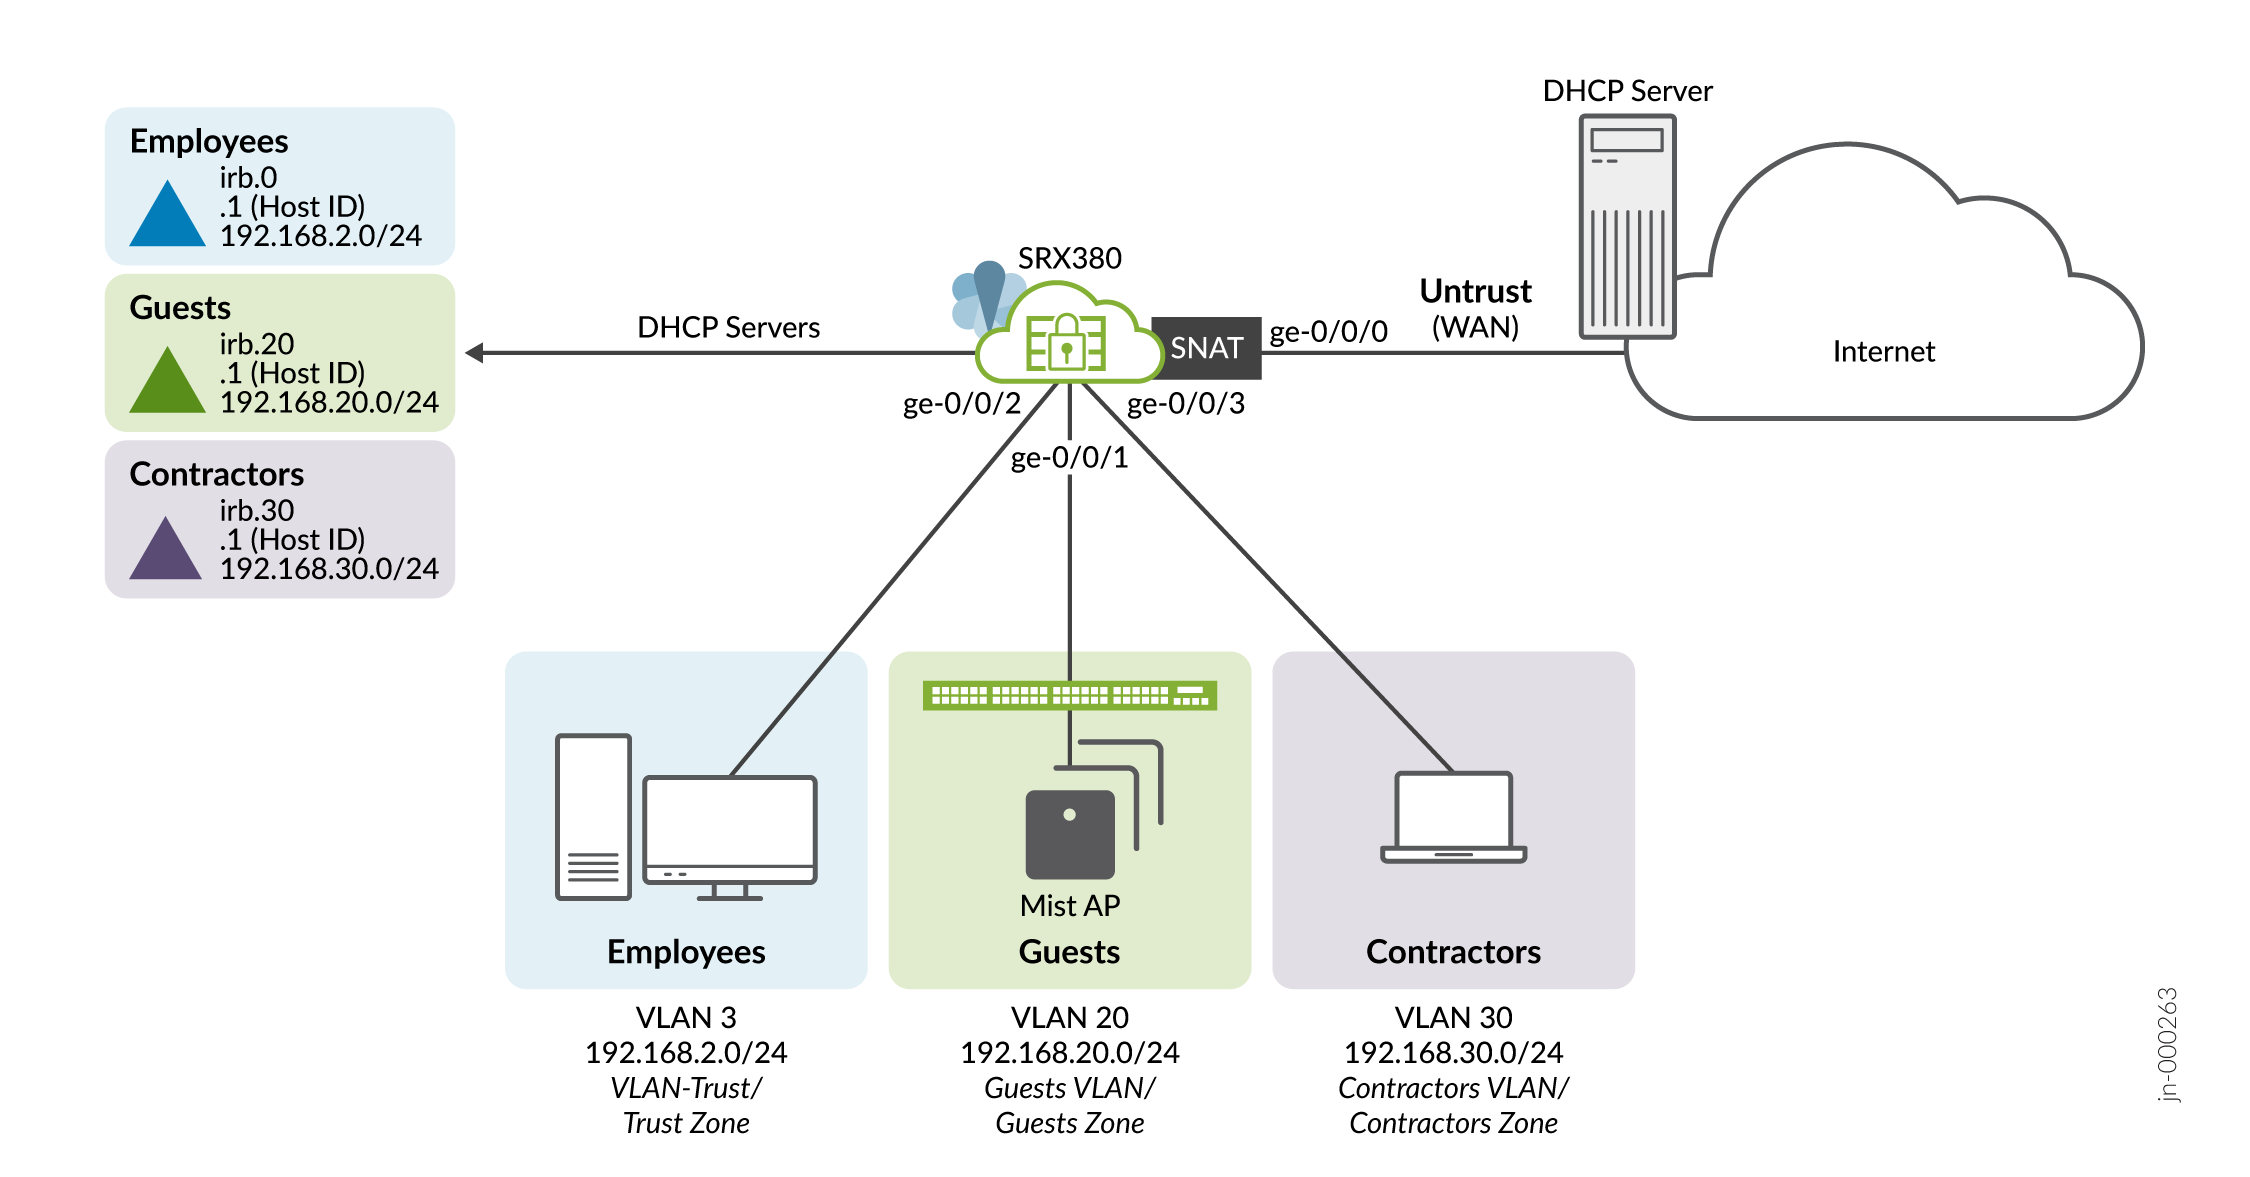
When finished, you’ll have VLANs, security zones, and policies that enforce your connectivity and security requirements.
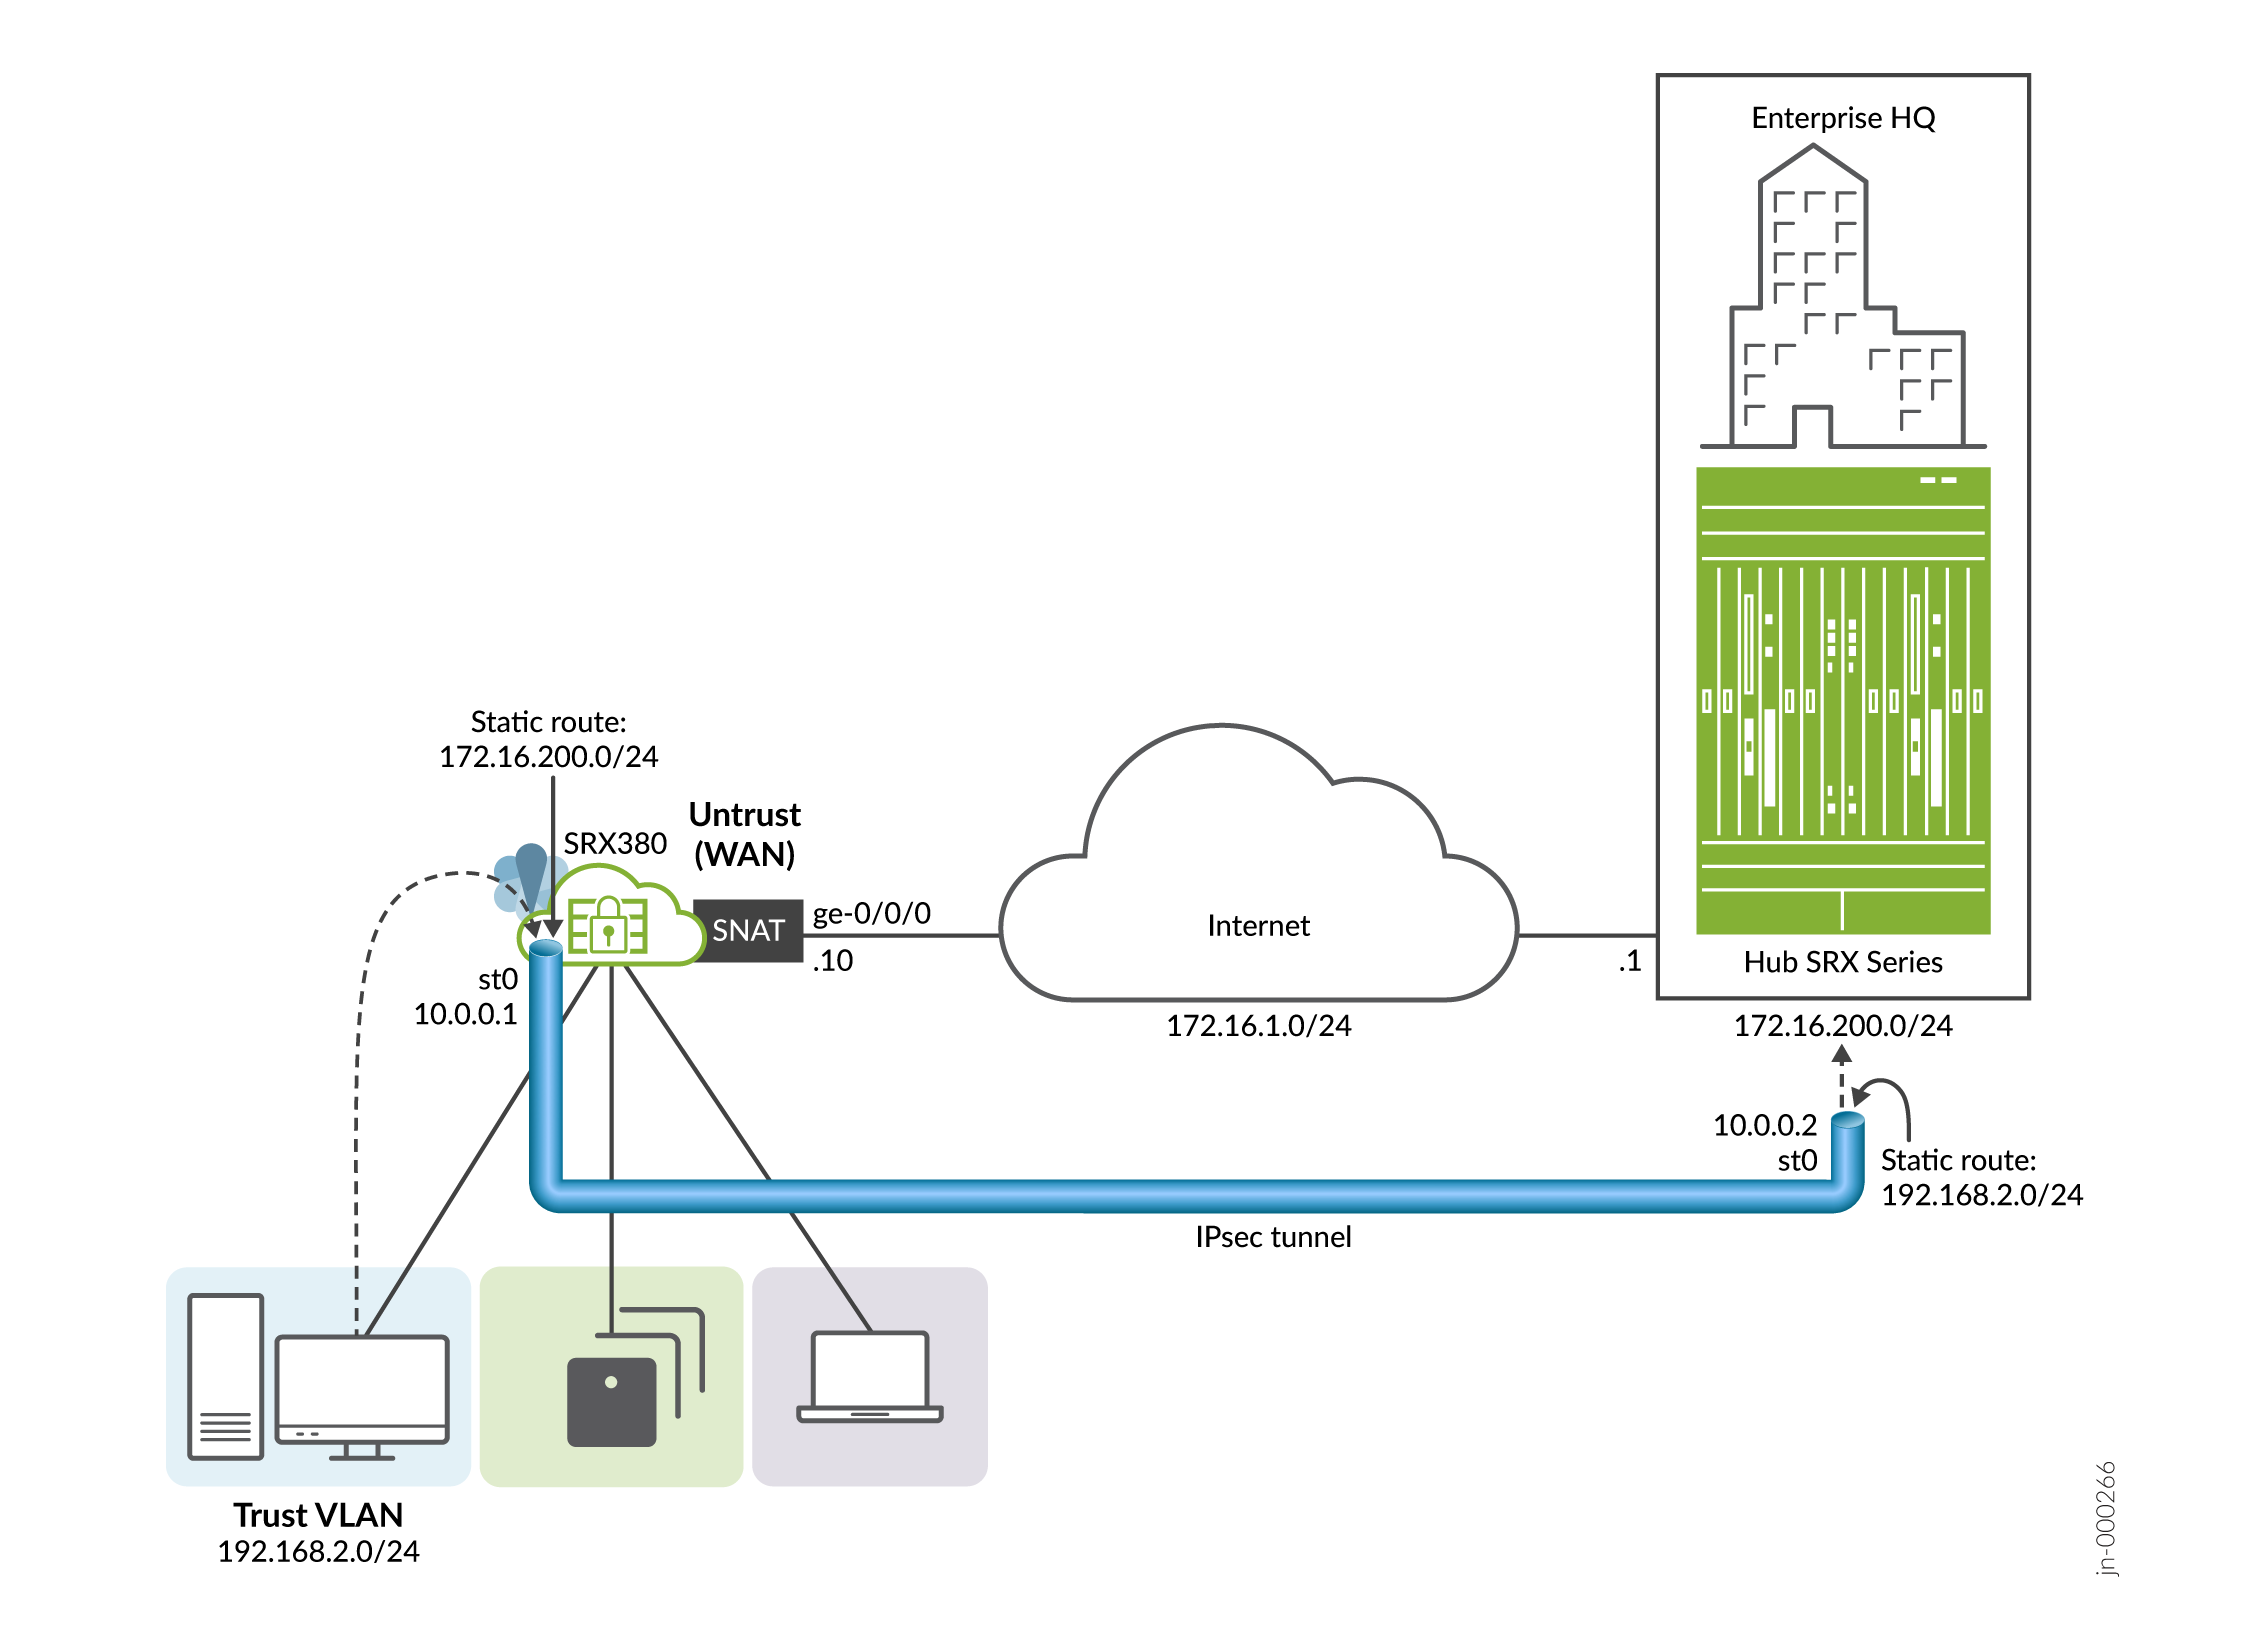
Here are the highlights of your IPsec VPN. The IPsec VPN securely connects your new branch office to a remote location over the Internet.
This guide covers how to:
- Verify Default Branch Connectivity
- Configure Secure Local Branch Connectivity
- Verify Secured LAN Connectivity
- Configure an IPsec VPN
- Verify Your IPsec VPN
This guide is applicable to the SRX300, SRX320, SRX340, SRX345, and SRX380 SRX models. The SRX300 Line of firewalls are targeted to meet the needs of branch (and home ) office locations. We developed and tested the procedures in this guide using an SRX380 running Junos OS release 21.4R1. The SRX380 has a dedicated management interface and supports 16x1GE and 4x10GE network interfaces. Other SRX branch models have different port configurations and may not have a dedicated management interface, but all branch SRX models have a similar factory-default configuration.
The presence or absence of a dedicated management interface has an impact on the IP subnet used for the trusted LAN ports. When present, the management interface is configured as a DHCP server for the 192.168.1.0/24 subnet with the IRB providing DHCP on the 192.168.2.0/24 subnet. If your platform does not have a management port the IRB uses the 192.168.1.0/24 subnet.
Table 1 calls out which platforms have dedicated management ports and the subnet used for the trust LAN ports.
| Platform | Management Port | Management Subnet | Trust LAN Subnet | Comment |
|---|---|---|---|---|
| SRX300 | No | NA | 192.168.1.0/24 | -- |
| SRX320 | No | NA | 192.168.1.0/24 | -- |
| SRX340 | Yes | 192.168.1.0/24 | 192.168.2.0/24 | -- |
| SRX345 | Yes | 192.168.1.0/24 | 192.168.2.0/24 | -- |
| SRX380 | Yes | 192.168.1.0/24 | 192.168.2.0/24 | We used a SRX380 to develop this guide |
We'll provide a lot of links to the main documentation along the way to keep reminding you of where to find additional details. See Table 2 for additional information about the many features you can configure for the Juniper Networks SRX Services Gateway .