Creating a Virtualized Instance of CTPView Server on an ESX Server
Before you begin:
Make sure that vSphere client is installed on you workstation.
Note:Within vSphere, there are numerous ways to perform a particular task. The following example illustrates one such method. You can use the procedure that suits your network deployment effectively.
To create a new CentOS 7 STIG’d VM instance of CTPView server on an ESXi Server:
Copy the CentOS 7 ISO file (centOS-7-x86_64-DVD-1804.iso) to the ESXi datastore. The CentOS 7 ISO can be downloaded from http://vault.centos.org/7.5.1804/isos/x86_64/.
Start the vSphere client and enter the ESXi server IP address and your login credentials.
Start the wizard to create a new virtual machine. Select File > New > Virtual Machine.
Select the configuration as Typical and click Next.
Enter a name for the VM. For example, CTPView_9.0R1.
Select the datastore (with at least 80 GB free space) and click Next.
Select Guest OS as Linux and version as Other Linux (64-bit), and then click Next.
Select the number of NICs as 2 and adapter type as E1000, and then click Next.
Select the virtual disk size as 80 GB and select Thick Provision Lazy Zeroed.
Select the Edit the virtual machine settings before completion check box and click Continue.
Click the Hardware tab and select memory size as 4 GB.
In the Hardware tab, select CPU. Then, select the number of virtual sockets as 2 and number of cores per socket as 1 (you can select up to 4 cores).
In the Hardware tab, select CD/DVD. Then, select the device type as Datastore ISO File and browse to CentOS 7 ISO file. Select the Connect at power on check box under Device Status.
Click Finish.
Select your created virtual machine in the left panel of vSphere > Inventory.
In the Getting Started tab, select Power on the virtual machine.
Switch to the Console tab and click inside the terminal emulator.
Select the Install CentOS Linux 7 option with the Up Arrow key and press Enter.
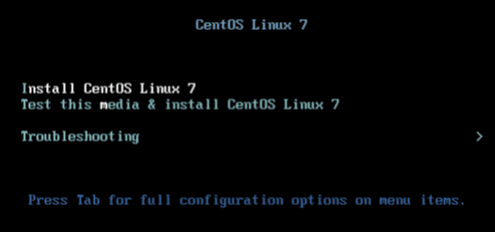
Press the Enter key to begin the installation process.
Select the language and your desired country time zone (if necessary) and then click Continue.
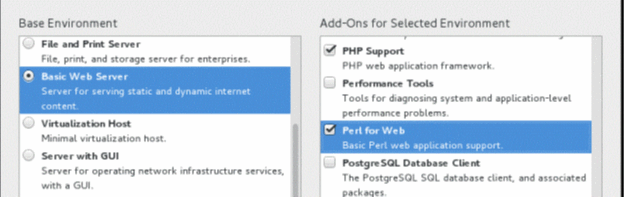
Click the SOFTWARE SELECTION option.

In the Basic Environment section, select the Basic Web Server radio button. In the Add-Ons for Selected Environment section, select PHP Support and Perl for Web check boxes and click Done.
Click INSTALLATION DESTINATION and verify that the VMware Virtual disk (80 GB) is selected.
In the Other Storage Options section, select the I will configure a partitioning option button.
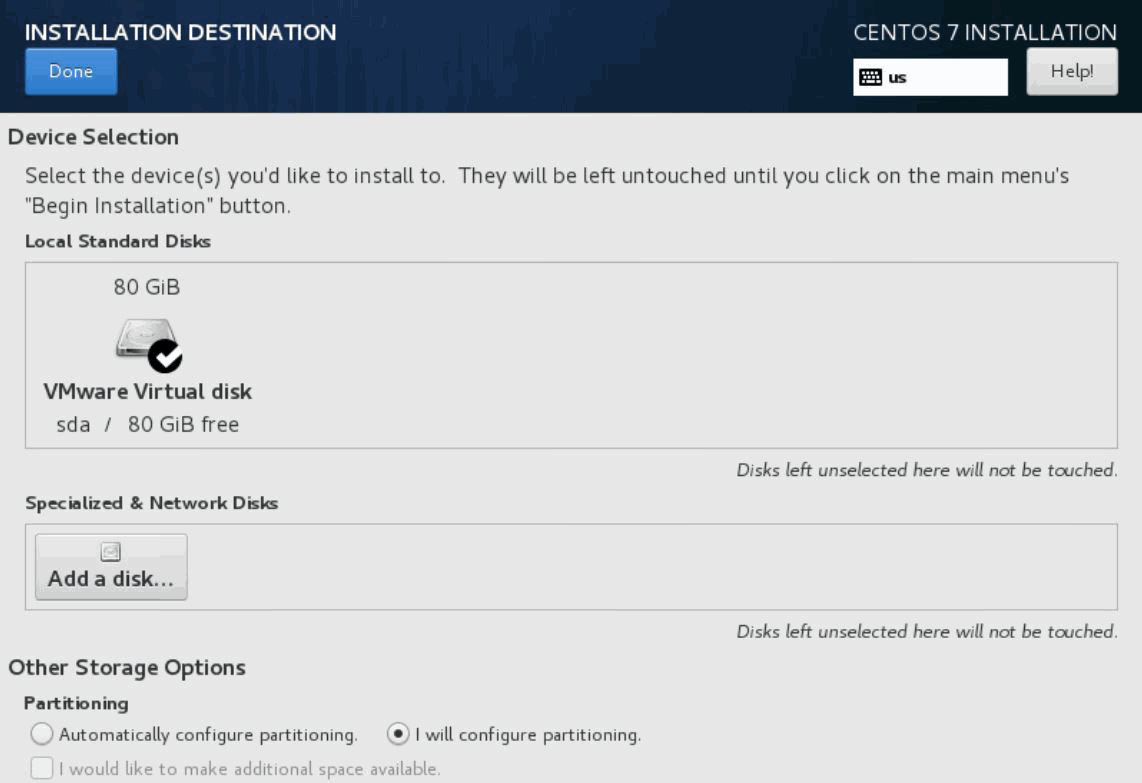
Click Done. The MANUAL PARTITIONING page appears.
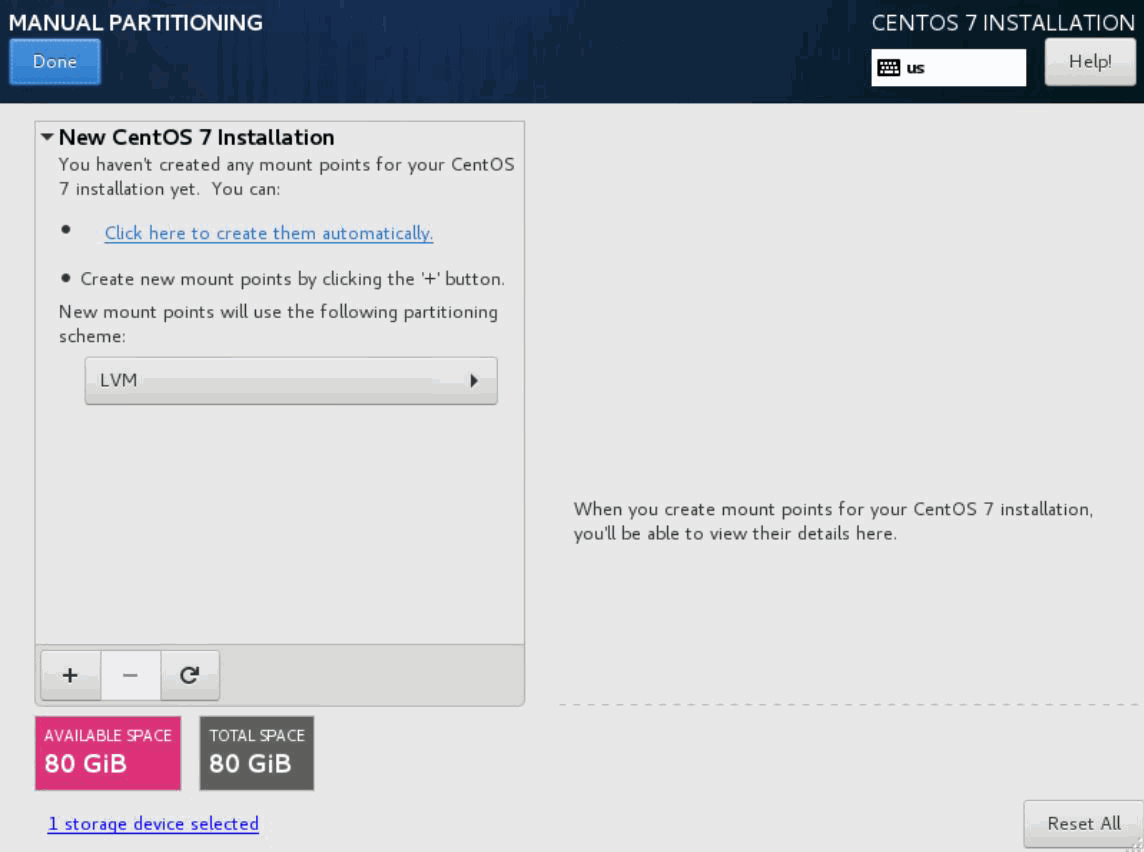
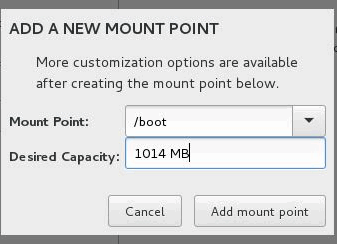
Click the + button. The ADD A NEW MOUNT POINT dialog box appears.
To create a partition for /boot, enter /boot in the Mount Point field and enter 1014 MB in the Desired Capacity field. Then, click Add mount point.
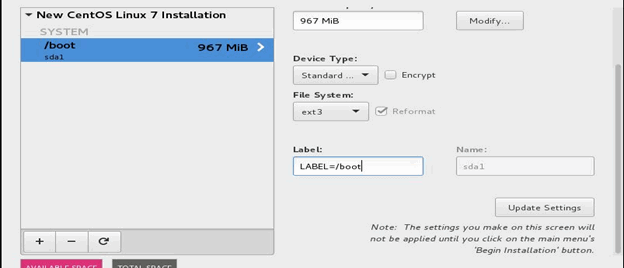
Select Standard Partition from the Device Type list and select ext3 from the File System list. Enter LABEL=/boot in the Label field and then click Update Settings.
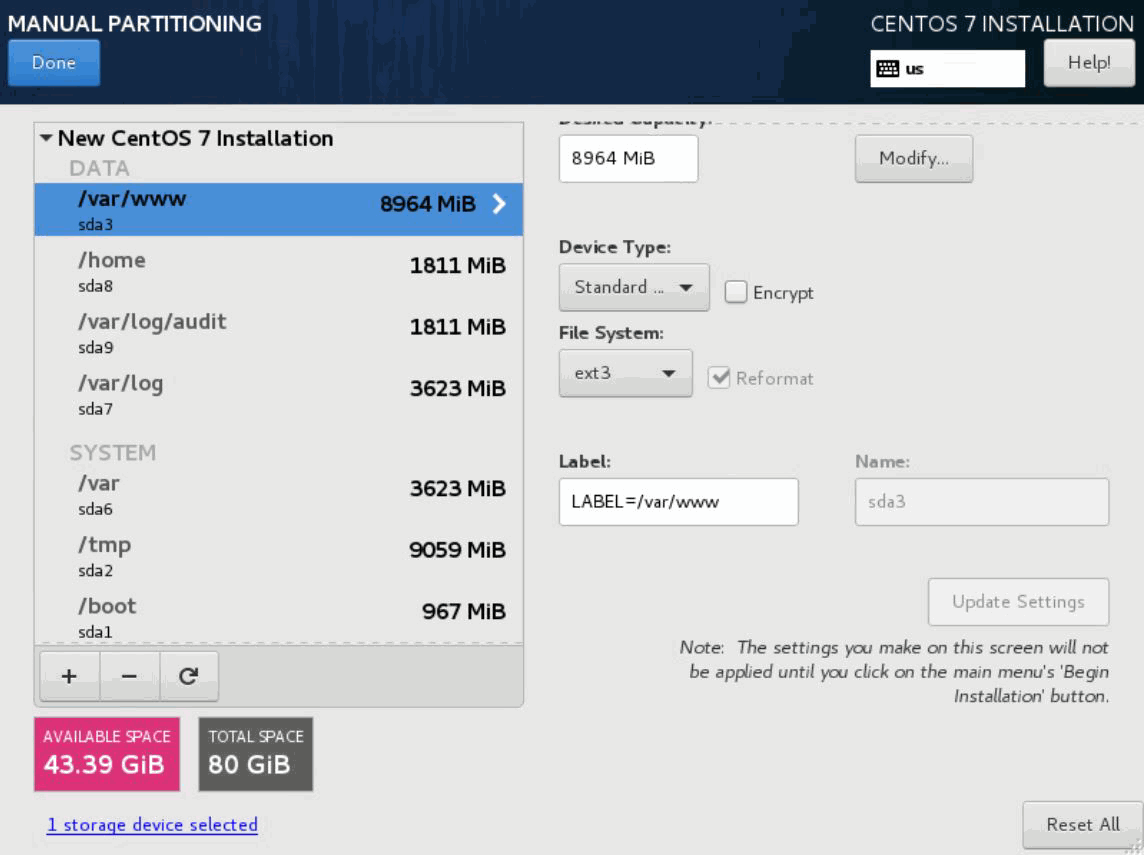
Similarly, repeat the steps 26 through 28 to create partitions for the following mount points with the provided settings.
Table 1: Mount Points and Their Settings Mount Point
Desired Capacity
Device Type
File System
Label
/tmp
9.5 GB
Standard Partition
ext3
LABEL=/tmp
/
8 GB
Standard Partition
ext3
LABEL=/
/var/log
3.8 GB
Standard Partition
ext3
LABEL=/var/log
/var
3.8 GB
Standard Partition
ext3
LABEL=/var
/var/log/audit
1.9 GB
Standard Partition
ext3
LABEL=/var/log/a
/home
1.9 GB
Standard Partition
ext3
LABEL=/home
/var/www
9.4 GB
Standard Partition
ext3
LABEL=/var/www
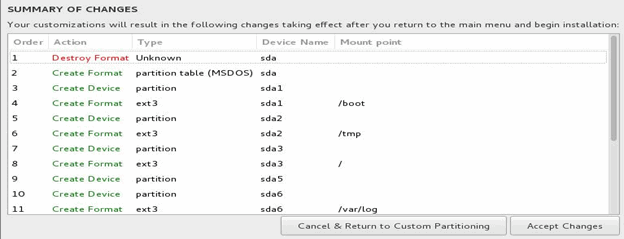
Click Done twice and then click Accept Changes.
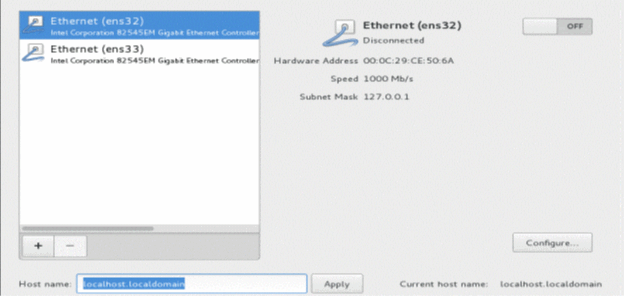
Click NETWORK & HOST NAME.
Select an Ethernet option (for example, Ethernet (ens32)), enter the hostname (for example, ctpview) in the Host name field, and then click Apply.
Click Configure. Then, click the IPv4 Settings tab.
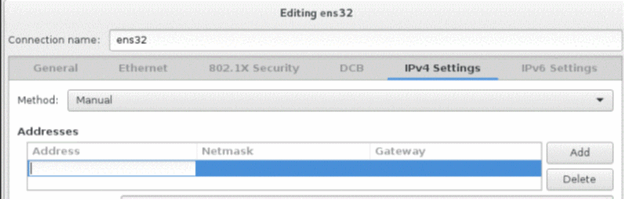
Select Manual from the Method list and click Add.
Enter values for Address, Netmask, and Gateway fields, and then click Save.
Click the toggle button in the right-top corner to bring the configured Ethernet up and running, and then click Done.
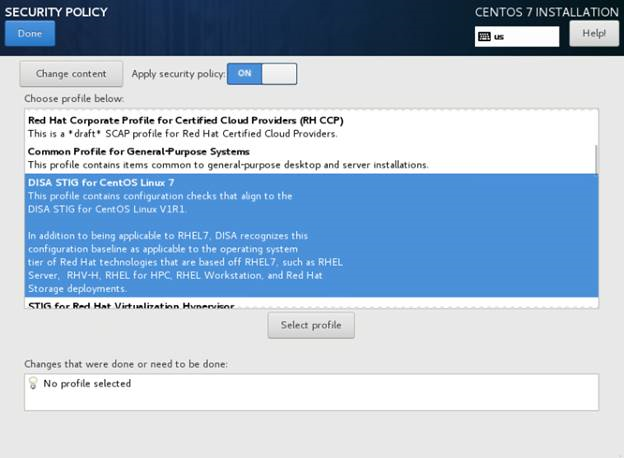
Click SECURITY POLICY.
Select the DISA STIG for CentOS Linux 7 Server option and click Select Profile. Then, click Done.
 Note:
Note:Skip this step, if you are creating a non-STIG’d VM.
Click Begin Installation. The USER SETTINGS page appears.
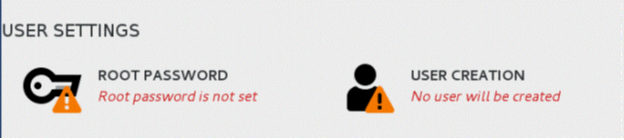
Click USER CREATION and enter the username as “admin” and enter a password. Do Not use the username “juniper_sa”.
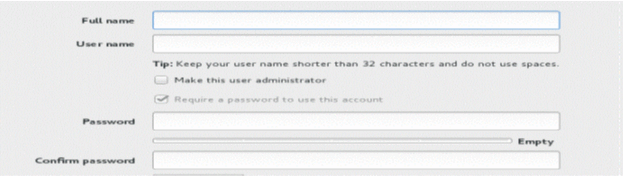
Select the Make this user administrator check box and click Done.
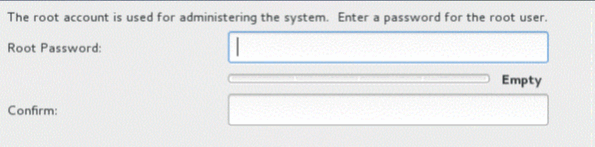
In the USER SETTINGS page, click ROOT PASSWORD, enter a password for the root account and click Done.
Remember the passwords. Password recovery is not a simple process and is service affecting. It requires console access to the CTPView and requires rebooting of CTPView (possibly even a system re-power).
Note:If unique passwords are not required, use the password as “CTPView-2-2”.
After the installation process is completed, click Reboot.
Note:By default, USB mass storage device will not be detected on CentOS 7 server as it is blacklisted due to security requirements.To enable USB mass storage device on CentOS 7:
Comment the line install usb-storage /bin/true in the file /etc/modprobe.d/usb-storage.conf.
Reboot the server.