IPv6 Addresses
IPv6 Addresses
IPv6 is supported on EVPN L2 deployments and L3 deployments. Full feature parity for IPv6 across vendors is not available. Refer to the Feature Matrix for details.
To use IPv6 addressing, you must enable IPv6 in the blueprint (Staged > Policies > Fabric Addressing Policy).
You'll create IP pools in the Resources section, then when you're building your blueprint you'll assign those pools. The resources from the pool will automatically be pulled, as needed.
If you need to assign a specific Loopback IP address or Link IP address, you can assign it manually.
IPv6 Pool Details
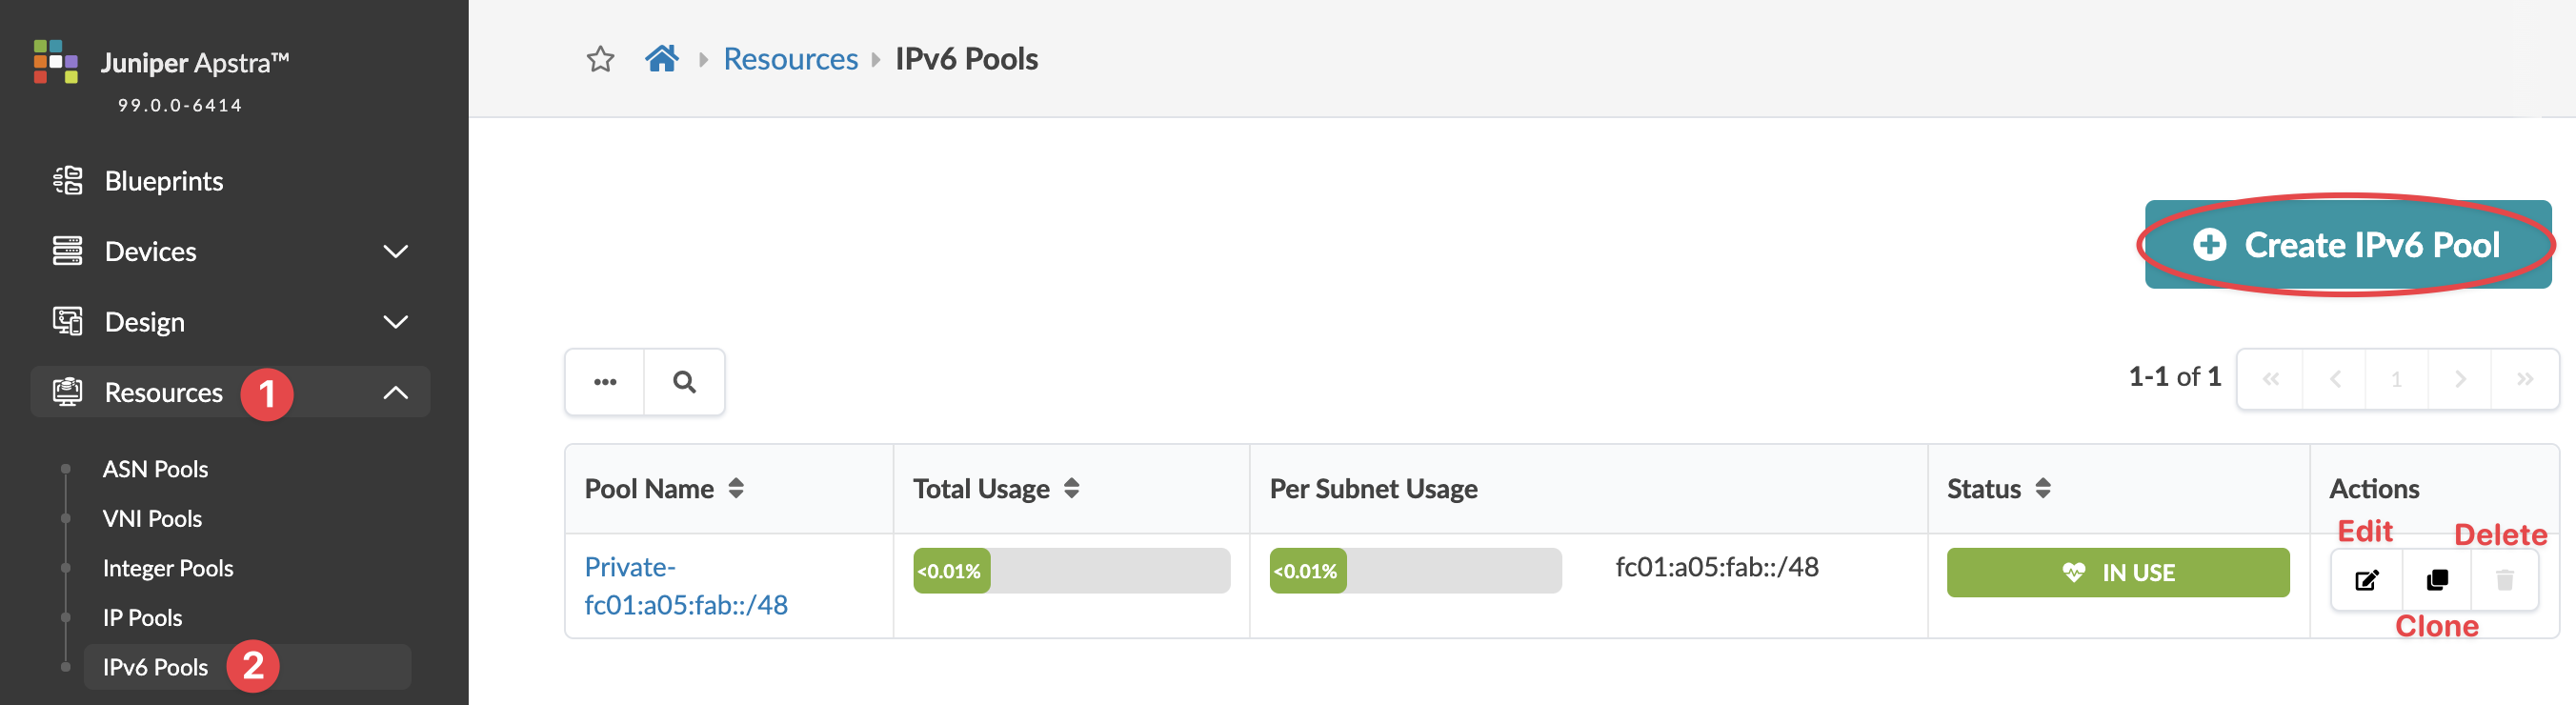
IPv6 pools include the following details:
| Pool Name | A unique name to identify the resource pool |
| Total Usage | Percentage of IPv6 addresses in use for all subnets in the resource pool. (Hover over the status bar to see the number of IPv6 addresses in use and the total number of IPv6 addresses in the pool.) |
| Per Subnet Usage | The IPv6 addresses included in the subnet and the percentage that are in use. (Hover over the status bar to see the number of IPv6 addresses in use and the total number of IPv6 addresses in that subnet.) |
| Status | Indicates if the pool is in use |
IPv6 Pools Using the GUI
From the left navigation menu, navigate to Resources > IPv6 Pools to go to the IPv4 Pools page where you can create (clone), edit and delete IPv6 pools. The pool fc01:a05:fab::/48 is predefined.
Create IPv6 Pool
Update IPv6 Pool
You can add, change and delete subnets in IPv6 pools, but if an IPv6 address in a subnet is in use, you can't remove the subnet.
To update an IPv6 pool using the GUI: