Create Configlet
Create configlets in the Design catalog in preparation for importing them into blueprints.
To create a configlet in the GUI:
-
From the left navigation menu, navigate to Design >
Configlets and click Create Configlet.
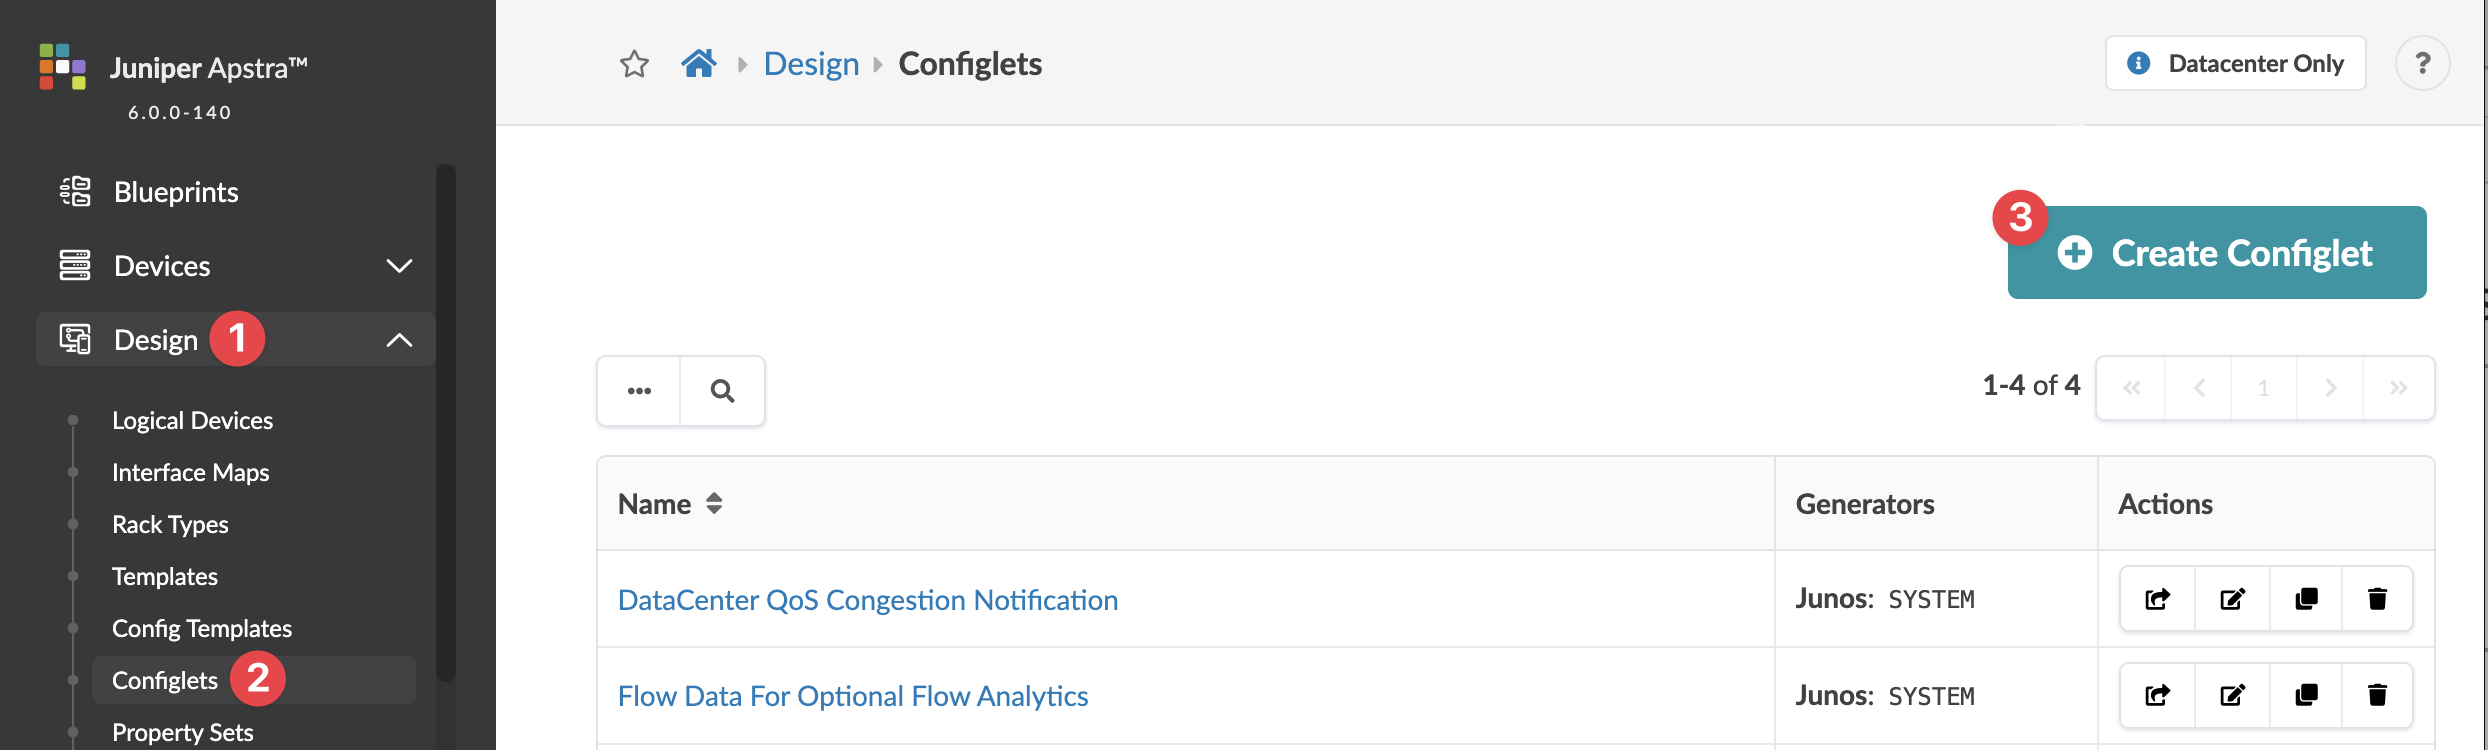 The Create Configlet dialog opens.
 -
If you've created a configlet JSON payload, click Import
Configlet and select the file to import. Otherwise, continue to the next
step.

Either click Choose File and navigate to the image on your computer; or drag and drop the image from your computer into the dialog window, click Import Configlet, then click Create.
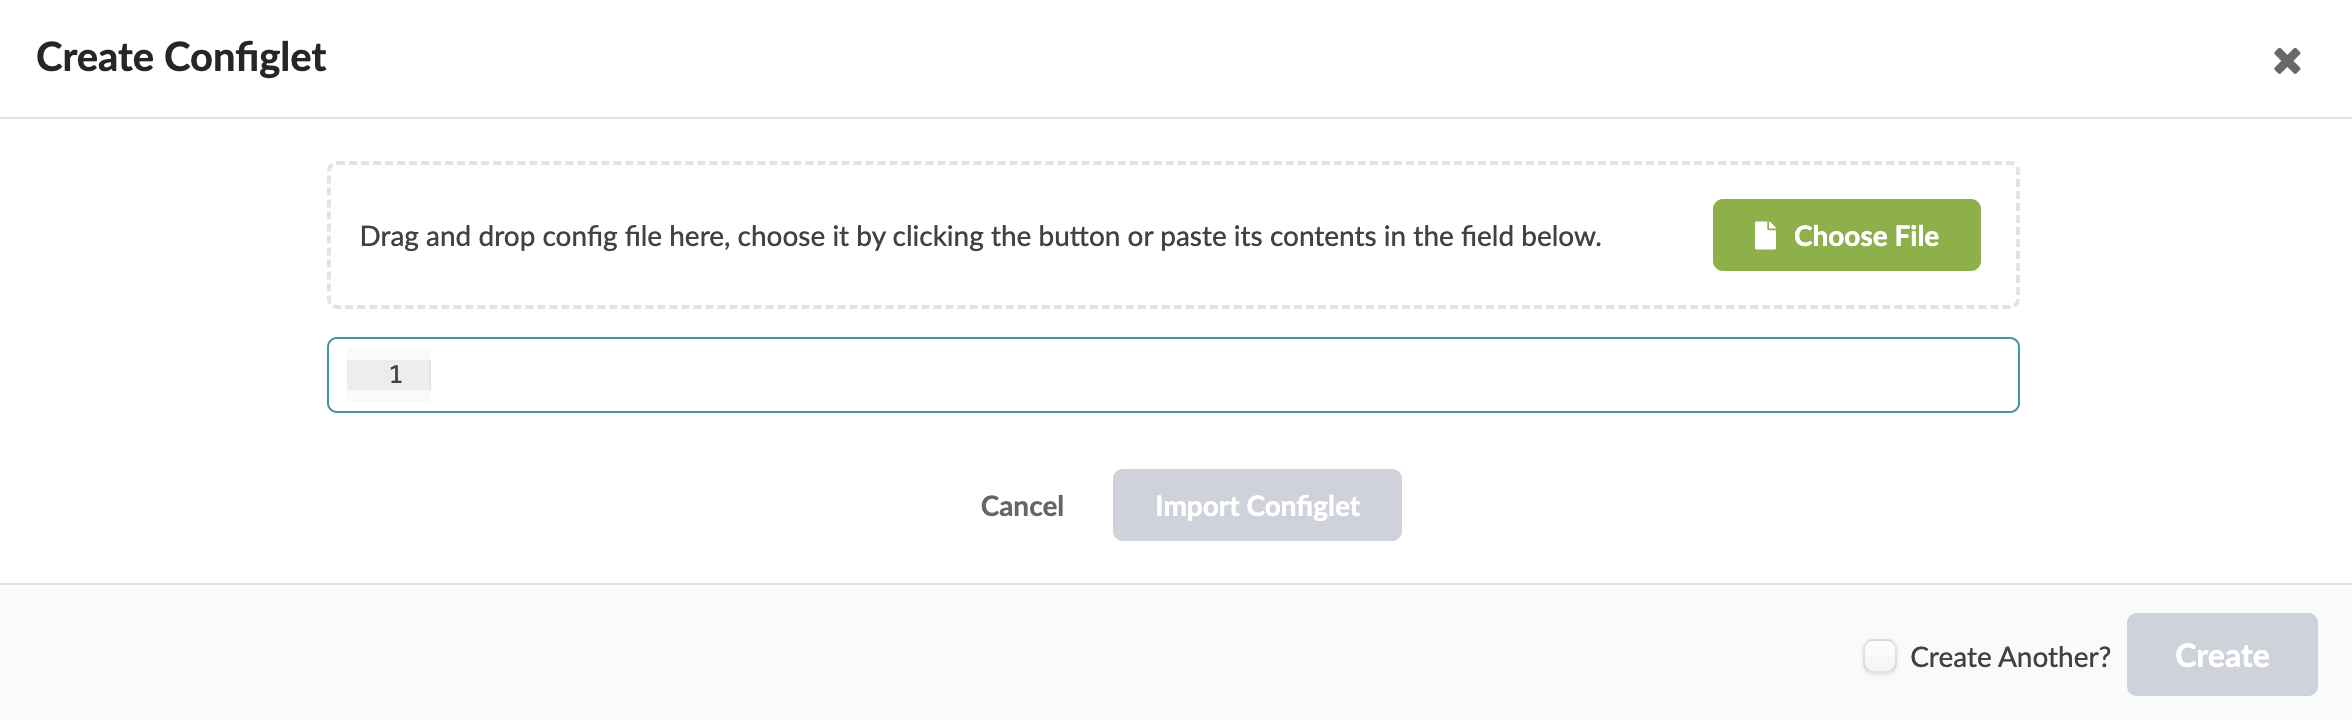
The configlet is created and you're returned to the Configlets table view.
-
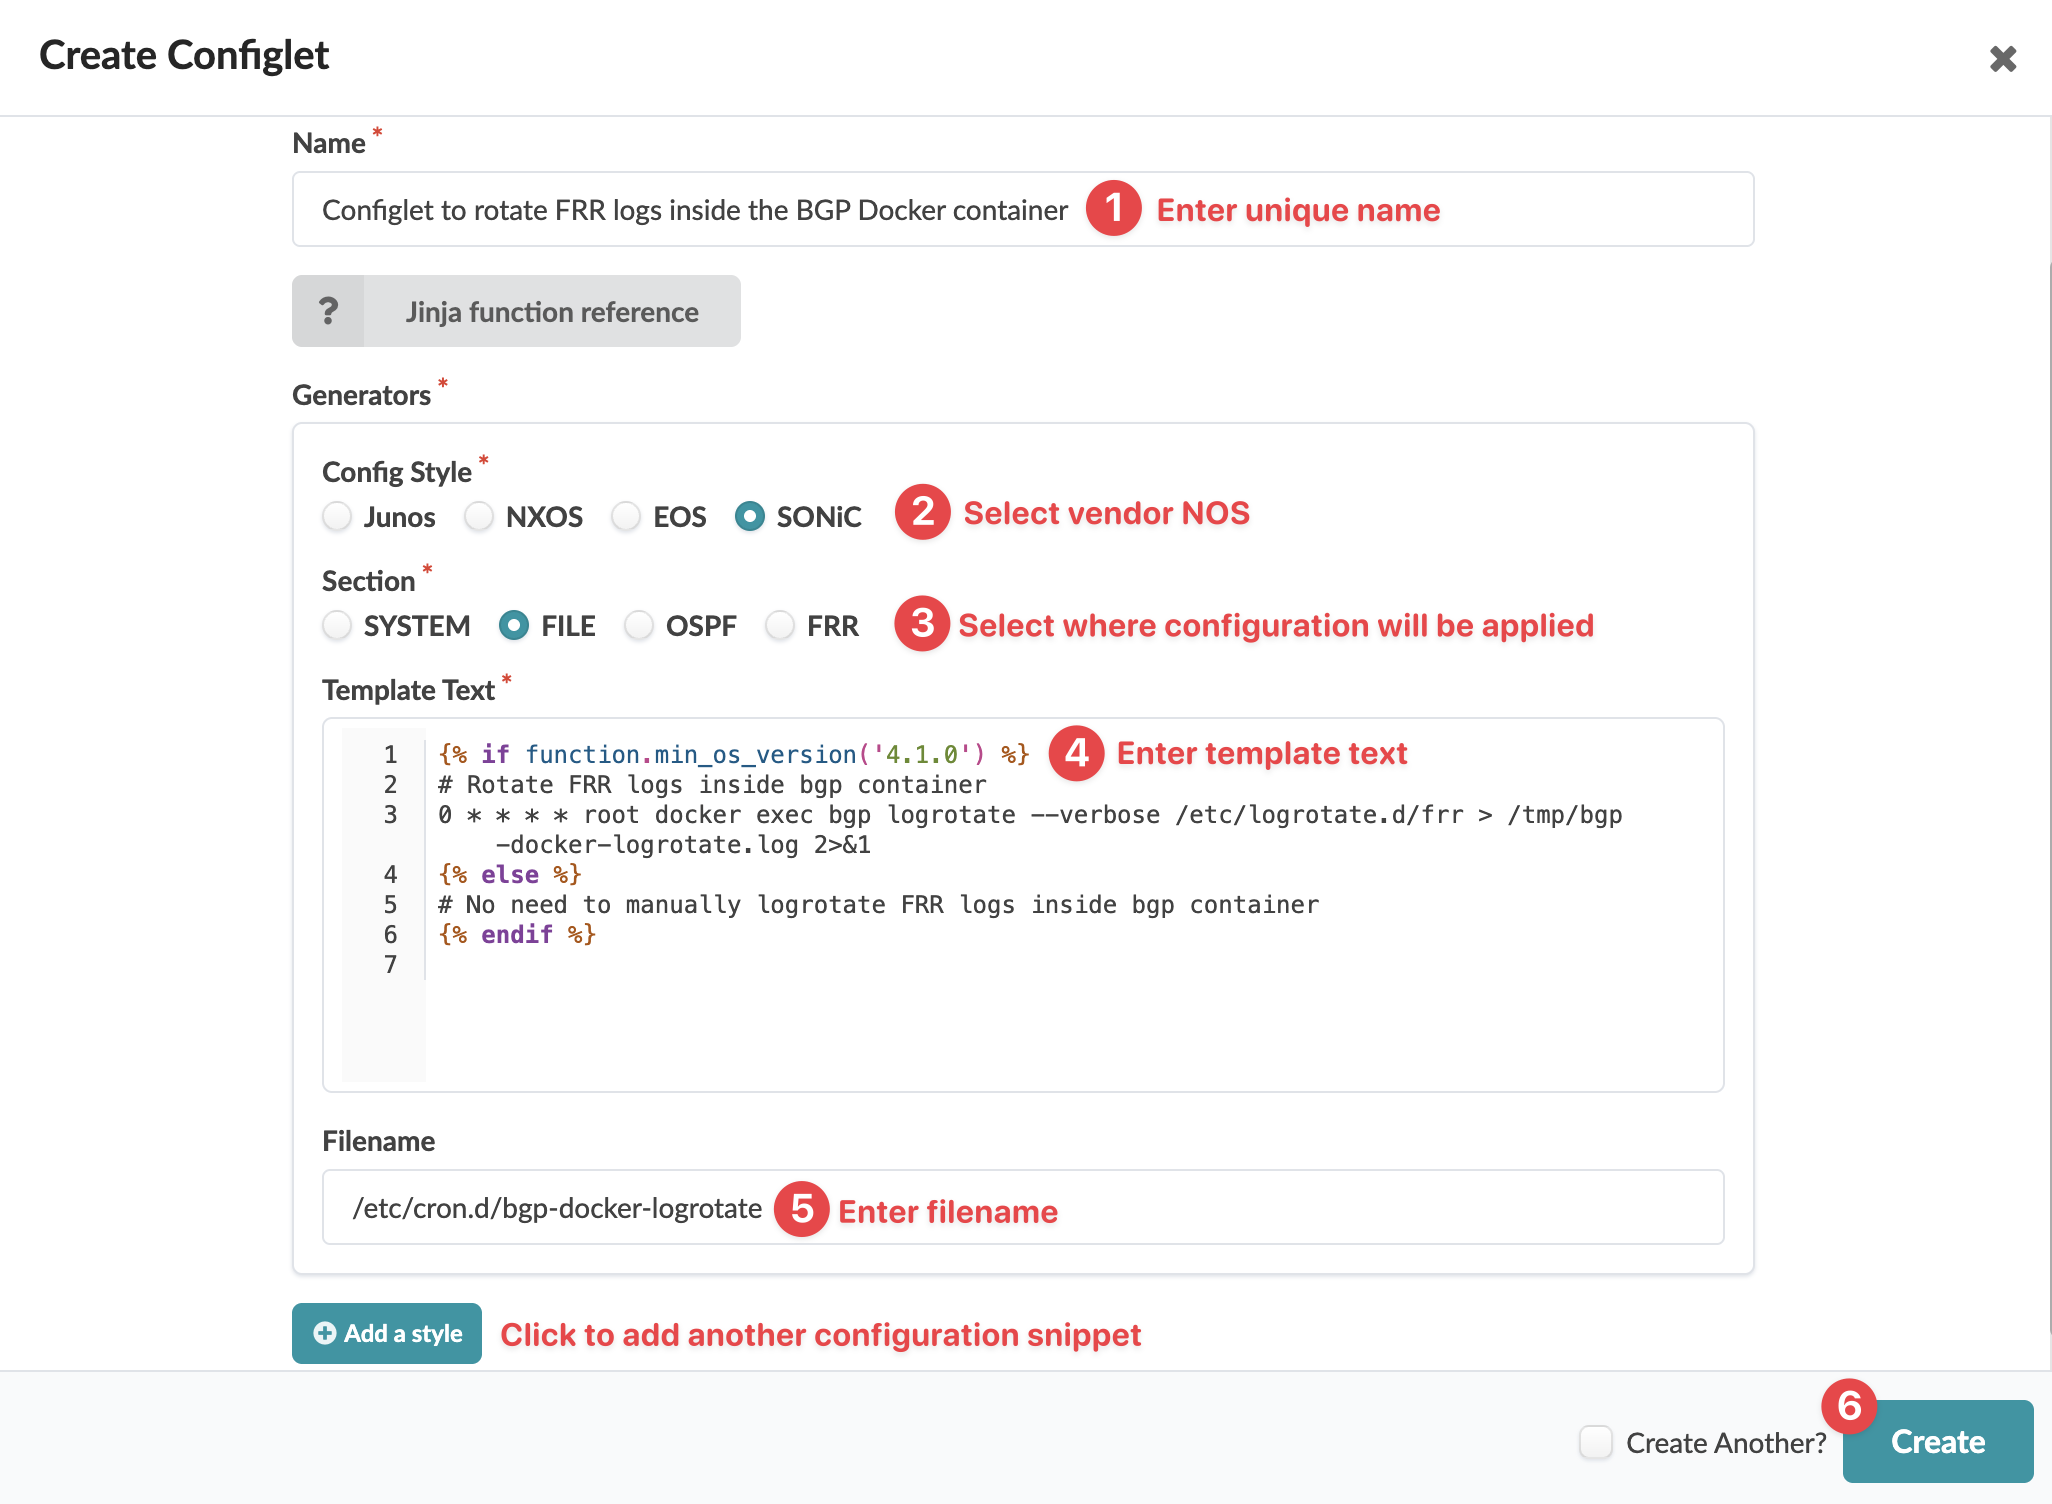
If you're not uploading a JSON file, then enter configlet details manually.
Configlet parameters vary depending on the NOS type and the location where the configlet is to to take effect. For some references, see the configlet examples and the GitHub repo. You can also access a dictionary of variables (device model) that you can use when you create configlets, see the Device Configuration Lifecycle.
Our example is for SONiC configuration that's added as a file at the end of rendering steps.
When you’re ready to use the configlet in a blueprint, import it into the blueprint's catalog and define its scope (based on role, name, hostname, and/or system tags.