Step 1: Begin
This guide walks you through the simple steps to install Juniper® Paragon Automation and use Juniper® Paragon Automation to onboard, manage, and monitor networks devices.
Meet Paragon Automation
Paragon Automation provides end-to-end transport network automation and simplifies the adoption of network automation for device, network, and service life cycles from Day 0 to Day 2.
You can onboard ACX7000 Series, PTX Series, MX Series, EX Series Switches, QFX Series Switches, and Cisco devices listed in Paragon Automation Supported Hardware to Paragon Automation and manage them.
Install Paragon Automation
Before you install the Paragon Automation application, ensure that your server(s) meet the requirements listed in this section. A Paragon Automation cluster should contain only four nodes [virtual machines (VMs)], with three nodes acting as both primary and worker nodes and one node acting as a worker-only node.
Requirements
Hardware Requirements
The bare minimum resources required for each of the four nodes in the cluster are:
-
16-core vCPU
-
32-GB RAM
-
300-GB SSD (SSDs are mandatory)
-
These VMs do not need to be in the same server, but the nodes need to be able to communicate over an L2 or L3 network.
-
The hardware resources needed for each node VM depend on the size of the network that you want to onboard. To get a scale and size estimate of a production deployment and to discuss detailed dimensioning requirements, contact your Juniper Partner or Juniper Sales Representative.
Software Requirements
Use any of the following bare metal-hypervisors to deploy Paragon Automation on one or more servers:
-
VMware ESXi 8.0
-
Kernel-based virtual machines (KVM)
For a KVM, use RHEL 8.10 as the host OS. For details about using KVM, see Software Requirements.
-
Proxmox Virtual Environment (VE)
Network Requirements
You can configure the Paragon Automation cluster by using IPv6 addresses in addition to IPv4 addresses. While configuring IPv6 addresses is optional, you must configure IPv4 addresses.
The nodes can be in the same network or in the different networks. In either case, the four nodes of a Paragon Automation installation must be able to communicate with each other through SSH. You must have the following addresses available for the installation.
-
IPv4 addresses (and optionally IPv6 addresses), one for each of the four nodes.
-
A Virtual IP (VIP) address for generic ingress shared between gNMI, OC-TERM, and the Web UI.
Alternatively, you can also use two VIP addresses—one for the Web GUI and another for gNMI and OC-TERM.
-
A VIP address for Paragon Active Assurance Test Agent gateway (TAGW).
-
A VIP address to establish Path Computational Element Protocol (PCEP) sessions between Paragon Automation and the devices for collecting label-switched path (LSP) information from the device.
-
A VIP address (cRPD VIP) for establishing BGP Monitoring Protocol (BMP) session with external devices for routing observability.
-
IPv6 address is not supported for the PCE server and establishing BMP sessions.
-
You must configure the IPv6 addresses when you deploy the cluster. You cannot configure IPv6 addresses after a cluster is deployed using only IPv4 addresses.
If your cluster nodes are in different subnets, in addition to the listed addresses, you must ensure that:
-
The cluster nodes have BGP connectivity with the respective upstream gateway top-of-rack (ToR).
-
BGP peering is established between the cluster nodes and the ToR routers.
For more information, see Network Requirements.
Browser Requirements
Paragon Automation is supported on the latest version of Google Chrome, Mozilla Firefox, and Safari.
Installation Workflow
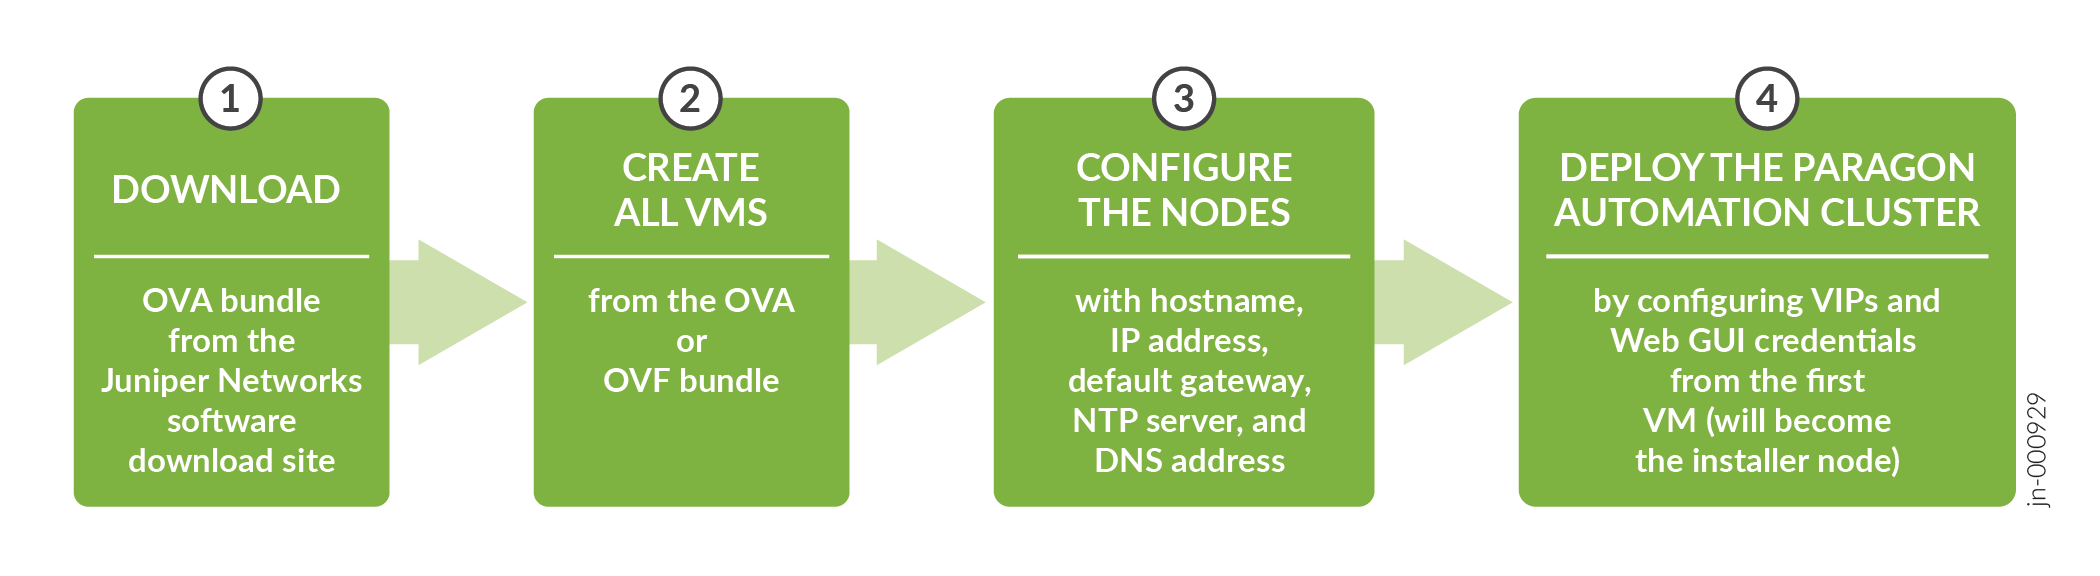
A system administrator can install Paragon Automation by downloading an OVA bundle and using the OVA bundle to deploy the node VMs on one or more VMware ESXi servers. Alternatively, you must extract the VMDK files from the OVA bundle and use them to deploy the node VMs on a KVM server or Proxmox VE. Paragon Automation runs on a Kubernetes cluster with three primary/worker nodes and one worker-only node. The installation is air-gapped but you need Internet access to download the OVA bundle to your computer.
Figure shows the workflow at a high-level for installing Paragon Automation.
For a detailed workflow, see Install Paragon Automation.
To install Paragon Automation, perform the following tasks:
-
Download the OVA bundle from the Software Download Site.
-
Create the VMs.
You use the OVA (or OVF and VMDK files) bundle to create your node VMs. The software download files come prepackaged with the OS and all packages required to create the VMs and deploy your Paragon Automation cluster. The VMs have Ubuntu 22.04.5 LTS (Jammy Jellyfish) Linux base OS.
For details, see Create the Node VMs.
-
Configure the node VMs.
Once the VMs are created, you must configure hostname, IP address, DNS, and NTP server on each VM in the same way.
For details, see Configure the Node VMs.
-
Deploy the cluster.
After all the VMs are configured, you can deploy the Paragon Automation cluster from the first VM. For details, see Deploy the Cluster Nodes.
Log in to Paragon Automation
To log in to the Paragon Automation Web GUI:
-
Enter the common ingress VIP address in a browser to open the Paragon Automation login page.
The common ingress IP address, that you configured during installation, can be either IPv4 or IPv6.
To use the IPv4 address to connect to the Web GUI, enter the address in the https://ingress-vip format in the URL. For example, https://10.1.2.7.
To use the IPv6 address to connect to the Web GUI, enter the address in the https://[ingress-vip-ipv6] format in the URL. Ensure that you enclose the IPv6 address within square brackets. For example, https://[2001:db8:1:2::7].
Alternatively, if you have configured hostnames, you can use https://ingress-vip-dns-hostname to access the GUI.
-
Enter the Web admin user e-mail address and password that you configured while deploying Paragon Automation.
The New Account page appears. You are now logged into Paragon Automation. You can now create organizations, sites, and users.
Add an Organization, a Site, and Users
Add an Organization
After you log in to the Paragon Automation GUI for the first time after installation, you must create an organization. After you create the organization, you are the superuser for the organization.
You can add only one organization in this release. Adding more than one organization can lead to performance issues and constrain the disk space in the Paragon Automation cluster.
To create an organization:
After you create an organization, you can add sites and users to the organization.
Create a Site
A site represents the location where devices are installed. You must be a superuser to add a site.
Add Users
The superuser can add users and define roles for the users.
To add a user to the organization: