ON THIS PAGE
Step 2: Up and Running
Now that the NFX150 is powered on, let’s get it up and running!
Plug and Play
The NFX150 already has factory-default settings configured right out of the box to make it a plug-and-play device. These settings are loaded as soon as you power it on. By default, DHCP, HTTPS, and TFTP services are enabled, and a basic set of screens are configured on the untrust zone. To see other default settings, see “Factory-Default Settings” in Initial Configuration on NFX150 Devices.
You can easily customize the default configuration with just a few commands. You can always revert to the factory-default configuration anytime you want.
Connect and Configure
Before you begin connecting and configuring your NFX150, verify that your laptop or desktop PC is set to these defaults:
Baud Rate—9600
Flow Control—None
Data—8
Parity—None
Stop Bits—1
DCD State—Disregard
- Connect the RJ-45 console port (labeled
CONon the front panel) to a laptop or desktop PC using the RJ-45 cable and RJ-45 to DB-9 adapter (not provided). The CLI displays a login prompt.Note Alternately, you can use a USB cable to connect to the mini-USB console port on the device. To use the mini-USB console port, you’ll need to download the USB driver from the following page and install it on your laptop or desktop PC:
- Log in as root. You don’t need to enter
a password. If the software boots before you connect the cable to
the console port, you might need to press the
Enterkey for the prompt to appear.login: root - Start the CLI. root@># cli
- Enter configuration mode.root@># configure
- Add a password to the root administration user account.
Enter a plain text password.[edit]root@># set system root-authentication plain-text-passwordNew password: passwordRetype new password: password
- Enable SSH service for the root user.[edit]root@>#set system services ssh root-login allow
- Commit the configuration.[edit]root@>#commit
- Connect the NFX150 to the Internet (WAN ports 0/4 or 0/5).
The ISP assigns an IP address to the NFX150 through DHCP.
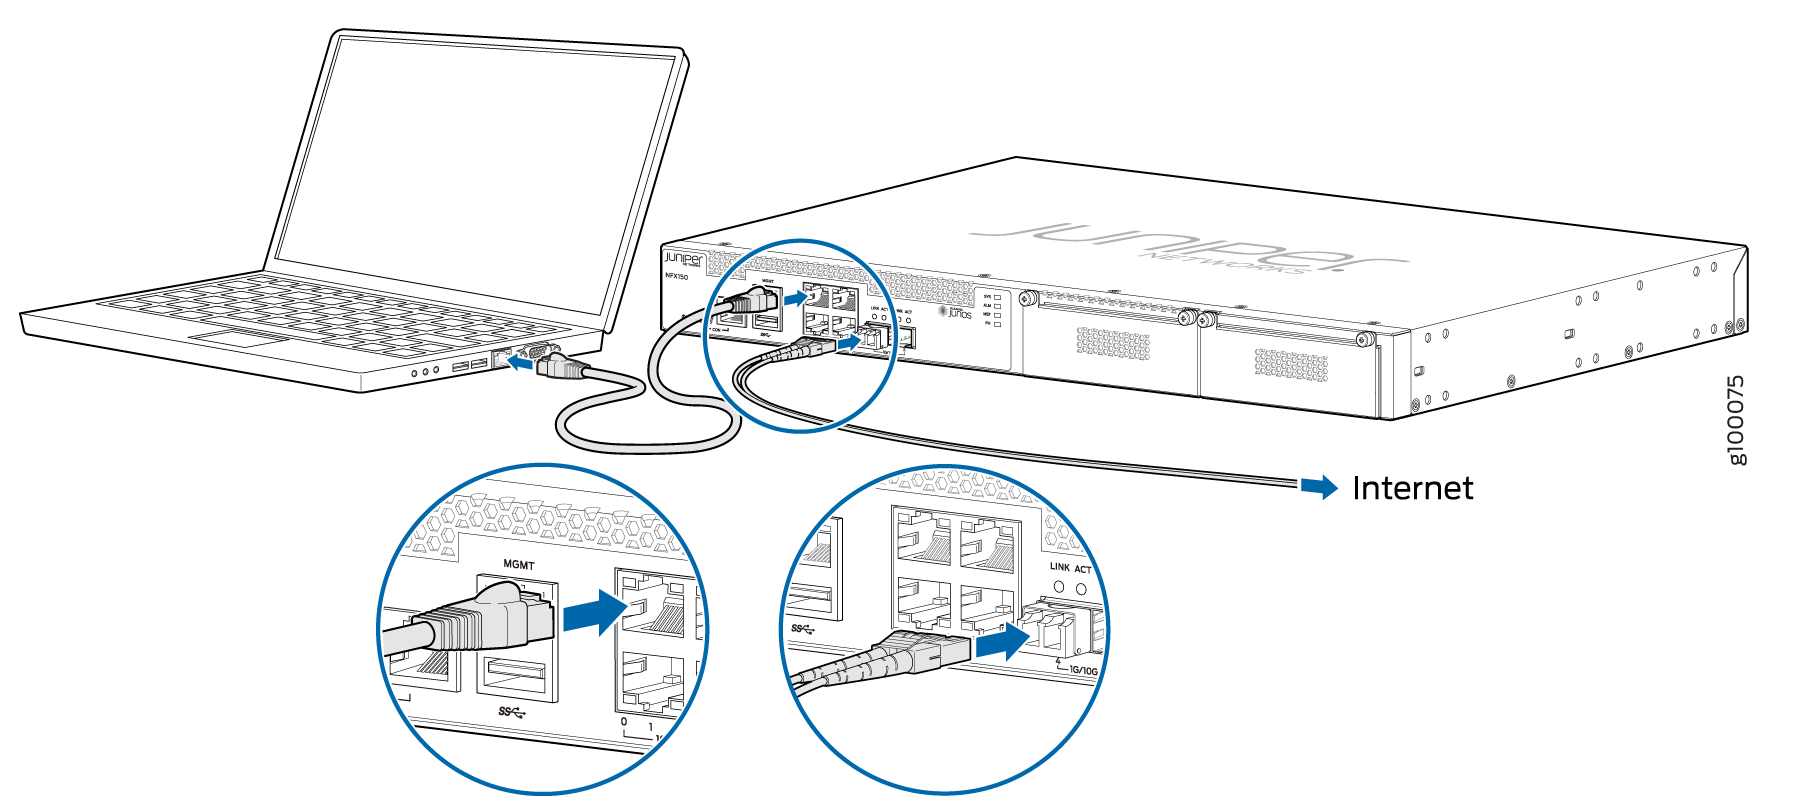
- Connect your laptop to a LAN port (ports 0/0 through 0/3).
The DHCP server running on the NFX150 assigns an IP address to your laptop.
- Open a browser on your laptop, navigate to https://www.juniper.net, and verify your connectivity.