ON THIS PAGE
Maintaining the SRX Series Interface Modules
Required Tools and Parts for Replacing Interface Modules
The following tools and parts are required for replacing a Gigabit-Backplane Physical Interface Module (GPIM) or a Mini-Physical Interface Module on the services gateway:
Electrostatic bag or antistatic mat, for each component
Electrostatic discharge (ESD) grounding wrist strap
Flat-blade (–) screwdriver, approximately 1/8 in. (3 mm)
Phillips (+) screwdrivers, numbers 1 and 2
Blank panels (if no component will be installed)
Preventing Electrostatic Discharge Damage to the SRX300 Series and SRX550 High Memory Services Gateway
Many services gateway hardware components are sensitive to damage from static electricity. Some components can be impaired by voltages as low as 30 V. You can easily generate potentially damaging static voltages whenever you handle plastic or foam packing material or if you move components across plastic or carpets. Observe the following guidelines to minimize the potential for electrostatic discharge (ESD) damage, which can cause intermittent or complete component failures:
Always use an ESD wrist strap or ankle strap, and verify that it is in direct contact with your skin.
CAUTION:For safety, periodically check the resistance value of the ESD strap. The measurement must be in the range of 1 to 10 Mohms.
When handling any component that is removed from the chassis, verify that the equipment end of your ESD strap is attached to one of the ESD points on the chassis.
Avoid contact between the component and your clothing. ESD voltages emitted from clothing can damage components.
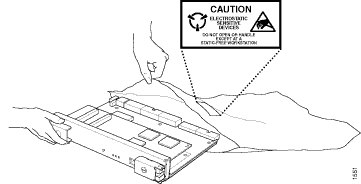
When removing or installing a component, always place it component-side up on an antistatic surface, in an antistatic card rack, or in an electrostatic bag. See Figure 1. If you are returning a component, place it into an electrostatic bag before packing it.
Replacing Mini-Physical Interface Modules on the SRX300 Series and SRX550 High Memory Services Gateways
Before you begin, power off the services gateway.
The Mini-Physical Interface Modules (Mini-PIMs) available are not hot-swappable. You must power off the services gateway before removing or installing Mini-PIMs.
To maintain proper airflow through the services gateway, cover any empty Mini-PIM slot with a blank faceplate.
Do not remove a blank faceplate unless you are installing a Mini-PIM in the empty slot.
- Removing a Mini-Physical Interface Module
- Installing a Mini-Physical Interface Module
- Removing a Blank Mini-Physical Interface Module Faceplate
- Installing a Blank Mini-Physical Interface Module Faceplate
Removing a Mini-Physical Interface Module
To remove a Mini-PIM from the services gateway:
- Place an electrostatic bag or antistatic mat on a flat, stable surface on which you intend to place the Mini-PIM.
- Attach an ESD grounding strap to your bare wrist, and connect the strap to the grounding point on the back of the device.
- Unplug the power adapter from the services gateway. Verify that the Power LED is off.
- Label the cables connected to the Mini-PIM so that you can later reconnect each cable to the correct Mini-PIM.
- Disconnect the cables from the Mini-PIM.
- If necessary, arrange the cables to prevent them from dislodging or developing stress points.
- Remove the screws on each side of the Mini-PIM faceplate using a 1/8-in. (3-mm) flat-blade (–) screwdriver.
- Grasp the screws on each side of the Mini-PIM faceplate and slide the Mini-PIM out of the services gateway.
- Place the Mini-PIM in the electrostatic bag or on the antistatic mat.
- If you are not reinstalling a Mini-PIM into the empty slot, install a blank faceplate over the slot to maintain proper airflow.
Installing a Mini-Physical Interface Module
To install a Mini-Physical Interface Module (Mini-PIM) in the services gateway.
Removing a Blank Mini-Physical Interface Module Faceplate
To remove a blank faceplate from the SRX Series Services Gateway:
Installing a Blank Mini-Physical Interface Module Faceplate
To install a blank faceplate on the SRX Series Services Gateway:
Replacing Gigabit-Backplane Physical Interface Modules on the SRX300 Series and SRX550 High Memory Services Gateways
- Removing a Gigabit-Backplane Physical Interface Module
- Installing a Gigabit-Backplane Physical Interface Module
- Removing a Blank Gigabit-Backplane Physical Interface Module Faceplate
- Installing a Blank Gigabit-Backplane Physical Interface Module Faceplate
Removing a Gigabit-Backplane Physical Interface Module
To remove a GPIM from the services gateway:
Installing a Gigabit-Backplane Physical Interface Module
Before you begin:
Ensure that the services gateway is powered off.
Ensure that the GPIM is installed in the appropriate GPIM slot. For information about the appropriate GPIM slots, see SRX300 Series and SRX550 High Memory Services Gateway Gigabit-Backplane Physical Interface Modules Overview.
To maintain proper airflow through the services gateway, leave blank faceplates in place over slots that do not contain GPIMs. Do not remove a blank faceplate unless you are immediately installing a GPIM in the empty slot.
To install a GPIM:
After the STATUS LED light turns green and glows steadily on, the GPIM is online and functioning normally. See Table 2 for hot-swappable components and their descriptions.
Number |
Component |
Description |
|---|---|---|
1 |
STATUS LED |
The STATUS LED has the following indicator s:
|
2 |
ONLINE/OFFLINE button |
Note:
You need not press this button when installing a GPIM. The services gateway automatically recognizes when a GPIM has been inserted into a slot. |
Removing a Blank Gigabit-Backplane Physical Interface Module Faceplate
To maintain proper airflow through the services gateway, leave blank faceplates in place over slots that do not contain Gigabit-Backplane Physical Interface Modules (GPIMs). Do not remove a blank faceplate unless you are immediately installing a GPIM in the empty slot.
To remove a blank faceplate:
- Using a Phillips (+) screwdriver, loosen the captive screws on each side of the blank faceplate.
- Using a flat-blade (–) screwdriver, gently pry out one side of the faceplate and pull it out.
When installing a blank GPIM faceplate, make sure that the padded side of the faceplate is facing up.
Installing a Blank Gigabit-Backplane Physical Interface Module Faceplate
To maintain proper airflow through the services gateway, install blank faceplates in slots that do not contain Gigabit-Backplane Physical Interface Modules (GPIMs).
To install a blank faceplate:
- Align the captive screws on the blank faceplate with the screw holes on the chassis.
- Using a Phillips (+) screwdriver, tighten the captive screws on each side of the blank faceplate until the faceplate is flush with the chassis.