Maintaining QFX5220 Cooling System
The fan modules in QFX5220 are hot-removable and hot-insertable field-replaceable units (FRUs): you can remove and replace one of them without powering off the switch or disrupting switching function.
To ensure proper airflow, keep a failed fan module in place until you have a replacement fan module at hand. Do not run the device with an open fan tray slot for an extended amount of time.
How to Remove a Fan Module from a QFX5220
Before you remove a fan module from a QFX5220, ensure that you have taken the necessary precautions to prevent electrostatic discharge (ESD) damage (see Prevention of Electrostatic Discharge Damage).
Ensure that you have the following parts and tools available to remove a fan module from a QFX5220:
-
ESD grounding strap
-
Antistatic bag or an antistatic mat
To remove a fan module from a QFX5220 (see Figure 1 for QFX5220-32CD and Figure 2 for QFX5220-128C):
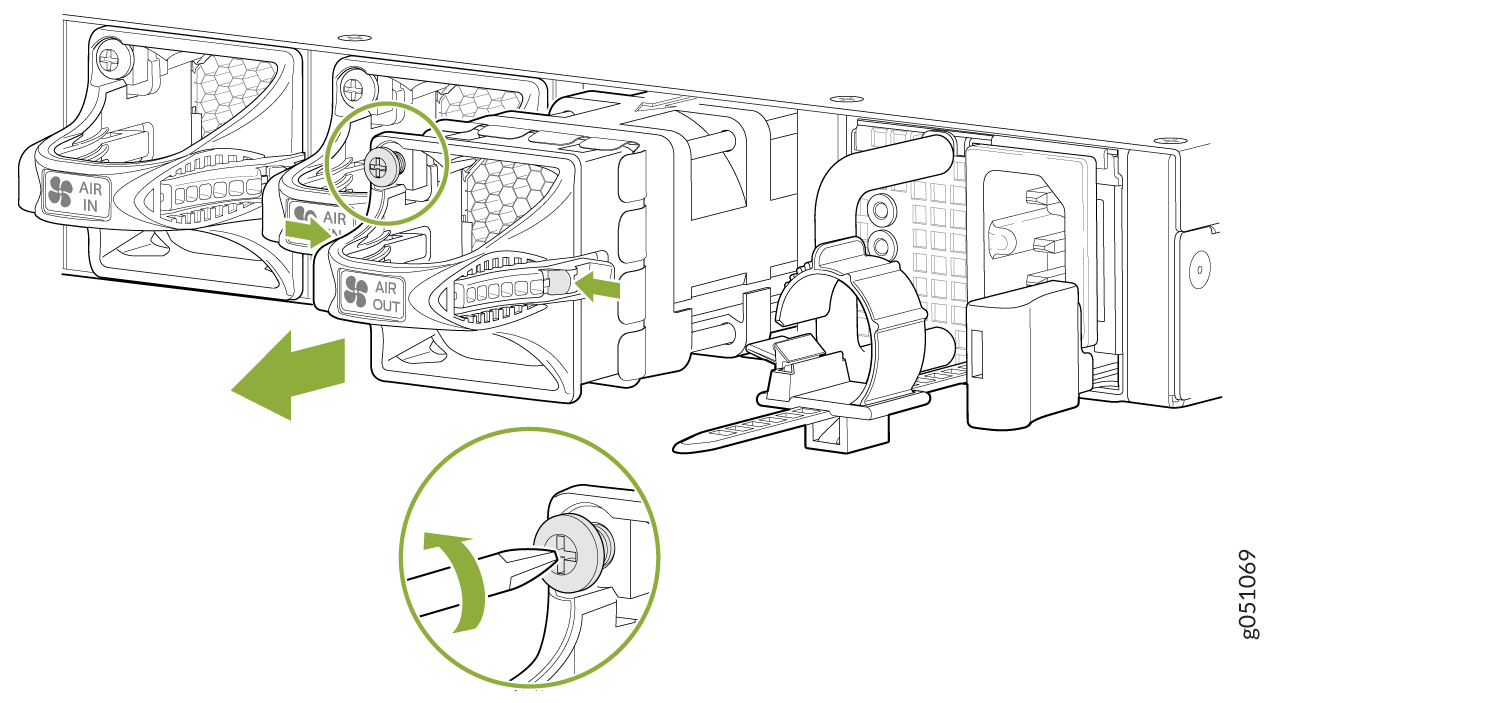
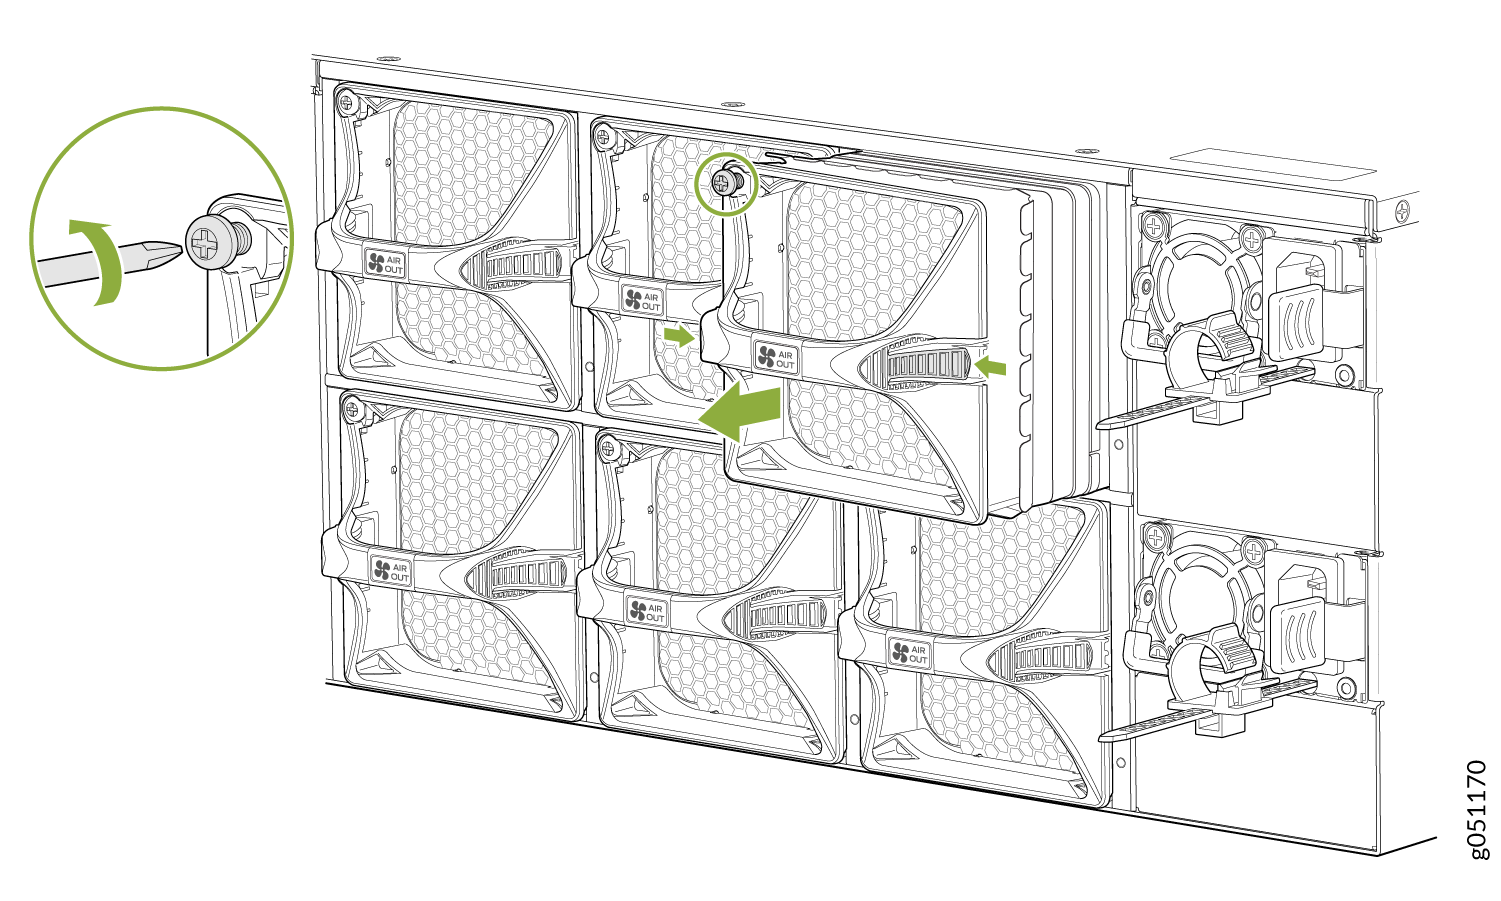
When a fan module is removed, the CLI message Fan/Blower is Absent is logged in the system log, and the system raises a minor alarm.
How to Remove a Fan Module in a QFX5220
Before you install a fan module in a QFX5220, ensure that you have taken the necessary precautions to prevent electrostatic discharge (ESD) damage (see Prevention of Electrostatic Discharge Damage).
The fan modules in a QFX5220 are hot-removable and hot-insertable field-replaceable units (FRUs); you can remove and replace them without powering off the switch or disrupting switch functions.
To ensure proper airflow, keep a failed fan module in place until you have a replacement fan module at hand. Do not run the device with an open fan tray slot for an extended amount of time.
The fan module provides FRU-to-port or port-to-FRU airflow depending on the switch product variant you purchase.
To install a fan module in a QFX5220 (see Figure 3 and Figure 4):
-
Align the module with the open slot on the management
panel of the chassis and slide it in until it is fully seated.
Figure 3: Installing a Fan Module in a QFX5220-32CD
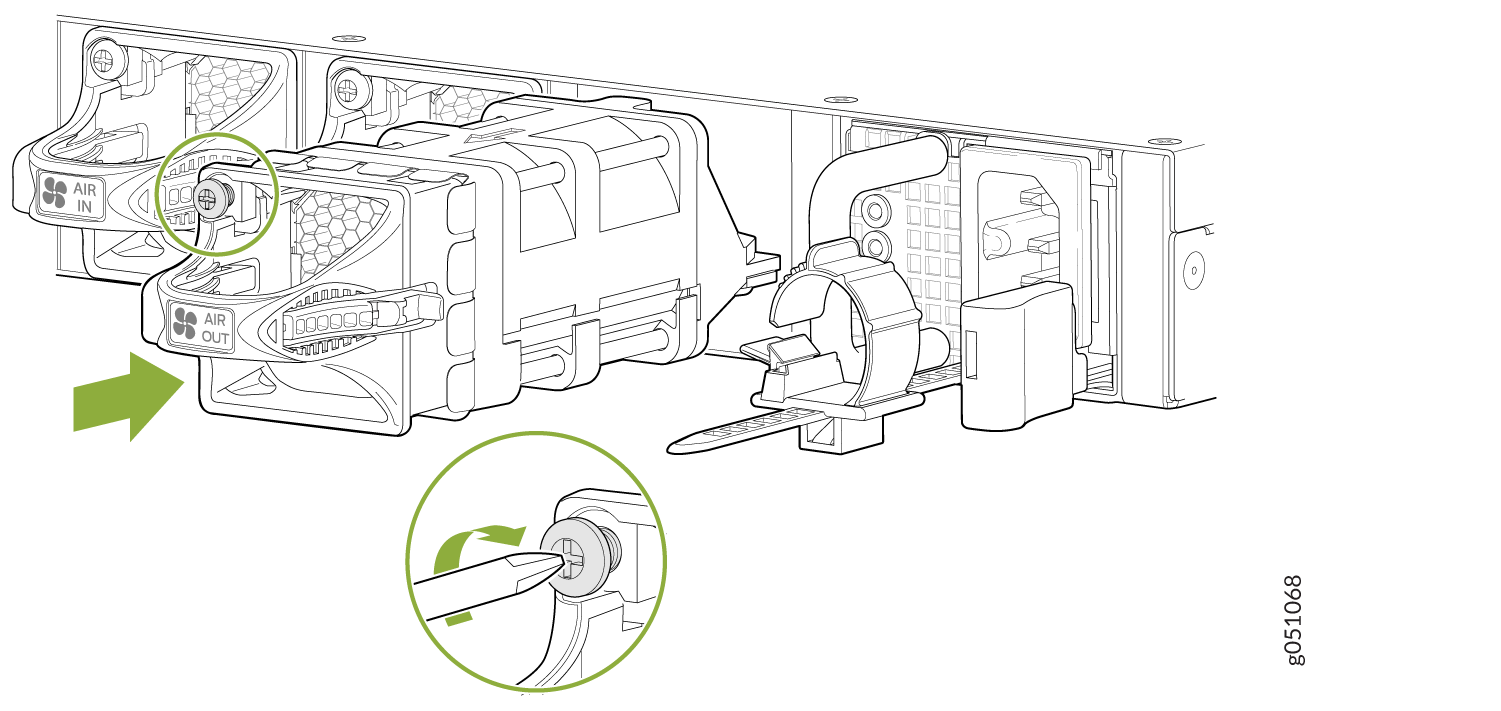 Figure 4: Installing a Fan Module in a QFX5220-128C
 CAUTION:
Damage can occur if you attempt to install a fan module into a chassis with a different airflow direction. Compare the switch product variant with the airflow marking on the handle to ensure that you are installing a fan module with the same airflow direction as the chassis. The fan modules are designed so that they can only be inserted into the QFX5220 product variant that supports the same airflow type. SeeQFX5220 Power System for more information.