Help us improve your experience.

Let us know what you think.

Do you have time for a two-minute survey?


Maintaining QFX5200 Cooling System

Removing a Fan Module from a QFX5200

Before you remove a fan module from a QFX5200, ensure that you have taken the necessary precautions to prevent electrostatic discharge (ESD) damage (see Prevention of Electrostatic Discharge Damage).

Ensure that you have the following parts and tools available to remove a fan module from a QFX5200:

  • ESD grounding strap

  • Antistatic bag or an antistatic mat

The fan modules in QFX5200 are hot-removable and hot-insertable field-replaceable units (FRUs): you can remove and replace them without powering off the switch or disrupting switch functions.

CAUTION:

Replace a failed fan module with a new fan module within 1 minute of removal to prevent chassis overheating. Before removing the fan module, ensure you have a replacement fan module at hand.

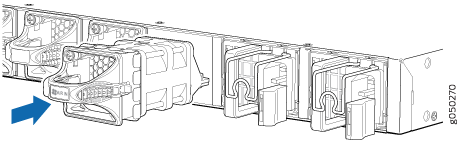
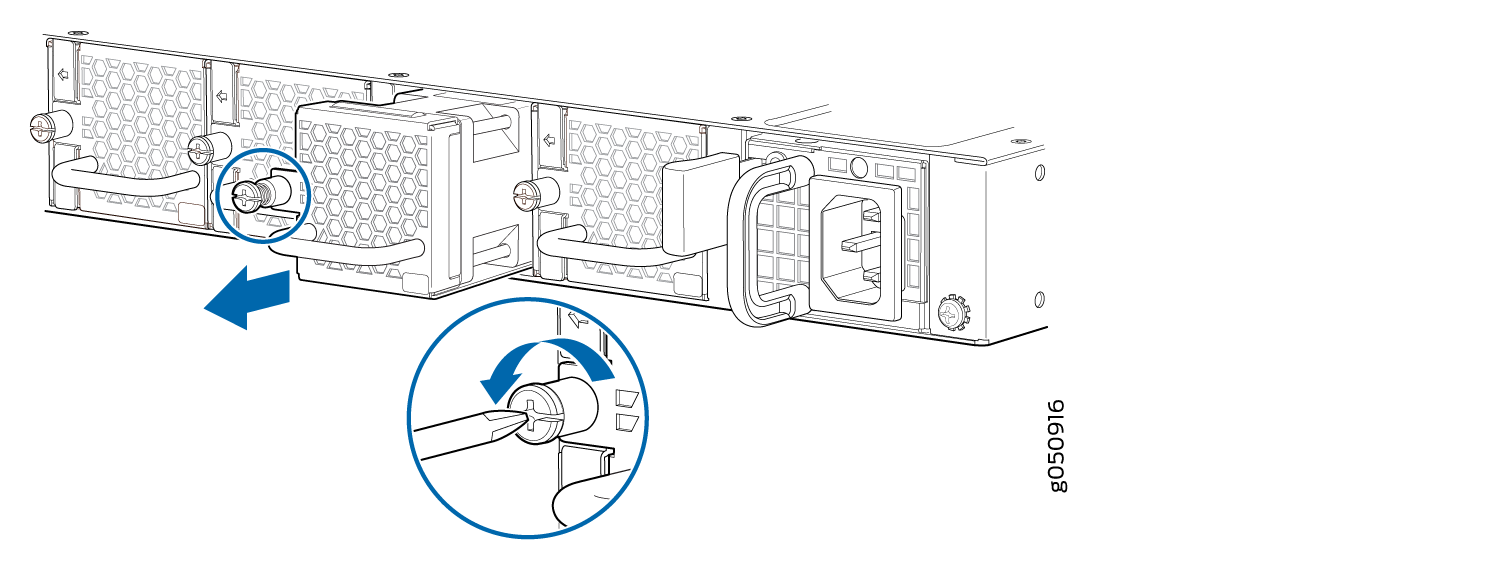
To remove a fan module from a QFX5200-32C or a QFX5200-32C-L (see Figure 1 and Figure 2):

  1. Place the antistatic bag or the antistatic mat on a flat, stable surface.
  2. Attach the ESD grounding strap to your bare wrist, and connect the strap to the ESD point on the chassis.
  3. Using a Phillips screwdriver, loosen the locking screw (3 or 4 turns).
  4. On QFX5200-32C and QFX5200-32C-L models, grasp the handle on the fan module and squeeze the outside of the handle to release the module. On QFX5200-48Y models, use a screwdriver to loosen the captive screw with 3 or 4 turns.
    Warning:

    To avoid injury, do not touch the fan with your hands or any tools as you slide the fan module out of the chassis—the fan might still be running.

  5. Pull firmly to slide the fan module halfway out of the chassis.
  6. When the fan stop spinning, use your other hand to support the fan and slide the fan module completely out of the chassis.
  7. Place the fan module in the antistatic bag or on the antistatic mat placed on a flat, stable surface.
Figure 1: Removing a Fan Module from a QFX5200-32C or QFX5200-32C-LRemoving a Fan Module from a QFX5200-32C or QFX5200-32C-L
Figure 2: Removing a Fan Module from a QFX5200-48YRemoving a Fan Module from a QFX5200-48Y
Note:

When a fan module is removed, the CLI message Fan/Blower is Absent is logged in the system log, and the system raises a minor alarm.

Installing a Fan Module in a QFX5200

Before you install a fan module in a QFX5200, ensure that you have taken the necessary precautions to prevent electrostatic discharge (ESD) damage (see Prevention of Electrostatic Discharge Damage).

The fan modules in a QFX5200 are hot-removable and hot-insertable field-replaceable units (FRUs): you can remove and replace them without powering off the switch or disrupting switch functions.

CAUTION:

Replace a failed fan module with a new fan module within 1 minute of removal to prevent chassis overheating. Before removing the fan module, ensure you have a replacement fan module at hand.

Note:

The fan module provides FRU-to-port or port-to-FRU airflow depending on the switch product SKU you purchase. In legacy switches, or switches with an LCD, this airflow is called front to back and back to front.

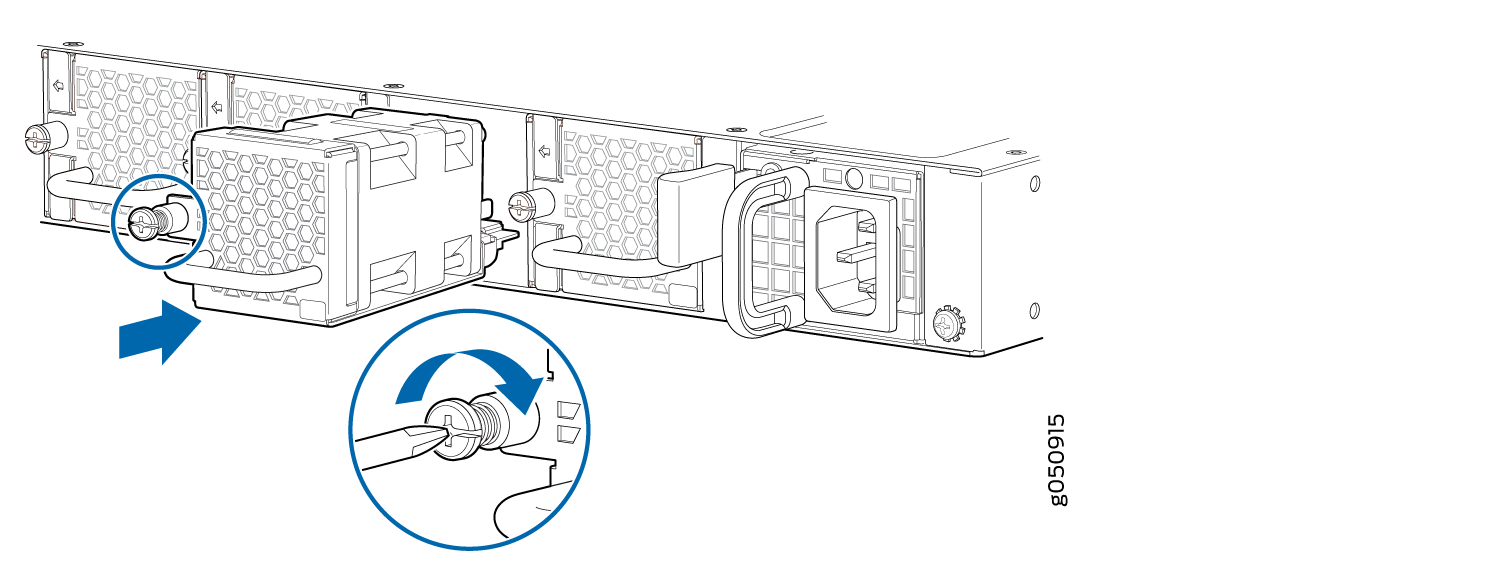
To install a fan module in a QFX5200 (see Figure 3 and Figure 4):

  1. Attach the ESD grounding strap to your bare wrist, and connect the strap to the ESD point on the chassis.
  2. Taking care not to touch the connectors, remove the fan module from its bag.
  3. Align the module with the open slot on the management panel of the chassis and slide it in until it is fully seated.
    CAUTION:

    Damage can occur if you attempt to install a fan module into a chassis with a different airflow direction. Compare the switch product SKU with the airflow marking on the handle to ensure that you are installing a fan module with the same airflow direction as the chassis. The fan modules are designed so that they can only be inserted into the QFX5200 product SKU that supports the same airflow type. See QFX5200 Cooling System for more information.

  4. On QFX5200-48Y models, use a Phillips screwdriver to turn the locking screw until it is tight.
Figure 3: Installing a Fan Module in a QFX5200-32C and QFX5200-32C-LInstalling a Fan Module in a QFX5200-32C and QFX5200-32C-L
Figure 4: Installing a Fan Module in a QFX5200-48YInstalling a Fan Module in a QFX5200-48Y