To install an AC or universal (HVAC/HVDC) power supply
(see Figure 1):
-
Attach an ESD grounding strap to your bare wrist, and connect the other end
of the strap to an ESD grounding point.
- Move the AC input switch in the chassis above the empty
power supply slot to the off (O) position.
Note: When upgrading to enhanced power supplies, always upgrade
power supplies in adjacent slots.
- Ensure that the release lever below the empty power supply
slot is locked in the counterclockwise position (see Figure 1).
If necessary, pull the spring-loaded locking pin in the release
lever away from the chassis and turn the release lever counterclockwise
until it stops. Let go of the locking pin in the release lever. Ensure
that the pin is seated inside the corresponding hole in the chassis.
- Using both hands, slide the power supply straight into
the chassis until the power supply is fully seated in the chassis
slot. The power supply faceplate should be flush with any adjacent
power supply faceplates.
The small tab on the metal housing that is controlled by the
release lever must be inside of the corresponding slot at the bottom
of the power supply (see Figure 1). This tab is used
to pull the power supply down in the chassis slot, prior to removing
the power supply.
- While firmly pushing the handle on the power supply faceplate
with one hand, use your other hand to pull the spring-loaded locking
pin in the release lever away from the chassis and turn the release
lever clockwise until it stops.
- Let go of the locking pin in the release lever. Ensure
that the pin is seated inside the corresponding hole in the chassis.
- Move the AC input switch in the chassis above the power
supply to the on (—) position and observe
the status LEDs on the power supply faceplate. If the power supply
is correctly installed and functioning normally, the AC OK and DC OK LEDs light steadily, and the PS FAIL LED is not lit.
Figure 1: Installing
an AC Power Supply
Note: The chassis is shown without the extended cable manager.
Figure 2: Installing a High-Capacity Second-Generation AC Power
Supply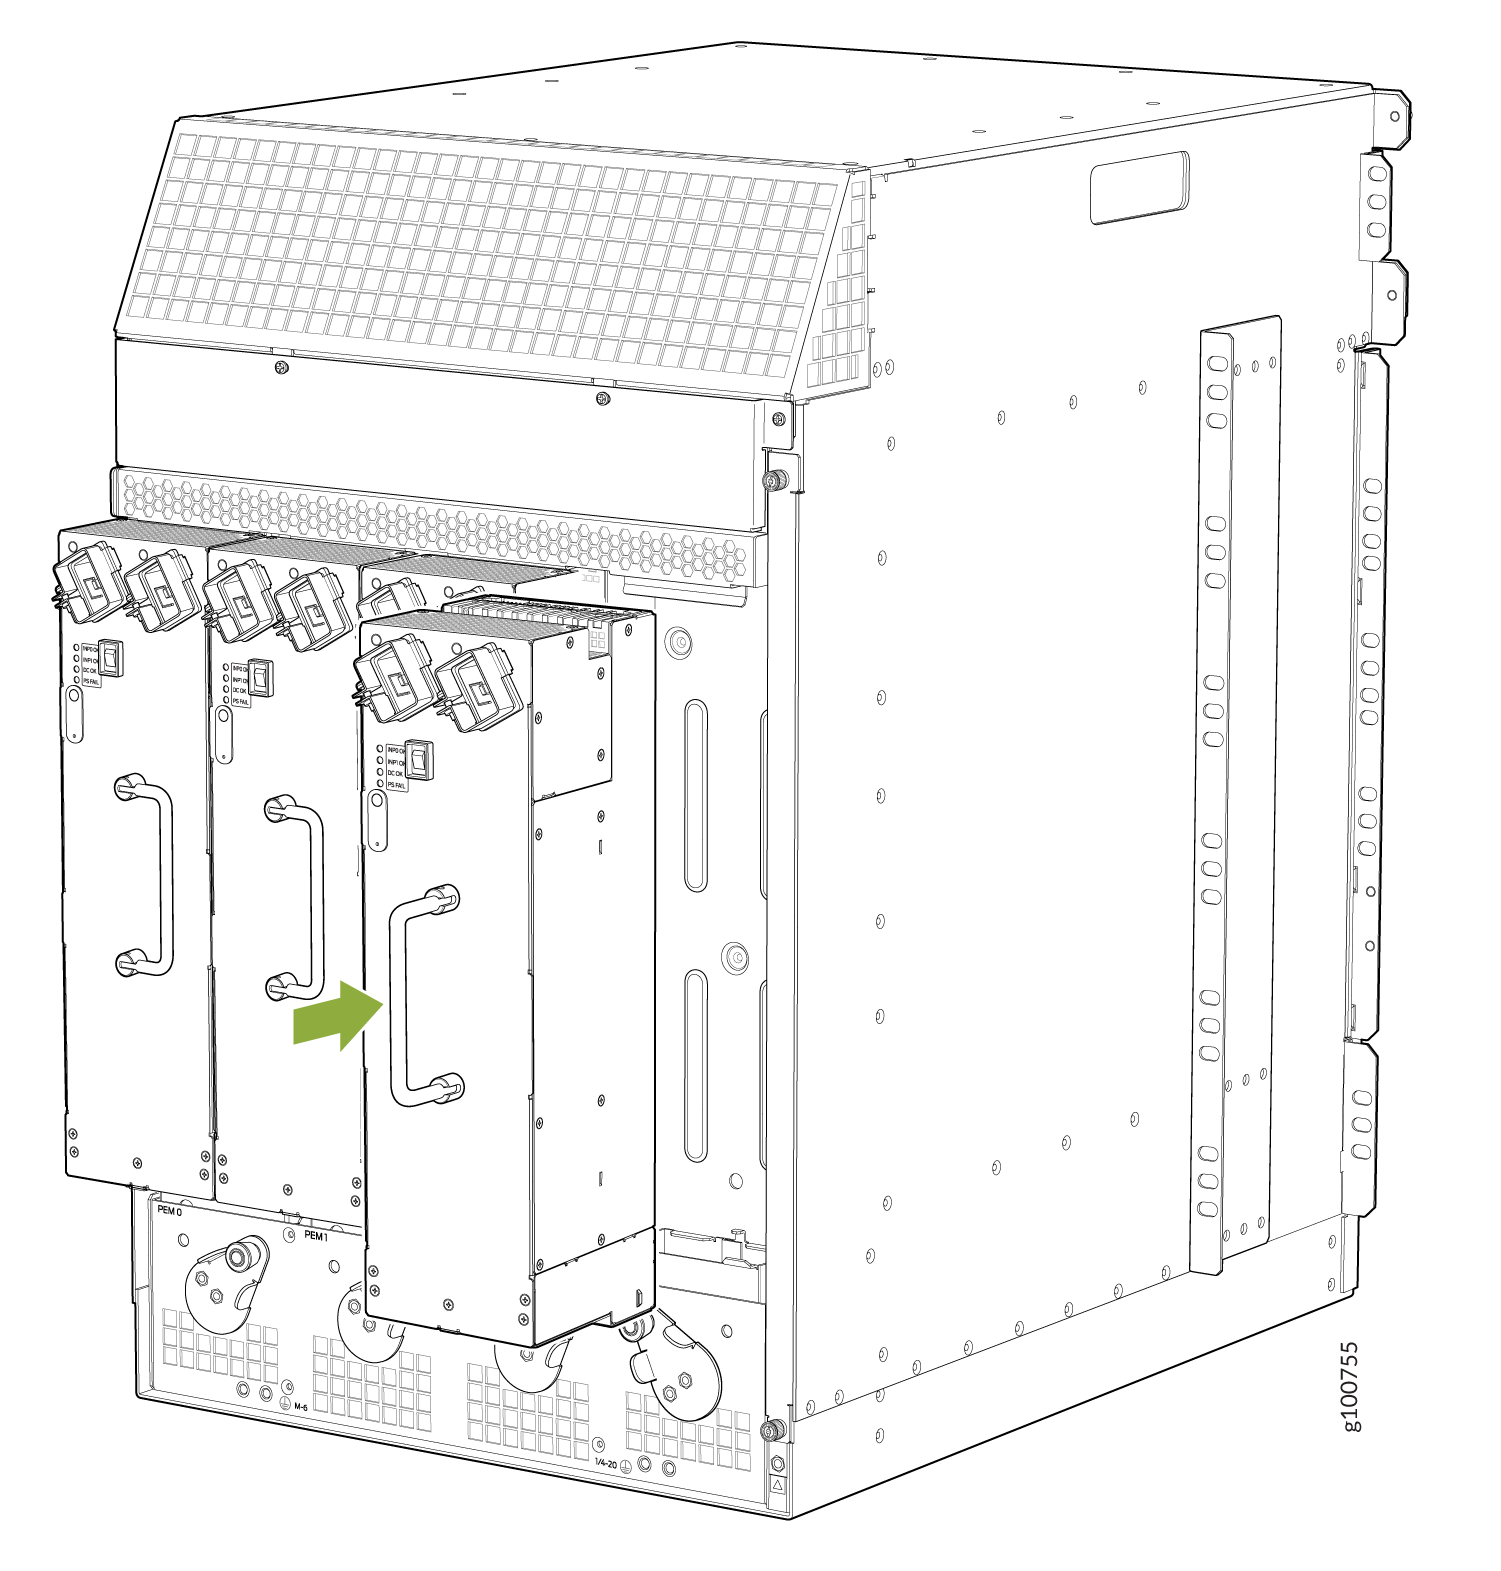
Note: The chassis is shown without the extended cable manager.
Figure 3: Installing a High-Voltage Second-Generation Universal
(HVAC or HVDC) Power Supply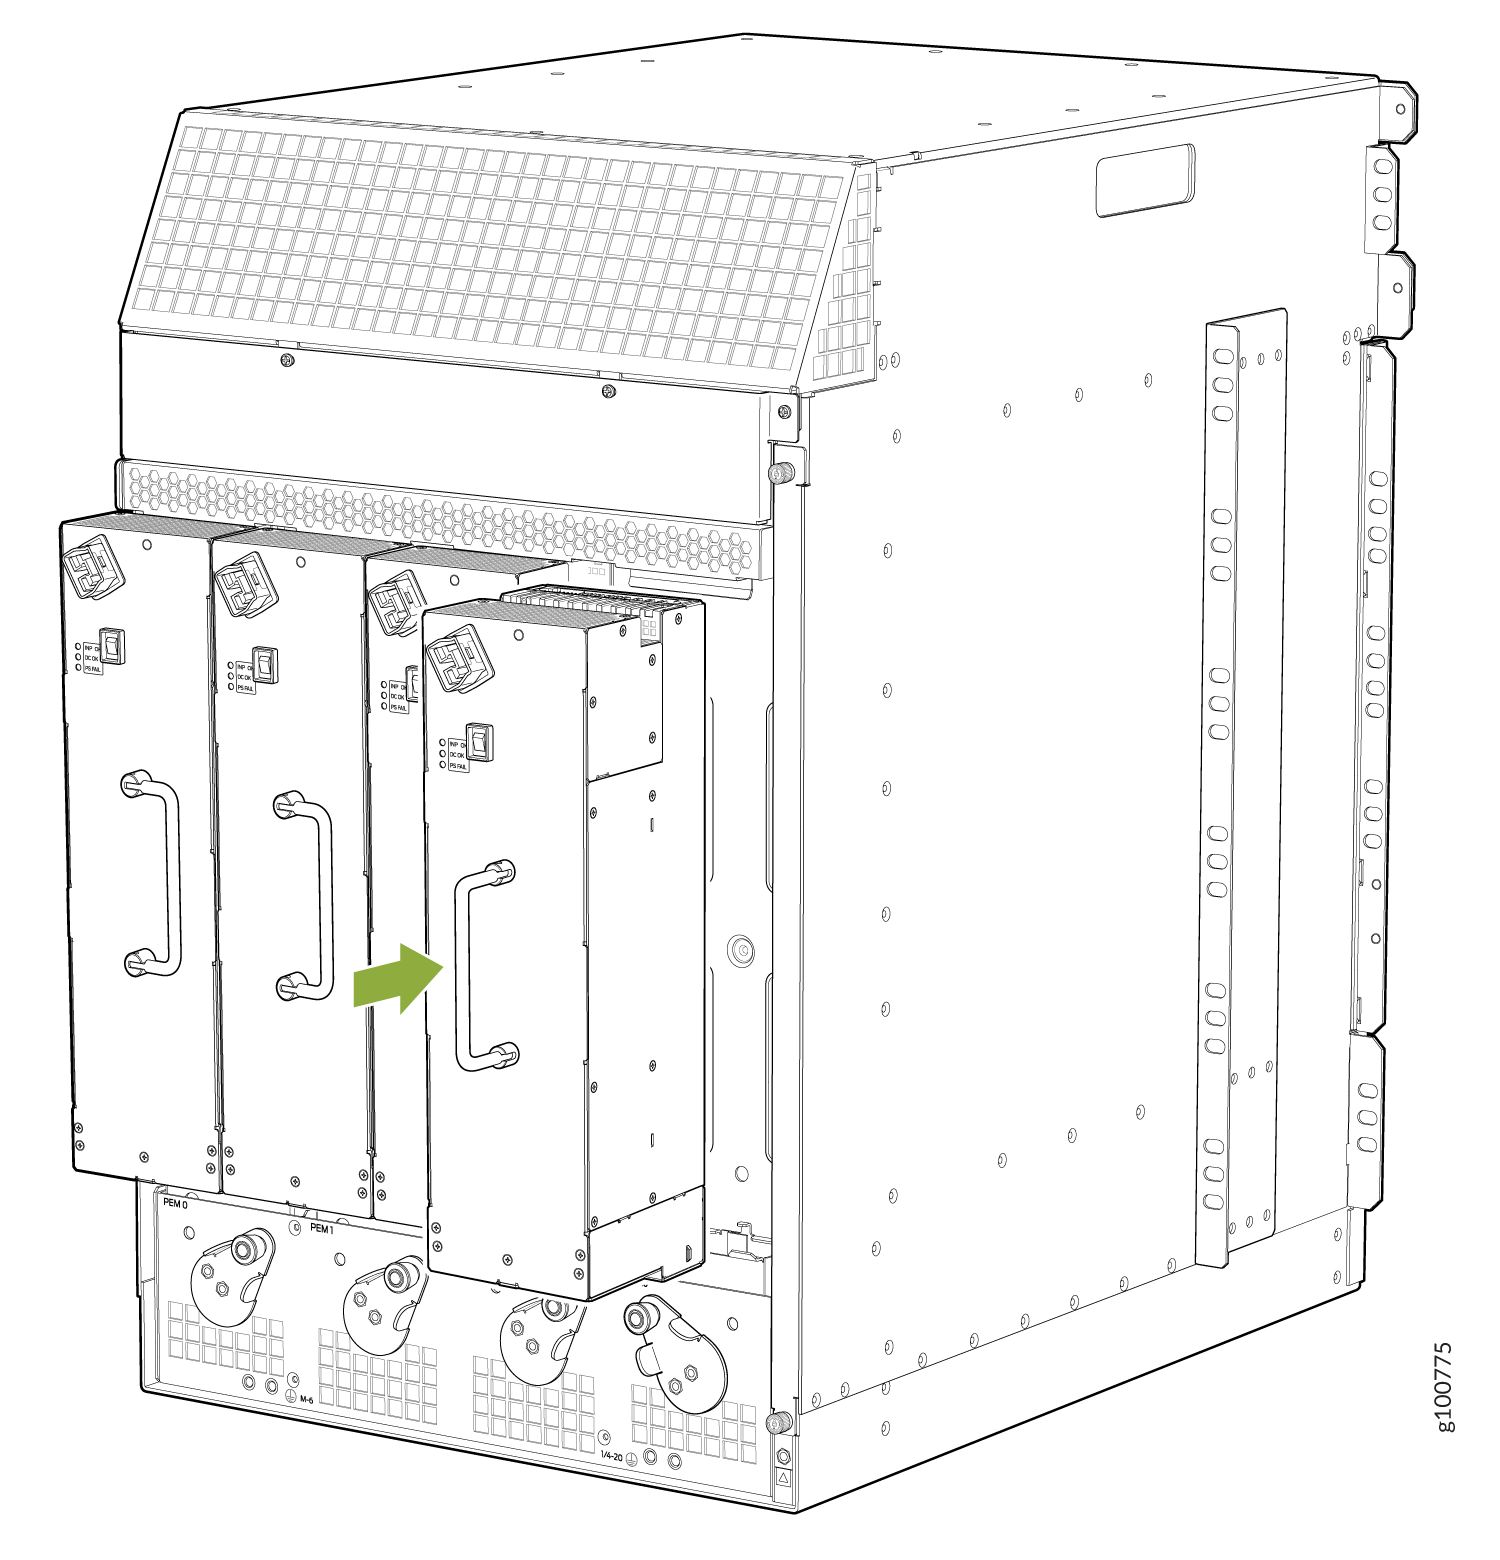
Note: The chassis is shown without the extended cable manager.
Note: If you are replacing the MX960-PSM-5K-AC or MX960-PSM-HV
power supplies on an existing chassis, make sure to replace the agency
label on the chassis with the new label. See MX960 Chassis Serial Number and Agency Label.