Help us improve your experience.

Let us know what you think.

Do you have time for a two-minute survey?


Unpacking the MX2010 Router

The router is shipped in a wooden crate. A wooden pallet forms the base of the crate. The router chassis is bolted to this pallet. Metal latches secure the top and bottom in place. Quick Start installation instructions, a rack mount tray (for four-post or open-frame rack mounting), a pallet jack attachment, an EMI cover, and a cardboard accessory box are also included in the shipping crate. The total weight of the container including the router, FRUs, and accessories is 1343 lb (609.18 kg)

Note:

Depending on your configuration, the MX2010 might be shipped with additional components already installed.

Note:

The MX2010 can be ordered with extended EMI covers and extended cable managers.

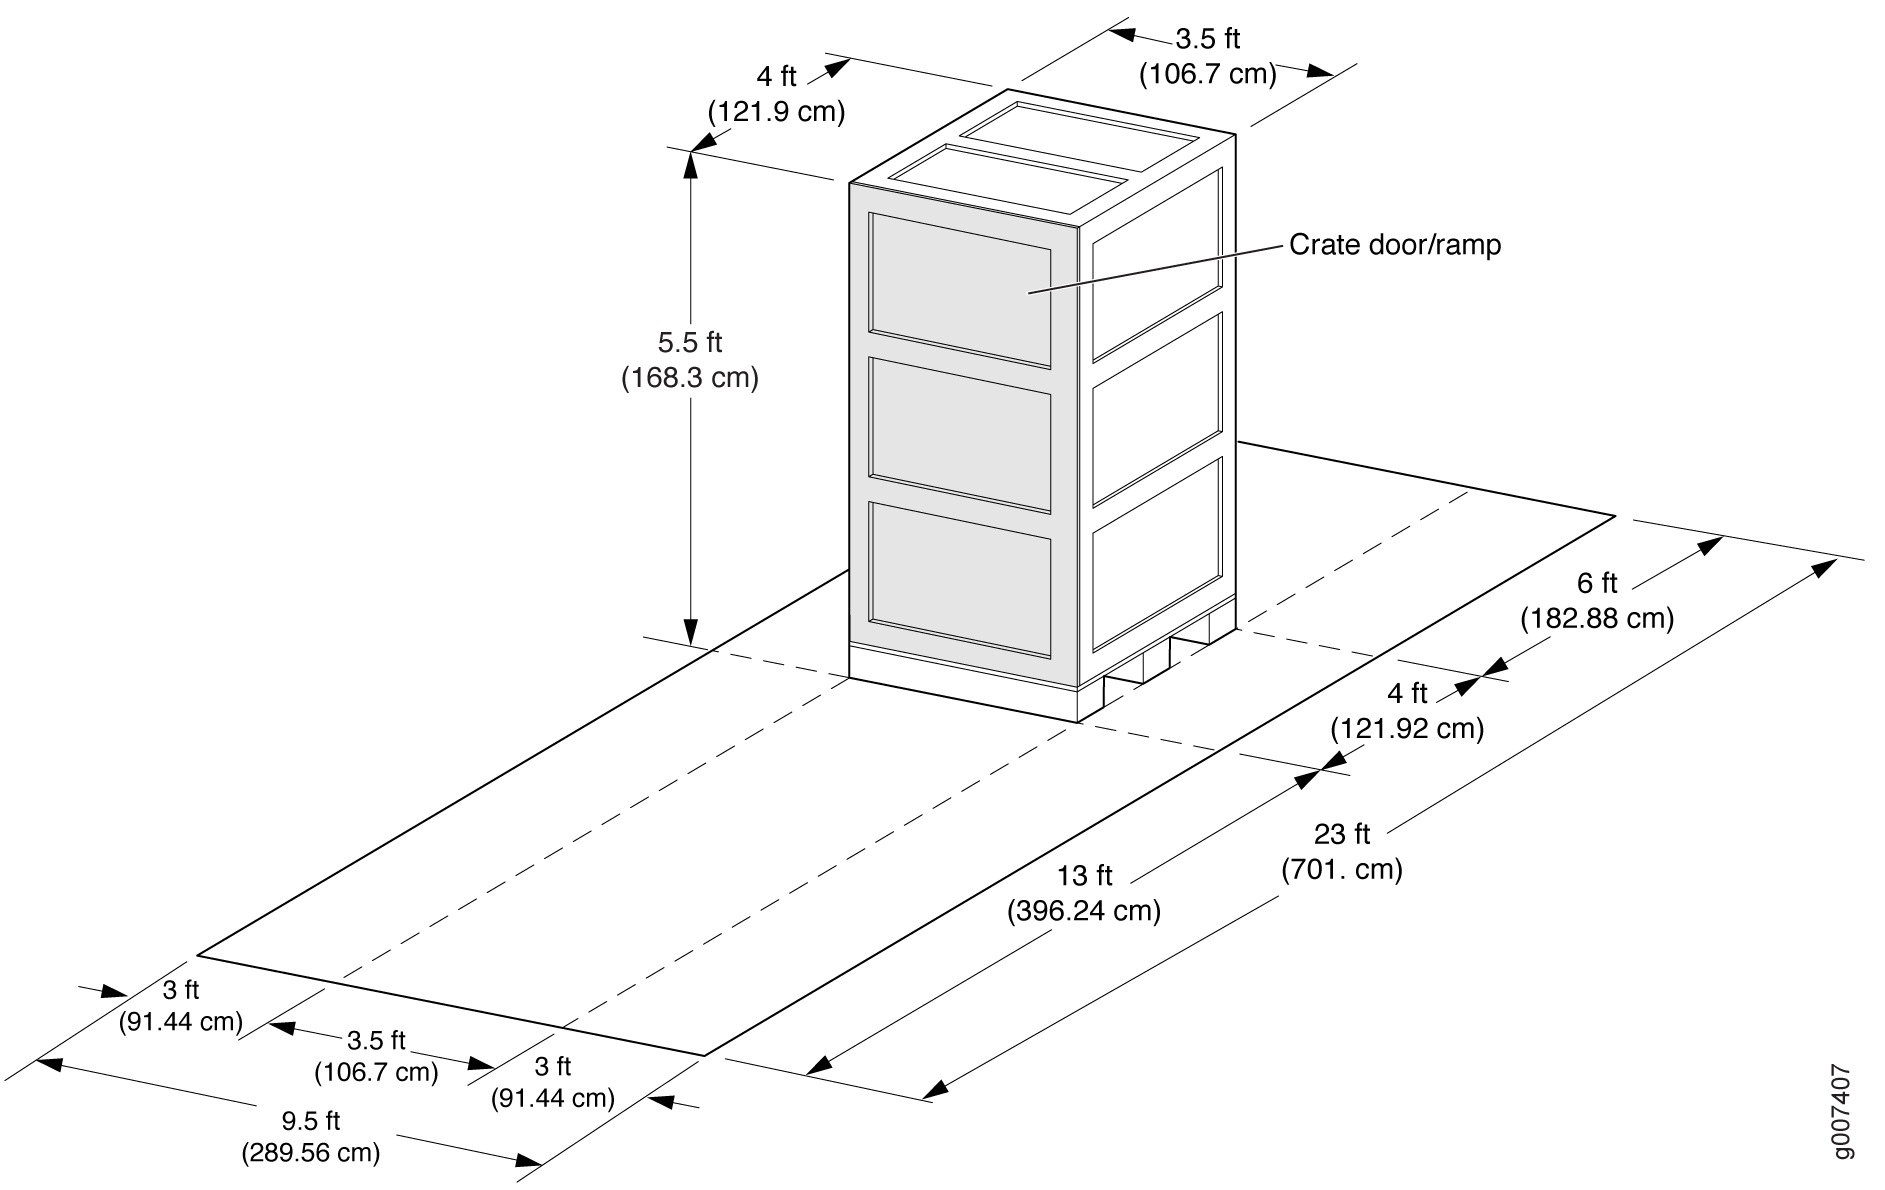
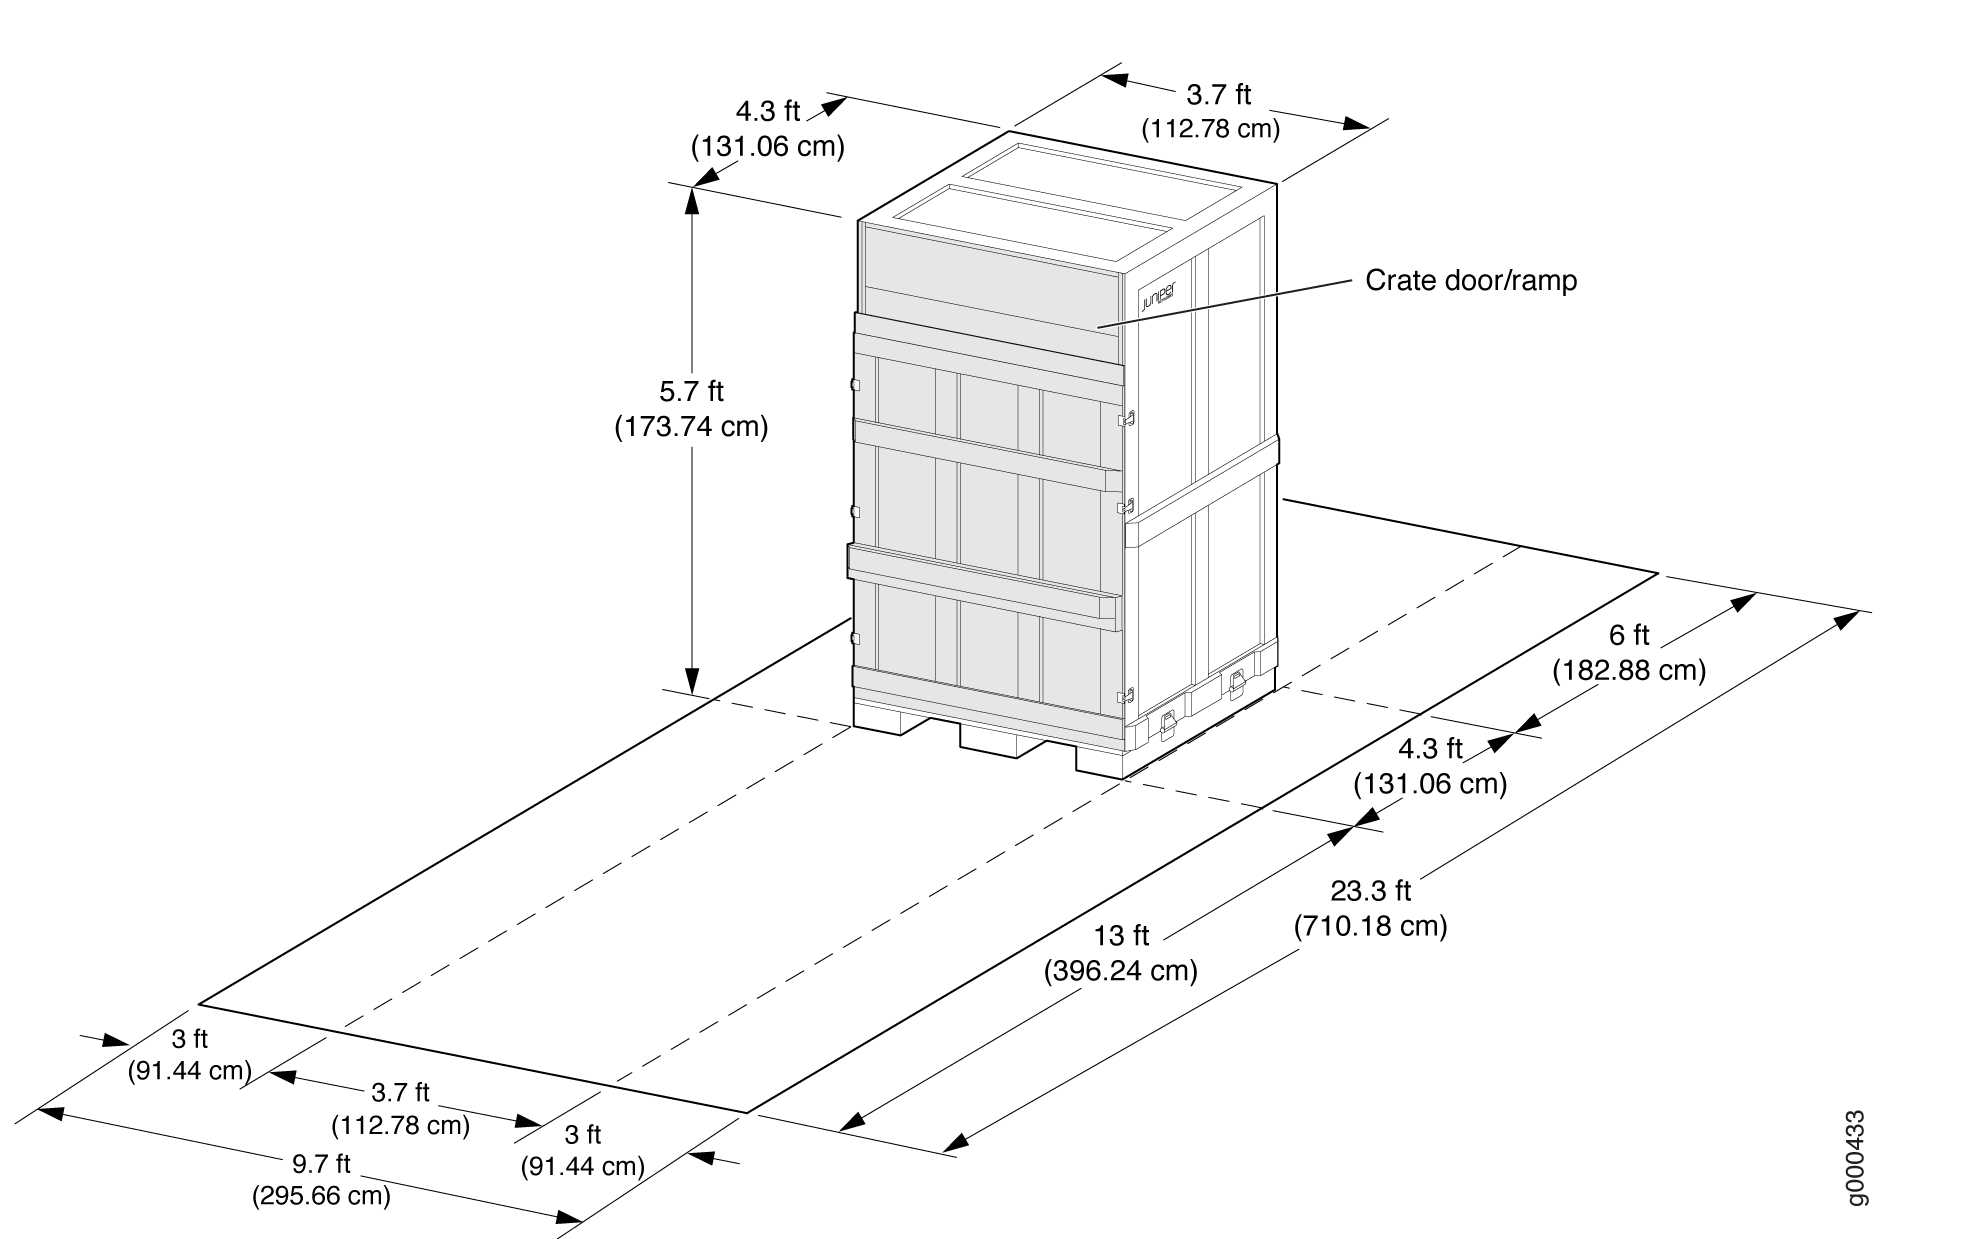
There are two styles of shipping crates for the MX2010. Figure 1 shows the smaller crate that measures 66.25 in. (168.3 cm) high, 42.0 in. (106.7 cm) wide, and 48.0 in. (121.9 cm) deep. Figure 2 shows the larger crate that measures 68.4 in. (173.7 cm) high, 44.4 in. (112.7 cm) wide, and 51.6 in. (131.1 cm) deep. If you are not sure which crate you have, plan for the larger crate.

The total weight of the shipping crate with router and accessories will vary depending on your configuration. See MX2010 Physical Specifications for more details.

Figure 1: MX2010 Shipping Crate Dimensions (smaller)MX2010 Shipping Crate Dimensions (smaller)
Figure 2: MX2010 Shipping Crate Dimensions (larger)MX2010 Shipping Crate Dimensions (larger)
Note:

The router is maximally protected inside the shipping crate. Do not unpack it until you are ready to begin installation.

To unpack the router:

  1. Move the shipping crate to an ESD-approved staging area as close to the installation site as possible, where you have enough room to remove the components from the chassis. While the chassis is bolted to the shipping pallet, you can use a forklift or pallet jack to move it.
  2. Position the shipping crate with the arrows pointing up.
  3. Open all the latches on the shipping crate.
  4. Remove the front door of the shipping crate and set it aside (see Figure 3).
    Note:

    If you ordered a router transport kit, the shipping crate door is used as a ramp to guide the MX2010 out of the crate.

  5. Using a two-person team, slide the remainder of the shipping crate off the pallet.
  6. Remove the foam covering the top of the router.
  7. Remove the large mounting tray, pallet jack attachment, accessory box, and the Quick Start installation instructions.
    Note:

    If you ordered a router transport kit, see Unpacking the MX2010 Router Transport Kit

    Figure 3: Unpacking the MX2010Unpacking the MX2010
  8. Verify the parts received against the list.
  9. Remove the vapor corrosion inhibitor (VCI) packs attached to the pallet, being careful not to break the VCI packs open.
  10. To remove the brackets holding the chassis to the pallet, use a 9/16-in (14 mm) socket wrench, and use a number 2 Phillips screwdriver to remove the bolts and screws from the brackets.
  11. Set the shipping brackets aside for later use to secure the router to the pallet jack attachment.
    Note:

    If you ordered a router transport kit, see Unpacking the MX2010 Router Transport Kit for instructions on how to unpack and install the router transport kit.

  12. Save the shipping crate cover, pallet, and packing materials in case you need to move or ship the router at a later time.