Help us improve your experience.

Let us know what you think.

Do you have time for a two-minute survey?


Installing the MX2010 Router Using a Pallet Jack with Attachment

Before installing the router, you must remove all components (see Removing Components from the MX2010 Router Chassis Before Installing It in a Rack).

To install the router by using a pallet jack with attachment:

  1. Ensure that the rack is in its permanent location and is secured to the building. Ensure that the installation site allows adequate clearance for both airflow and maintenance. See Clearance Requirements for Airflow and Hardware Maintenance for the MX2010 Router.
  2. Reattach the front and rear shipping covers to the chassis to help move the router. The handles on the shipping covers are used to guide the chassis during installation.
    CAUTION:

    Do not lift the router by using the handles on the shipping covers. Use these handles only to help position the router.

  3. Place the pallet jack attachment across both legs and secure the attachment to the pallet jack.
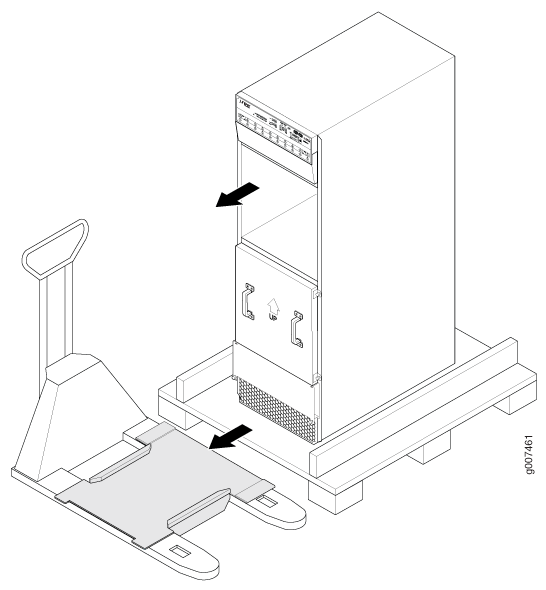
  4. Using a four-person team to load the router onto the pallet jack, make sure it rests securely on the pallet jack attachment platform.
    Figure 1: Loading the MX2010 Router onto the Pallet JackLoading the MX2010 Router onto the Pallet Jack
    CAUTION:

    Applying force to any other parts of the chassis other than the shipping covers can damage the chassis.

  5. Attach the shipping brackets to the pallet jack attachment by using existing bracket screws.
  6. On each of the shipping brackets, partially insert screws into the hole to secure the brackets to the chassis. Tighten all screws. These brackets will prevent the chassis from tilting.
  7. Lower the pallet jack before moving the chassis. This will help distribute the weight evenly and reduce the risk of tilting or damage to the chassis.
  8. Using the pallet jack, position the router in front of the rack or cabinet, centering it in front of the rack.
    Note:

    If you are installing the MX2010 router into a network cabinet, make sure that no hardware, device, rack, or cabinet component obstructs the 34-U rack space from access during installation.

  9. Using the pallet jack, lift the chassis approximately 0.75 in. (1.9 cm) above the surface of the mounting shelf (four-post rack) or bottom opening of the rack (open-frame rack), and position it as close as possible.
    Note:

    Due to the short lift capability of the pallet jack, we recommended that you install the router on the bottom of the rack.

  10. Remove the shipping brackets that are attached to the pallet jack attachment and chassis, and set them aside.
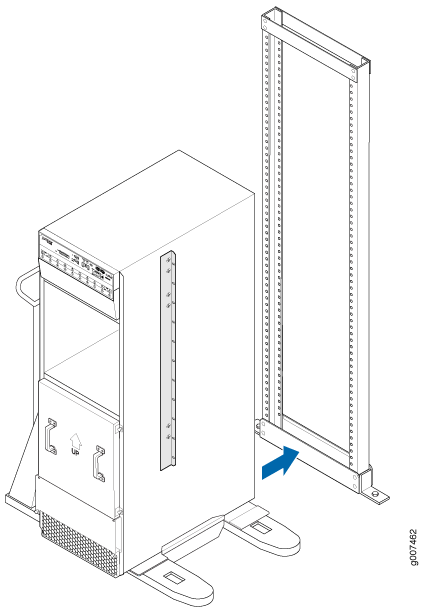
  11. Grasp the handles on the shipping covers and carefully slide the router into the rack (see and Figure 2 and Figure 3). If you are installing the router into a four-post rack, continue sliding the router onto the mounting shelf so that the bottom of the chassis and the mounting shelf overlap by approximately 2 inches.
    Figure 2: Loading the MX2010 Router into the RackLoading the MX2010 Router into the Rack
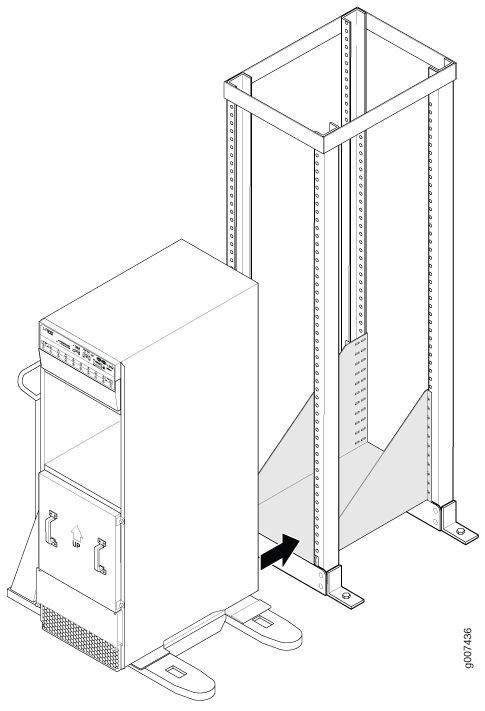
    Figure 3: Installing the MX2010 Router on an Open-Frame RackInstalling the MX2010 Router on an Open-Frame Rack
  12. With four people pushing on the front-mounting flanges, slide the router until the center-mounting brackets (open-frame racks) or front-mounting flanges (four-post racks) contact the rack rails. In a four-post rack, the mounting shelf ensures that the holes in the front-mounting flanges of the chassis align with the holes in the rack rails.
  13. Move the pallet jack away from the rack.
  14. Insert twelve mounting screws (six on each side) into the mounting holes to secure the router to the rack.
  15. Visually inspect the alignment of the router. If the router is installed properly in the rack, all the mounting screws on one side of the rack should be aligned with the mounting screws on the opposite side, and the router should be level.