Install Juniper Secure Connect on iOS
SUMMARY Learn about step-by-step procedures on how to install Juniper Secure Connect on iOS platform.
What's Next
Download the Juniper Secure Connect application software from here. See release notes for more details.
For more information on Juniper Secure Connect features and how to configure the options, see Diagnostics Menu and Info Menu.
Manual Installation of Juniper Secure Connect
Install the Juniper Secure Connect application from App Store.
- Install the Juniper Secure Connect application on your
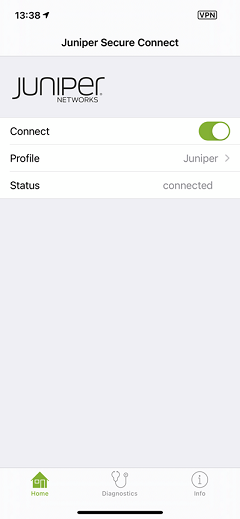
iPhone device from App Store. Figure 1 shows the Juniper Secure Connect home screen.Figure 1: Juniper Secure Connect Home Screen
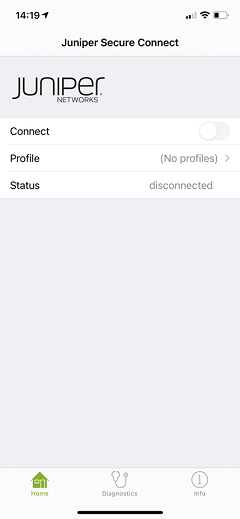
- Launch the Juniper Secure Connect Application and select Profile from the application home screen as shown in Figure 2. Figure 2: Profiles Page
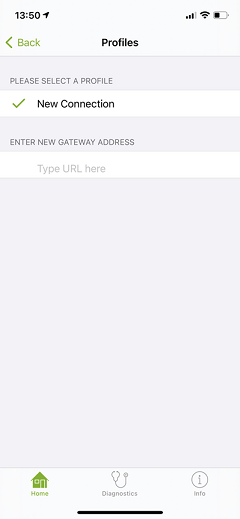
Figure 3, Figure 4, and Figure 5 shows an example for selecting, adding, or deleting a gateway address for the new connection.
Figure 3: Select Gateway Address from the List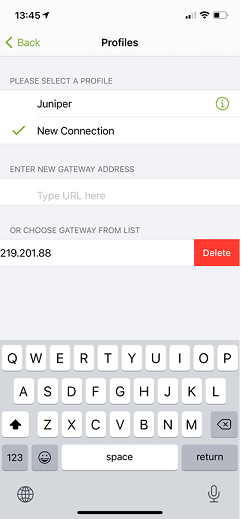
Click on New Connection to enter the gateway IP address or URL to connect with the SRX Series Firewall. Figure 4 shows an example to enter the gateway address to the SRX Series Firewall.
Figure 4: Enter New Gateway Address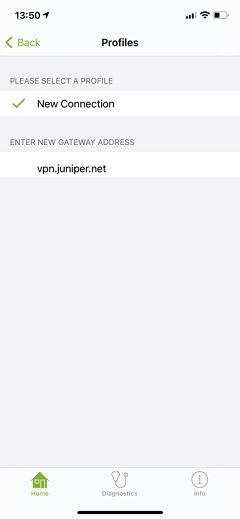
After entering the gateway address, click the Back button at the bottom.
Note:In the Profiles page, you can remove the profile name if you want. For example, if you want to remove the profile name ’Juniper’ in the Profile page as shown in Figure 5, navigate to iOS Settings > General > VPN.
Figure 5: Remove ’Juniper’ Profile Name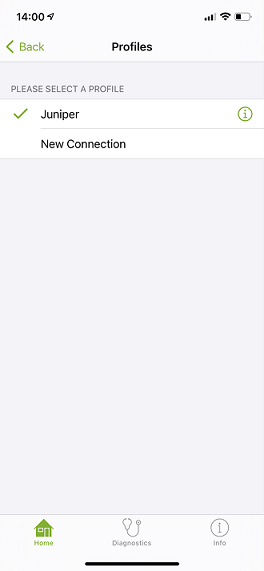
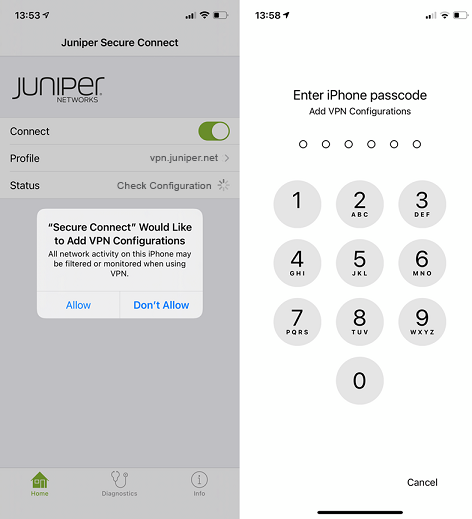
- Toggle the Connect button to establish connection
as shown in Figure 6. When you connect
for the first time to
a new gateway or profile, you need to allow the addition
of the downloaded VPN configuration. If your device is
password protected, you must enter the password.Figure 6: Enable Connect to Establish VPN Connection
If your device is missing a CA certificate for the SRX Series Firewall, a warning message is displayed. You can prevent this, if you install a CA certificate into the Juniper Secure Connect directory location of the device. To import user or CA certificates, see Certificates Import Menu Option.
Warning:If the following warning message as shown in Figure 7 is displayed, your application is missing the CA certificate from the VPN gateway (SRX Series Firewall). If you are a remote user, contact your IT organization for appropriate action.
Figure 7: Sample Certificate Warning Message on iOS Platform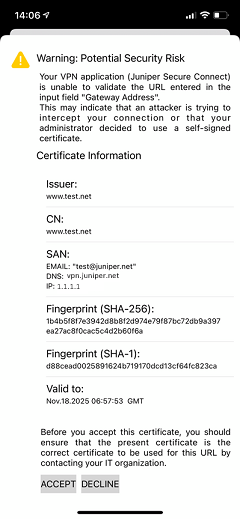
When the connection is established successfully, the Status of the connection changes to connected as shown in Figure 8.
Figure 8: VPN Connection Established Successfully