
Deploy Juniper Security Director Using KVM
This topic guides you through the Juniper Security Director VM deployment using KVM.
Before You Begin
-
Choose the hardware requirements, see Hardware Requirements.
-
You must have 4 dedicated IP addresses and ensure that you have access to SMTP, NTP, and DNS servers, see Software Requirements
Note: If the deployment is a regulated/air-gapped environment, ensure that the VM also has access to signatures.juniper.net for IDP/Applications Signatures download. -
Ensure that you have an active libvirt daemon when you are not using the
--no-runoption in the./Juniper-Security-Director-<version>-kvm.bincommand.
Step 1: Download the Juniper Security Director Software
-
Download the Juniper Security Director software (.bin) from the Software Downloads page to your Ubuntu, Red Hat Enterprise Linux, Debian, Oracle, or Rocky Linux server.
- Download the
Juniper Security Director Software Bundle (.tgz file) to your local machine from
Software Downloads page and then transfer the file to your
staging server.
A staging server is an intermediate server where the software bundle is downloaded and is accessible through SCP from the VM.
Step 2: Deploy the VM
Run the
chmod +x Juniper-Security-Director-<version>-kvm.bincommand.On the terminal:
Run
./Juniper-Security-Director-<version>-kvm.bincommand.If you need to only extract the artifact, use any supported Ubuntu, Red Hat Enterprise Linux, Debian, Oracle, or Rocky Linux machine without KVM. The artifacts are compatible with any Linux distribution that supports KVM-based VM. Any distribution-specific dependencies apply only to the deployment wrapper (.bin), and not to the artifacts.
Run
./Juniper-Security-Director-<version>-kvm.bin
                  --no-run
command to check if all the related packages are existing.
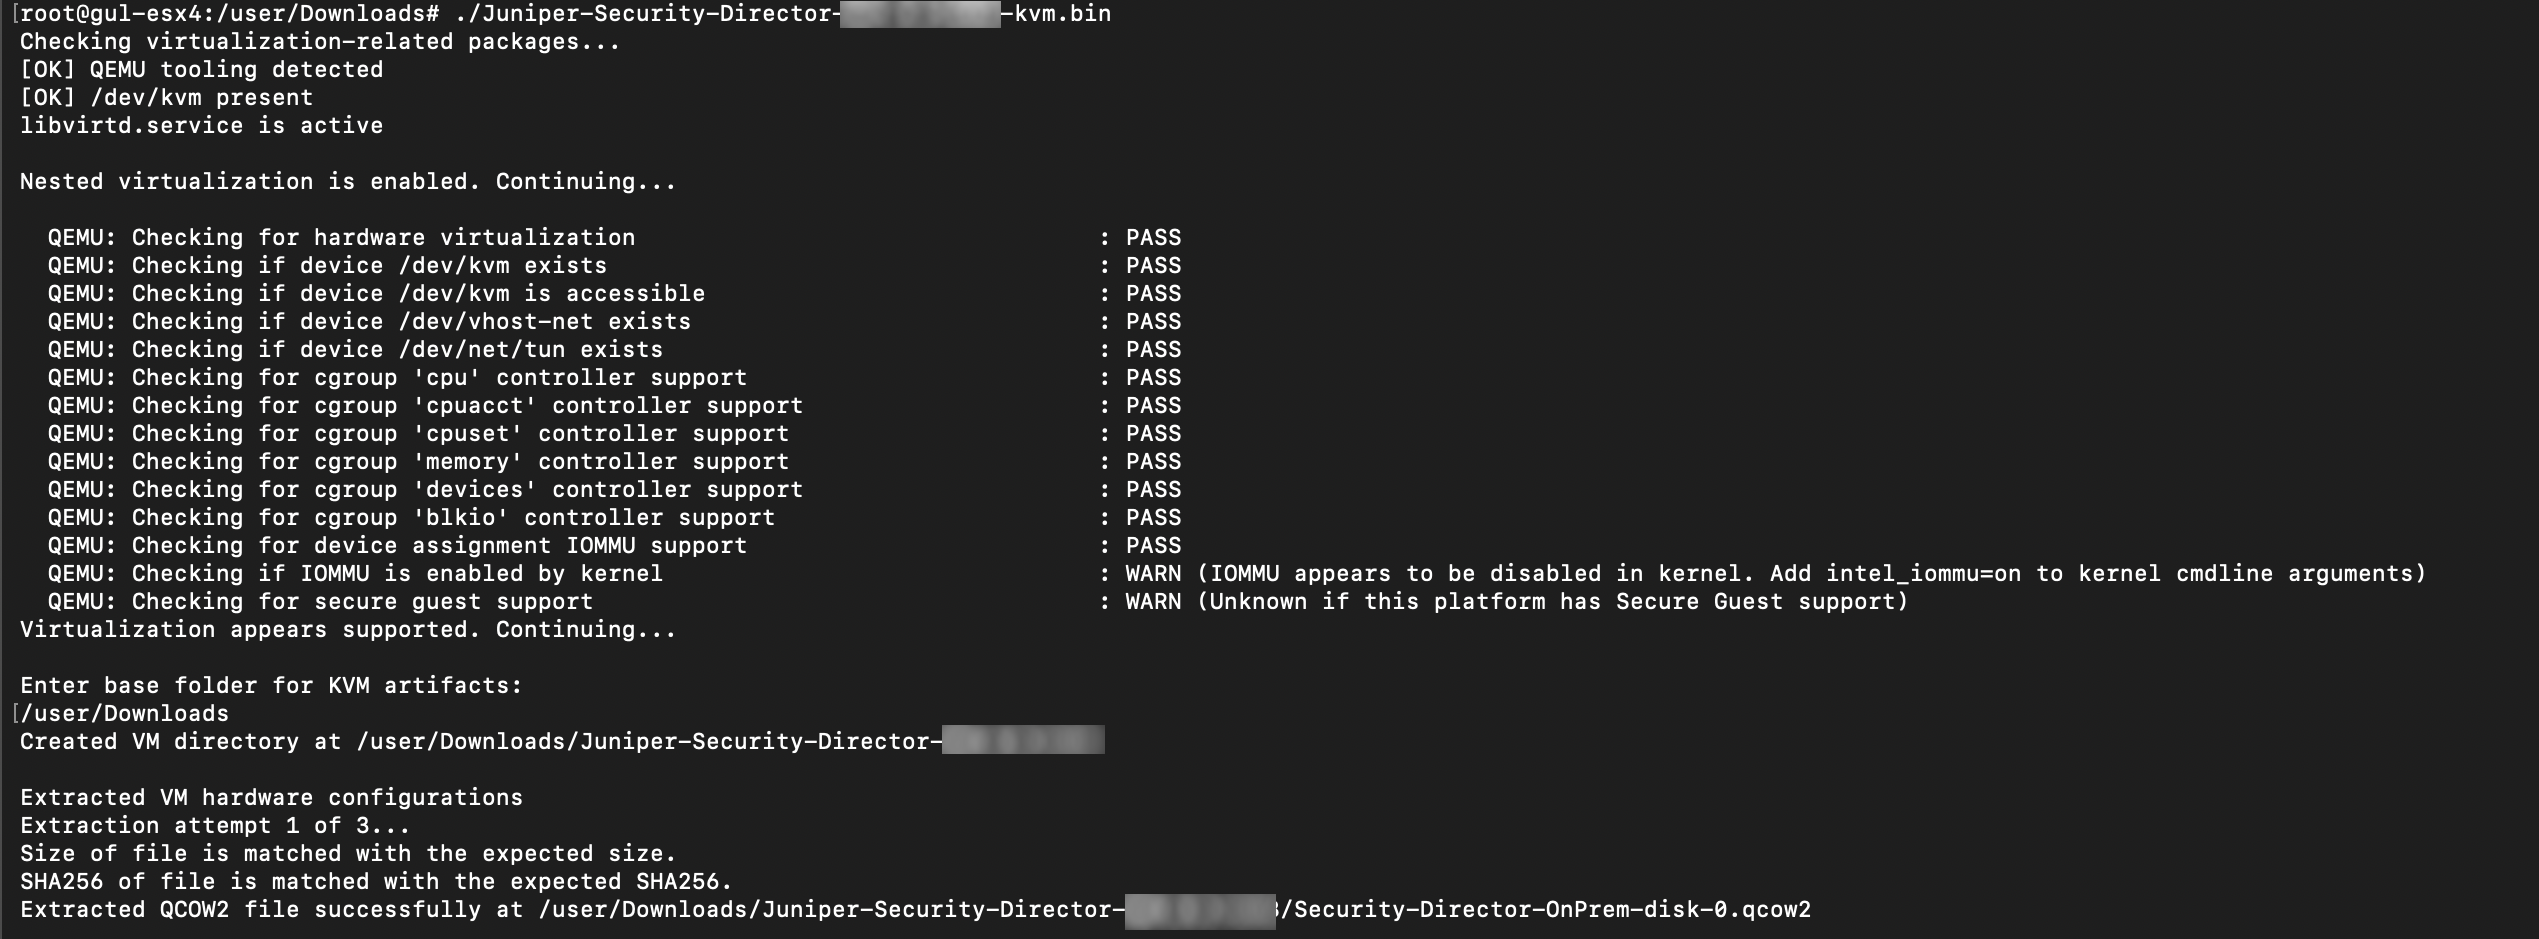
Enter the base folder for extracting the KVM files. Ensure the base folder has read and write permissions for the current user. QCOW2 and ISO files should have the executable permissions to run the script.
For example, /user/Downloads/
The VM directory is created, for example, /user/Downloads/Juniper-Security-Director-<version>. The QCOW2 disk 0 file is successfully extracted in the VM directory.
A checksum validation is performed to verify that the disk 0 file remains intact and uncorrupted after extraction. Table 2 lists the files in the VM directory.
Enter a unique VM name.
Enter the KVM configuration parameters when prompted.
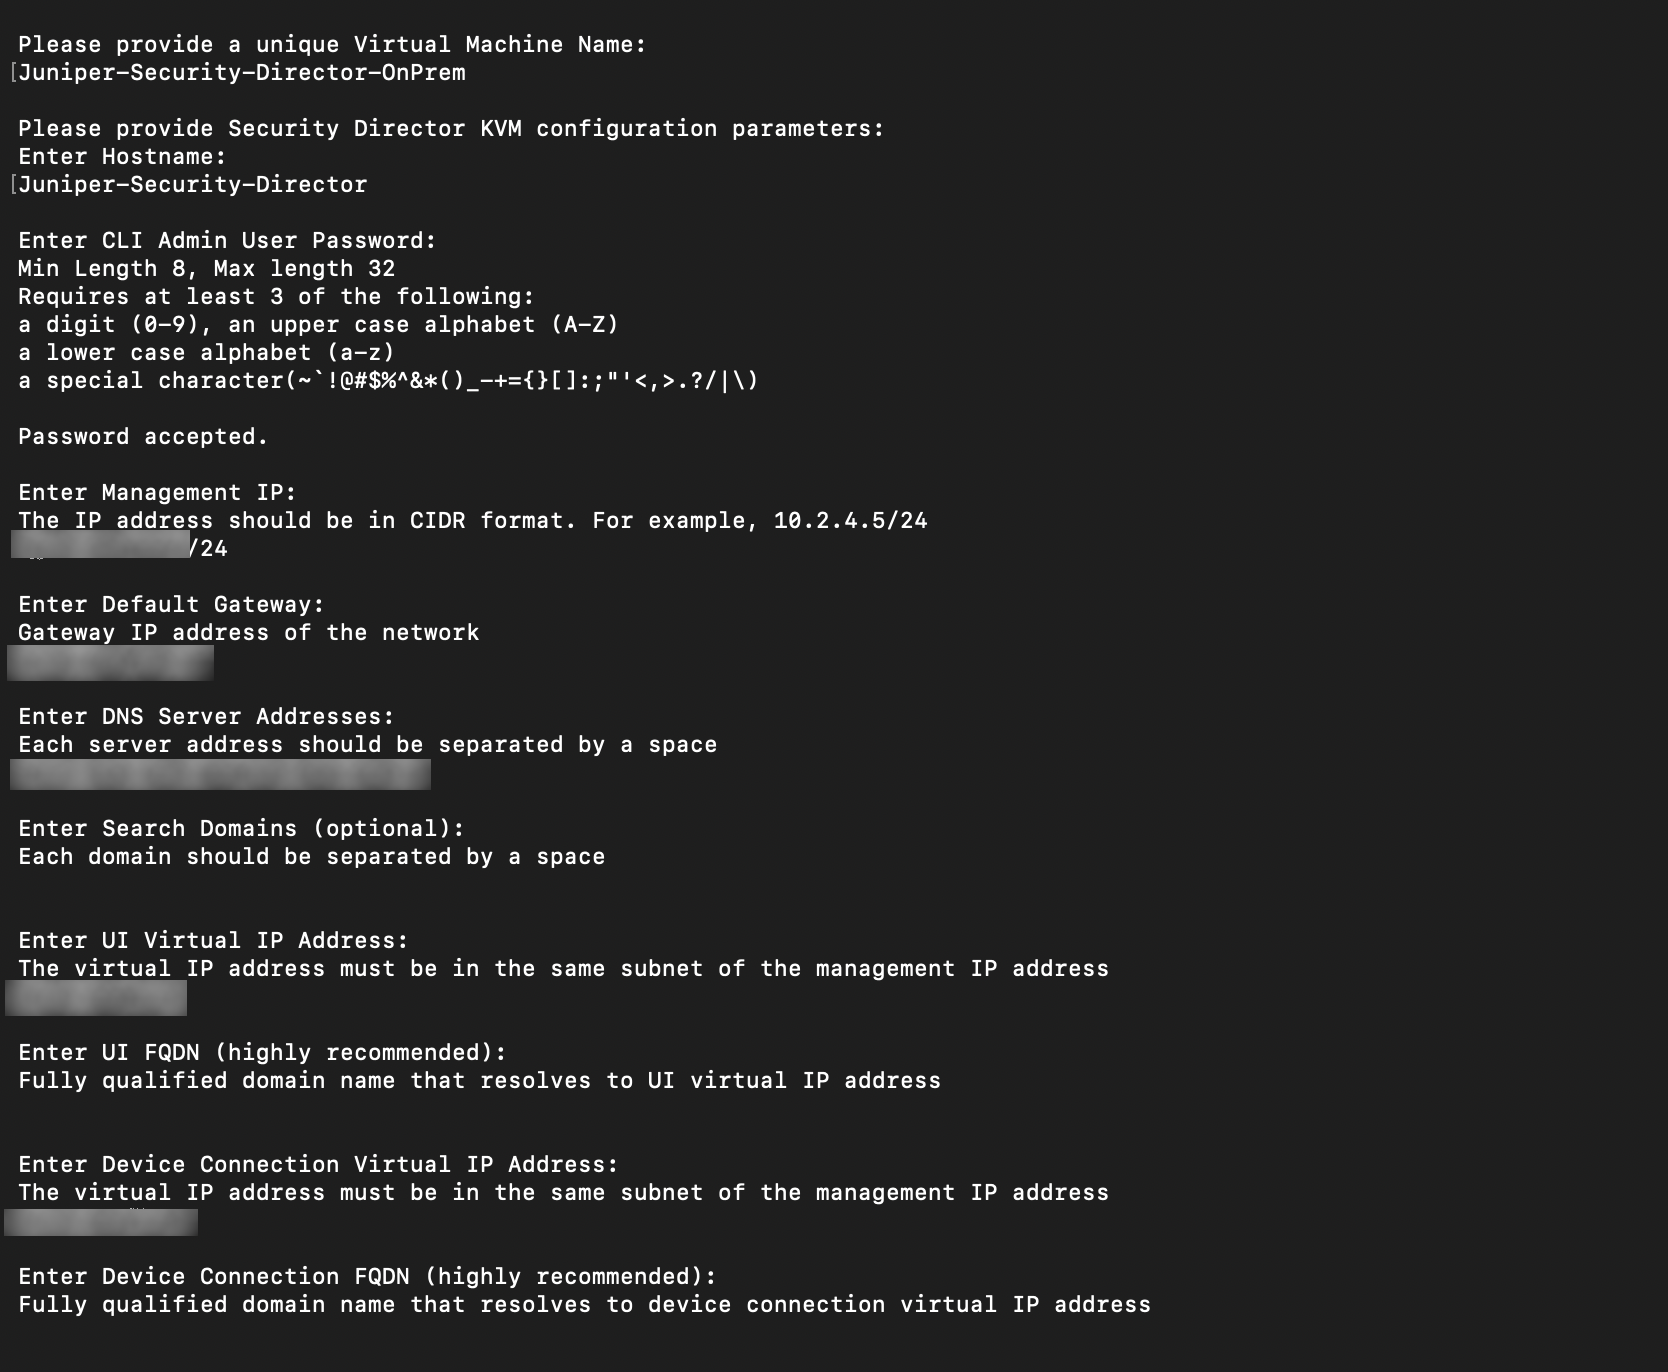
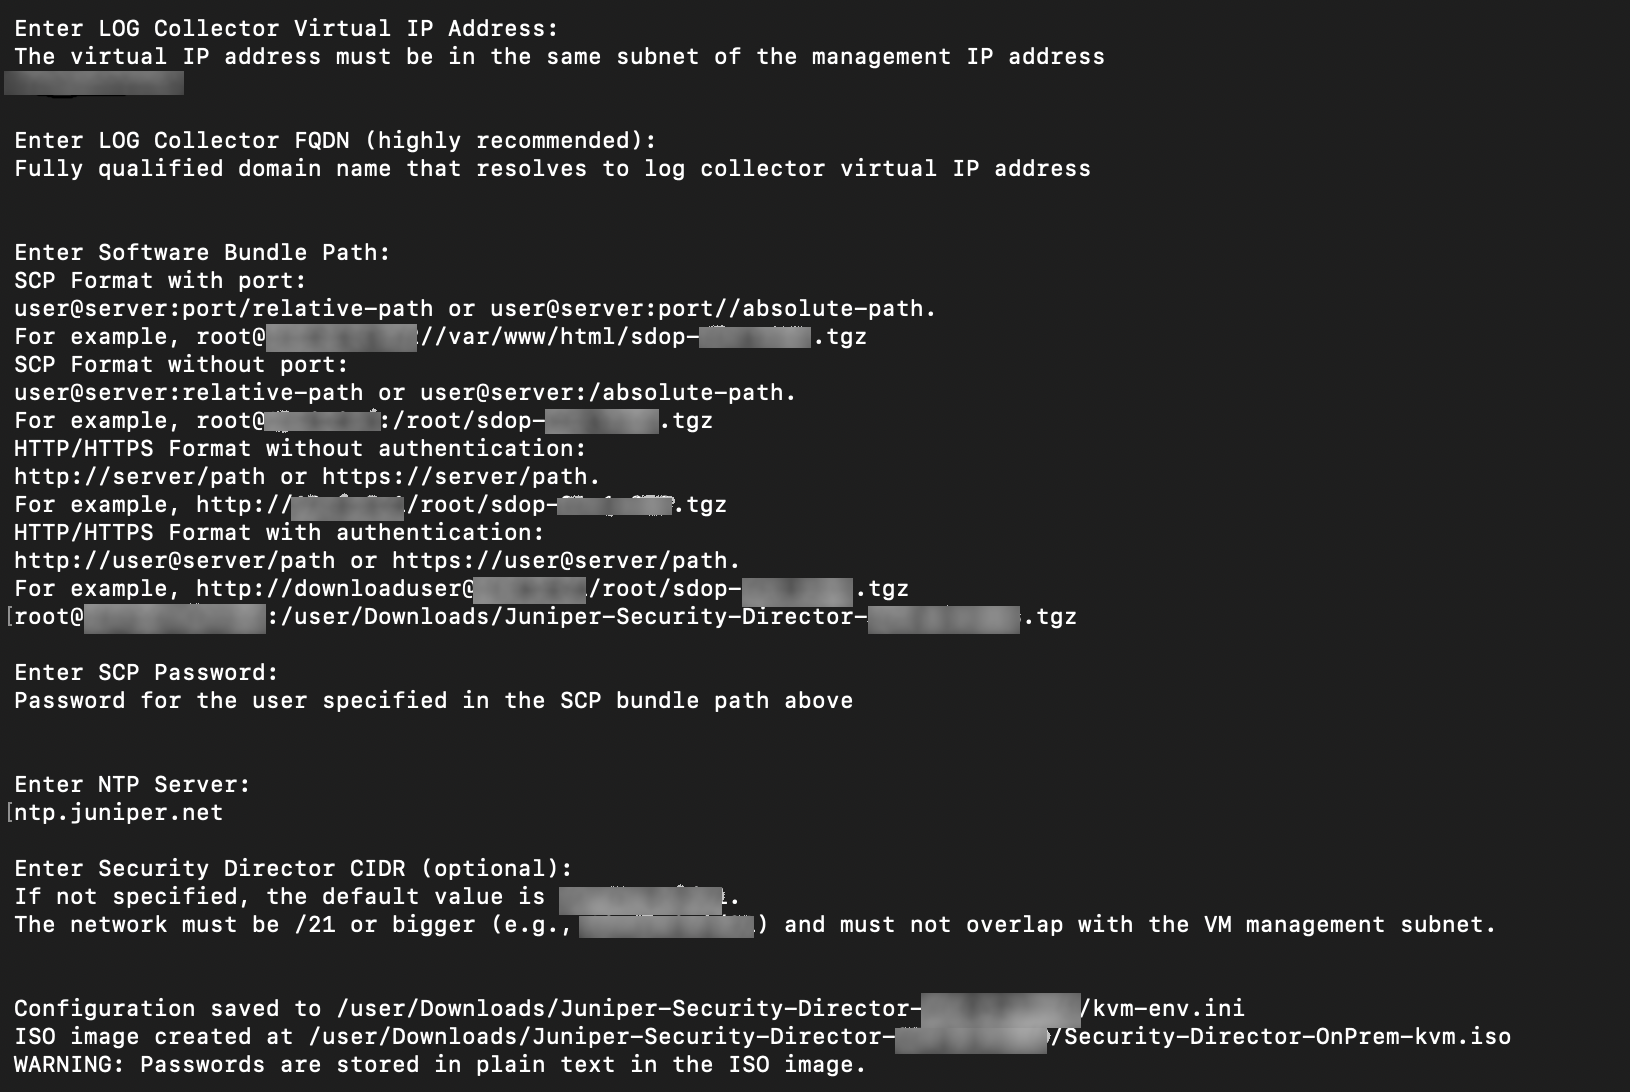
Table 1: Configuration Parameter Descriptions Parameter Description Hostname Enter the hostname of the Juniper Security Director VM. CLI admin user password Enter the CLI Admin User password. It must be of minimum length 8, maximum length 32. The password must have at least 3 of the following: A digit (0-9)
A upper case alphabet (A-Z)
A lower case alphabet (a-z)
A special character (~`!@#$%^&*()_-+={}[]:;"'<,>.?/|)
You won’t see the characters as you type, so be careful to enter the password correctly.
Management IP address Enter the management IP address in CIDR format. Default gateway Default gateway IP address of the network. DNS server addresses Enter the DNS server address. Search domains (Optional) Enter search domains. UI virtual IP address Enter the UI virtual IP address. UI FQDN (Highly recommended) Enter the FQDN that resolves to UI IP address. Device connection virtual IP address Enter the device connection virtual IP address. Device connection FQDN (Highly recommended) Enter the fully qualified device name that resolves to device connection virtual IP address. Log collector virtual IP address Enter the log collector virtual IP address. Log collector FQDN (Highly recommended) Enter the FQDN that resolves to log collector virtual IP address. Software bundle SCP/HTTP(s) Path Enter the software bundle path. SCP path must be in the following format: With port — user@server:port/relative-path or user@server:port//absolute-path
If the port is not specified, default value of 22 is used
.Without port — user@server:relative-path or user@server:/absolute-path.
For Windows VM as the staging server, you must provide the bundle location in the following format: user@<windowsvm>:/C:/<path>/Juniper-Security-Director-<version>.tgz
HTTP(s) path must be in the following format:
HTTP or HTTPS format without authentication: http://server/path or https://server/path
HTTP or HTTPS format with authentication: http://user@server/path or https://user@server/path
Bundle server password Enter the SCP password, or when authentication is enabled for HTTP(s). You won’t see the characters as you type, so be careful to enter the password correctly.
HTTP proxy path (Optional) Enter the HTTP proxy path: HTTP or HTTPS format without authentication: http://server[:port] or https://server[:port]
HTTP or HTTPS format with authentication: http://user@server[:port] or https://user@server[:port]
HTTP proxy password (Optional) Enter the password if authentication is enabled for the HTTP proxy. NTP server Enter the NTP server details. Security Director CIDR (optional) Enter the CIDR for the Juniper Security Director access. Security Director CIDR is the IP address range that Kubernetes will use for the internal service or pod networking when deploying and running Security Director On-Premises services.
Default—10.42.0.0/21
Requirement—The CIDR must be /21 or larger (for example, 10.42.0.0/21, 10.42.0.0/20).
This CIDR must not overlap with the VM management subnet, to avoid routing/IP conflicts between the Kubernetes network and the management network used by the VMs.
The configuration is saved to kvm-env.ini file (do not rename this file) and the ISO image is created, for example, /user/Downloads/Juniper-Security-Director-<version>/Security-Director-OnPrem-kvm.iso.
Table 2 lists the files in the directory.
Table 2: Files in the Directory Files Description kvm-env.ini An INI file that contains the VM's environment variables and deployment parameters. Security-Director-OnPrem-disk-0.qcow2 Primary or boot disk image for the Juniper Security Director VM. Security-Director-OnPrem-disk-1.qcow2 Application data disk used by the Juniper Security Director VM.
Security-Director-OnPrem-disk-2.qcow2 Log analytics disk used by the Juniper Security Director VM.
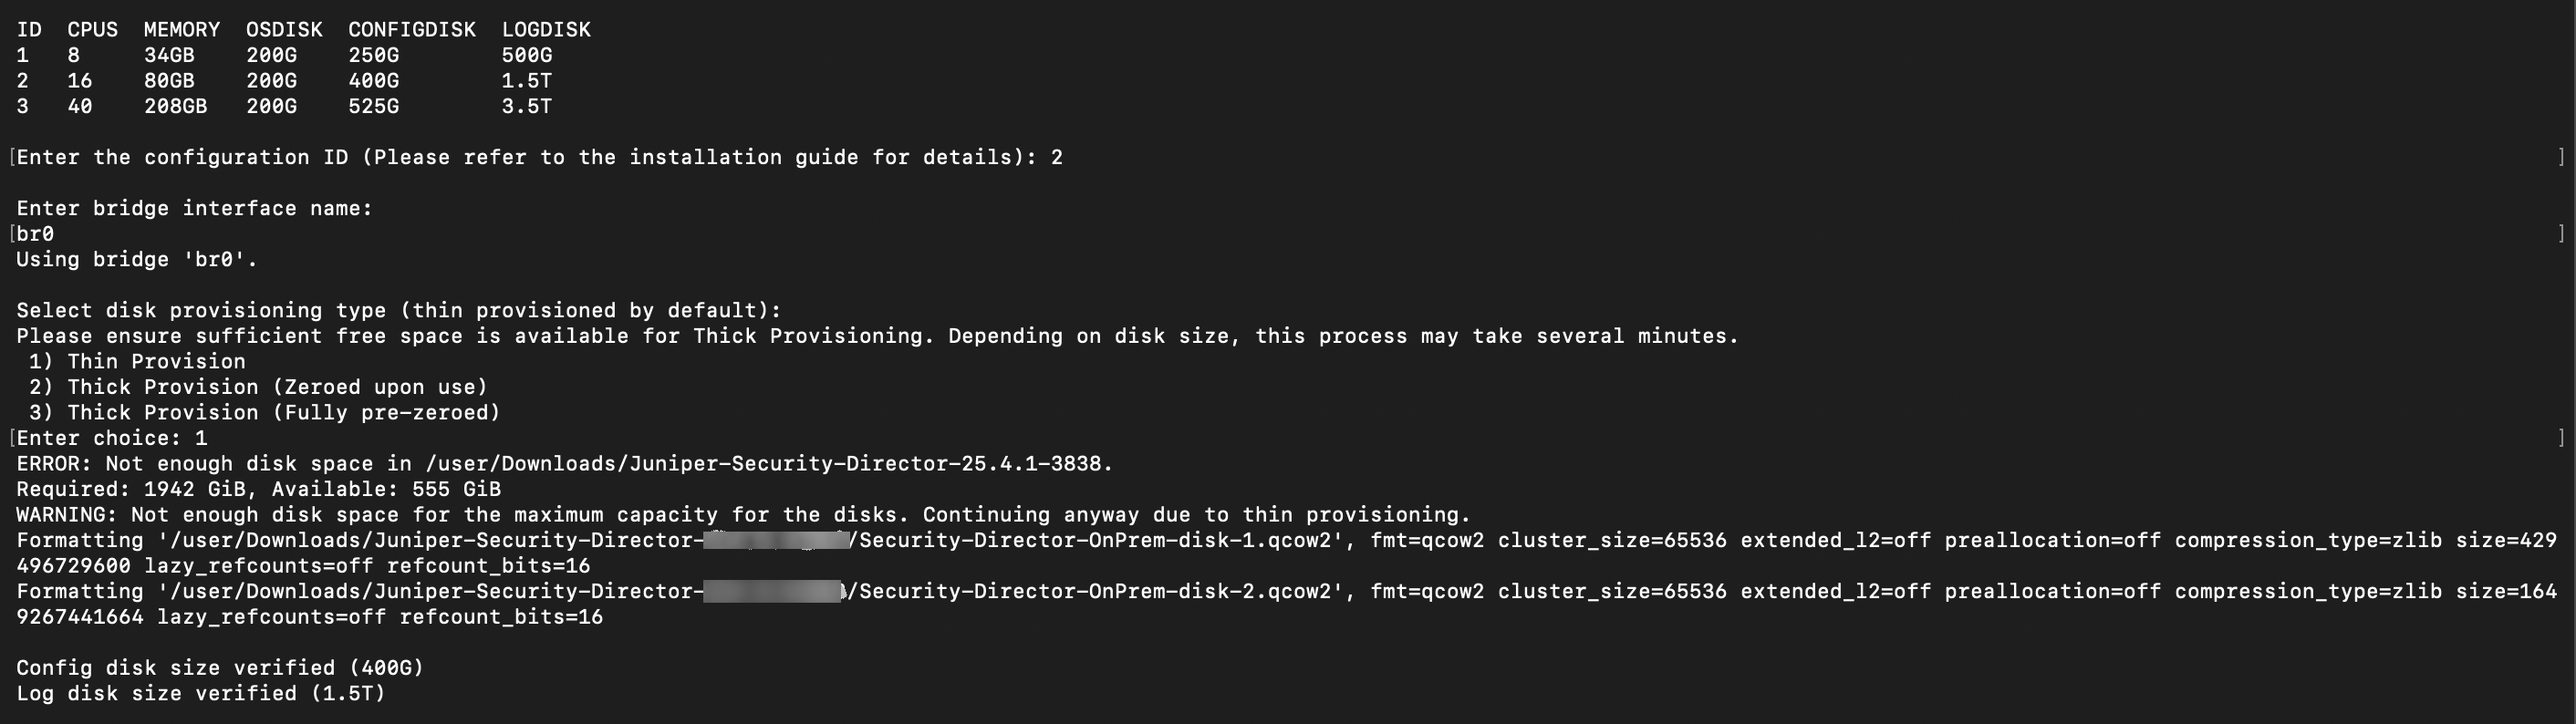
Security-Director-OnPrem-kvm.iso ISO image created from kvm-env.ini and used as a seed disk to automatically apply initial VM configuration during boot. Note: Contains passwords in plaintext and permission is set to 600.<vm_name>.xml Libvirt domain definition for the VM. launch-vm.sh File containing path to all extracted artifacts. It is used to create and start the Juniper Security Director VM. Enter the configuration ID for the VM configuration option as per your requirement. See for the recommended VM configuration option details.
Enter the bridge interface name. Ensure that bridge interface exists and is working.
To enable communication between a VM and a Ubuntu, Red Hat Enterprise Linux, Debian, Oracle, or Rocky Linux host using a bridge interface, you must configure a virtual bridge on the host. This bridge connects the host’s physical network interface to the VM’s virtual interface, allowing the VM to function as if it were a physical device on the local network.
The VM config file is created, for example, /user/Downloads/Juniper-Security-Director-<version>/<vm-name>-vm.xml.
The launch file is created, for example, /user/Downloads/Juniper-Security-Director-<version>/launch-vm.sh
On selecting --no-run option, launch-vm.sh is not created.
Without the --no-run option, the bridge interface must exist on the system. With the --no-run option, the existence of the bridge interface is not checked.
If you want to update the .xml file, then use
virsh edit <vm-name>command.To create the VM, run
virsh define
                    <path-to-vm-xml>/vm-name.xml
Enter the disk provisioning type as Thin, Thick (Zeroed upon use), or Thick (Fully pre-zeroed).
Ensure sufficient free space is available for Thick provisioning. Depending on the disk size, this process might take several minutes.
The disk1 and disk 2 QCOW2 files are created.
To create and start the VM, run the following command:
/user/Downloads/Juniper-Security-Director-<version>/launch-vm.shClick Yes to start Juniper Security Director.
Congratulations! Now the Juniper Security Director VM has been created and started. You can monitor the deployment and installation process through VM Manager graphical console or serial console.
You can ssh to the VM IP using the cliadmin user and the password you configured during the
VM deployment. Then, use the show bundle install status command to check
the installation status. On successful deployment, Node installation completed
successfully message is displayed.
To view application services messages run show health status CLI
command.
After the deployment is complete, use the UI virtual IP address or FQDN (domain name) that you configured during the VM deployment to log in to the Web GUI.