
Configure Switch-Level Variables
Follow these steps to create switch-level variables that allow you to apply unique configuration values per switch.
You can streamline and standardize the Juniper Mist™ configuration process by using switch-level (device-level) variables in your switch configuration. Device-level variables are similar to site variables, except that they are scoped to a specific switch rather than a site. You can define them as key-value pairs and reference them in configuration fields using the {{variable_name}} syntax.
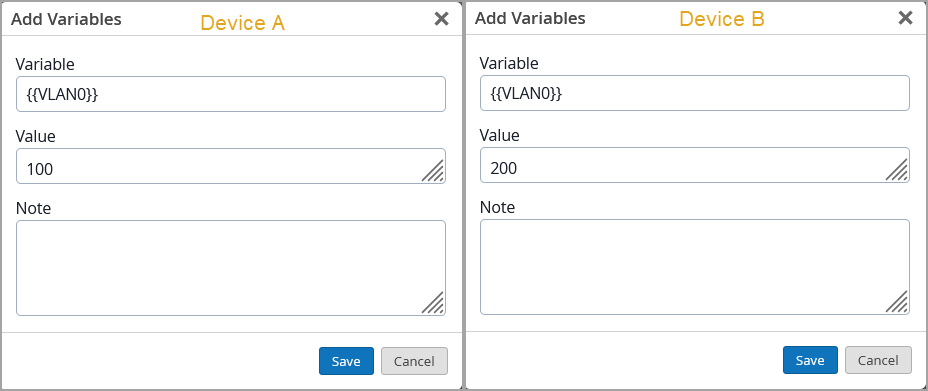
Device-level variables allow you to apply unique configuration values per switch, even when multiple switches are associated with the same switch template, as shown in the following example:
You configure the variable {{VLAN0}} with VLAN ID 100 on Switch A and VLAN ID 200 on Switch B.
Assign both switches to a switch template that specifies the VLAN ID as {{VLAN0}}.
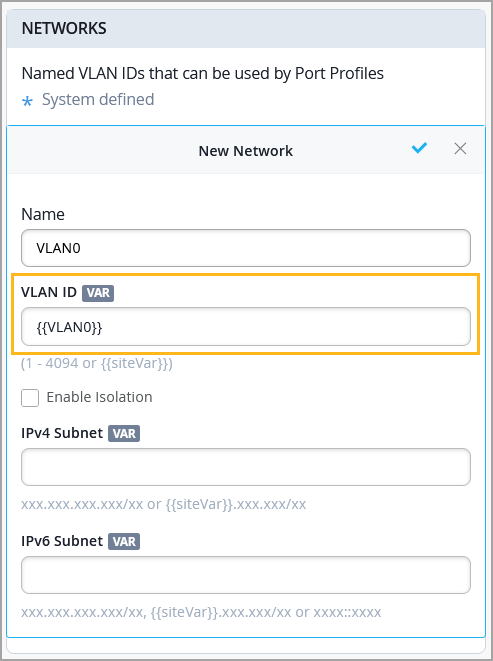
Now, Switch A receives VLAN ID 100, while Switch B receives VLAN ID 200.
Switch-level variables are supported for the following configuration fields:
-
DNS servers and DNS suffix
-
NTP servers
-
Networks (VLAN ID, subnet, subnet mask)
-
IP Configuration (Inband Management): IP address, subnet mask, default gateway, primary DNS, secondary DNS, DNS suffix — for both IPv4 and IPv6
-
IP Configuration (Out-of-Band): IP address, subnet mask
-
Additional IP Configuration
-
Authentication servers (RADIUS and accounting server hostname/IP)
-
TACACS+ servers (server and accounting server hostname/IP)
-
Static routes (destination, next hop)
-
SNMP (v2 and v3): name, location, contact, description, source address
When working on configuration screens, look for the VAR indicators. Fields with this indicator allow variables.
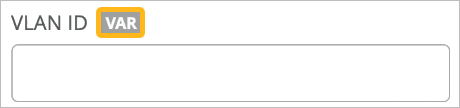
To configure switch variables:
-
From the Device Variables tile, you can add, import, edit, or
delete switch variables:
-
To add switch variables, click Add Variable, complete the required fields as described in Table 1, and then click Save.
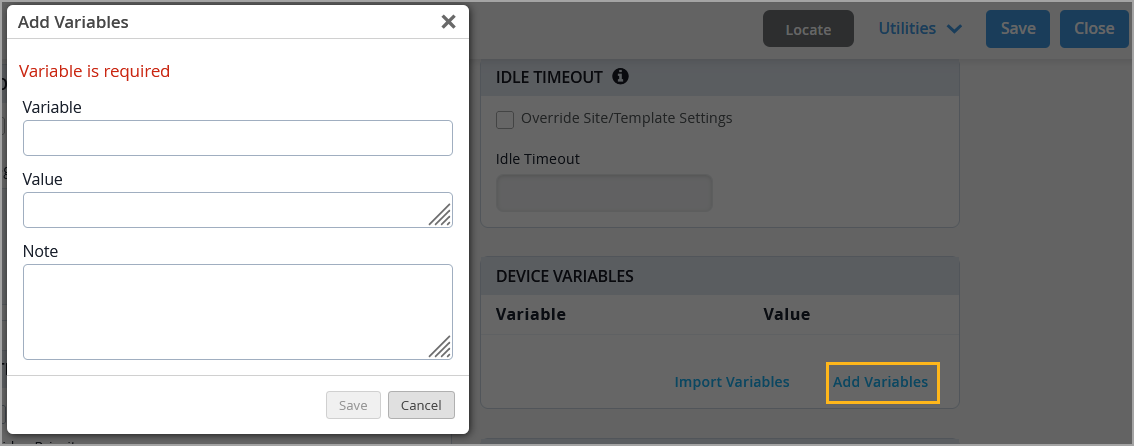
Table 1: Variable Settings Field Description Variable Enter a name for this variable.
Enclose the variable name within double curly brackets, such as {{variableName}}.
The name can include letters, numbers, and underscores. Do not include any other special characters.
Note:When you type {{ in a supported configuration field, an autocomplete dropdown displays both device variables and site variables. If a device variable has the same name as a site variable, the device variable takes precedence.
Value Enter the value that you want this variable to represent. For example, enter an IP address, subnet, or VLAN ID.
Note Enter any notes that will help you to use and manage this variable. -
To import a list of variables:
Prepare a .CSV file with switch variables to be imported and save the file to your computer. The first row must contain column headers (Variable, Value) followed by data. The rows in the first column should contain variables, enclosed by curly brackets. The variables can include only letters, numbers, and underscores. The rows in the second column should contain values corresponding to each variable in the first column.
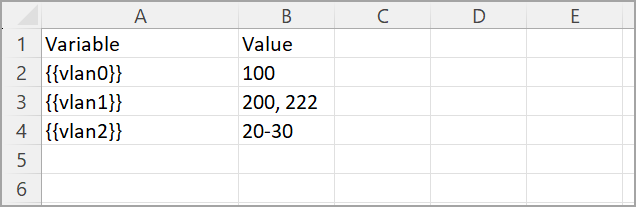
Click Import Variables.
Drag and drop the .CSV file to the Import Variable window.
Verify the data displayed on the Import Variables window and then click Save.
Note: If a .CSV file with variables was already uploaded or available, you can download it using the Download Variable List option and add the new variables to the bottom of that list and then upload that file. Refer to the existing entries as examples. You can either delete the existing variables in the CSV file or leave them in place. When you upload the file, Mist ignores the existing variables in order to preserve your configuration.
-
To edit switch variables, click the variable, make your changes, and then click Save.
-
To delete switch variables, select the variable, and then click Delete.
-
After configuring switch variables on multiple switches, use these variables in the associated switch template. Each switch associated with the template receives its own unique configuration values based on the variables configured on that switch.