Configure Site Variables
Follow these steps to create site variables to use in your templates.
You can streamline and standardize the Juniper Mist™ configuration process by using site variables in your templates, such as WLAN and WAN Edge templates.
With variables, you can easily use a single template to configure multiple sites, even though they have different attributes such as subnet addresses and VLAN IDs.
Naming Syntax
Variable names must be properly formatted.
-
Contain the name within double curly brackets, such as {{variableName}}.
-
The name can include letters, numbers, and underscores. Do not include any other special characters.
Example
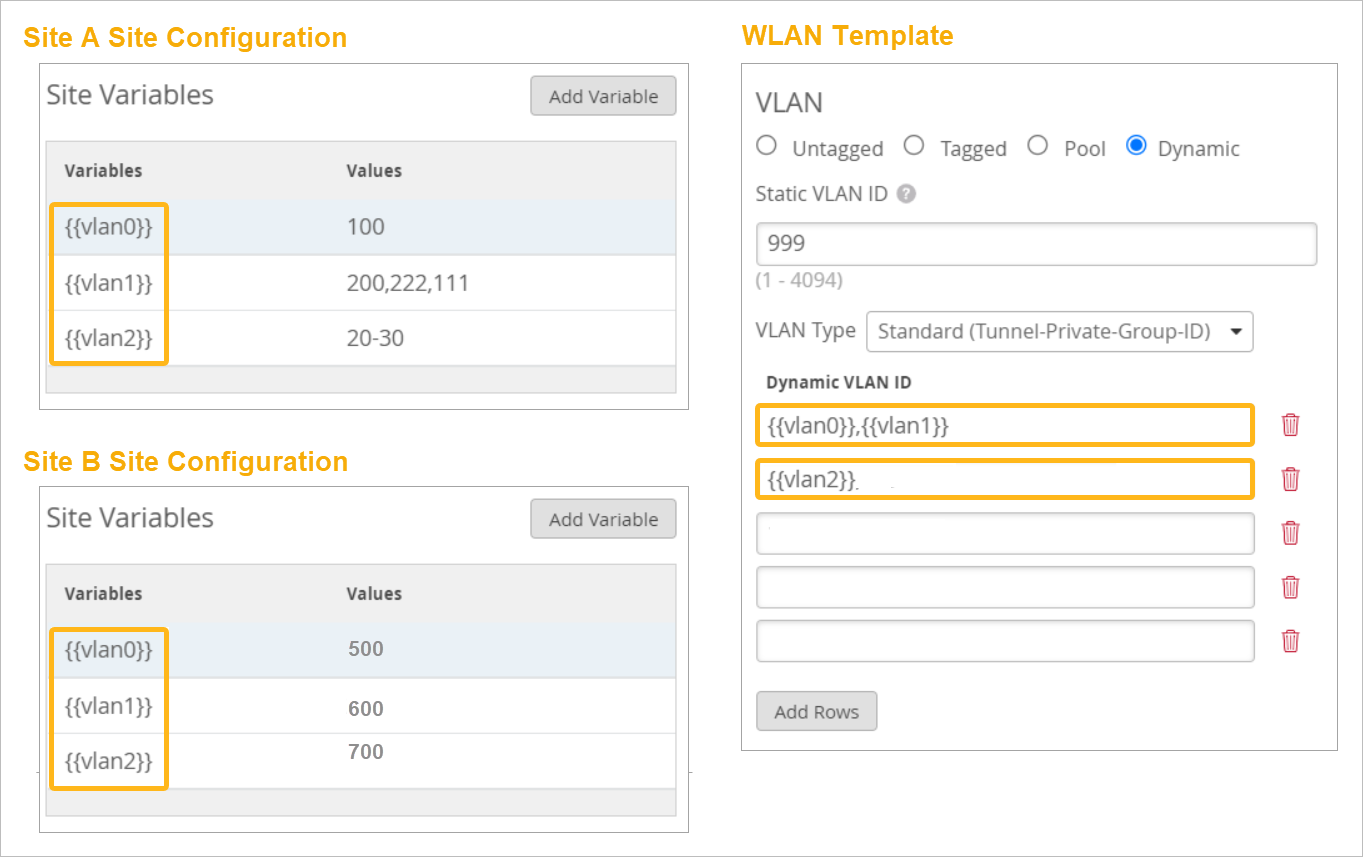
This example shows how you can use one WLAN template for two sites that have different VLAN IDs.
-
For Site A and Site B, you add variables with the same variable names, but different values.
-
In the WLAN template, you enter the variable names.
-
Juniper Mist uses this WLAN template to configure devices with the correct VLAN IDs for their respective sites.
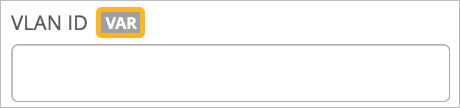
When working on configuration screens, look for the VAR indicators. Fields with this indicator allow site variables.
To configure site variables:
-
Edit, delete, add, or import site variables:
-
To edit—Click the variable, make your changes, and then click Save.
-
To delete—Click the variable, and then click Delete.
-
To add—Click Add Variable, complete the required fields, and then click Save.
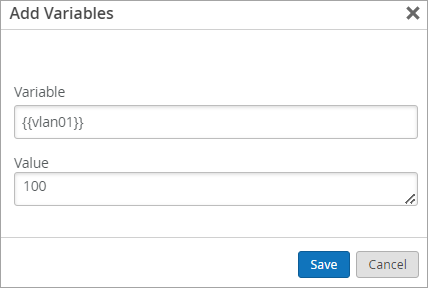
Table 1: Variable Settings Field Description Variable Enter a name for this variable.
Enclose the variable name within double curly brackets, such as {{variableName}}.
It can include letters, numbers, and underscores. Do not include any other special characters.
Value Enter the value that you want this variable to represent. For example, enter an IP address, subnet, or VLAN ID.
Note Enter any notes that will help you to use and manage this variable. -
To import a list of variables:
Click Import Variables.
Click Download Site Variable List.
Open the siteVariables.csv file.
Add your new variables at the bottom of the list.
Refer to the existing entries as examples. In each row, the first field contains the variable, enclosed by curly brackets. The second field contains the value.
The name can include only letters, numbers, and underscores.
Note:If you're adding a variable for a Mist Edge tunnel, enter the Tunnel ID. To find this ID, go to the Mist Edges page, scroll down to the Mist Tunnels section, and then click the tunnel. When the tunnel details page appears, click the copy button next to Tunnel ID.
You can delete the existing variables in the CSV file or leave them in place. When you upload the file, Mist ignores the existing variables in order to preserve your configuration.
Save the CSV file.
Return to your web browser, where you previously opened the Import Site Variables pop-up window.
Upload your CSV file, and then click Save.
The screen displays information about the import. For example, you'll see a confirmation that Mist is ignoring any previously configured variables in the file.
-