ON THIS PAGE
What does the Inactive wired VLANs warning on the Mist dashboard mean?
How to verify if Marvis is detecting the correct case of missing VLANs?
Is Spanning Tree Protocol (STP) enabled on EX Series switches by default?
How do I move a switch between organizations without affecting its configuration?
How many sessions are recommended per single SSH connection for switches?
FAQs (Mist Wired)
Get answers to common questions about missing VLANs, default configuration options, port configuration, upgrades, and more,
What does the Inactive wired VLANs warning on the Mist dashboard mean?
When your APs do not detect incoming traffic from a particular VLAN that is used in either an AP or a WLAN configuration, Mist suspects that this VLAN is not configured on the switch port where the APs are connected. The Inactive wired VLANs warning appears on the AP list page to indicate this issue, and an icon is displayed next to the APs experiencing the inactive wired VLAN issue.

How to check which VLAN is missing on the switch port?
To find out which VLANs are missing on the switch port:
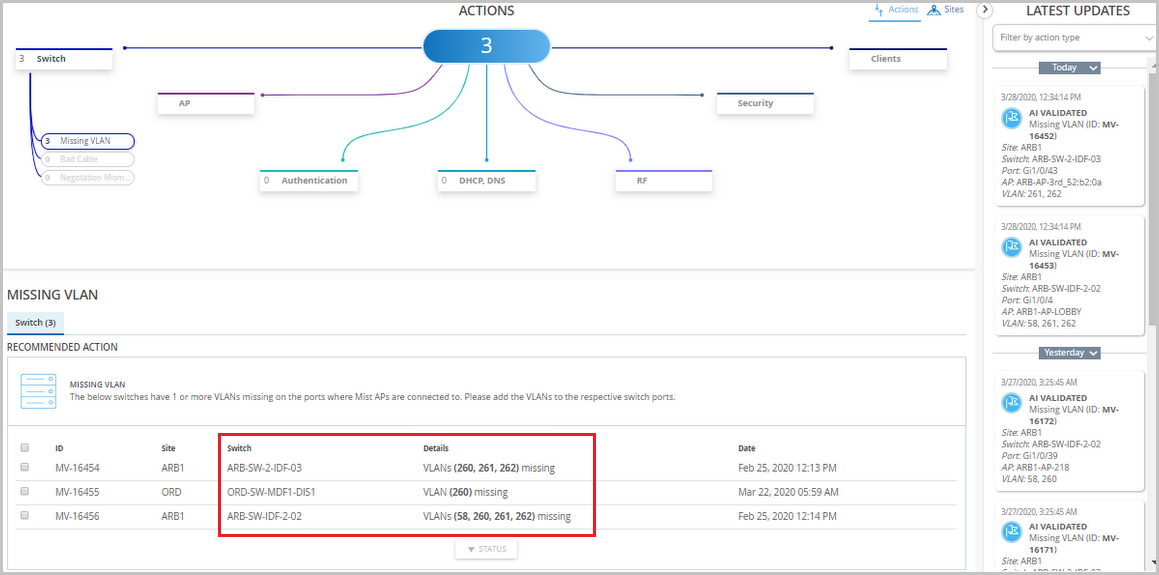
Go to the Marvis Actions page (Marvis > Actions).
From the actions tree, select Switch > Missing VLAN to see the VLANs that are missing.

How to verify if Marvis is detecting the correct case of missing VLANs?
To verify whether the Marvis AI is detecting the correct case of missing VLANs, do a packet capture or port mirroring on the switch port to which the AP is connected, and use the Wireshark tool to analyze the traffic. You can also use the VLAN filter to verify if any traffic is coming from that VLAN. See Dynamic and Manual Packet Captures for more help on setting up Wireshark.
How to fix the missing VLAN error?
Once you have identified the VLAN that is missing from the switch port but is being used in your AP or WLAN configuration, you can configure that VLAN on your switch. After the VLAN is correctly configured on your switch and the AP starts detecting traffic from it, Mist takes some time to verify the fix and ensure that the issue is resolved. After that, the warning disappears automatically.
If you see the warning even after fixing all the VLANs on your switch ports, open a support ticket for assistance. For more information, see Create a Support Ticket.
In an EX Series switch-based Virtual Chassis (VC) system, how do I convert the DAC-attached VC port to a trunk port?
You can do this by converting the VC port on the Virtual Chassis to network port by running the following CLI command locally on the switch:
request virtual-chassis mode network-port
This behavior applies to the EX Series switches that come with a default VC port. This is a one-time step.
Is Spanning Tree Protocol (STP) enabled on EX Series switches by default?
STP is not enabled on EX Series switches by default. However, if the switch is managed by Mist, this protocol is enabled on the switch automatically. If users do not want STP on a port, they can set the port as a Rapid Spanning Tree Protocol (RSTP) edge port by using a port profile. This setting ensures that the port is treated as an edge port and guards against the reception of Bridge Protocol Data Units (BPDUs).
Why are some EX Series switches failing to onboard?
Problem: When onboarding brownfield EX Series switches to the Juniper Mist Cloud, the procedure fails.
Solution: The simple answer, as shown at the end of the FAQ, is to create a firewall rule that allows traffic on ports 2200 and 443. For your reference, however, the list below shows all the things one administrator tired before contacting support to get the solution:
-
The switch is not connecting to the Mist cloud on port 2200
- In the Mist dashboard, restarting the outbound-ssh port has no effect
-
In the Mist dashboard, re-pasting the default switch adoption code from the terminal window has no effect
- No packet drops on the physical (uplink) interface
- The switch Integrated Routing and Bridging (IRB) interface is up and able to ping the Internet
- The system clock is able to sync with the Internet time server
- The DNS server is able to resolve oc-term.ac2.mist.com when pinged
- Unable to telnet oc-term.ac2.mist.com
- Ran packet capture and see that the TCP status is SYN_SENT. Should be Established
-
Ran packet capture and see TCP SYN packets leaving the switch, but no return packets are coming back
-
Ran packet capture from the WAN edge, but no SYN-ACK packets are coming back
In summary, because the switch was blocking traffic from port 2200 and port 443, onboarding failed. The administrator needed to create firewall policy on the switch to allow traffic from those ports to the Juniper Mist cloud server.
For switches managed from the Juniper Mist cloud, the custom CLI configuration statements
that you enter from the Mist dashboard is at risk of being overwritten by the next update
or configuration push. The best way to prevent this is to encapsulate the commands with
the groups statement so they are unique and persistent, as shown in the
example below.
Here is a code sample for creating the necessary firewall rules:
set groups firewall family inet filter PROTECT-RE term allow_mist from source-port 2200
set groups firewall family inet filter PROTECT-RE term allow_mist from source-port 443
set groups firewall family inet filter PROTECT-RE term allow_mist then accept
I created a port configuration and applied that to a range of ports on a switch. Now, I want to select a single port from that range and configure an individual port description on it. How do I do that?
To do that, follow the steps below:
Go to the switch details page (Switches > Switch Name).
Select the port to be updated from the Front Panel section.
Click the Modify Port Configuration button to open the Port Configuration tile.
Specify a port description in the Description field.
Click the check mark (✓) on the top right of the Port Configuration tile to save the configuration.
My switch lost connectivity during the onboarding process to Mist because of a phone-home client issue. How do I troubleshoot this issue?
You can try the below steps:
Check if the phone home process is running. To do that, log in to the switch CLI and run the command below:
 show
        system processes extensive | match phone-home
If the phone-home process is not running, configure the phone-home server using the CLI commands below:
set
          system phone-home server https://redirect.juniper.net
set system
          phone-home rfc-compliant
commit
If the phone-home configuration is available on the device but the issue is persisting, restart the home client, using the CLI command below:
restart
        phone-home-client
If you don't want to carry out the above steps, you can
consider zeroising the switch using the CLI command request system zeroize.
This command will restart all the services on the switch, including the phone-home
process.
If you want to collect logs from the phone-home process, run the CLI command
show log phc.log | last 100 on the switch.
My switch lost connectivity while being onboarded to the Mist cloud because of a native VLAN mismatch between the switch and the uplink device. How do I resolve this issue?
To resolve this issue, configure the uplink interface on the new switch that is being onboarded with the same native VLAN as the connected uplink device.
You can configure the native VLAN on the new switch uplink port through the template or directly from the switch details page. On the template (Organization > Switch Templates), you can configure the native VLAN from the IP Config tab on the Rules tile in the Select Switches Configuration section.

In the switch details page (Switches > Switch Name), you can configure the native VLAN at the device level from the IP Configuration tile in the Device section.
While being onboarded to the Mist cloud, my switch lost connectivity because the port on the uplink device does not have a native (untagged) VLAN with DHCP, DNS and Internet access. How do I resolve this issue?
To resolve this issue, try the below steps:
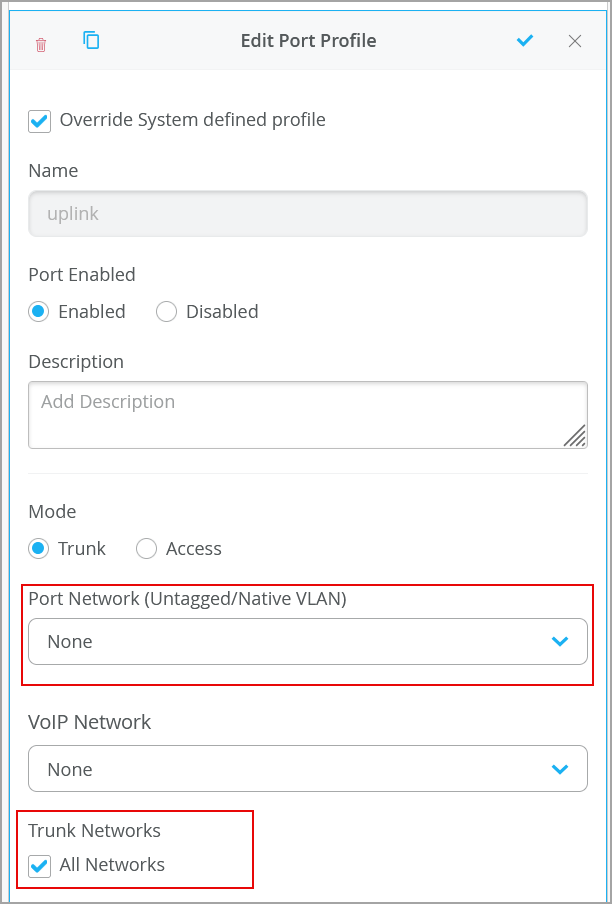
- Create a configuration template for the new switch with uplink port profile configured
with all VLANs tagged.

- Stage the switch by connecting its OOB-MGMT port to a network with DHCP, DNS, and internet access to start the ZTP process.
Once the configuration, which has uplink ports configured with all VLANs tagged, is pushed to the switch, disconnect the switch from OOB-MGMT and connect it to the existing switch via the revenue uplink ports for in-band management.
How do I move a switch between organizations without affecting its configuration?
To move a switch to a different organization while preserving its configuration, follow these steps:
On the switch you want to move, turn off configuration management. You can do this from the Switch Details page or via the More menu on the Switches (List View) page.
Release the switch from the current organization’s inventory.
Adopt the switch into the new organization. Use the Adopt CLI commands (7 lines) to add the switch to the new organization. See Onboard a Brownfield Switch for details. Do not enable configuration management yet—doing so will cause the Mist cloud to overwrite the existing configuration.
Assign the switch to the previously linked configuration template. You can do this by assigning the switch to a site which has the template linked to it. Additionally, configure the switch with the device-level settings previously applied when it was associated with the original organization. You can do this from the Switch Details page.
Once the correct configuration is applied, turn configuration management back on from the Switch Details page or via the More menu on the Switches (List View) page.
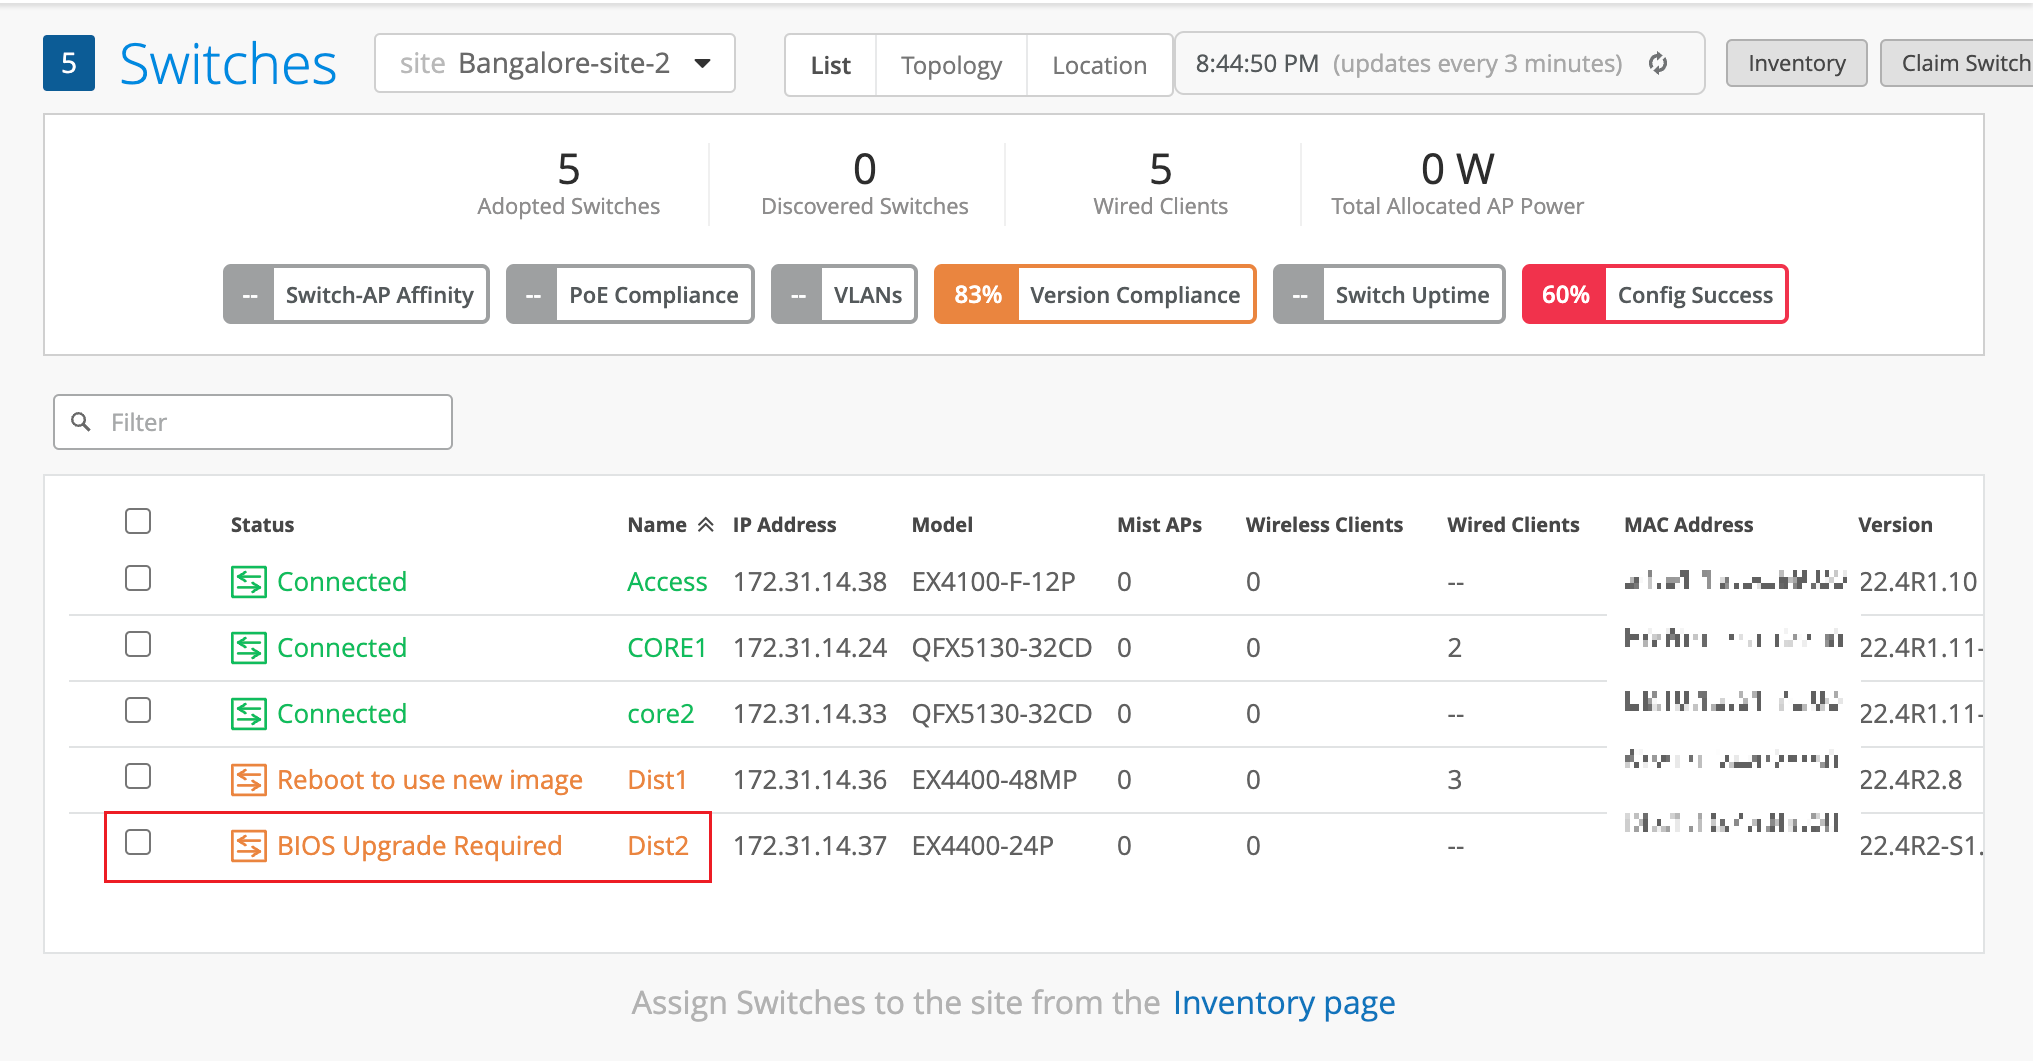
Upgrade Required: Why am I seeing an upgrade notification for my EX4400 switches, and how do I perform Junos or BIOS upgrade from the Mist dashboard?
For Juniper EX Series switches that are managed by Mist, you can identify and upgrade the Junos version and/or switch BIOS to the current version from the Mist dashboard. To alert you to a version mismatch and to recent releases, a notification appears at both the switch list, and on the configuration page of individual switch. When more than one switch is affected, you can select all to perform a simultaneous upgrade.

When you see an upgrade notification, we recommend that you perform the update as soon as convenient to prevent "silent," or unexpected, device reboots that can result in the case of new Mist features not being supported by a previous version of the switch firmware. Note that for BIOS upgrades and some Junos upgrades, the switch will be taken offline to reboot or restart a given line card.
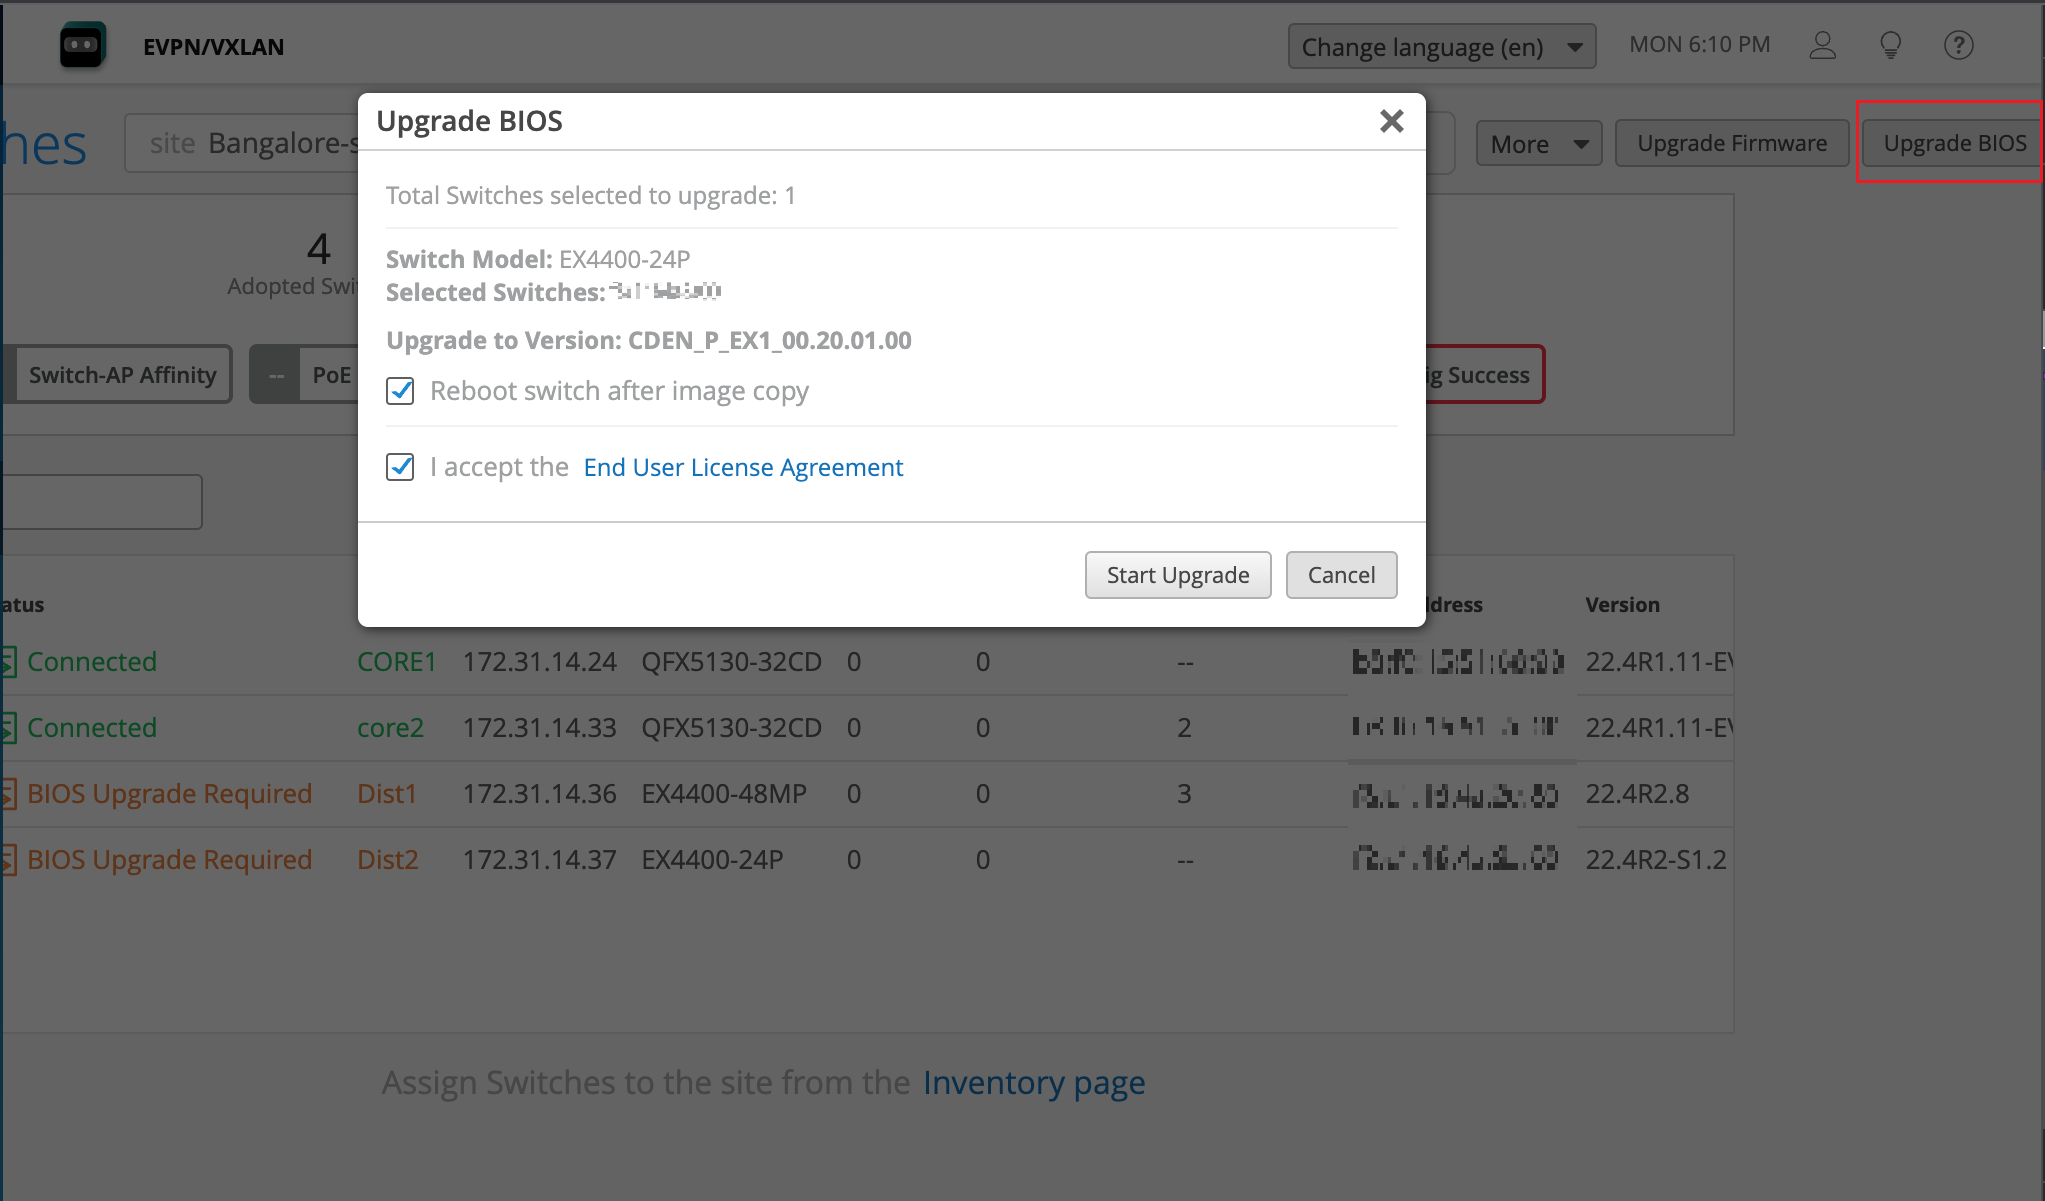
The Upgrade BIOS option appears:

For switches configured for virtual chassis (VC), all members are automatically upgraded together; you do not need to perform separate BIOS upgrades. Likewise, in the case where different FPCs are running different BIOS versions, only those FPCs that need the newer BIOS will be upgraded.
Tip: You can find the switch BIOS by opening a remote shell (Utilities > Remote Shell at the top of the switch configuration page) and running the following Junos command from the CLI:
show chassis firmware
The exact output will depend on the switch and hardware configuration, as shown in the following sample:
 {master:0} user@device> show chassis firmware
                                     Part       Type       Version
            FPC 0                    loader     FreeBSD EFI loader 2.1
                                     BIOS       CDEN_P_EX1_00.15.01.00
                                     System CPLD 0.f
                                     CPU CPLD   1.0
            FPC 1                    loader     FreeBSD EFI loader 2.1
                                     BIOS       CDEN_P_EX1_00.20.01.00
                                     System CPLD 0.12
                                     CPU CPLD   1.0
            {master:0} user@device>
The following tables provide upgrade recommendations with regards to a known, and since September, 2023 fixed, issue with silent reboots on the EX4400 platform. If you have a device that is effected, upgrade the BIOS and/or Junos version as instructed in the following tables.
| Junos Version | Next Step | Comment |
| Junos 22.2R3-S1.11 and below. | Upgrade to Junos 22.2R3-S2. | Schedule a maintenance window and perform the upgrade. Multiple EX4400s can be upgraded together. Go to Utilities > Upgrade Firmware on the Switch detail page to perform the upgrade. |
| Junos 22.3 | Upgrade to Junos 22.3R2-S2. | |
| Junos 22.4 and below 22.4R2-S1 | Upgrade to Junos 22.4R2-S1. |
| BIOS Upgrade Required | Next Step | Comment |
| If a warning for “BIOS Upgrade Required” is displayed on the Mist UI... | Upgrade the affected switches to the recommended BIOS version.
If the switch is
configured for VC, and is operating in HiGiG mode To see
which mode VC is running in, open a remote shell to the switch and run the
following commands: |
Upgrading the BIOS upgrade requires the switch to reboot. Only those versions
needing the upgrade will be upgraded, for example in a virtual chassis. On the Switch Detail page, go to Utilities > Upgrade BIOS. Select the EX4400 switches with the warnings and click Upgrade BIOS. For additional details, see |
| Both Warnings | Next Step | Comment |
| If a warning for BIOS as well as Junos Upgrade Required is displayed on the Mist UI... | We recommend that you perform both upgrades and then reboot once to minimize downtime. | On the Switch List page, select the affected switches and click Upgrade Switches (without Reboot) and Upgrade BIOS (with Reboot) to upgrade both Junos and BIOS in a single reboot. |
How many sessions are recommended per single SSH connection for switches?
We recommend that you configure the default value which is 10. Range: 1 through 65535. See max-sessions-per-connection.
How many SSH connections are recommended for switches?
We recommend that you configure the default value which is 10. Range: 1 through 250. See connection-limit.
