Configure a Hub Profile
Follow these steps to set up a hub profile to configure each hub device.
Each hub device in a Juniper Mist™ cloud topology must have its own profile. Hub profiles are a convenient way to create an overlay and assign a path for each WAN link on that overlay in Juniper WAN Assurance.
You'll create hub profiles for WAN Edge devices at hub sites. You'll create WAN Edge templates for WAN Edge devices at spoke sites. Hub WAN interfaces create overlay endpoints for spokes. Spoke WAN interfaces map the appropriate Hub WAN interfaces, defining the topology. Hub profiles drive the addition and removal of paths on your overlay.
When you create a hub profile for a WAN Edge device, the Mist cloud generates and installs the SSL certificates automatically. It also sets up WAN uplink probes for failover detection.
As a time saver, you can create a hub profile by cloning an existing one.
Before You Begin
Create a Hub Profile (Without Cloning)
Use this procedure to get started setting up your hub profile. From this high-level overview, you can jump to more detailed information later in this topic.
To get started with your hub profile:
-
Work your way through the remaining sections of the hub profile, saving
your work as you go.
Tips:
-
When a configuration panel appears at the side of the screen, enter the settings, and then click the Add or Save button at the bottom of the panel.
If you click a button in a panel and a new sub-section opens, enter the settings, and then click the check mark in the title bar of the sub-section.

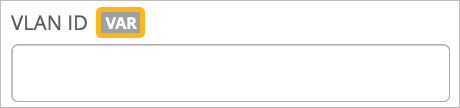
In fields with a VAR label, you can enter variables to represent values such as IP addresses, VLAN IDs, and more. As you type, the field displays any matching variables as defined in site configurations across the organization.
For more information, see Use Site Variables to Streamline Configuration.
-
After completing each major section of a template, click Save at the top-right corner of the template page. When the page reloads, showing the list of templates, simply click the template to resume your work.
-
For help with the various sections of the hub profile, see the Configuration Reference chapter of this guide.
-
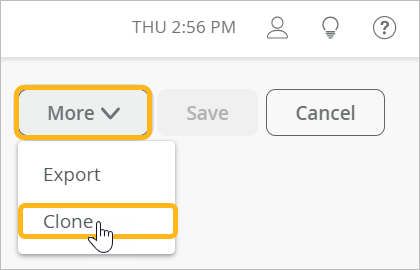
Create a Hub Profile by Cloning
As a time saver, you can create a hub profile by cloning an existing one. Then modify the cloned profile so that it has the required settings.
To create a hub profile by cloning:
-
In the top-right corner of the profile page, click
More and then click
Clone.
Create a Hub-to-Hub Overlay
Use this feature to create a peer overlay path between two hub devices. You can then set up traffic steering rules for the use of this path. You might use a hub-to-hub path as a preferred route for data center traffic originating from sites. Or you might use it as a failover path for a hub-to-spoke connection.
When you create a hub-to-hub overlay, you add corresponding hub endpoints to the hub profiles. For example:
-
On Hub A, add an endpoint for one of Hub B's WAN interfaces.
-
On Hub B, add an endpoint for one of Hub A's WAN interfaces.
Before You Begin: Configure the hub profiles for both hubs (Hub A and Hub B).
To create a hub-to-hub overlay:
-
Go to the hub profile for one hub (Hub A) and add an endpoint for the other
hub (Hub B):
-
At the bottom of the Edit WAN Configuration
window, click Add Hub-to-Hub Endpoints.
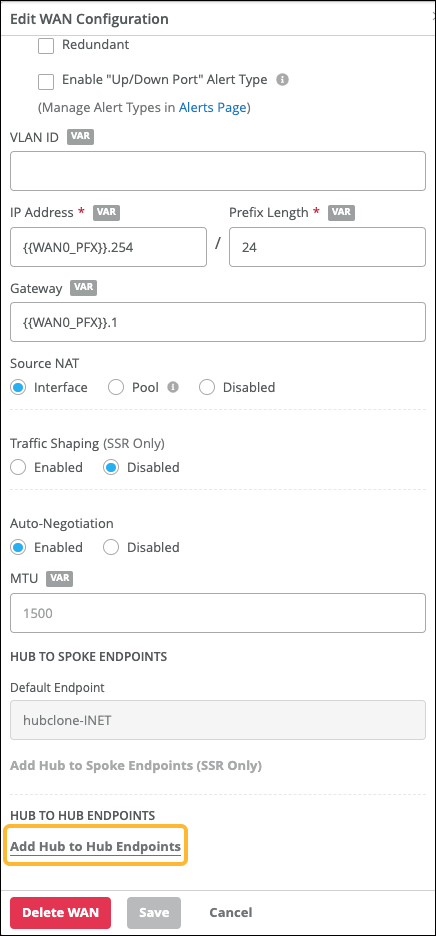
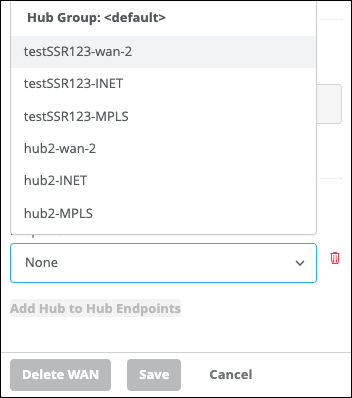
-
From the drop-down menu, select a WAN interface on Hub B that you
want to use for this hub-to-hub overlay.
If needed, you can click Add Hub-to-Hub Endpoints again to add more endpoints.
-
Click Save at the bottom of the panel to
save the WAN configuration.
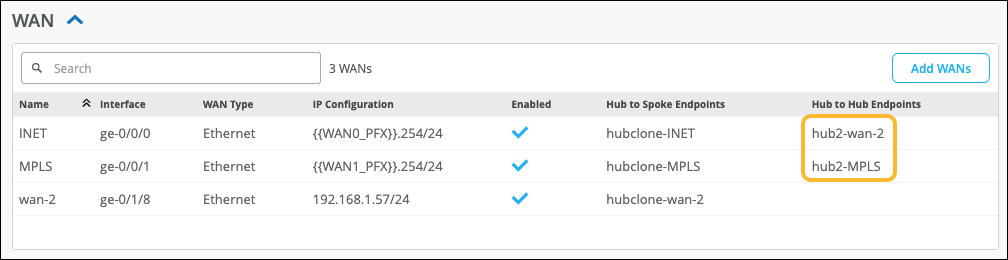
In the WAN section of the hub profile, you'll see the new endpoints in the Hub to Hub Endpoints column.
-
At the bottom of the Edit WAN Configuration
window, click Add Hub-to-Hub Endpoints.
-
Go to the hub profile for other hub (Hub B) and add an endpoint for the
first hub (Hub A):