Manage a Virtual Chassis Using the Mist AI Mobile App
Know how you can create or modify a Virtual Chassis using the Mist AI mobile app.
A Virtual Chassis allows multiple switches to operate as a single logical device, simplifying management and improving scalability. The switches in a Virtual Chassis are interconnected through Virtual Chassis ports (VCPs), which handle data and control traffic. A Virtual Chassis can consist of two to ten switches, offering increased resilience if a switch fails. For more information about Virtual Chassis, see Virtual Chassis Overview (Juniper Mist).
With the Mist AI Mobile app, you can now create and manage a Virtual Chassis directly from your mobile device. The mobile app supports:
-
Virtual Chassis creation and modification for devices without a VCP (EX2300, EX4650, and QFX5120).
-
Virtual Chassis modification for devices with a VCP.
Create a Virtual Chassis Using the Mist AI Mobile App
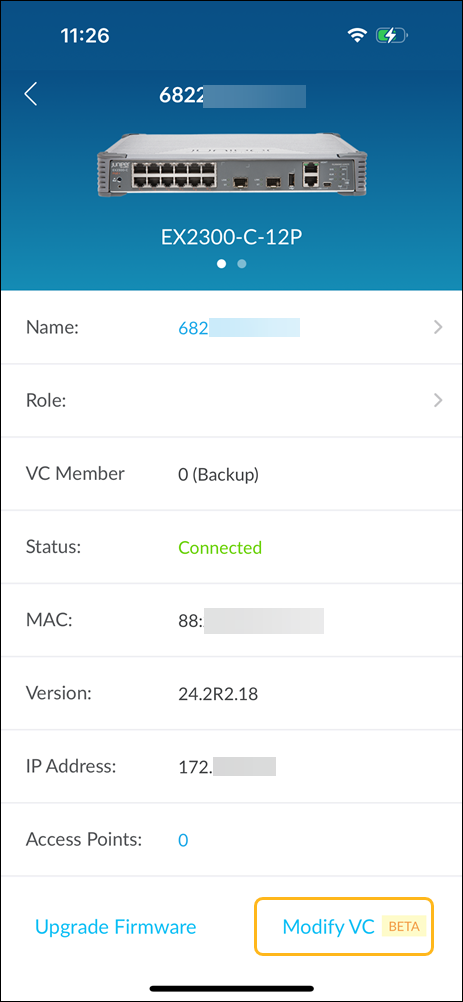
Before you begin this task, ensure that you have enabled configuration management on the switches that'll be part of the Virtual Chassis. You must enable the option through the Juniper Mist portal, as it cannot be enabled from the app.
The Modify VC button is disabled on the app when the Configuration Management option is disabled for the switch.
To create a Virtual Chassis:
-
Tap the Form VC option at the lower-right corner of
the Switches page.
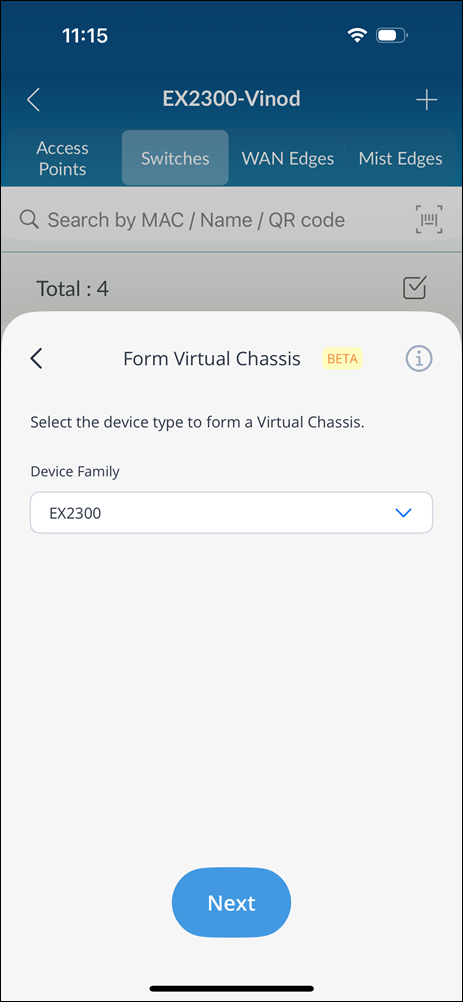
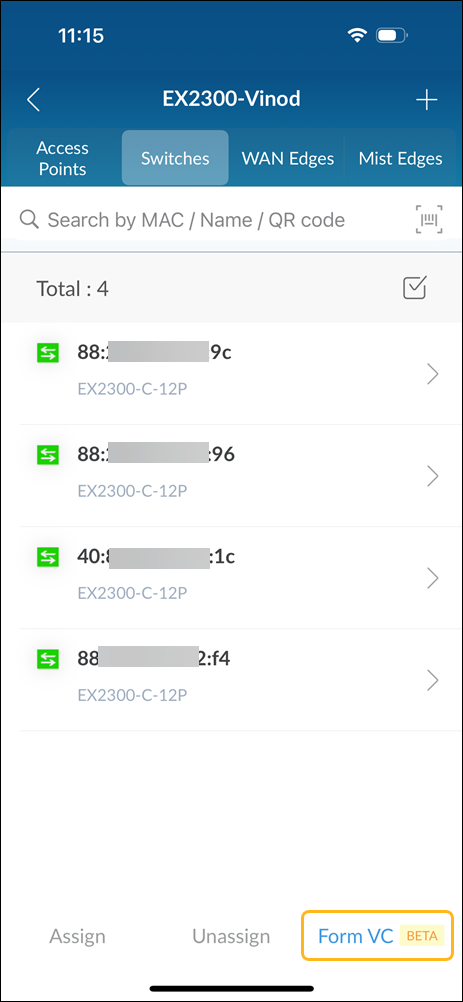 You'll see the list of switch family SKUs that support Virtual Chassis creation (EX2300, EX4650, and QFX5120).
 -
Select a device family and tap Next.
-
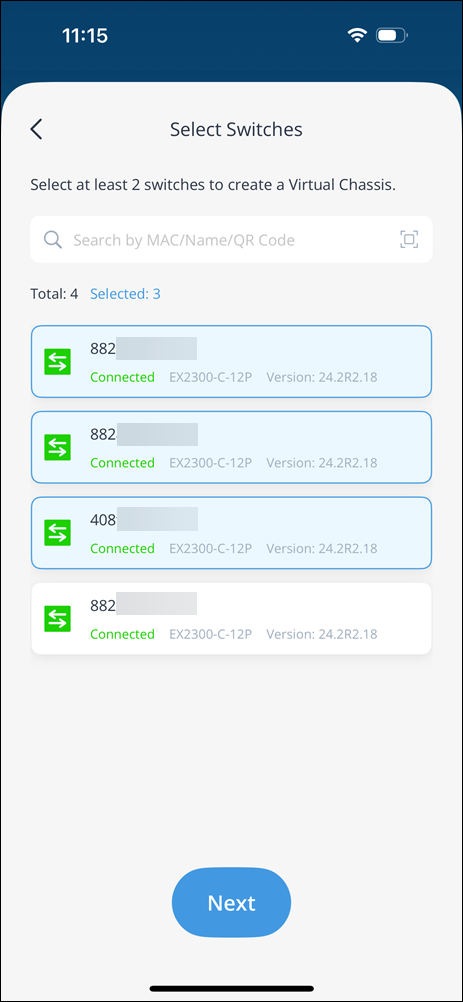
Select the devices that you want to add to the Virtual Chassis and tap
Next. You'll see only the list of switch models
for the selected device family. You'll need to select at least two
switches.
-
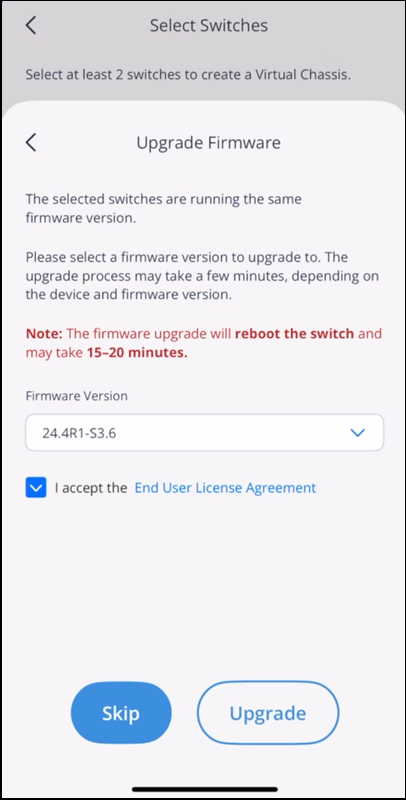
Upgrade the firmware on the switches so that all the switches in the
Virtual Chassis run the same Junos OS version. If all the switches are
already on the same Junos OS version, you can skip this step.
-
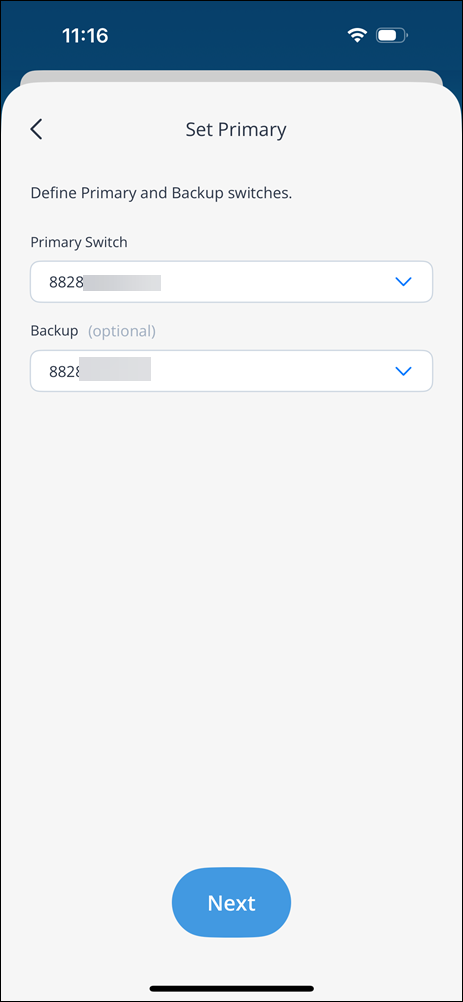
Select the primary and backup switches for the Virtual Chassis and tap
Next.
-
Rearrange the switches to match the physical stack layout and tap
Next. You can also identify the switches that use
the locate functionality.

-
Select the ports to be configured as uplink ports and tap
Next.
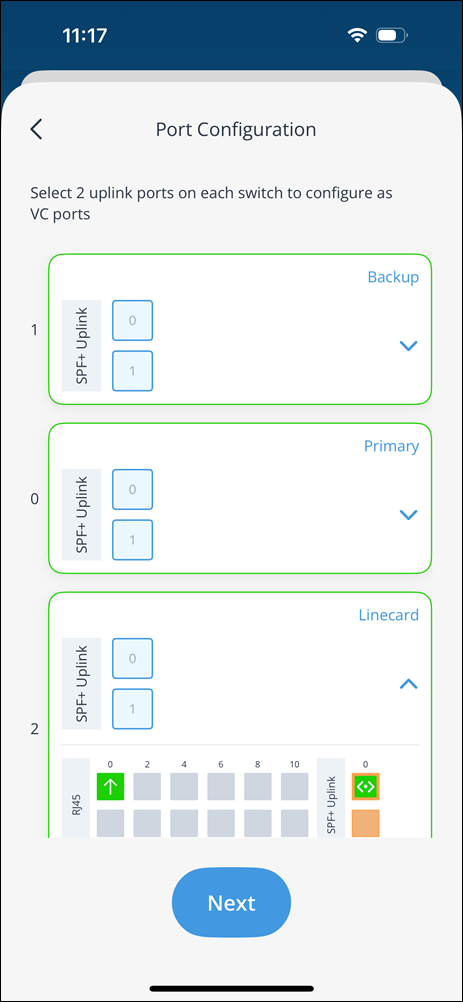 The Mist app displays the recommended VCP link configuration.
 -
Connect the uplink ports by following the recommendation and select the
I've connected all the ports according to the
diagram check box. You can also upload a picture of the VCP
link configuration.
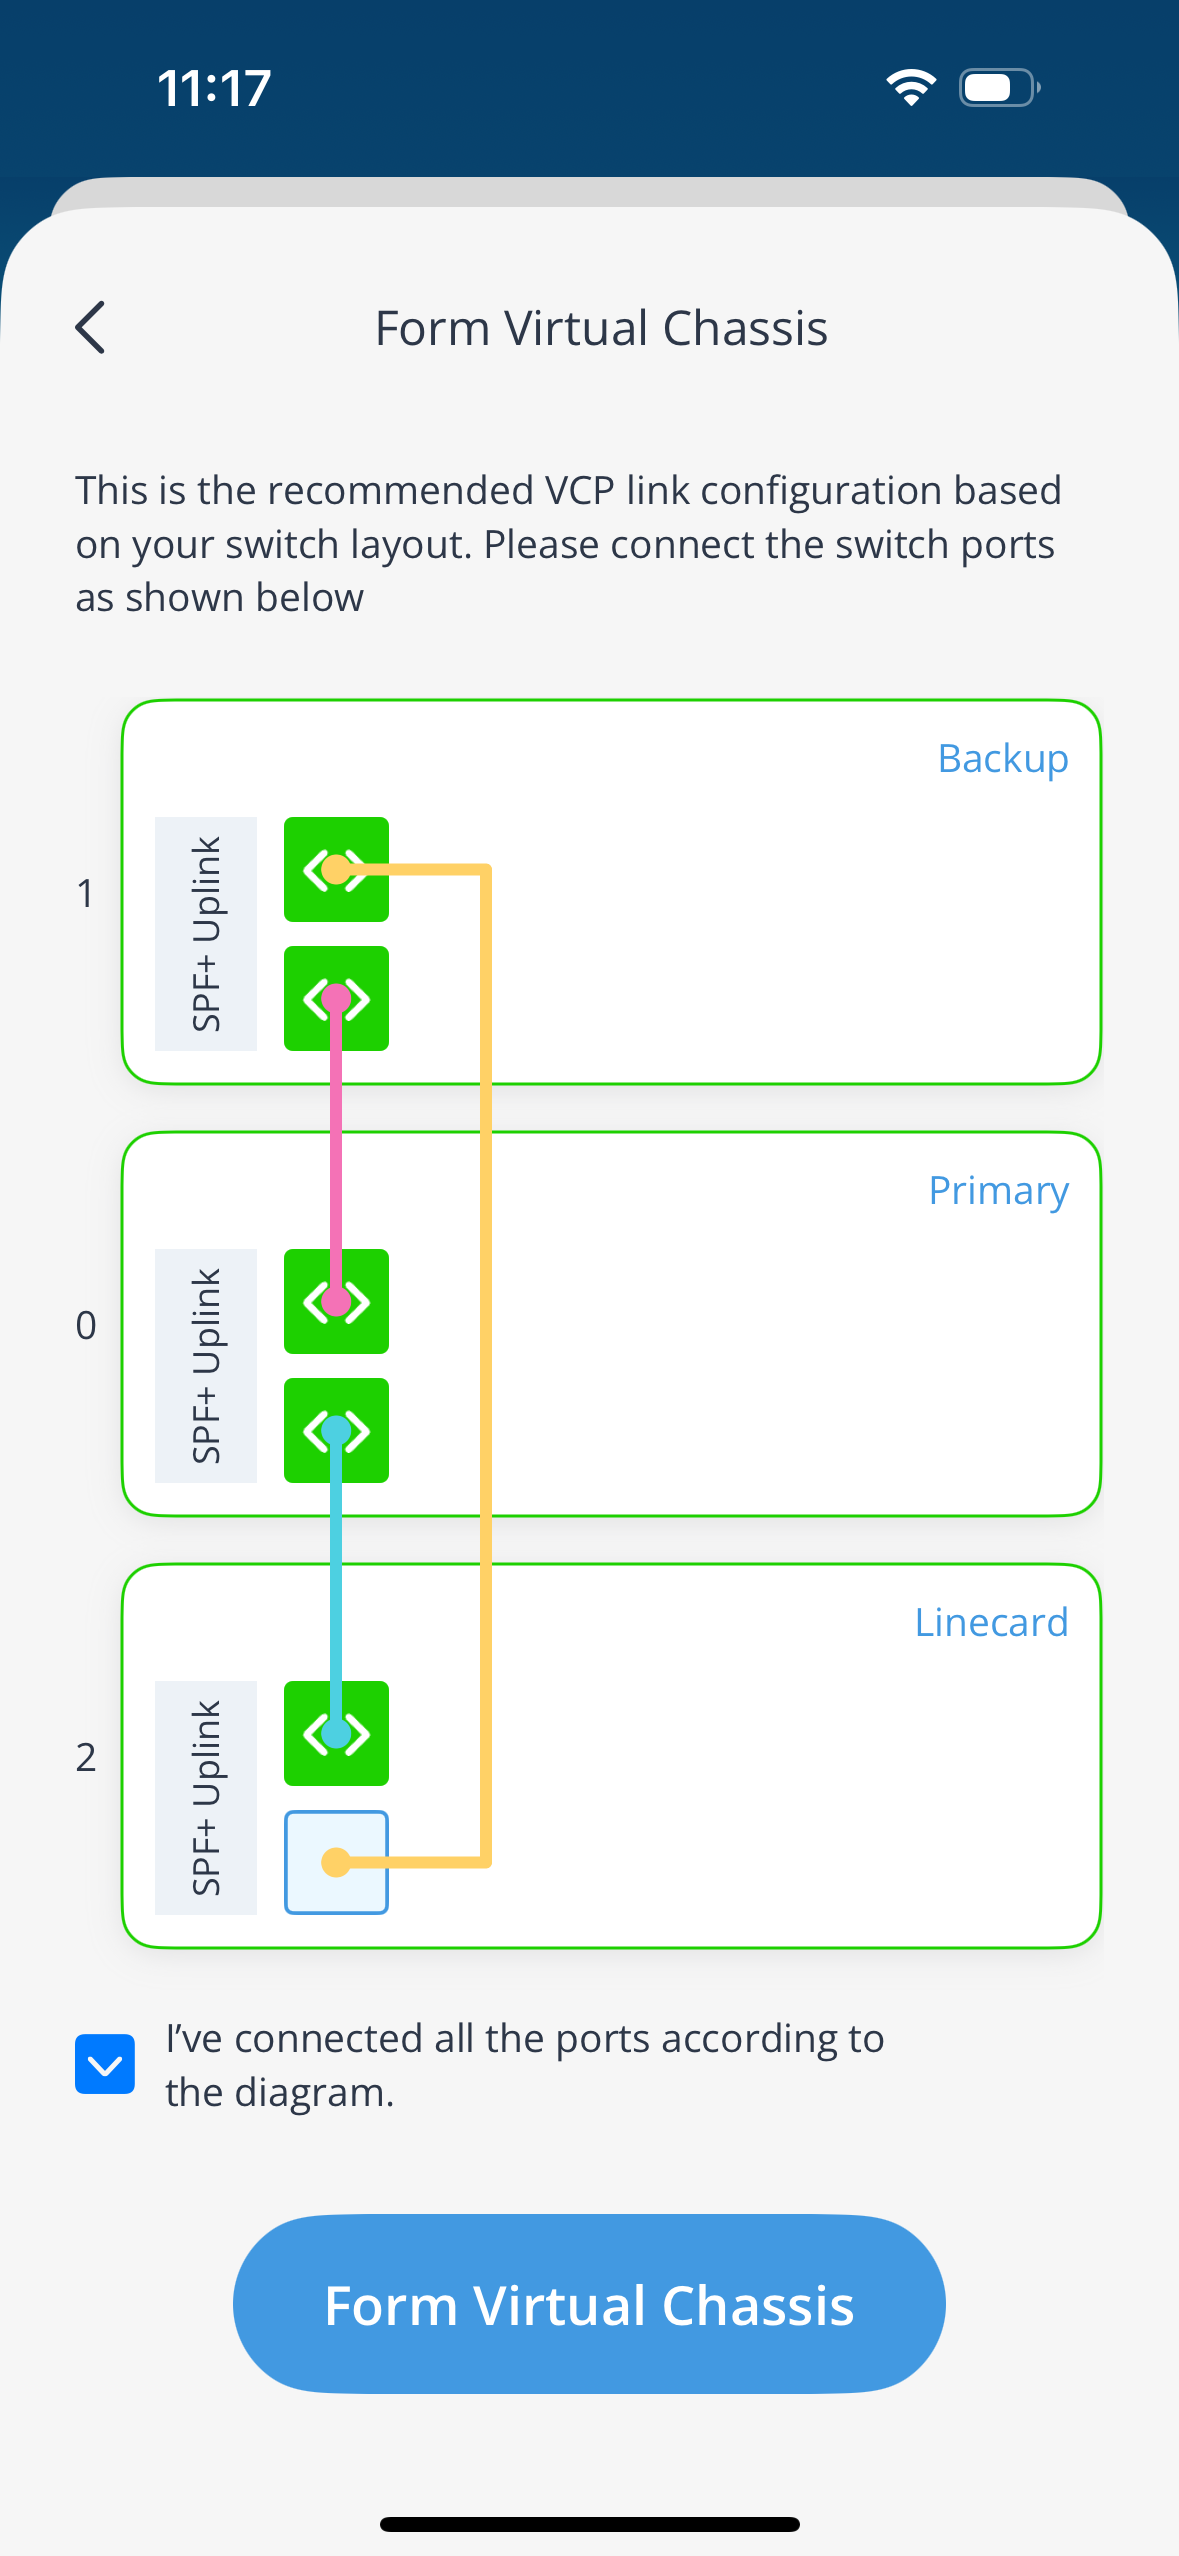 Note:
Note:We recommend using a ring topology, which ensures that each switch is connected to both the preceding switch and the following switch, creating a continuous loop. The switches at the edges are also interconnected. If one of the connections fails, the circular design and the presence of redundant links keep the Virtual Chassis operational, enhancing reliability and network resilience.
Modify a Virtual Chassis Using the Mist AI Mobile App
- Add a Switch to a Virtual Chassis Using the Mist AI Mobile App
- Remove a Switch from a Virtual Chassis Using the Mist AI Mobile App
- Renumber the Virtual Chassis Members Using the Mist AI Mobile App
- Reassign Virtual Chassis Member Roles Using the Mist AI Mobile App
Add a Switch to a Virtual Chassis Using the Mist AI Mobile App
Before adding a new switch to an existing Virtual Chassis, ensure the following prerequisites are met:
-
Model compatibility—The new switch must belong to the same model family as the existing members of the Virtual Chassis.
-
Network connectivity—The new switch must be connected to the network (applicable to EX2300, EX4650, and QFX5120).
-
Site assignment—The new switch must be assigned to the same site as the other members of the Virtual Chassis.
-
Virtual Chassis exclusivity—The new switch must not already be part of any other Virtual Chassis.
To add a switch to an existing Virtual Chassis:
Select the Virtual Chassis that you want to modify and tap Modify VC.
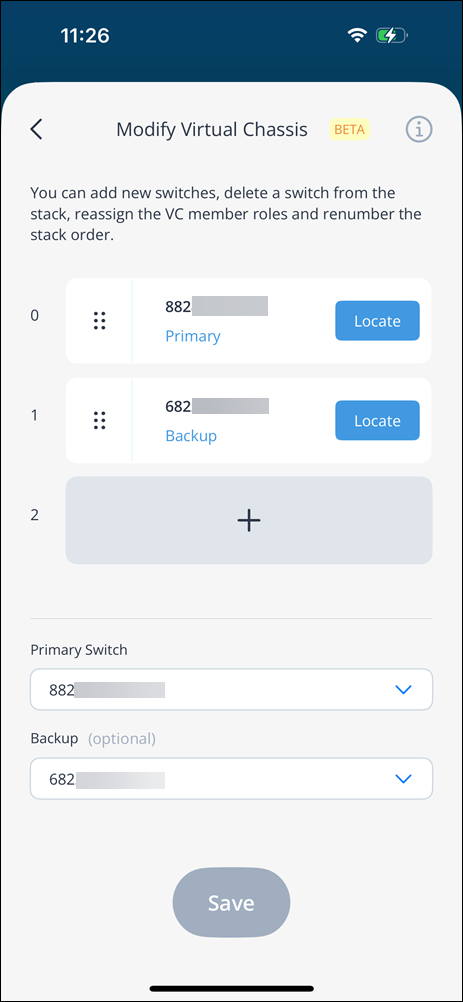
On the Modify Virtual Chassis page, tap + to add a switch to the Virtual Chassis.
Select a switch from the list displayed and tap Next. The app displays the switches that belong to the same switch family as the other switches in the Virtual Chassis.
Upgrade the switch firmware to the same Junos OS version as the other switches in the Virtual Chassis. If the switches are already on the same Junos OS version, you can skip this step.
Select the ports to be configured as uplink ports and tap Next.
The Mist app displays the recommended VCP link configuration.
Connect the uplink ports by following the recommendation and select the I've connected all the ports according to the diagram check box.
Tap Update Virtual Chassis.
Remove a Switch from a Virtual Chassis Using the Mist AI Mobile App
To remove a switch from the Virtual Chassis stack, you'll need to first disconnect the switch from the Virtual Chassis. Power off the switch or remove the VCP cable from it. The mobile app prompts you to confirm whether you want to remove the switch from the Virtual Chassis.
If you are replacing the primary member, perform a graceful switchover from the primary role to the backup role. To perform this step, log in to the Remote Shell and run the following CLI command. The Remote Shell provides direct access to the CLI through the Mist portal.
request chassis routing-engine master switch
When the backup switch becomes the new primary switch, power off the original primary member (the member to be replaced). Then remove the VCP cables from this member.
Renumber the Virtual Chassis Members Using the Mist AI Mobile App
If you prefer to have the order of switches reflect their physical stacking arrangement on the app, you can reorder the switches after they are powered on and connected to the Virtual Chassis. The process of modifying the order of member switches is quite simple in the app. To rearrange the switches in the stack, tap and hold the stack of 3 dots located on the left side of each switch. Drag the switch to your desired position and release to drop it in place.
Reassign Virtual Chassis Member Roles Using the Mist AI Mobile App
You can change the role of a switch from the Modify Virtual Chassis page in the app. You can change the role from primary to backup, backup to line card, or line card to primary.