Installing the Marvis Client for Linux
Understand how to set up Marvis Client for Linux on your Fedora or Debian-based device.
The Marvis Client for Linux is a secure, lightweight application that simplifies connecting Linux devices to the enterprise network. It uses certificate-based authentication for zero-touch onboarding, thereby eliminating the need for passwords. Marvis Client for Linux gives employees, guests, and contractors quick and secure access the wireless network. The Juniper Mist cloud manages device identity.
Key features include:
- AI-driven visibility and troubleshooting through the Juniper Mist portal.
- Auto-renewal of credentials.
- Support for BYOD, guest, and corporate devices.
- One-click provisioning.
- Automatic installation of wireless profiles and certificates.
- Certificate-based authentication (no passwords required.)
Requirements
Confirm specific version requirements with your IT team.
- A valid provisioning link from your organization.
- A Juniper Mist Access Assurance subscription.
- Debian-based systems: Debian 10 (Buster) or later, Ubuntu 20.04 or later.
- Fedora-based systems: Fedora 34 or later.
Setup Overview
To install the Marvis Client for Linux, you'll need a special onboarding link from your organization. It is typically provided through email, a QR code, or an onboarding portal.
- Install the Marvis Client for Linux as explained in the following section.
- Launch the Marvis client application.
- Authenticate with your organization credentials through SSO such as Okta.
- Click Install to install the network and Wi-Fi profiles. The onboarding process starts automatically. A secure certificate is issued and the wireless profile is installed on your device.
- Click Join when prompted. Your device connects to the Wi-Fi network and uses certificate-based access for seamless and secure connectivity.
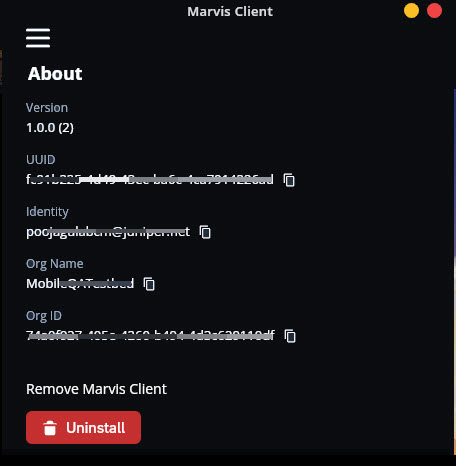
If needed, you can find details such as the version, UUID, and your organization name on the About page.
Installing Marvis Client for Linux
Debian / Ubuntu
- Download the Marvis client .deb package from your organization’s provisioning portal or the provided link.
- Install the
package:
sudo dpkg -i marvisclient-installer.deb
- If there are missing dependencies,
run:
sudo apt-get install f
Fedora
- Download the Marvis client .rpm package from your organization’s provisioning portal or the provided link.
- Install the
package:
sudo dnf install marvisclient-installer.rpm
View Logs in Marvis Client for Linux
Marvis Client for Linux classifies logs as:
- Info—General information
- Error—Critical issues
- Debug—Detailed data that you can use to debug issues
To view logs in Marvis Client for Linux:
- Open the Marvis client application.
- Open the menu and click the version number 7 times to enable debug mode, after which the Logs option will appear in the menu.
- Select Logs, then select a log category from the Log Level
drop-down list.Figure 1: Log files for the Linux Marvis client
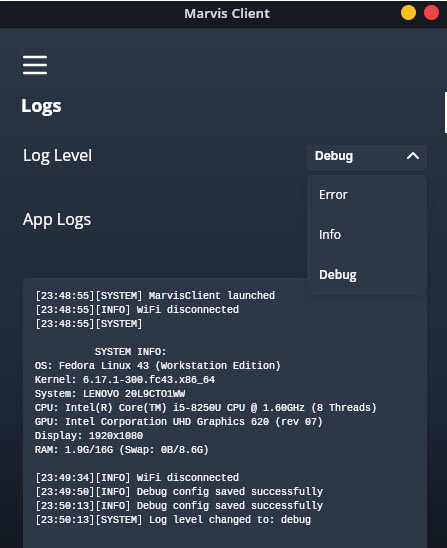
- To share logs with support, click Copy to copy the log details.
Uninstalling Marvis Client for Linux
You can uninstall Marvis Client for Linux using either the application interface or the command line.
From the app
- Open the Marvis client application.
- Go to Menu > About.
- Scroll to the bottom and click Uninstall.Figure 2: Uninstall Marvis Linux Client from the App
Using the Debian or Ubuntu command line:
sudo apt-get remove marvisclient
Using the Fedora command line:
sudo dnf remove marvisclient