Performing a Unified ISSU
Follow the steps below to perform a unified ISSU.
Best Practices for Performing a Unified ISSU
When you are planning to perform a unified in-service software upgrade (ISSU), choose a time when your network is as stable as possible. As with a normal upgrade, Telnet sessions, SNMP, and CLI access are briefly interrupted. In addition, the following restrictions apply:
The primary Routing Engine and backup Routing Engine must be running the same software version before you can perform a unified ISSU.
Verify that your platform supports the unified ISSU feature.
Read the “Unified ISSU Considerations” topic in the chapter Unified ISSU System Requirements to anticipate any special circumstances that might affect your upgrade.
Example: Performing a Unified ISSU
This example shows how to perform a unified in-service software upgrade (ISSU).
- Requirements
- Overview
- Configuration
- Verifying Dual Routing Engines and Enabling GRES and NSR
- Verifying the Software Versions and Backing Up the Device Software
- Adjusting Timers and Changing Feature-Specific Configuration
- Upgrading and Rebooting Both Routing Engines Automatically
- Restoring Feature-Specific Configuration
- Upgrading Both Routing Engines and Rebooting the New Backup Routing Engine Manually
- Upgrading and Rebooting Only One Routing Engine
Requirements
This example uses the following hardware and software components:
-
MX480 router with dual Routing Engines
-
Junos OS Release 13.3R6 as the starting release
-
Junos OS Release 14.1R4 as the ending release
Before You Begin
Before you perform a unified ISSU, be sure you:
-
Perform a compatibility check to ensure that the software and hardware components and the configuration on the device support unified ISSU by using the request system software validate in-service-upgrade command
-
Read the chapter Unified ISSU System Requirements to anticipate any special circumstances that might affect your upgrade.
-
Verify that your platform supports the unified ISSU feature.
-
Verify that the field-replaceable units (FRUs) installed in your platform support the unified ISSU feature or that you can accept the results of performing the upgrade with some FRUs that do not support unified ISSU.
-
Verify that the protocols and features configured on your platform support the unified ISSU feature or that you can accept the results of performing the upgrade with some protocols and features that do not support unified ISSU.
-
-
Download the software package from the Juniper Networks Support website at https://www.juniper.net/support/ and place the package on your local server.
Best Practice:When you access the Download Software web page for your device, record the md5 checksum. After downloading the software package to your device, confirm that it is not modified in any way by using the
file checksum md5command.Note:Starting with Junos OS Release 16.1R1, while performing a unified ISSU from a FreeBSD 6.1 based Junos OS to an upgraded FreeBSD 10.x based Junos OS, the configuration must be validated on a remote host or on a routing engine. The remote host or the routing engine must be running a Junos OS with an upgraded FreeBSD. In addition, only a few selected directories and files will be preserved while upgrading from FreeBSD 6.1 based Junos OS to FreeBSD 10.x based Junos OS. See Upgrading Junos OS with Upgraded FreeBSD and request system software valdiate on (Junos OS with Upgraded FreeBSD)
Overview
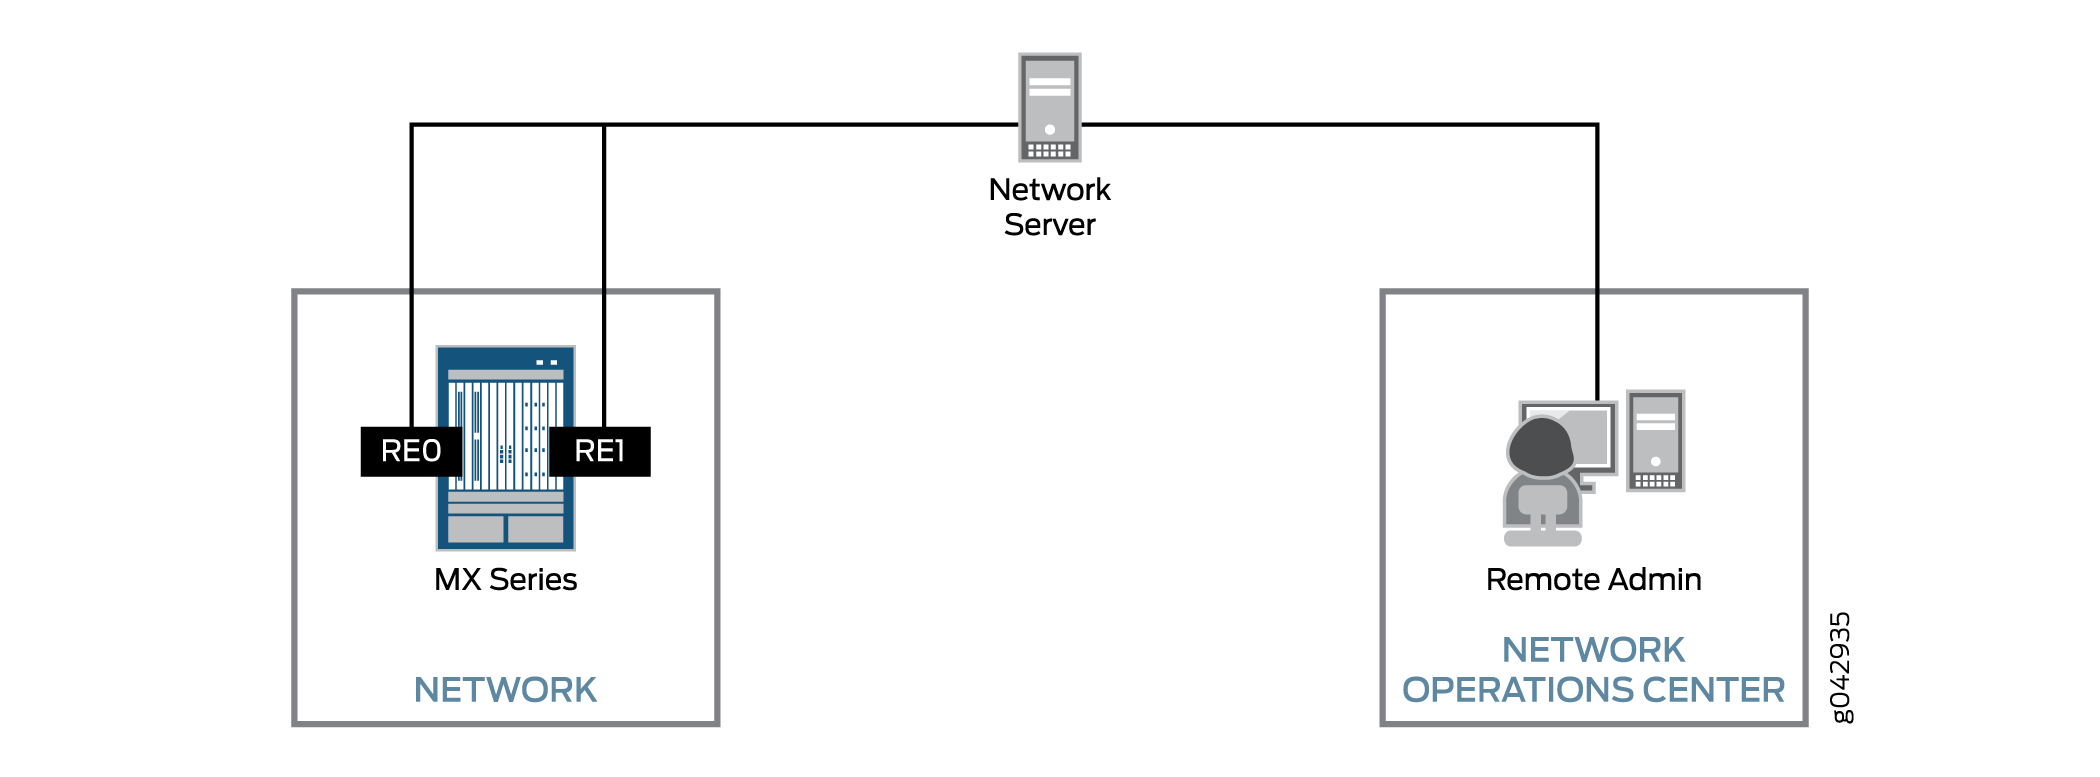
This procedure can be used to upgrade M Series, T Series, MX Series, EX Series, and PTX Series devices that have dual Routing Engines installed and support unified ISSU.
In the example, the hostnames, filenames, and FRUs are representational. When you perform the procedure on your device, the hostnames, filenames, and FRUs are different. The command output is truncated to only show the text of interest in this procedure.
Configuration
There are variations of the procedure depending on if you want to install the new software on one or both Routing Engines and if you want to automatically reboot both Routing Engines or manually reboot one of the Routing Engines.
In all cases, you must verify that dual Routing Engines are installed and that graceful Routing Engine switchover (GRES) and nonstop active routing (NSR) are enabled. We recommend that you back up the device software before the upgrade.
To perform a unified ISSU, select the appropriate tasks from the following list:
Verifying Dual Routing Engines and Enabling GRES and NSR
Procedure
Step-by-Step Procedure
Enabling GRES and NSR is required regardless of which variation of the unified ISSU procedure you use.
To verify that your device has dual Routing Engines and to enable GRES and NSR:
-
Log in to your device.
-
Verify that dual Routing Engines are installed in your device by using the
show chassis hardwarecommand.user@host> show chassis hardware Routing Engine 0 REV 01 740-051822 9013086837 RE-S-1800x4 Routing Engine 1 REV 01 740-051822 9013086740 RE-S-1800x4
The command output contains lines listing Routing Engine 0 and Routing Engine 1.
-
By default, GRES is disabled; if you have not already done so, enable GRES by including the
graceful-switchoverstatement at the[edit chassis redundancy]hierarchy level on the primary Routing Engine.[edit ] user@host# set chassis redundancy graceful-switchover
-
By default, NSR is disabled; if you have not already done so, enable NSR by including the
nonstop-routingstatement at the[edit routing-options]hierarchy level.[edit] user@host# set routing-options nonstop-routing
-
When you configure NSR, you must also include the
commit synchronizestatement at the[edit system]hierarchy level so that configuration changes are synchronized on both Routing Engines.[edit] user@host# set system commit synchronize
-
After you have verified your configuration and are satisfied with it, commit the changes by using the
commitcommand.[edit] user@host# commit commit complete
When you enable GRES and commit the configuration, the CLI prompt changes to indicate which Routing Engine you are using. For example:
{master} [edit] user@host# -
Exit configuration mode by using the
exitcommand.{master} [edit] user@host# exit Exiting configuration mode -
Verify that NSR is configured on the primary Routing Engine (
re0) by using theshow task replicationcommand.{master} user@host> show task replication Stateful Replication: Enabled RE mode: Master Protocol Synchronization Status OSPF Complete IS-IS CompleteIn the output, verify that the
Synchronization
Status
field displaysComplete. -
Verify that GRES is enabled on the backup Routing Engine (
re1) by using theshow system switchovercommand.user@host> request routing-engine login re1 {backup} user@host> show system switchover Graceful switchover: On Configuration database: Ready Kernel database: Ready Peer state: Steady StateIn the output, verify that the
Graceful switchoverfield state displaysOn. For more information about theshow system switchovercommand, see show system switchover.
Verifying the Software Versions and Backing Up the Device Software
Procedure
Step-by-Step Procedure
Unified ISSU requires that both Routing Engines are running the same version of Junos OS before the upgrade. As a preventive measure in case any problems occur during an upgrade, it is a best practice to back up the system software to the device hard disk.
To verify the software versions and back up the device software:
-
Verify that the same version of Junos OS is installed and running on both Routing Engines by using the
show versioncommand.{backup} user@host> show version invoke-on all-routing-engines re0: -------------------------------------------------------------------------- Hostname: host Model: mx480 Junos: 13.3R6.5 JUNOS Base OS boot [13.3R6.5] JUNOS Base OS Software Suite [13.3R6.5] JUNOS 64-bit Kernel Software Suite [13.3R6.5] JUNOS Crypto Software Suite [13.3R6.5] JUNOS Packet Forwarding Engine Support (M/T/EX Common) [13.3R6.5] JUNOS Packet Forwarding Engine Support (MX Common) [13.3R6.5] JUNOS Online Documentation [13.3R6.5] re1: -------------------------------------------------------------------------- Hostname: host Model: mx480 Junos: 13.3R6.5 JUNOS Base OS boot [13.3R6.5] JUNOS Base OS Software Suite [13.3R6.5] JUNOS 64-bit Kernel Software Suite [13.3R6.5] JUNOS Crypto Software Suite [13.3R6.5] JUNOS Packet Forwarding Engine Support (M/T/EX Common) [13.3R6.5] JUNOS Packet Forwarding Engine Support (MX Common) [13.3R6.5] JUNOS Online Documentation [13.3R6.5] -
Back up the system software to the device hard disk by using the
request system snapshotcommand on each Routing Engine.Note:The root file system is backed up to /altroot, and /config is backed up to /altconfig. After you issue the
request system snapshotcommand, the device flash and hard disks are identical. You can return to the previous version of the software only by booting the device from removable media.{backup} user@host> request system snapshot user@host> request routing-engine login re0 {master} user@host> request system snapshot
Adjusting Timers and Changing Feature-Specific Configuration
Procedure
Step-by-Step Procedure
If you have any of the following feature-specific configuration on your device, perform the appropriate steps.
To adjust timers and change feature-specific configuration:
-
Bidirectional Forwarding Detection (BFD) sessions temporarily increase their detection and transmission timers during unified ISSU procedures. After the upgrade, these timers revert to the values in use before the unified ISSU started.
If BFD is enabled on your device and you want to disable the BFD timer negotiation during the unified ISSU, include the
no-issu-timer-negotiationstatement at the[edit protocols bfd]hierarchy level.{master} [edit] user@host# set protocols bfd no-issu-timer-negotiationNote:If you include this statement, the BFD timers maintain their original values during the unified ISSU, and the BFD sessions might flap during the unified ISSU or Routing Engine switchover, depending on the detection intervals.
-
If proxy ARP is enabled on your M Series, MX Series, or EX 9200 Series device, remove the
unconditional-src-learnstatement from the[edit interfaces interface-name unit 0 family inet]hierarchy level.By default the statement is not included. This example shows the ge-0/0/1 interface only.
{master} [edit] user@host# delete interfaces ge-0/0/1 unit 0 family inet unconditional-src-learn -
If LACP is enabled on your PTX Series device, remove the
lacpstatement from the[edit interfaces interface-name aggregated-ether-options]hierarchy level.{master} [edit] user@host# delete interfaces aex aggregated-ether-options lacp -
If ATM Point-to-Point Protocol (PPP) is enabled on your M Series or T Series device, set the keepalive interval to 10 seconds or greater.
PPP requires three keepalives to fail before it brings down the session. Thirty seconds (10 seconds x three) provides a safe margin to maintain PPP sessions in case of any traffic loss during the unified ISSU operation.
This example shows the at-0/0/1 interface only.
{master} [edit] user@host# set interfaces at-0/0/1 unit 0 keepalives interval 10 -
If ATM OAM is enabled on your M Series or T Series device, set the OAM F5 loopback cell period to 20 seconds or greater to maintain ATM connectivity across the unified ISSU.
Include the
oam-periodstatement at the[edit interfaces interface-name unit logical-unit-number]hierarchy level and specify 20 seconds. This example shows the at-0/0/1 interface only.{master} [edit] user@host# set interfaces at-0/0/1 unit 0 oam-period 20 -
After you have verified your configuration and are satisfied with it, commit the changes by using the
commitcommand.{master} [edit] user@host# commit commit complete -
Exit configuration mode by using the exit command.
{master} [edit]
user@host# exit
{master}
user@host>
Upgrading and Rebooting Both Routing Engines Automatically
Procedure
Step-by-Step Procedure
In this procedure, both Routing Engines automatically reboot. Rebooting both Routing Engines automatically is the most common scenario. Variations to this procedure are described in other sections.
Table 1 shows the Routing Engine status prior to starting the unified ISSU.
|
RE0 |
RE1 |
|---|---|
|
Primary |
Backup |
|
Old software version installed |
Old software version installed |
|
Old software version running |
Old software version running |
To upgrade and reboot both Routing Engines automatically:
-
Copy the Junos OS software package to the device by using the
file copy ftp://username@hostname.net/filename /var/tmp/filenamecommand.We recommend that you copy the package to the /var/tmp directory, which is a large file system on the hard disk.
{master}
user@host> file copy ftp://myid@myhost.mydomain.net/jinstall64-14.1R4.10-domestic-signed.tgz
/var/tmp/jinstall64-14.1R4.10-domestic-signed.tgz
Best Practice:When you access the Download Software web page for your device, record the md5 checksum. After downloading the software package to your device, confirm that it is not modified in any way by using the
                              file checksum
                      md5
command. -
On the primary Routing Engine, start the upgrade by using the
request system software in-service-upgrade package-name rebootcommand.Note:Do not try running any additional commands until after the
Connection closedmessage is displayed and your session is disconnected.{master} user@host> request system software in-service-upgrade /var/tmp/jinstall64-14.1R4.10-domestic-signed.tgz reboot Checking compatibility with configuration Initializing... Using jbase-13.3R6.5 Verified manifest signed by PackageProductionEc_2015 Using /var/tmp/jinstall64-14.1R4.10-domestic-signed.tgz Verified jinstall64-14.1R4.10-domestic.tgz signed by PackageProductionEc_2015 Using jinstall64-14.1R4.10-domestic.tgz Using jbundle64-14.1R4.10-domestic.tgz Checking jbundle requirements on / Using jbase-14.1R4.10.tgz Verified manifest signed by PackageProductionEc_2015 Verified jbase-14.1R4.10 signed by PackageProductionEc_2015 Using /var/v/c/tmp/jbundle/jboot-14.1R4.10.tgz Using jcrypto64-14.1R4.10.tgz Verified manifest signed by PackageProductionEc_2015 Verified jcrypto64-14.1R4.10 signed by PackageProductionEc_2015 Using jdocs-14.1R4.10.tgz Verified manifest signed by PackageProductionEc_2015 Verified jdocs-14.1R4.10 signed by PackageProductionEc_2015 Using jkernel64-14.1R4.10.tgz Using jpfe-14.1R4.10.tgz Verified SHA1 checksum of jpfe-M10-14.1R4.10.tgz Verified SHA1 checksum of jpfe-M120-14.1R4.10.tgz Verified SHA1 checksum of jpfe-M160-14.1R4.10.tgz Verified SHA1 checksum of jpfe-M320-14.1R4.10.tgz Verified SHA1 checksum of jpfe-M40-14.1R4.10.tgz Verified SHA1 checksum of jpfe-M7i-14.1R4.10.tgz Verified SHA1 checksum of jpfe-T-14.1R4.10.tgz Verified SHA1 checksum of jpfe-X2000-14.1R4.10.tgz Verified SHA1 checksum of jpfe-X960-14.1R4.10.tgz Verified SHA1 checksum of jpfe-common-14.1R4.10.tgz Using jplatform-14.1R4.10.tgz Verified manifest signed by PackageProductionEc_2015 Verified jplatform-14.1R4.10 signed by PackageProductionEc_2015 Using jroute-14.1R4.10.tgz Verified manifest signed by PackageProductionEc_2015 Verified jroute-14.1R4.10 signed by PackageProductionEc_2015 Using jruntime-14.1R4.10.tgz Verified manifest signed by PackageProductionEc_2015 Verified jruntime-14.1R4.10 signed by PackageProductionEc_2015 Using jruntime64-14.1R4.10.tgz Verified manifest signed by PackageProductionEc_2015 Verified jruntime64-14.1R4.10 signed by PackageProductionEc_2015 Using jservices-14.1R4.10.tgz Using jservices-crypto-14.1R4.10.tgz Hardware Database regeneration succeeded Validating against /config/juniper.conf.gz mgd: commit complete Validation succeeded ISSU: Preparing Backup RE Pushing /var/tmp/jinstall64-14.1R4.10-domestic-signed.tgz to re1:/var/tmp/jinstall64-14.1R4.10-domestic-signed.tgz Installing package '/var/tmp/jinstall64-14.1R4.10-domestic-signed.tgz' ... Verified jinstall64-14.1R4.10-domestic.tgz signed by PackageProductionEc_2015 Verified jinstall64-14.1R4.10-domestic.tgz signed by PackageProductionRSA_2015 Adding jinstall64... Verified manifest signed by PackageProductionEc_2015 WARNING: This package will load JUNOS 14.1R4.10 software. WARNING: It will save JUNOS configuration files, and SSH keys WARNING: (if configured), but erase all other files and information WARNING: stored on this machine. It will attempt to preserve dumps WARNING: and log files, but this can not be guaranteed. This is the WARNING: pre-installation stage and all the software is loaded when WARNING: you reboot the system. Saving the config files ... NOTICE: uncommitted changes have been saved in /var/db/config/juniper.conf.pre-install Installing the bootstrap installer ... WARNING: A REBOOT IS REQUIRED TO LOAD THIS SOFTWARE CORRECTLY. Use the WARNING: 'request system reboot' command when software installation is WARNING: complete. To abort the installation, do not reboot your system, WARNING: instead use the 'request system software delete jinstall' WARNING: command as soon as this operation completes. Saving state for rollback ... Backup upgrade done Rebooting Backup RE Rebooting re1 ISSU: Backup RE Prepare Done Waiting for Backup RE reboot GRES operational Initiating Chassis In-Service-Upgrade Chassis ISSU Started ISSU: Preparing Daemons ISSU: Daemons Ready for ISSU ISSU: Starting Upgrade for FRUs ISSU: Preparing for Switchover ISSU: Ready for Switchover Checking In-Service-Upgrade status Item Status Reason FPC 0 Online (ISSU) Resolving mastership... Complete. The other routing engine becomes the master. ISSU: RE switchover Done ISSU: Upgrading Old Master RE Installing package '/var/tmp/jinstall64-14.1R4.10-domestic-signed.tgz' ... Verified jinstall64-14.1R4.10-domestic.tgz signed by PackageProductionEc_2015 Verified jinstall64-14.1R4.10-domestic.tgz signed by PackageProductionRSA_2015 Adding jinstall64... Verified manifest signed by PackageProductionEc_2015 WARNING: This package will load JUNOS 14.1R4.10 software. WARNING: It will save JUNOS configuration files, and SSH keys WARNING: (if configured), but erase all other files and information WARNING: stored on this machine. It will attempt to preserve dumps WARNING: and log files, but this can not be guaranteed. This is the WARNING: pre-installation stage and all the software is loaded when WARNING: you reboot the system. Saving the config files ... NOTICE: uncommitted changes have been saved in /var/db/config/juniper.conf.pre-install Installing the bootstrap installer ... WARNING: A REBOOT IS REQUIRED TO LOAD THIS SOFTWARE CORRECTLY. Use the WARNING: 'request system reboot' command when software installation is WARNING: complete. To abort the installation, do not reboot your system, WARNING: instead use the 'request system software delete jinstall' WARNING: command as soon as this operation completes. Saving package file in /var/sw/pkg/jinstall64-14.1R4.10-domestic-signed.tgz ... Saving state for rollback ... ISSU: Old Master Upgrade Done ISSU: IDLE Shutdown NOW! [pid 10149] {backup} user@host> {backup} user@host> *** FINAL System shutdown message from user@host *** System going down IMMEDIATELY Connection closed by foreign host.When the Routing Engine that was previously the primary is rebooted, you are logged out of the device.
-
Wait a few minutes and then log in to the device again.
Table 2 shows the Routing Engine status after the unified ISSU.
Table 2: Routing Engine Status After Upgrading and Rebooting Both Routing Engines RE0
RE1
Backup
Primary
New software version installed
New software version installed
New software version running
New software version running
You are logged in to the new backup Routing Engine (
re0). -
Verify that both Routing Engines have been upgraded by using the
show versioncommand.{backup} user@host> show version invoke-on all-routing-engines re0: -------------------------------------------------------------------------- Hostname: host Model: mx480 Junos: 14.1R4.10 JUNOS Base OS boot [14.1R4.10] JUNOS Base OS Software Suite [14.1R4.10] JUNOS Packet Forwarding Engine Support (M/T/EX Common) [14.1R4.10] JUNOS Packet Forwarding Engine Support (MX Common) [14.1R4.10] JUNOS platform Software Suite [14.1R4.10] JUNOS Runtime Software Suite [14.1R4.10] JUNOS Online Documentation [14.1R4.10] re1: -------------------------------------------------------------------------- Hostname: host Model: mx480 Junos: 14.1R4.10 JUNOS Base OS boot [14.1R4.10] JUNOS Base OS Software Suite [14.1R4.10] JUNOS Packet Forwarding Engine Support (M/T/EX Common) [14.1R4.10] JUNOS Packet Forwarding Engine Support (MX Common) [14.1R4.10] JUNOS platform Software Suite [14.1R4.10] JUNOS Runtime Software Suite [14.1R4.10] JUNOS Online Documentation [14.1R4.10] -
If you want to, you can optionally display the unified ISSU log messages by using the
show log messagescommand. -
If you want to, you can optionally make
re0the primary Routing Engine by using therequest chassis routing-engine master acquirecommand.{backup} user@host> request chassis routing-engine master acquire Attempt to become the master routing engine ? [yes,no] (no) yes Resolving mastership... Complete. The local routing engine becomes the master. {master} user@host>Table 3 shows the Routing Engine status after Step 5 is completed.
Table 3: Routing Engine Status After Upgrading, Rebooting, and Switching Primary Role RE0
RE1
Primary
Backup
New software version installed
New software version installed
New software version running
New software version running
-
Perform the applicable steps in Restoring Feature-Specific Configuration.
-
If you are satisfied with the results of your testing, you can optionally back up the system software to the device’s hard disk by using the
request system snapshotcommand on each Routing Engine.Note:The root file system is backed up to /altroot, and /config is backed up to /altconfig. After you issue the
request system snapshotcommand, you cannot easily return to the previous version of the software, because the device flash and hard disks are identical. To return to the previous version of the software, you must boot the device from removable media.{master} user@host> request system snapshot user@host> request routing-engine login re1 {backup} user@host> request system snapshot
Restoring Feature-Specific Configuration
Procedure
Step-by-Step Procedure
If you have any of the following feature-specific configuration on your device, perform the appropriate steps.
To restore feature-specific configuration:
-
If BFD is enabled on your device and you previously disabled the BFD timer negotiation, delete the
no-issu-timer-negotiationstatement at the[edit protocols bfd]hierarchy level.{master} [edit] user@host# delete protocols bfd no-issu-timer-negotiation -
If proxy ARP is enabled on your M Series, MX Series, or EX9200 device and you previously removed the
unconditional-src-learnstatement, include the statement again.This example shows the ge-0/0/1 interface only.
{master} [edit] user@host# set interfaces ge-0/0/1 unit 0 family inet unconditional-src-learn -
If LACP is enabled on your PTX Series device and you previously removed the
lacpstatement, include the statement again.{master} [edit] user@host# set interfaces aex aggregated-ether-options lacp -
If ATM PPP is enabled on your M Series or T Series device and you previously set the keepalive interval to 10 seconds or greater, restore the original value.
This example shows the at-0/0/1 interface only and shows the interval being set to the default 3 seconds.
{master} [edit] user@host# set interfaces at-0/0/1 unit 0 keepalives interval 3 -
If ATM OAM is enabled on your M Series or T Series device and you previously set the OAM F5 loopback cell period to 20 seconds or greater, change the configuration back to the original value.
This example shows the at-0/0/1 interface only and shows the period being set to 10 seconds.
{master} [edit] user@host# set interfaces at-0/0/1 unit 0 oam-period 10 -
After you have verified your configuration and are satisfied with it, commit the changes by using the
commitcommand.{master} [edit] user@host# commit commit complete -
Exit configuration mode by using the exit command.
{master} [edit]
user@host# exit
{master}
user@host>
Upgrading Both Routing Engines and Rebooting the New Backup Routing Engine Manually
Procedure
Step-by-Step Procedure
In certain circumstances, you might want to install the new software on only one Routing Engine and reboot only the primary until after you can test the new software. A Routing Engine does not start running the new software until after it is rebooted.
The advantage is if the results of your testing requires you to downgrade the software, you can switch Routing Engines to run the old software on one Routing Engine and then install the old software on the other Routing Engine. This is not the typical scenario.
To upgrade both Routing Engines and to reboot the new backup Routing Engine manually:
-
Perform the steps in Verifying Dual Routing Engines and Enabling GRES and NSR.
-
Perform the steps in Verifying the Software Versions and Backing Up the Device Software.
-
Perform the steps in Adjusting Timers and Changing Feature-Specific Configuration.
-
Copy the Junos OS software package to the device using the
file copy ftp://username@hostname.net/filename /var/tmp/filenamecommand.We recommend that you copy the package to the /var/tmp directory, which is a large file system on the hard disk.
{master}
user@host> file copy ftp://myid@myhost.mydomain.net/jinstall64-14.1R4.10-domestic-signed.tgz
/var/tmp/jinstall64-14.1R4.10-domestic-signed.tgz
Best Practice:When you access the Download Software web page for your device, record the md5 checksum. After downloading the software package to your device, confirm that it is not modified in any way by using the
file checksum md5command.Table 4 shows the Routing Engine status prior to starting the unified ISSU.
Table 4: Routing Engine Status Before Upgrading and Manually Rebooting the Backup Routing Engine RE0
RE1
Primary
Backup
Old software version installed
Old software version installed
Old software version running
Old software version running
-
On the primary Routing Engine, start the upgrade by using the
request system software
                  in-service-upgrade package-name
command without the reboot option.{master} user@host> request system software in-service-upgrade /var/tmp/jinstall64-14.1R4.10-domestic-signed.tgz Checking compatibility with configuration Initializing... Using jbase-13.3R6.5 Verified manifest signed by PackageProductionEc_2015 Using /var/tmp/jinstall64-14.1R4.10-domestic-signed.tgz Verified jinstall64-14.1R4.10-domestic.tgz signed by PackageProductionEc_2015 Using jinstall64-14.1R4.10-domestic.tgz Using jbundle64-14.1R4.10-domestic.tgz Checking jbundle requirements on / Using jbase-14.1R4.10.tgz Verified manifest signed by PackageProductionEc_2015 Verified jbase-14.1R4.10 signed by PackageProductionEc_2015 Using /var/v/c/tmp/jbundle/jboot-14.1R4.10.tgz Using jcrypto64-14.1R4.10.tgz Verified manifest signed by PackageProductionEc_2015 Verified jcrypto64-14.1R4.10 signed by PackageProductionEc_2015 Using jdocs-14.1R4.10.tgz Verified manifest signed by PackageProductionEc_2015 Verified jdocs-14.1R4.10 signed by PackageProductionEc_2015 Using jkernel64-14.1R4.10.tgz Using jpfe-14.1R4.10.tgz Verified SHA1 checksum of jpfe-M10-14.1R4.10.tgz Verified SHA1 checksum of jpfe-M120-14.1R4.10.tgz Verified SHA1 checksum of jpfe-M160-14.1R4.10.tgz Verified SHA1 checksum of jpfe-M320-14.1R4.10.tgz Verified SHA1 checksum of jpfe-M40-14.1R4.10.tgz Verified SHA1 checksum of jpfe-M7i-14.1R4.10.tgz Verified SHA1 checksum of jpfe-T-14.1R4.10.tgz Verified SHA1 checksum of jpfe-X2000-14.1R4.10.tgz Verified SHA1 checksum of jpfe-X960-14.1R4.10.tgz Verified SHA1 checksum of jpfe-common-14.1R4.10.tgz Using jplatform-14.1R4.10.tgz Verified manifest signed by PackageProductionEc_2015 Verified jplatform-14.1R4.10 signed by PackageProductionEc_2015 Using jroute-14.1R4.10.tgz Verified manifest signed by PackageProductionEc_2015 Verified jroute-14.1R4.10 signed by PackageProductionEc_2015 Using jruntime-14.1R4.10.tgz Verified manifest signed by PackageProductionEc_2015 Verified jruntime-14.1R4.10 signed by PackageProductionEc_2015 Using jruntime64-14.1R4.10.tgz Verified manifest signed by PackageProductionEc_2015 Verified jruntime64-14.1R4.10 signed by PackageProductionEc_2015 Using jservices-14.1R4.10.tgz Using jservices-crypto-14.1R4.10.tgz Hardware Database regeneration succeeded Validating against /config/juniper.conf.gz mgd: commit complete Validation succeeded ISSU: Preparing Backup RE Pushing /var/tmp/jinstall64-14.1R4.10-domestic-signed.tgz to re1:/var/tmp/jinstall64-14.1R4.10-domestic-signed.tgz Installing package '/var/tmp/jinstall64-14.1R4.10-domestic-signed.tgz' ... Verified jinstall64-14.1R4.10-domestic.tgz signed by PackageProductionEc_2015 Verified jinstall64-14.1R4.10-domestic.tgz signed by PackageProductionRSA_2015 Adding jinstall64... Verified manifest signed by PackageProductionEc_2015 WARNING: This package will load JUNOS 14.1R4.10 software. WARNING: It will save JUNOS configuration files, and SSH keys WARNING: (if configured), but erase all other files and information WARNING: stored on this machine. It will attempt to preserve dumps WARNING: and log files, but this can not be guaranteed. This is the WARNING: pre-installation stage and all the software is loaded when WARNING: you reboot the system. Saving the config files ... NOTICE: uncommitted changes have been saved in /var/db/config/juniper.conf.pre-install Installing the bootstrap installer ... WARNING: A REBOOT IS REQUIRED TO LOAD THIS SOFTWARE CORRECTLY. Use the WARNING: 'request system reboot' command when software installation is WARNING: complete. To abort the installation, do not reboot your system, WARNING: instead use the 'request system software delete jinstall' WARNING: command as soon as this operation completes. Saving state for rollback ... Backup upgrade done Rebooting Backup RE Rebooting re1 ISSU: Backup RE Prepare Done Waiting for Backup RE reboot GRES operational Initiating Chassis In-Service-Upgrade Chassis ISSU Started ISSU: Preparing Daemons ISSU: Daemons Ready for ISSU ISSU: Starting Upgrade for FRUs ISSU: Preparing for Switchover ISSU: Ready for Switchover Checking In-Service-Upgrade status Item Status Reason FPC 0 Online (ISSU) Resolving mastership... Complete. The other routing engine becomes the master. ISSU: RE switchover Done ISSU: Upgrading Old Master RE Installing package '/var/tmp/jinstall64-14.1R4.10-domestic-signed.tgz' ... Verified jinstall64-14.1R4.10-domestic.tgz signed by PackageProductionEc_2015 Verified jinstall64-14.1R4.10-domestic.tgz signed by PackageProductionRSA_2015 Adding jinstall64... Verified manifest signed by PackageProductionEc_2015 WARNING: This package will load JUNOS 14.1R4.10 software. WARNING: It will save JUNOS configuration files, and SSH keys WARNING: (if configured), but erase all other files and information WARNING: stored on this machine. It will attempt to preserve dumps WARNING: and log files, but this can not be guaranteed. This is the WARNING: pre-installation stage and all the software is loaded when WARNING: you reboot the system. Saving the config files ... NOTICE: uncommitted changes have been saved in /var/db/config/juniper.conf.pre-install Installing the bootstrap installer ... WARNING: A REBOOT IS REQUIRED TO LOAD THIS SOFTWARE CORRECTLY. Use the WARNING: 'request system reboot' command when software installation is WARNING: complete. To abort the installation, do not reboot your system, WARNING: instead use the 'request system software delete jinstall' WARNING: command as soon as this operation completes. Saving package file in /var/sw/pkg/jinstall64-14.1R4.10-domestic-signed.tgz ... Saving state for rollback ... ISSU: Old Master Upgrade Done ISSU: IDLETable 5 shows the Routing Engine status after the unified ISSU and before manually rebooting the backup Routing Engine.
Table 5: Routing Engine Status After Upgrading and Before Manually Rebooting the Backup Routing Engine RE0
RE1
Backup
Primary
New software version installed
New software version installed
Old software version running
New software version running
-
Verify that the new backup, (old primary) Routing Engine (
re0), is still running the previous software image and that the new primary Routing Engine (re1) is running the new software image, by using theshow versioncommand.{backup} user@host> show version invoke-on all-routing-engines re0: -------------------------------------------------------------------------- Hostname: host Model: mx480 Junos: 13.3R6.5 JUNOS Base OS boot [13.3R6.5] JUNOS Base OS Software Suite [13.3R6.5] JUNOS 64-bit Kernel Software Suite [13.3R6.5] JUNOS Crypto Software Suite [13.3R6.5] JUNOS Packet Forwarding Engine Support (M/T/EX Common) [13.3R6.5] JUNOS Packet Forwarding Engine Support (MX Common) [13.3R6.5] JUNOS Online Documentation [13.3R6.5] re1: -------------------------------------------------------------------------- Hostname: host Model: mx480 Junos: 14.1R4.10 JUNOS Base OS boot [14.1R4.10] JUNOS Base OS Software Suite [14.1R4.10] JUNOS Packet Forwarding Engine Support (M/T/EX Common) [14.1R4.10] JUNOS Packet Forwarding Engine Support (MX Common) [14.1R4.10] JUNOS platform Software Suite [14.1R4.10] JUNOS Runtime Software Suite [14.1R4.10] JUNOS Online Documentation [14.1R4.10] -
At this point, if you do not want to install the newer software version on the new backup Routing Engine (
re0), issue therequest system software delete package-namecommand on it.Otherwise, to complete the upgrade, go to the next step.
-
Reboot the new backup Routing Engine (
re0) by issuing therequest system rebootcommand.{backup} user@host> request system reboot Reboot the system ? [yes,no] (no) yes *** FINAL System shutdown message from remote@host *** System going down IMMEDIATELY Shutdown NOW! [pid 38432] {backup} user@home> Connection closed by foreign host.If you are not on the console port, you are disconnected from the device session.
Table 6 shows the Routing Engine status after the unified ISSU, after rebooting the backup Routing Engine, but before switching primary role.
Table 6: Routing Engine Status After Upgrading, Manually Rebooting, and Before Switching Primary Role RE0
RE1
Backup
Primary
New software version installed
New software version installed
New software version running
New software version running
-
Wait a few minutes, then log in to the device again.
You are logged in to the new backup Routing Engine (
re0). -
Verify that both Routing Engines have been upgraded by using the
show versioncommand.{backup} user@host> show version invoke-on all-routing-engines re0: -------------------------------------------------------------------------- Hostname: host Model: mx480 Junos: 14.1R4.10 JUNOS Base OS boot [14.1R4.10] JUNOS Base OS Software Suite [14.1R4.10] JUNOS Packet Forwarding Engine Support (M/T/EX Common) [14.1R4.10] JUNOS Packet Forwarding Engine Support (MX Common) [14.1R4.10] JUNOS platform Software Suite [14.1R4.10] JUNOS Runtime Software Suite [14.1R4.10] JUNOS Online Documentation [14.1R4.10] re1: -------------------------------------------------------------------------- Hostname: host Model: mx480 Junos: 14.1R4.10 JUNOS Base OS boot [14.1R4.10] JUNOS Base OS Software Suite [14.1R4.10] JUNOS Packet Forwarding Engine Support (M/T/EX Common) [14.1R4.10] JUNOS Packet Forwarding Engine Support (MX Common) [14.1R4.10] JUNOS platform Software Suite [14.1R4.10] JUNOS Runtime Software Suite [14.1R4.10] JUNOS Online Documentation [14.1R4.10] -
If you want to, you can optionally display the unified ISSU log messages by using the
show log messagescommand. -
If you want to, you can optionally make
re0the primary Routing Engine by using therequest chassis routing-engine master acquirecommand:{backup} user@host> request chassis routing-engine master acquire Attempt to become the master routing engine ? [yes,no] (no) yes Resolving mastership... Complete. The local routing engine becomes the master. {master} user@host>Table 7 shows the Routing Engine status after the unified ISSU, after rebooting the backup Routing Engine, and after switching primary role.
Table 7: Routing Engine Status After Upgrading, Manually Rebooting, and Switching Primary Role RE0
RE1
Primary
Backup
New software version installed
New software version installed
New software version running
New software version running
-
Perform the applicable steps in Restoring Feature-Specific Configuration.
-
If you are satisfied with the results of your testing, you can optionally back up the system software to the device’s hard disk by using the
request system snapshotcommand on each Routing Engine.Note:The root file system is backed up to /altroot, and /config is backed up to /altconfig. After you issue the
request system snapshotcommand, you cannot easily return to the previous version of the software, because the device flash and hard disks are identical. To return to the previous version of the software, you must boot the device from removable media.{master} user@host> request system snapshot user@host> request routing-engine login re1 {backup} user@host> request system snapshot
Upgrading and Rebooting Only One Routing Engine
Procedure
Step-by-Step Procedure
In certain circumstances you might want to install the new software on only one Routing Engine.
The advantage is if the results of your testing requires you to downgrade the software, you can switch Routing Engines to run the old software on one Routing Engine and then install the old software on the other Routing Engine. This is not the typical scenario.
Table 8 shows the Routing Engine status prior to starting the unified ISSU.
|
RE0 |
RE1 |
|---|---|
|
Primary |
Backup |
|
Old software version installed |
Old software version installed |
|
Old software version running |
Old software version running |
To upgrade and rebooting only one Routing Engine:
-
Perform the steps in Verifying Dual Routing Engines and Enabling GRES and NSR.
-
Perform the steps in Verifying the Software Versions and Backing Up the Device Software.
-
Perform the applicable steps in Adjusting Timers and Changing Feature-Specific Configuration.
-
Copy the Junos OS software package to the device by using the
file copy ftp://username@hostname.net/filename /var/tmp/filenamecommand.We recommend that you copy the package to the /var/tmp directory, which is a large file system on the hard disk.
{master}
user@host> file copy ftp://myid@myhost.mydomain.net/jinstall64-14.1R4.10-domestic-signed.tgz
/var/tmp/jinstall64-14.1R4.10-domestic-signed.tgz
Best Practice:When you access the Download Software web page for your device, record the md5 checksum. After downloading the software package to your device, confirm that it is not modified in any way by using the
                              file checksum
                      md5
command. -
On the primary Routing Engine, start the upgrade by using the
request system software in-service-upgrade package-name no-old-master-upgradecommand.{master} user@host> request system software in-service-upgrade /var/tmp/jinstall64-14.1R4.10-domestic-signed.tgz no-old-master-upgrade Checking compatibility with configuration Initializing... Using jbase-13.3R6.5 Verified manifest signed by PackageProductionEc_2015 Using /var/tmp/jinstall64-14.1R4.10-domestic-signed.tgz Verified jinstall64-14.1R4.10-domestic.tgz signed by PackageProductionEc_2015 Using jinstall64-14.1R4.10-domestic.tgz Using jbundle64-14.1R4.10-domestic.tgz Checking jbundle requirements on / Using jbase-14.1R4.10.tgz Verified manifest signed by PackageProductionEc_2015 Verified jbase-14.1R4.10 signed by PackageProductionEc_2015 Using /var/v/c/tmp/jbundle/jboot-14.1R4.10.tgz Using jcrypto64-14.1R4.10.tgz Verified manifest signed by PackageProductionEc_2015 Verified jcrypto64-14.1R4.10 signed by PackageProductionEc_2015 Using jdocs-14.1R4.10.tgz Verified manifest signed by PackageProductionEc_2015 Verified jdocs-14.1R4.10 signed by PackageProductionEc_2015 Using jkernel64-14.1R4.10.tgz Using jpfe-14.1R4.10.tgz Verified SHA1 checksum of jpfe-M10-14.1R4.10.tgz Verified SHA1 checksum of jpfe-M120-14.1R4.10.tgz Verified SHA1 checksum of jpfe-M160-14.1R4.10.tgz Verified SHA1 checksum of jpfe-M320-14.1R4.10.tgz Verified SHA1 checksum of jpfe-M40-14.1R4.10.tgz Verified SHA1 checksum of jpfe-M7i-14.1R4.10.tgz Verified SHA1 checksum of jpfe-T-14.1R4.10.tgz Verified SHA1 checksum of jpfe-X2000-14.1R4.10.tgz Verified SHA1 checksum of jpfe-X960-14.1R4.10.tgz Verified SHA1 checksum of jpfe-common-14.1R4.10.tgz Using jplatform-14.1R4.10.tgz Verified manifest signed by PackageProductionEc_2015 Verified jplatform-14.1R4.10 signed by PackageProductionEc_2015 Using jroute-14.1R4.10.tgz Verified manifest signed by PackageProductionEc_2015 Verified jroute-14.1R4.10 signed by PackageProductionEc_2015 Using jruntime-14.1R4.10.tgz Verified manifest signed by PackageProductionEc_2015 Verified jruntime-14.1R4.10 signed by PackageProductionEc_2015 Using jruntime64-14.1R4.10.tgz Verified manifest signed by PackageProductionEc_2015 Verified jruntime64-14.1R4.10 signed by PackageProductionEc_2015 Using jservices-14.1R4.10.tgz Using jservices-crypto-14.1R4.10.tgz Hardware Database regeneration succeeded Validating against /config/juniper.conf.gz mgd: commit complete Validation succeeded ISSU: Preparing Backup RE Pushing /var/tmp/jinstall64-14.1R4.10-domestic-signed.tgz to re1:/var/tmp/jinstall64-14.1R4.10-domestic-signed.tgz Installing package '/var/tmp/jinstall64-14.1R4.10-domestic-signed.tgz' ... Verified jinstall64-14.1R4.10-domestic.tgz signed by PackageProductionEc_2015 Verified jinstall64-14.1R4.10-domestic.tgz signed by PackageProductionRSA_2015 Adding jinstall64... Verified manifest signed by PackageProductionEc_2015 WARNING: This package will load JUNOS 14.1R4.10 software. WARNING: It will save JUNOS configuration files, and SSH keys WARNING: (if configured), but erase all other files and information WARNING: stored on this machine. It will attempt to preserve dumps WARNING: and log files, but this can not be guaranteed. This is the WARNING: pre-installation stage and all the software is loaded when WARNING: you reboot the system. Saving the config files ... NOTICE: uncommitted changes have been saved in /var/db/config/juniper.conf.pre-install Installing the bootstrap installer ... WARNING: A REBOOT IS REQUIRED TO LOAD THIS SOFTWARE CORRECTLY. Use the WARNING: 'request system reboot' command when software installation is WARNING: complete. To abort the installation, do not reboot your system, WARNING: instead use the 'request system software delete jinstall' WARNING: command as soon as this operation completes. Saving state for rollback ... Backup upgrade done Rebooting Backup RE Rebooting re1 ISSU: Backup RE Prepare Done Waiting for Backup RE reboot GRES operational Initiating Chassis In-Service-Upgrade Chassis ISSU Started ISSU: Preparing Daemons ISSU: Daemons Ready for ISSU ISSU: Starting Upgrade for FRUs ISSU: Preparing for Switchover ISSU: Ready for Switchover Checking In-Service-Upgrade status Item Status Reason FPC 0 Online (ISSU) Resolving mastership... Complete. The other routing engine becomes the master. ISSU: RE switchover Done Skipping Old Master Upgrade ISSU: IDLETable 9 shows the Routing Engine status after the unified ISSU upgrades the primary Routing Engine but before the backup Routing Engine is upgraded.
Table 9: Routing Engine Status After Upgrading One Routing Engine and Before Upgrading the Other Routing Engine RE0
RE1
Backup
Primary
Old software version installed
New software version installed
Old software version running
New software version running
-
Verify that the new backup, (old primary) Routing Engine (
re0), is still running the previous software image and that the new primary Routing Engine (re1) is running the new software image, by using theshow versioncommand.{backup} user@host> show version invoke-on all-routing-engines re0: -------------------------------------------------------------------------- Hostname: host Model: mx480 Junos: 13.3R6.5 JUNOS Base OS boot [13.3R6.5] JUNOS Base OS Software Suite [13.3R6.5] JUNOS 64-bit Kernel Software Suite [13.3R6.5] JUNOS Crypto Software Suite [13.3R6.5] JUNOS Packet Forwarding Engine Support (M/T/EX Common) [13.3R6.5] JUNOS Packet Forwarding Engine Support (MX Common) [13.3R6.5] JUNOS Online Documentation [13.3R6.5] re1: -------------------------------------------------------------------------- Hostname: host Model: mx480 Junos: 14.1R4.10 JUNOS Base OS boot [14.1R4.10] JUNOS Base OS Software Suite [14.1R4.10] JUNOS Packet Forwarding Engine Support (M/T/EX Common) [14.1R4.10] JUNOS Packet Forwarding Engine Support (MX Common) [14.1R4.10] JUNOS platform Software Suite [14.1R4.10] JUNOS Runtime Software Suite [14.1R4.10] JUNOS Online Documentation [14.1R4.10] -
If your testing is complete and you want to install the new software on the backup Routing Engine, you must first disable GRES and NSR on both Routing Engines and commit the configuration.
{backup} [edit ] user@host# delete chassis redundancy graceful-switchover user@host# delete routing-options nonstop-routing user@host# commit warning: Graceful-switchover is enabled, commit on backup is not recommended Continue commit on backup RE? [yes,no] (no) yes re0: configuration check succeeds re1: commit complete re0: commit complete [edit ] user@host# -
Install the new software on the backup Routing Engine (
re0) by using therequest system software add /var/tmp/jinstall64-14.1R4.10-domestic-signed.tgzcommand.user@host> request system software add /var/tmp/jinstall64-14.1R4.10-domestic-signed.tgz NOTICE: Validating configuration against jinstall64-14.1R4.10-domestic-signed.tgz. NOTICE: Use the 'no-validate' option to skip this if desired. Checking compatibility with configuration Initializing... Using jbase-13.3R6.5 Verified manifest signed by PackageProductionEc_2015 Using /var/tmp/jinstall64-14.1R4.10-domestic-signed.tgz Verified jinstall64-14.1R4.10-domestic.tgz signed by PackageProductionEc_2015 Using jinstall64-14.1R4.10-domestic.tgz Using jbundle64-14.1R4.10-domestic.tgz Checking jbundle requirements on / Using jbase-14.1R4.10.tgz Verified manifest signed by PackageProductionEc_2015 Verified jbase-14.1R4.10 signed by PackageProductionEc_2015 Using /var/v/c/tmp/jbundle/jboot-14.1R4.10.tgz Using jcrypto64-14.1R4.10.tgz Verified manifest signed by PackageProductionEc_2015 Verified jcrypto64-14.1R4.10 signed by PackageProductionEc_2015 Using jdocs-14.1R4.10.tgz Verified manifest signed by PackageProductionEc_2015 Verified jdocs-14.1R4.10 signed by PackageProductionEc_2015 Using jkernel64-14.1R4.10.tgz Using jpfe-14.1R4.10.tgz Verified SHA1 checksum of jpfe-M10-14.1R4.10.tgz Verified SHA1 checksum of jpfe-M120-14.1R4.10.tgz Verified SHA1 checksum of jpfe-M160-14.1R4.10.tgz Verified SHA1 checksum of jpfe-M320-14.1R4.10.tgz Verified SHA1 checksum of jpfe-M40-14.1R4.10.tgz Verified SHA1 checksum of jpfe-M7i-14.1R4.10.tgz Verified SHA1 checksum of jpfe-T-14.1R4.10.tgz Verified SHA1 checksum of jpfe-X2000-14.1R4.10.tgz Verified SHA1 checksum of jpfe-X960-14.1R4.10.tgz Verified SHA1 checksum of jpfe-common-14.1R4.10.tgz Using jplatform-14.1R4.10.tgz Verified manifest signed by PackageProductionEc_2015 Verified jplatform-14.1R4.10 signed by PackageProductionEc_2015 Using jroute-14.1R4.10.tgz Verified manifest signed by PackageProductionEc_2015 Verified jroute-14.1R4.10 signed by PackageProductionEc_2015 Using jruntime-14.1R4.10.tgz Verified manifest signed by PackageProductionEc_2015 Verified jruntime-14.1R4.10 signed by PackageProductionEc_2015 Using jruntime64-14.1R4.10.tgz Verified manifest signed by PackageProductionEc_2015 Verified jruntime64-14.1R4.10 signed by PackageProductionEc_2015 Using jservices-14.1R4.10.tgz Using jservices-crypto-14.1R4.10.tgz Hardware Database regeneration succeeded Validating against /config/juniper.conf.gz mgd: commit complete Validation succeeded Installing package '/var/tmp/jinstall64-14.1R4.10-domestic-signed.tgz' ... Verified jinstall64-14.1R4.10-domestic.tgz signed by PackageProductionEc_2015 Verified jinstall64-14.1R4.10-domestic.tgz signed by PackageProductionRSA_2015 Adding jinstall64... Verified manifest signed by PackageProductionEc_2015 WARNING: This package will load JUNOS 14.1R4.10 software. WARNING: It will save JUNOS configuration files, and SSH keys WARNING: (if configured), but erase all other files and information WARNING: stored on this machine. It will attempt to preserve dumps WARNING: and log files, but this can not be guaranteed. This is the WARNING: pre-installation stage and all the software is loaded when WARNING: you reboot the system. Saving the config files ... NOTICE: uncommitted changes have been saved in /var/db/config/juniper.conf.pre-install Installing the bootstrap installer ... WARNING: A REBOOT IS REQUIRED TO LOAD THIS SOFTWARE CORRECTLY. Use the WARNING: 'request system reboot' command when software installation is WARNING: complete. To abort the installation, do not reboot your system, WARNING: instead use the 'request system software delete jinstall' WARNING: command as soon as this operation completes. Saving package file in /var/sw/pkg/jinstall64-14.1R4.10-domestic-signed.tgz ... Saving state for rollback ...
-
Reboot
re0by using therequest system rebootcommand.user@host> request system reboot Reboot the system ? [yes,no] (no) yes *** FINAL System shutdown message from user@host *** System going down IMMEDIATELY Shutdown NOW! [pid 22857] user@host> Connection closed by foreign host.
If you are not on the console port, you are disconnected from the router session.
-
After waiting a few minutes, log in to the device again.
You are logged in to the backup Routing Engine (
re0). -
Verify that both Routing Engines are running the new software image by using the
show versioncommand.{backup} user@host> show version invoke-on all-routing-engines Hostname: host Model: mx480 Junos: 14.1R4.10 JUNOS Base OS boot [14.1R4.10] JUNOS Base OS Software Suite [14.1R4.10] JUNOS Packet Forwarding Engine Support (M/T/EX Common) [14.1R4.10] JUNOS Packet Forwarding Engine Support (MX Common) [14.1R4.10] JUNOS platform Software Suite [14.1R4.10] JUNOS Runtime Software Suite [14.1R4.10] JUNOS Online Documentation [14.1R4.10] re1: -------------------------------------------------------------------------- Hostname: host Model: mx480 Junos: 14.1R4.10 JUNOS Base OS boot [14.1R4.10] JUNOS Base OS Software Suite [14.1R4.10] JUNOS Packet Forwarding Engine Support (M/T/EX Common) [14.1R4.10] JUNOS Packet Forwarding Engine Support (MX Common) [14.1R4.10] JUNOS platform Software Suite [14.1R4.10] JUNOS Runtime Software Suite [14.1R4.10] JUNOS Online Documentation [14.1R4.10] -
If you want to, you can optionally display the unified ISSU log messages by using the
show log messagescommand. -
If you want to, make
re0the primary Routing Engine by using therequest chassis routing-engine master acquirecommand.{backup} user@host> request chassis routing-engine master acquire Attempt to become the master routing engine ? [yes,no] (no) yes Resolving mastership... Complete. The local routing engine becomes the master. user@host>Table 10 shows the Routing Engine status after the unified ISSU, after rebooting the backup Routing Engine, and after switching primary role.
Table 10: Routing Engine Status After Upgrading, Manually Rebooting, and Switching Primary Role RE0
RE1
Primary
Backup
New software version installed
New software version installed
New software version running
New software version running
-
Enable GRES and NSR again by performing the steps in Verifying Dual Routing Engines and Enabling GRES and NSR.
-
Perform the applicable steps in Restoring Feature-Specific Configuration.
-
If you are satisfied with the results of your testing, you can optionally back up the system software to the device’s hard disk by using the
request system snapshotcommand on each Routing Engine.Note:The root file system is backed up to /altroot, and /config is backed up to /altconfig. After you issue the
request system snapshotcommand, you cannot easily return to the previous version of the software, because the device flash and hard disks are identical. To return to the previous version of the software, you must boot the device from removable media.{master} user@host> request system snapshot user@host> request routing-engine login re1 {backup} user@host> request system snapshot
Performing an In-Service Software Upgrade (ISSU) with Non-Stop Routing
You can use an in-service software upgrade with non-stop routing to upgrade the software running on the switch with minimal traffic disruption during the upgrade.
Starting with Junos OS Release 18.2R1 on the QFX5200 switch, we recommend that you wait at least five minutes between in-service software upgrades.
Starting with Junos OS Release 17.1R1, on QFX5100 and EX4600 switches, you cannot perform an ISSU from a Junos OS Release earlier than 17.1R1 to Junos OS Release 17.1R1.
This topic covers:
Preparing the Switch for Software Installation
Before you begin software installation using ISSU:
Before you perform an in-service software upgrade, if
applicable, remove the set system internet-options no-tcp-reset
drop-all-tcp command from the configuration, otherwise the upgrade
will fail and an error message will be displayed.
NSB and non-stop routing enable NSB-supported Layer 2 protocols to synchronize protocol information between the primary and backup Routing Engines.
Enable non-stop routing. See Configuring Nonstop Active Routingfor information on how to enable it.
Enable nonstop bridging (NSB). See Configuring Nonstop Bridging for information on how to enable it.
Configure the Bidirectional Forwarding Detection Protocol (BFD) timeout to be more than one second, otherwise you will receive an error.
Upgrading the Software Using ISSU
This procedure describes how to upgrade the software running on a standalone switch:
If the Host OS software needs to be updated, you cannot perform an ISSU. Instead, perform a standard software upgrade.
To upgrade the switch using ISSU:
Download the software package by following the procedure in the Downloading Software Files with a Browser section in Installing Software Packages on QFX Series Devices.
Copy the software package or packages to the switch. We recommend that you copy the file to the
/var/tmpdirectory.Log in to the console connection. Using a console connection allows you to monitor the progress of the upgrade.
Start the ISSU:
On the switch, enter:
user@switch> request system software in-service-upgrade /var/tmp/package-name.tgz
where
package-name.tgzis, for example,jinstall-host-qfx-5e-18.1R1-secured-signed.tgz.
Note:During the upgrade, you will not be able to access the Junos OS CLI.
The switch displays status messages similar to the following messages as the upgrade executes:
ISSU: Validating Image

 PRE ISSU CHECK:
 ---------------
 PFE Status                            : Online
 Member Id zero                        : Valid
 VC not in mixed or fabric mode        : Valid
 Member is single node vc              : Valid
 BFD minimum-interval check done       : Valid
 GRES enabled                          : Valid
 GR enabled                            : Valid
 drop-all-tcp not configured           : Valid
 Ready for ISSU                        : Valid

warning: Do NOT use /user during ISSU. Changes to /user during ISSU may get lost!


Pushing Junos image package to the host...
Installing /var/tmp/install-media-qfx-5e-junos-2018-secure.tgz
Extracting the package ...
total 1110328
-rw-r--r-- 1 18735 758 237044439 Oct 26 05:11 jinstall-qfx-5e-junos-2018-secure-linux.tgz
-rw-r--r-- 1 18735 758 899918118 Oct 26 05:11 jinstall-qfx-5e-junos-2018-secure-app.tgz

============================================
Current Host kernel version : 3.14.52-rt50-WR7.0.0.9_ovp
Package Host kernel version : 3.14.52-rt50-WR7.0.0.9_ovp
Current Host version        : 3.0.7
Package Host version        : 3.0.7
Min host version required for applications: 3.0.7
Min host version required for in-service-upgrade: 3.0.7
============================================

Setting up Junos host applications for in-service-upgrade ...
------------------------------------------------
Running Junos application installer for in-service-upgrade
------------------------------------------------

-------------------------------
Installing /var/sw/applications/qfx-5e-flex-2018.tgz
-------------------------------
pkg_install_rpms: qfx-5e-base-1.0-0-2018.x86_64.rpm
Installing qfx-5e-control-plane-flex-1.0-0-2018.x86_64.rpm ...
========================================
Loading cache...
Updating cache...               ######################################## [100%]

Committing transaction...
Preparing...                    ######################################## [  0%]
   1:Installing qfx-5e-contro.. ######################################## [100%]

Output from qfx-5e-control-plane-flex-1.0-0@x86_64:
-------------------------------
Installing JUNOS image: jinstall-jcp-i386-flex-18.12018.img.gz
-------------------------------
Extracting jinstall-jcp-i386-flex-18.12018.img.gz to /recovery/junos/jinstall-jcp-i386-flex-18.12018-2018.img
Prepare host for virtfs...
Integrity check passed for hash-control-plane.md5.


Installing packages (1):
  qfx-5e-control-plane-flex-1.0-0@x86_64

812.9MB of package files are needed. 821.5MB will be used.


Saving cache...

========================================
Application installed.
Waiting to sync newly setup VM disk
VM ready after 200 seconds
[Oct 26 05:19:22]:ISSU: Preparing Backup RE
Prepare for ISSU
[Oct 26 05:19:27]:ISSU: Backup RE Prepare Done
Spawning the backup RE
Spawn backup RE, index 0 successful
Starting secondary dataplane
Second dataplane container started
GRES in progress
Waiting for backup RE switchover ready
GRES operational
Copying home directories
Copying home directories successful
Initiating Chassis In-Service-Upgrade
Chassis ISSU Started
[Oct 26 05:28:33]:ISSU: Preparing Daemons
[Oct 26 05:28:39]:ISSU: Daemons Ready for ISSU
[Oct 26 05:28:43]:ISSU: Starting Upgrade for FRUs
[Oct 26 05:28:54]:ISSU: FPC Warm Booting
[Oct 26 05:29:59]:ISSU: FPC Warm Booted
[Oct 26 05:30:10]:ISSU: Preparing for Switchover
[Oct 26 05:30:14]:ISSU: Ready for Switchover
Checking In-Service-Upgrade status
  Item           Status                  Reason
  FPC 0          Online (ISSU)
Send ISSU done to chassisd on backup RE
Chassis ISSU Completed
Removing dcpfe1 eth1 128.0.0.16 IP
Bringing down bme01
Post Chassis ISSU processing done
[Oct 26 05:30:17]:ISSU: IDLE
Stopping primary dataplane
Clearing ISSU states
Console and management sessions will be disconnected. Please login again.
Note:If the ISSU process stops, you can look at the CLI output when you issue the
request system software in-service-upgradecommand to diagnose the problem. You can also look at syslog files for more information.Log in after the reboot of the switch completes. To verify that the software has been upgraded, enter the following command:
user@switch>
show version
Performing an In-Service Software Upgrade (ISSU) in ACX5000 Series Routers
You can use an in-service software upgrade to upgrade the software running on the router with minimal traffic disruption during the upgrade.
ISSU is supported in Junos OS Release 15.1X54–D60 and later on ACX5000 Series routers.
This topic covers:
- Preparing the Router for Software Installation
- Upgrading the Software Using ISSU
- Verifying a Unified ISSU
Preparing the Router for Software Installation
Before you begin software installation using ISSU:
Before you perform an in-service software upgrade, if
applicable, remove the set system internet-options no-tcp-reset
drop-all-tcp command from the configuration, otherwise the upgrade
will fail and an error message will be displayed.
Ensure that nonstop active routing (NSR) and nonstop bridging (NSB) are enabled. If enabled, disable graceful restart (GR), because NSR and GR cannot be enabled simultaneously. NSB and GR enable NSB-supported Layer 2 protocols to synchronize protocol information between the primary and backup Routing Engines.
If NSR is not enabled (
Stateful ReplicationisDisabled), then enable NSR. NSR requires you to configure graceful Routing Engine switchover (GRES). By default, NSR is disabled.To enable graceful Routing Engine switchover, include the
graceful-switchoverstatement at the [edit chassis redundancy] hierarchy level as user@host#set chassis redundancy graceful-switchover.To enable NSR, include the
nonstop-routingstatement at the [edit routing-options] hierarchy level as user@host#set routing-options nonstop-routing.
Enable nonstop bridging (NSB). Nonstop bridging requires you to configure graceful Routing Engine switchover (GRES). By default, NSB is disabled.
To enable graceful Routing Engine switchover, include the
graceful-switchoverstatement at the [edit chassis redundancy] hierarchy level as user@host#set chassis redundancy graceful-switchover.To enable NSB, include the
nonstop-bridgingstatement at the [edit protocols layer2-control] hierarchy level as user@host#set protocols layer2-control nonstop-bridging.
(Optional) Back up the system software—Junos OS, the active configuration, and log files—on the router to an external storage device with the
request system snapshotcommand.
On ACX5000 line of routers, you need to consider the following feature before performing ISSU:
ISSU supports link fault management (LFM) timeout sessions of 1 second interval. During ISSU, you may notice LFM flaps for sessions having timeout interval of less than 1 second.
Bidirectional Forwarding Detection (BFD) sessions having timeout interval of less than 1 second need to be reconfigured to 1 second before starting the ISSU process. You can restore the timeout interval to its original value after completing the ISSU process.
ISSU supports interval slow (every 30 seconds) for periodic transmission of Link Aggregation Control Protocol (LACP) packets.
ISSU supports Virtual Router Redundancy Protocol (VRRP) version 3.
ISSU do not support the following ACX5000 features:.
Downgrade to an earlier version of Junos OS software. If you want to install an earlier version of Junos OS software, use the
request system software addCLI command.Upgrade of Host OS software.
Connectivity fault management (CFM).
TWAMP, RPF, RFC2544, and clocksyncd daemon (timing functionality).
Mirroring and pseudowire cross connect.
IPv6 firewall, IPv6 COS (classification and rewrite), IPv6 VPN, and VPLS mesh group.
Virtual Router Redundancy Protocol (VRRP) version 1 and 2.
Interval fast (every second) for periodic transmission of Link Aggregation Control Protocol (LACP) packets. If the periodic interval fast is configured, then you may notice traffic drops because of LACP links going down during ISSU. ACX5000 line of routers can support LACP with fast hello by configuring the
fast-hello-issuoption (user@host# set protocols lacp fast-hello-issu) on the main router and peer routers before starting ISSU.Note:The peer router must have Junos OS software to support this functionality.
Upgrading the Software Using ISSU
This procedure describes how to upgrade the software running on a standalone router:
If the Host OS software needs to be updated, you cannot perform an ISSU. Instead, perform a standard software upgrade.
It is recommended to cleanup any unwanted data from the /var directory (/var/log, /var/tmp) before initiating the ISSU process.
To upgrade the router using ISSU:
Download the software package from the Juniper Networks Support website https://www.juniper.net/support/downloads/junos.html .
Note:To access the download site, you must have a service contract with Juniper Networks and an access account. If you need help obtaining an account, complete the registration form at the Juniper Networks website https://www.juniper.net/registration/Register.jsp .
Go to ACX Series section and select the ACX5000 Series platform software you want to download.
Copy the software package or packages to the router. We recommend that you copy the file to the
/var/tmpdirectory.Log in to the console connection. Using a console connection allows you to monitor the progress of the upgrade.
Start the ISSU:
On the router, enter:
user@host> request system software in-service-upgrade /var/tmp/package-name.tgz
where
package-name.tgzis, for example,jinstall-acx5k-15.1X54-D60.9-domestic-signed.tgz.
Note:During the upgrade, you will not be able to access the Junos OS CLI.
The router displays status messages similar to the following messages as the upgrade executes:
PRE ISSU CHECK:
---------------
PFE Status                            : Online
BFD minimum-interval check done       : Valid
GRES enabled                          : Valid
NSR enabled                           : Valid
drop-all-tcp not configured           : Valid
OVSDB not configured                  : Valid

warning: Do NOT use /user during ISSU. Changes to /user during ISSU may get lost!
[Oct 24 00:25:37]:ISSU: Validating Image
[Oct 24 00:25:44]:ISSU: Preparing Backup RE
Prepare for ISSU
[Oct 24 00:25:49]:ISSU: Backup RE Prepare Done
Extracting jinstall-acx5k-15.1X54-D60.3-domestic ...
Install jinstall-acx5k-15.1X54-D60.3-domestic completed
Spawning the backup RE
Spawn backup RE, index 0 successful
GRES in progress
GRES done in 0 seconds
Waiting for backup RE switchover ready
GRES operational
Copying home directories
Copying home directories successful
Initiating Chassis In-Service-Upgrade
Chassis ISSU Started
[Oct 24 00:31:56]:ISSU: Preparing Daemons
[Oct 24 00:32:57]:ISSU: Daemons Ready for ISSU
[Oct 24 00:33:02]:ISSU: Starting Upgrade for FRUs
[Oct 24 00:33:23]:ISSU: FPC Warm Booting
[Oct 24 00:34:41]:ISSU: FPC Warm Booted
[Oct 24 00:34:51]:ISSU: Preparing for Switchover
[Oct 24 00:34:57]:ISSU: Ready for Switchover
Checking In-Service-Upgrade status
  Item           Status                  Reason
  FPC 0          Online (ISSU)
Send ISSU done to chassisd on backup RE
Chassis ISSU Completed
[Oct 24 00:35:18]:ISSU: IDLE
Console and management sessions will be disconnected. Please login again.
Note:An ISSU might stop instead of terminate if the FPC is at the warm boot stage. Also, any links that go down and up will not be detected during a warm boot of the Packet Forwarding Engine (PFE).
Note:If the ISSU process stops, you can look at the log files to diagnose the problem. The log files are located at
/var/log/vjunos-log.tgz.Log in after the router reboots. To verify that the software has been upgraded, enter the following command:
user@host>
show versionDisable or delete the configuration done to enable the ISSU. This includes disabling nonstop active routing (NSR), nonstop bridging (NBR) and graceful Routing Engine (GRES).
Verifying a Unified ISSU
Verify the status of FPCs and their corresponding PICs after the most recent unified ISSU.
Issue the show chassis in-service-upgrade command
on the primary Routing Engine.
user@host> show chassis in-service-upgrade
   Item           Status                  Reason
  FPC 0          Online
Display the unified ISSU process messages by using the show log messages command.
How to Use Unified ISSU with Enhanced Mode
- Unified ISSU with Enhanced Mode Overview
- Benefits of Unified ISSU with Enhanced Mode
- Prerequisites for Performing Unified ISSU with Enhanced Mode
- Performing Unified ISSU with Enhanced Mode
Unified ISSU with Enhanced Mode Overview
Enhanced mode is an in-service software upgrade (ISSU) option available on MPC8E, MPC9E,
MPC11E, and
JNP10K-LC4802 line cards that eliminates packet loss during the unified ISSU
process. This is achieved by taking advantage of new line card architecture improvements that
make it possible to have a second copy of the Junos OS software running on the line card in
standby mode ready to take over while software moves from an old image to a new one during
unified ISSU. You can enable enhanced mode by adding the enhanced-mode option
to the request system software in-service-upgrade CLI command.
Use this document to learn about unified ISSU with enhanced mode and how to use it.
Benefits of Unified ISSU with Enhanced Mode
Unified ISSU with enhanced mode provides the following benefits:
Upgrades to a new software version with no loss of transit or host bound traffic
Reduces packet loss to zero or several milliseconds depending on configuration and network conditions
Allows software upgrades to be performed without the need for maintenance windows
Uses the existing unified ISSU process and doesn’t require any special configuration
Prerequisites for Performing Unified ISSU with Enhanced Mode
Before you begin a unified ISSU with enhanced mode, there are several prerequisites to keep in mind:
The device running unified ISSU with enhanced mode must use an MPC8E, MPC9E, MPC11E, or JNP10K-LC4802 line card.
Note:If you are performing unified ISSU with enhanced mode on a device that has a mix of supported and unsupported line cards, there will be sub-second traffic loss for traffic passing through the unsupported line cards.
Note:If you are performing unified ISSU with enhanced mode on guest network functions (GNFs), then all GNFs should be using MPC8E, MPC9E, MPC11E, or JNP10K-LC4802 line cards to avoid traffic loss.
The Linux version running on your Flexible PIC Concentrator (FPC) and the line card Linux version in the target release need to be compatible.
Enhanced mode won’t work if the target release carries changes that require the ASIC blocks to be reset.
Forwarding memory usage should be below 75 percent to ensure no packet loss during the unified ISSU process
Note:Unified ISSU with enhanced mode will still work if forwarding memory usage is above 75 percent, but it might introduce several milliseconds of packet loss.
All prerequisites for unified ISSU also apply to enhanced mode. See Unified ISSU System Requirements for more information.
You can check to see if your device can use unified ISSU with
enhanced mode to upgrade to a specific release by using the request
system software validate in-service-upgrade package-name.tgz enhanced-mode command. If your device and the target release
are not compatible with enhanced mode, you can still use regular unified
ISSU to upgrade with minimal disruption of traffic.
Performing Unified ISSU with Enhanced Mode
To perform a unified ISSU with enhanced mode, follow these steps:
Download the software package by following the procedure in Downloading Software.
Copy the software package or packages to the device. We recommend that you copy the file to the
/var/tmpdirectory.Log in to the console connection. Using a console connection allows you to monitor the progress of the upgrade.
Verify that you can use unified ISSU with enhanced mode for your desired release.
On the device, enter:
user@host>
request system software validate in-service-upgrade /var/tmp/package-name.tgz enhanced-modewhere
package-name.tgzis the name of the software package you downloaded in Step 1.
Start the unified ISSU with enhanced mode:
On the device, enter:
user@host>
No link title /var/tmp/package-name.tgz enhanced-moderebootwhere
package-name.tgzis the name of the software package you downloaded in Step 1.
Note:During the upgrade, you will not be able to access the Junos OS CLI.
The device displays status messages similar to the following messages as the upgrade executes:
Chassis ISSU enhanced-mode
ISSU: set chassis enhanced-mode
Chassis ISSU Check Done
ISSU: Validating Image
..
mgd: commit complete
Validation succeeded
 Validating Image Done
 Preparing Backup RE
 Pushing /var/tmp/junos-install-mx-x86-32-20.1.tgz to re1:/var/tmp/junos-install-mx-x86-32-20.1.tgz
 Pushing package /var/tmp/junos-install-mx-x86-32-20.1.tgz to re1 done
 Installing package /var/tmp/junos-install-mx-x86-32-20.1.tgz on re1
…
Verified sflow-mx signed by PackageDevelopmentEc_2019 method ECDSA256+SHA256
NOTICE: 'pending' set will be activated at next reboot...
ISSU: Installing package /var/tmp/junos-install-mx-x86-32-20.1.tgz on re1 done
ISSU: Rebooting Backup RE

Rebooting re1
 Backup RE Prepare Done
 Waiting for Backup RE reboot
 Backup RE reboot done. Backup RE is up
 Waiting for Backup RE state synchronization
 Backup RE state synchronization done
 GRES operational
 "Initiating Chassis In-Service-Upgrade"
Chassis ISSU Started
ISSU: Preparing Daemons
ISSU: Daemons Ready for ISSU
ISSU: Offline Incompatible FRUs
ISSU: Starting Upgrade for FRUs
…

ISSU: Preparing for Switchover
ISSU: Ready for Switchover
 Checking In-Service-Upgrade status
  Item           Status                  Reason
  FPC 1          Online (ISSU)
  FPC 2          Offline                 Configured power off
Resolving mastership...
Complete. The other routing engine becomes the master.
Note:If the unified ISSU process stops, you can look at the CLI output by using the
request system software in-service-upgradecommand to diagnose the problem. You can also look at syslog files for more information.Log in after the reboot of the device is completed. To verify that the software has been upgraded, enter the following command:
user@host>
show version
When using unified ISSU with enhanced mode, the base Linux OS on your FPC cannot be upgraded as part of the ISSU process. Linux can be updated with an upgrade done through regular unified ISSU or a reboot of the FPC.
Verifying a Unified ISSU
Purpose
Verify the status of FPCs and their corresponding PICs after the most recent unified ISSU.
Action
Issue the show chassis in-service-upgrade command on the primary Routing Engine.
user@host> show chassis in-service-upgrade
  Item           Status                  Reason
  FPC 0          Online
  FPC 1          Online
  FPC 2          Online
    PIC 0        Online
    PIC 1        Online
  FPC 3          Online
  FPC 4          Online
    PIC 1        Online
  FPC 5          Online
    PIC 0        Online
  FPC 6          Online
    PIC 3        Online
  FPC 7          Online
Display the unified ISSU process messages by using the show log messages command.
Meaning
See show chassis in-service-upgrade for more information.
Troubleshooting Unified ISSU Problems
If the unified ISSU procedure stops progressing:
Open a new session on the primary Routing Engine and issue the
request system software abort in-service-upgradecommand.Check the existing router session to verify that the upgrade has been terminated.
An “ISSU: terminated!” message is provided. Additional system messages provide you with information about where the upgrade stopped and recommendations for the next step to take.
See request chassis cluster in-service-upgrade abort (ISSU) for more information.
Managing and Tracing BFD Sessions During Unified ISSU Procedures
Bidirectional Forwarding Detection (BFD) sessions temporarily increase their detection and transmission timers during unified ISSU procedures. After the upgrade, these timers revert to the values in use before the unified ISSU started. The BFD process replicates the unified ISSU state and timer values to the backup Routing Engine for each session.
No additional configuration is necessary to enable unified
ISSU for BFD. However, you can disable the BFD timer negotiation during
the unified ISSU by including the no-issu-timer-negotiation statement at the [edit protocols bfd] hierarchy level.
[edit protocols bfd]
no-issu-timer-negotiation;
If you include this statement, the BFD timers maintain their original values during unified ISSU.
The BFD sessions might flap during unified ISSU or Routing Engine switchover, depending on the detection intervals.
For more information about BFD, see the Junos OS Routing Protocols Library.
To configure unified ISSU trace options for BFD sessions,
include the issu statement at the [edit protocols
bfd traceoptions flag] hierarchy level.
[edit protocols]
bfd {
    traceoptions {
        flag issu;
    }
}
Change History Table
Feature support is determined by the platform and release you are using. Use Feature Explorer to determine if a feature is supported on your platform.