
Configure LLM Connector
Use this topic to configure LLM connector in Routing Director.
LLM connector integrates large language models (LLMs) with the Routing Director infrastructure. This integration allows you to query your network for troubleshooting and monitoring through Routing Director by using conversational English, bypassing the need for traditional CLI commands. For example, What is the status of the OSPF neighbors of device-a?
You can also configure LLM Connector to query HPE Juniper Networking documentation by using Juniper LLM (JLLM).
To be able to query your network and HPE Juniper Networking documentation through Routing Director, the LLM Connector GUI (Configure LLM Connector tile on the Organization Settings page) presents two tabs:
-
Conversation, where you configure an external LLM (for example, such as GPT), to process queries related to Routing Director and your network.
-
Documentation, where you configure Juniper LLM (JLLM) to process queries related to HPE Juniper Networking documentation. When configured, JLLM retrieves supporting documentation and references for answers provided by the external LLM.
Note: To use LLM Connector, you must configure atleast one external LLM in the Conversation tab. Configuring JLLM in the Documentation tab is optional.
While configuring LLM Connector, you must complete the external LLM configuration in the Conversation tab before configuring JLLM in the Documentation tab.
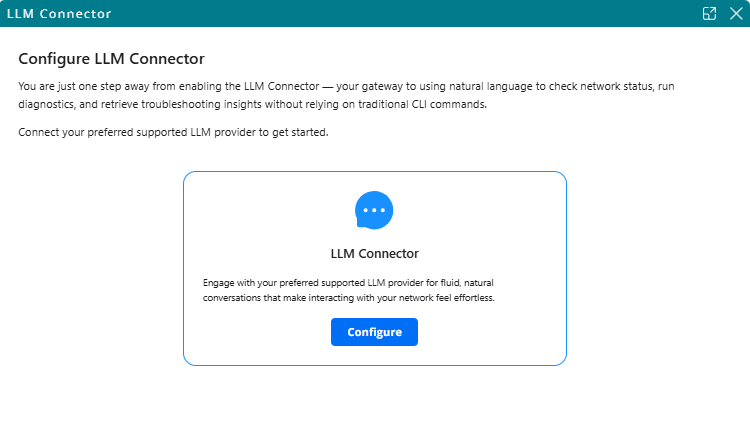
When you access LLM Connector for the first time after installing Routing Director, you are presented with the option to configure LLM Connector as shown in Figure 1. Click Configure to access the Configure LLM Connector tile..
To configure an external LLM in LLM Connector:
|
Field |
Description |
|---|---|
|
Name* |
Enter a name for the LLM model. The name need not be unique within an organization. For example, demo-llm. |
|
Provider* |
Select an LLM provider. For example, Azure OpenAI, OpenAI, OpenAI-Compatible, or Anthropic. |
|
Model* |
Enter an LLM from the selected provider to be used. For example, GPT-5.x The following models are supported in this release:
Note:
For all GPT 5.x models, you must enable Responses API. For information, see Migrate to Responses API. |
|
API Key* |
Enter an API key for the LLM. The LLM uses the API key to authenticate requests from LLM Connector. This field is optional for OpenAI-Compatible. |
|
Base URL* |
Enter the base URL. This is a mandatory field if you select Azure OpenAI. Anthropic, or OpenAI-Compatible as the LLM provider. You obtain the base URL when you deploy your LLM. For example:
|
|
API Version* |
Enter the API version of the AI model. You obtain the base URL when you deploy your LLM. This field is mandatory for Azure OpenAI. |
|
Skip Verify |
Enable this option if you want to bypass authentication during TLS handshake between LLM Connector and the OpenAI-Compliant LLM and trust the server certificate provided by the LLM. Enable this option if you use self-signed SSL certificates. Note: Skip Verify is applicable only when the LLM provider is
OpenAI-Compliant LLM.
|
|
Active |
Click to enable (default) or disable the LLM. Only one LLM configuration can be active at a time. This field is mandatory for Azure OpenAI, Anthropic, and OpenAI Compatible. |
Configure LLM Connector to Query Documentation
LLM Connector uses JLLM to query HPE Juniper Networking documentation.
Before you configure JLLM in LLM Connector, ensure that:
-
An external LLM is configured in the Conversation tab.
-
You must have an account in Juniper Routing Assurance, with an organization created and an API token generated that the Documentation Connector can use to connect with Juniper LLM. To access Routing Assurance, configure an organization, and generate an API token:
Access Routing Assurance using the link https://routing.ai.juniper.net/.
Create an account in Routing Assurance. See User Activation and Login.
Create an organization. See Add an Organization.
Take a note of the organization UUID. The organization UUID is needed for configuring the Documentation Connector.
Create an API token for the Observer role. See Manage API tokens.
Take a note of the generated API token. The token is needed for configuring the Documentation Connector.
To configure JLLM in LLM Connector:
Click Settings Menu > System Settings on the banner.
The Organization Settings page appears.
On the Configure LLM Connector tile, in the Documentation tab, click + (Add) icon.
The Documentation Connector Configuration page appears.
Enter values by referring to table Table 2.
Click Validate to validate the entered values.
The values are listed in the Configure LLM Connector tile.
| Field | Description |
|---|---|
| Organization ID* |
Enter the UUID of the organization you created in Routing Assurance. |
| API Token* |
Enter the API token that you created in Routing Assurance. Juniper LLM uses the API token to authenticate requests from Documentation Connector. |
| Base URL* |
Enter the URL of the Routing Assurance (https://routing.ai.juniper.net). Note:
Enter the Routing Assurance URL as is. Do not end the URL with a /. Doing so would result in an error. |